Manufacturing guy-at-large.

Filtering by Tag: thepublicradio

Preproduction

Added on by Spencer Wright.

The Public Radio is getting close.

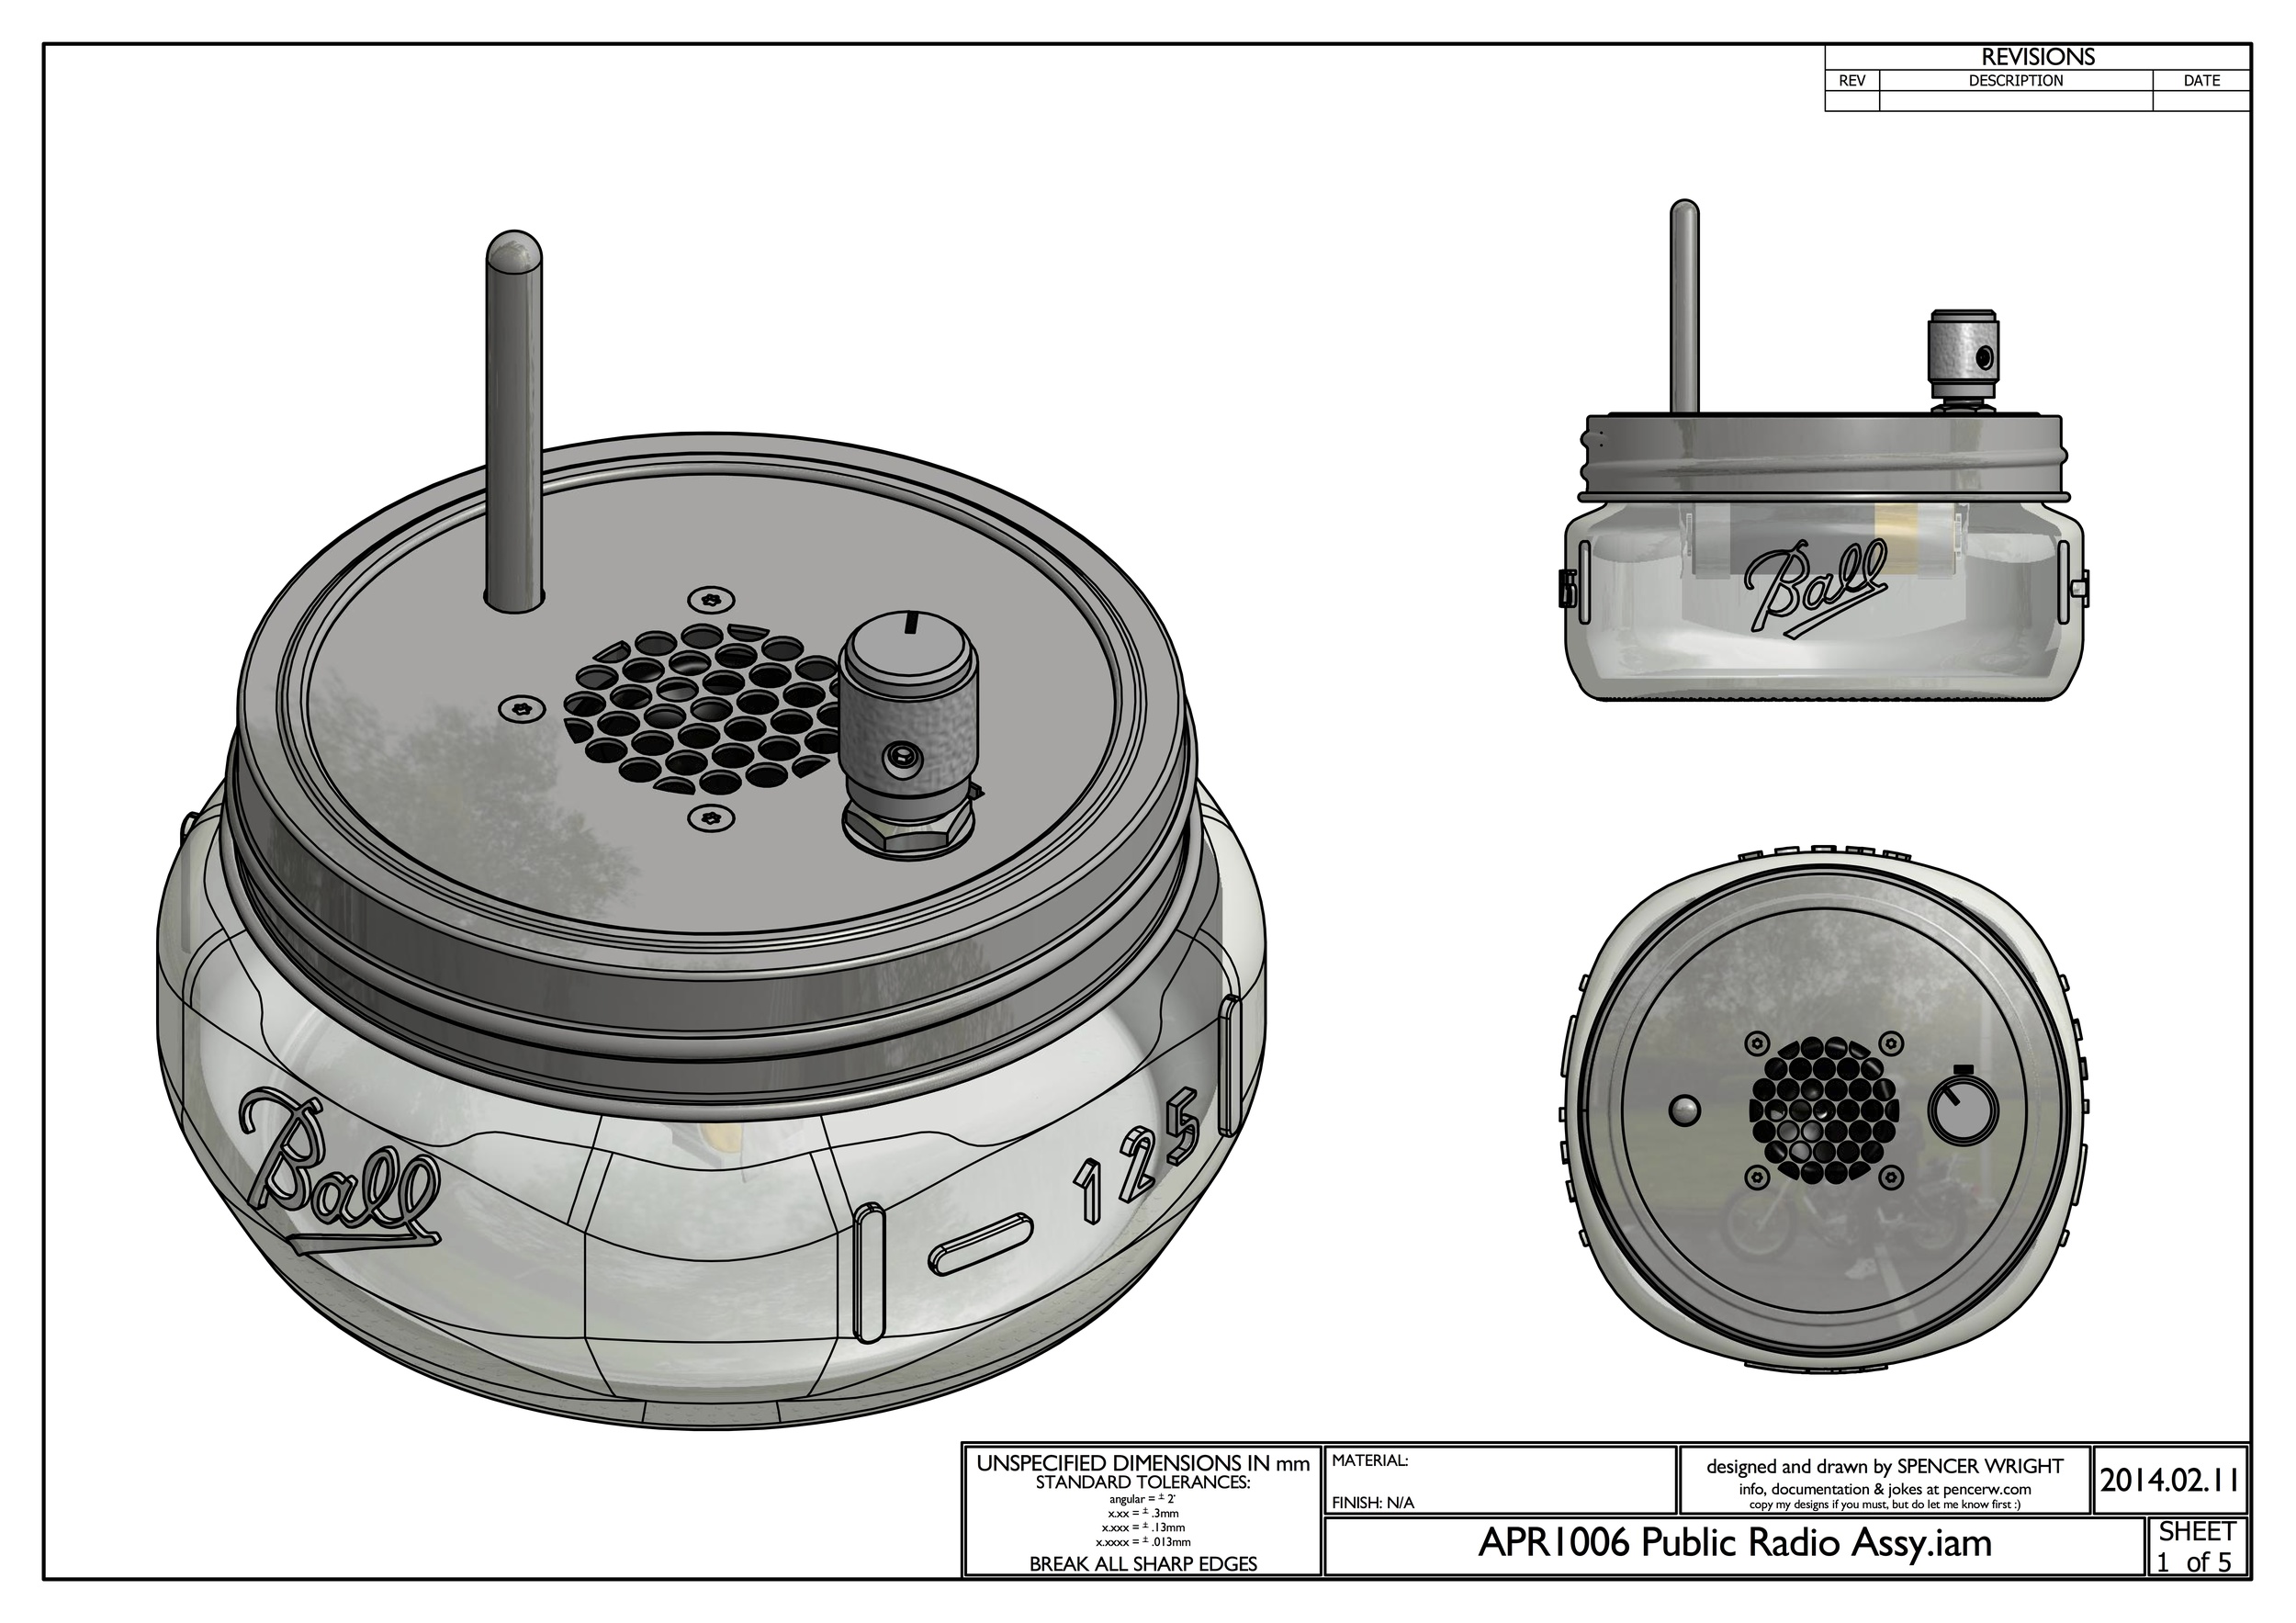
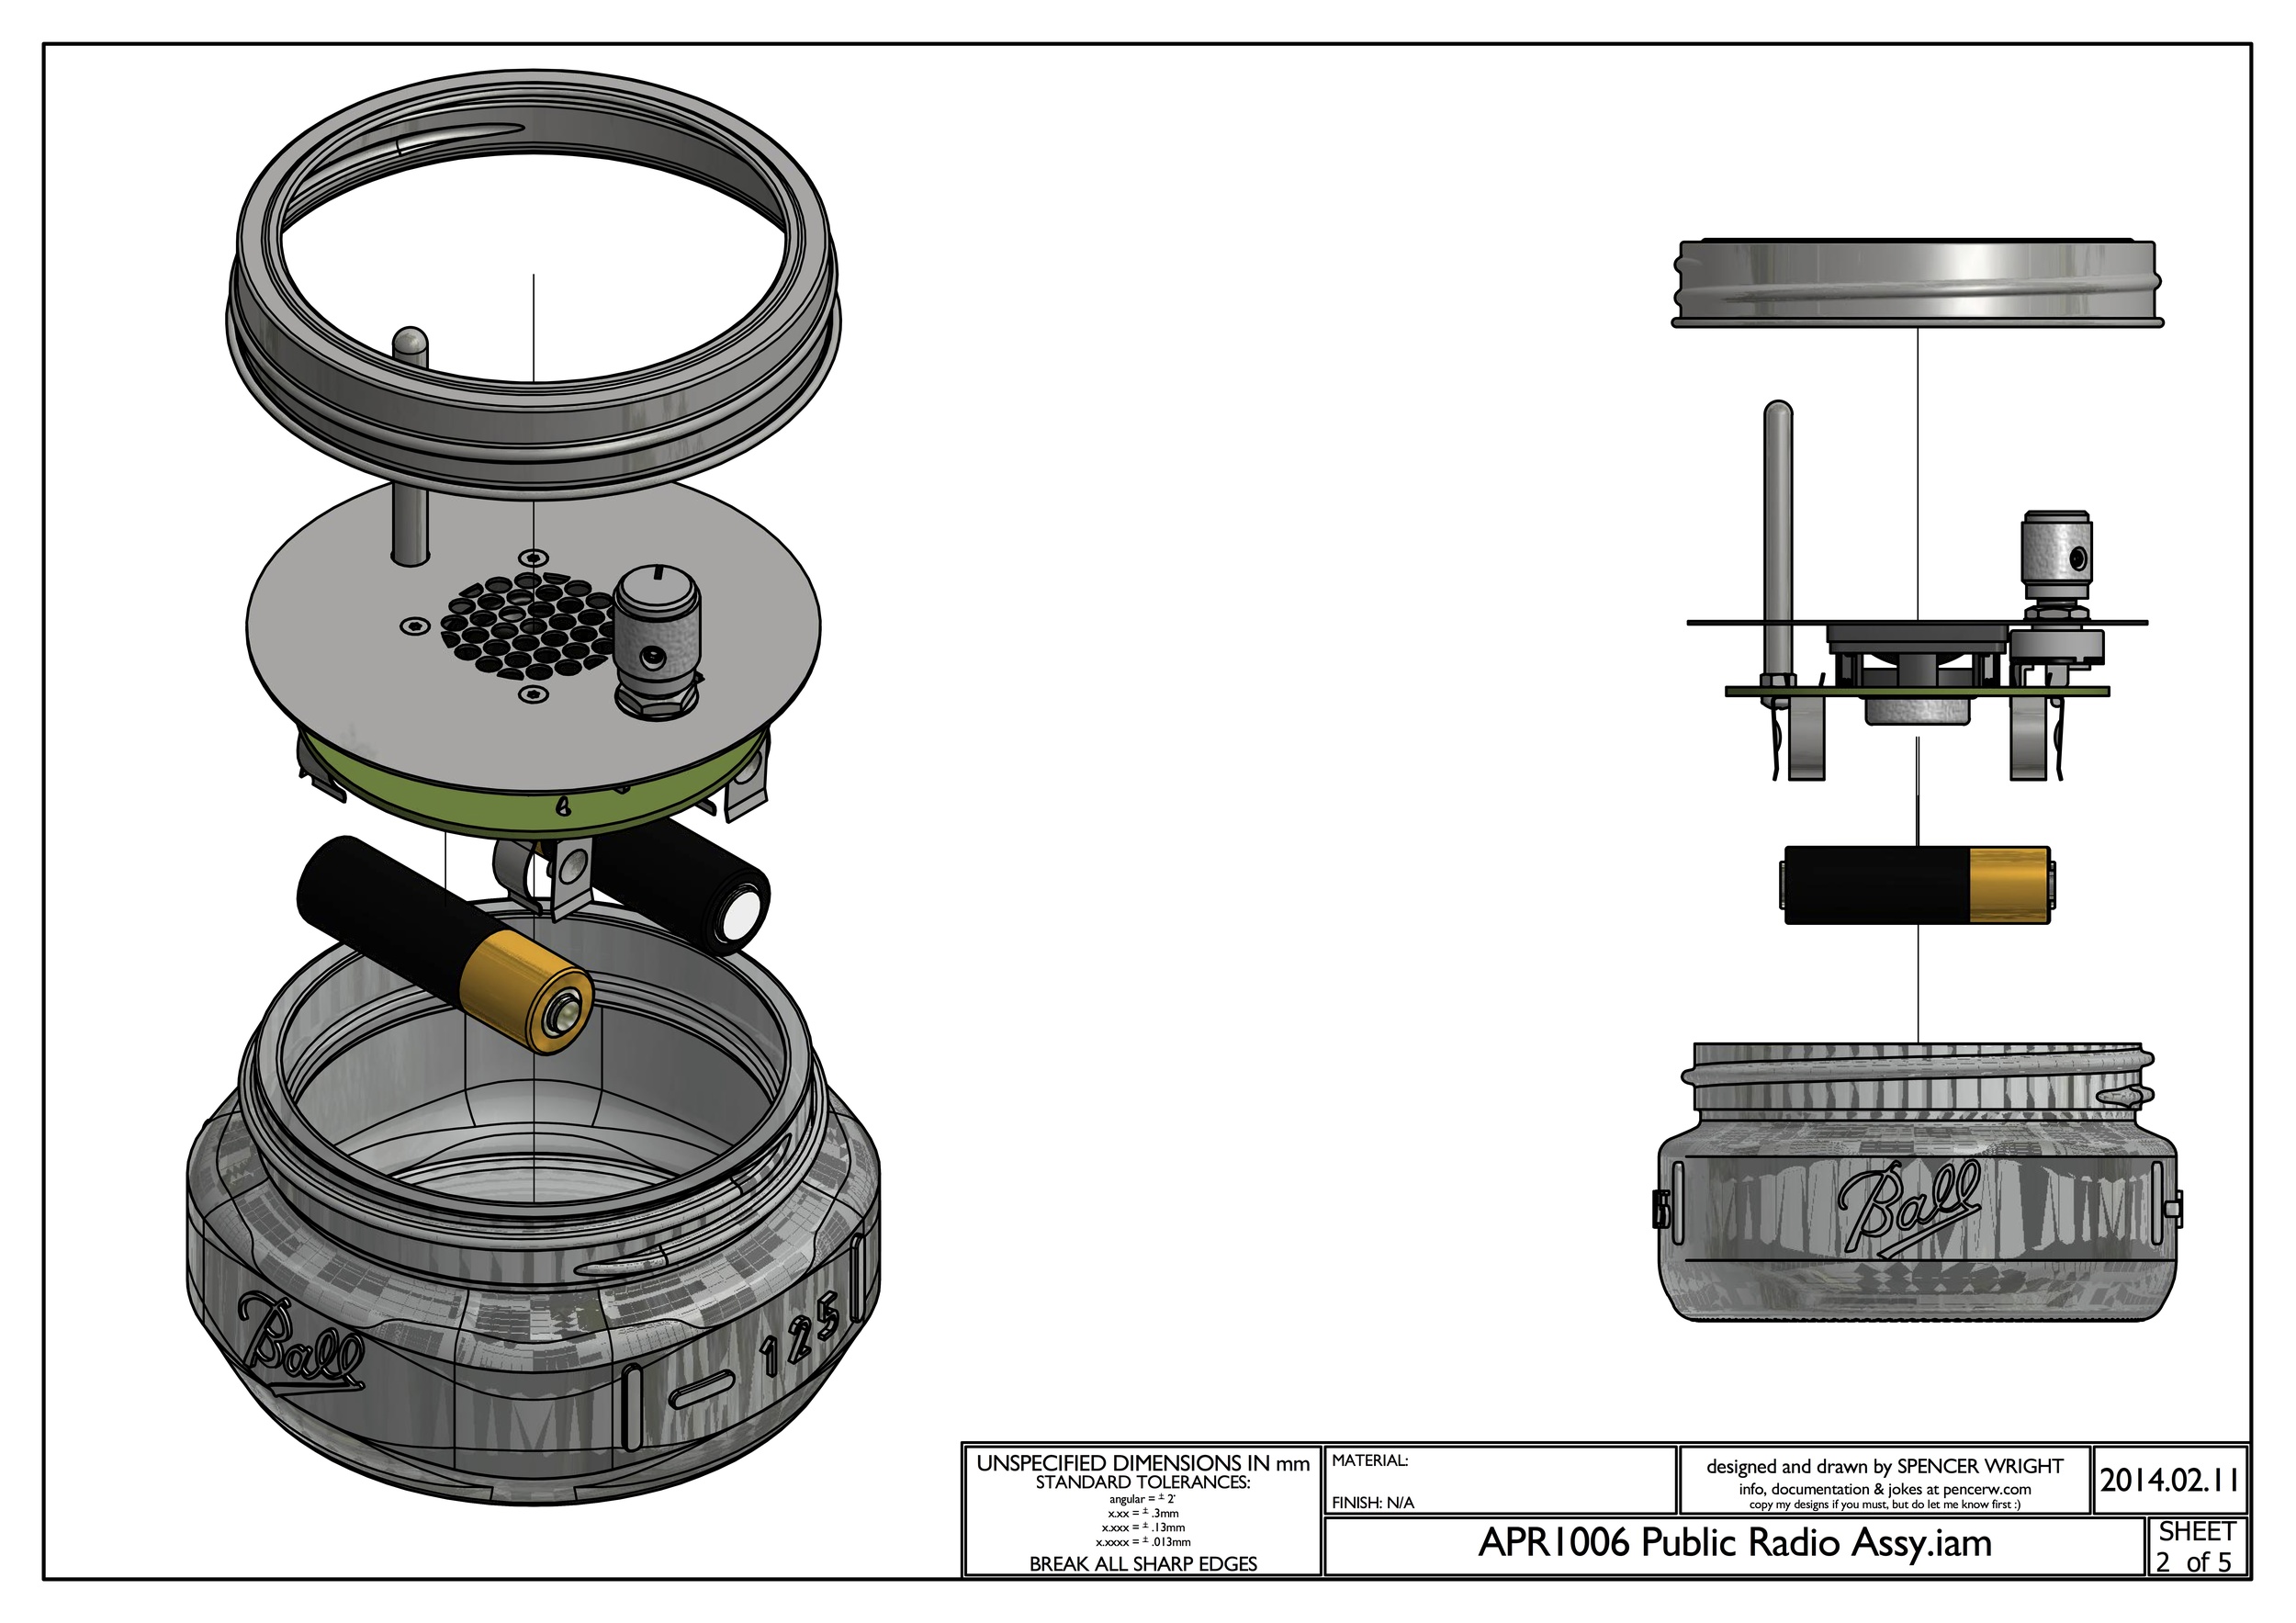
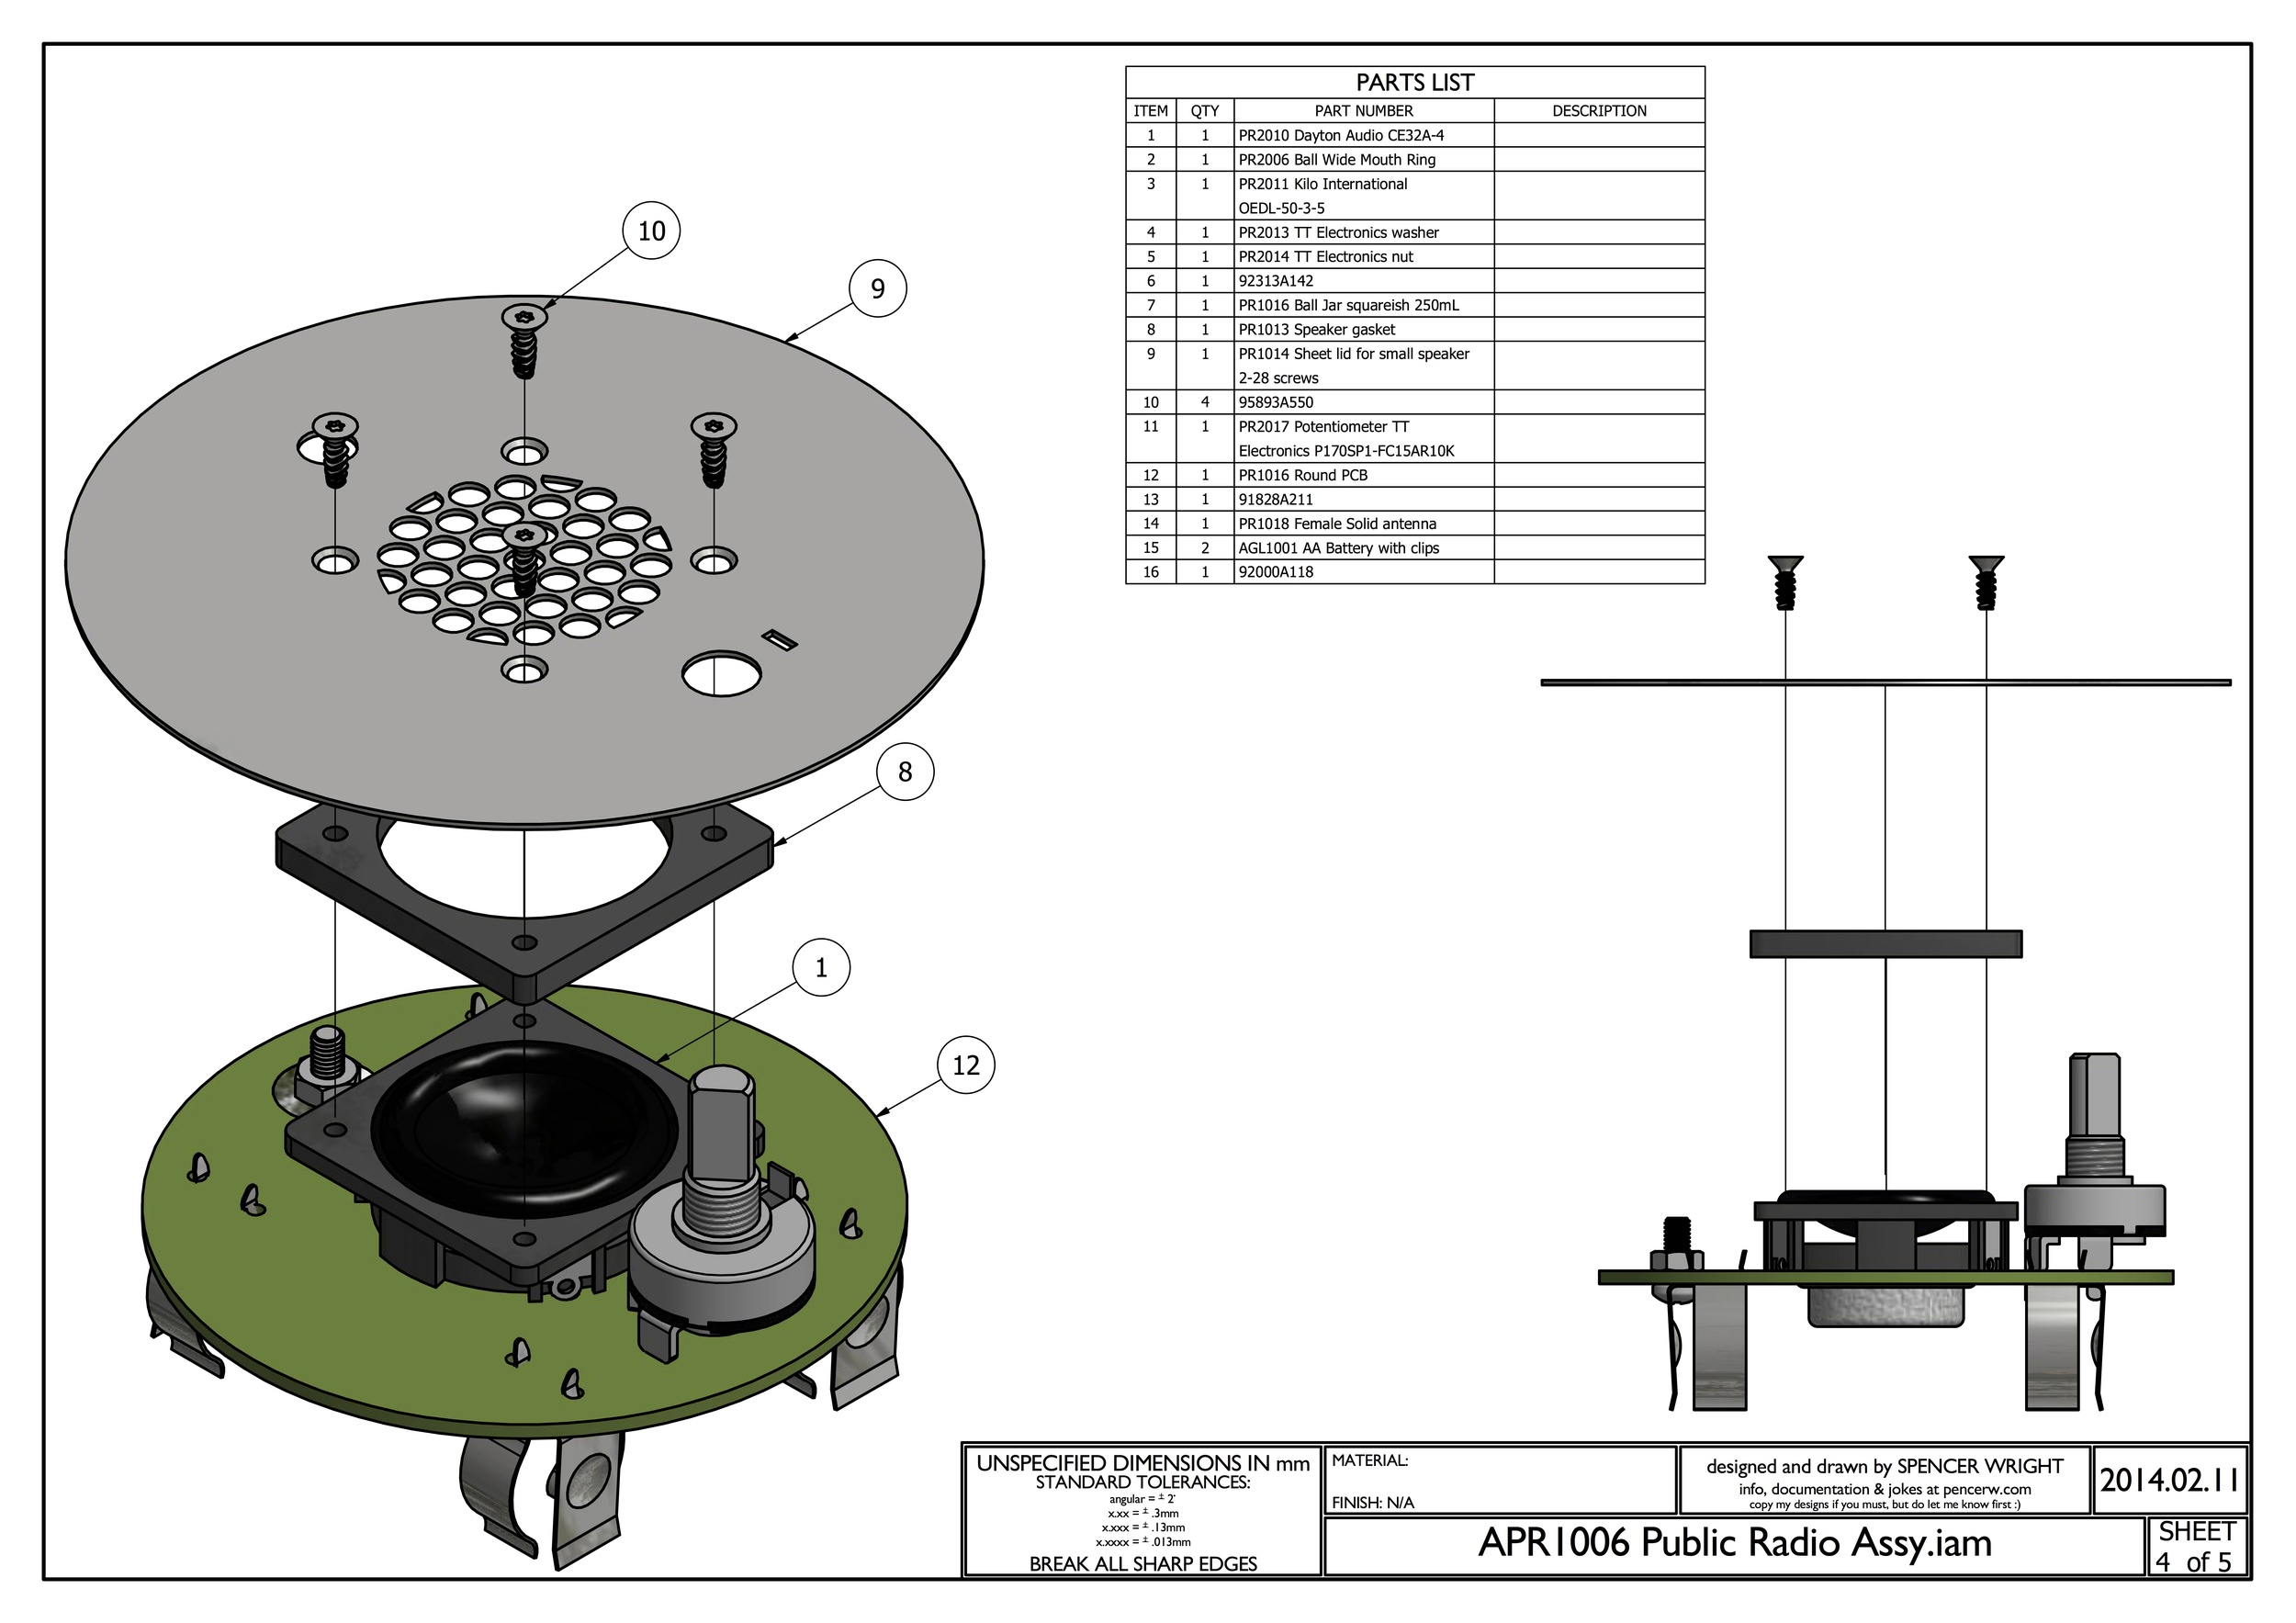
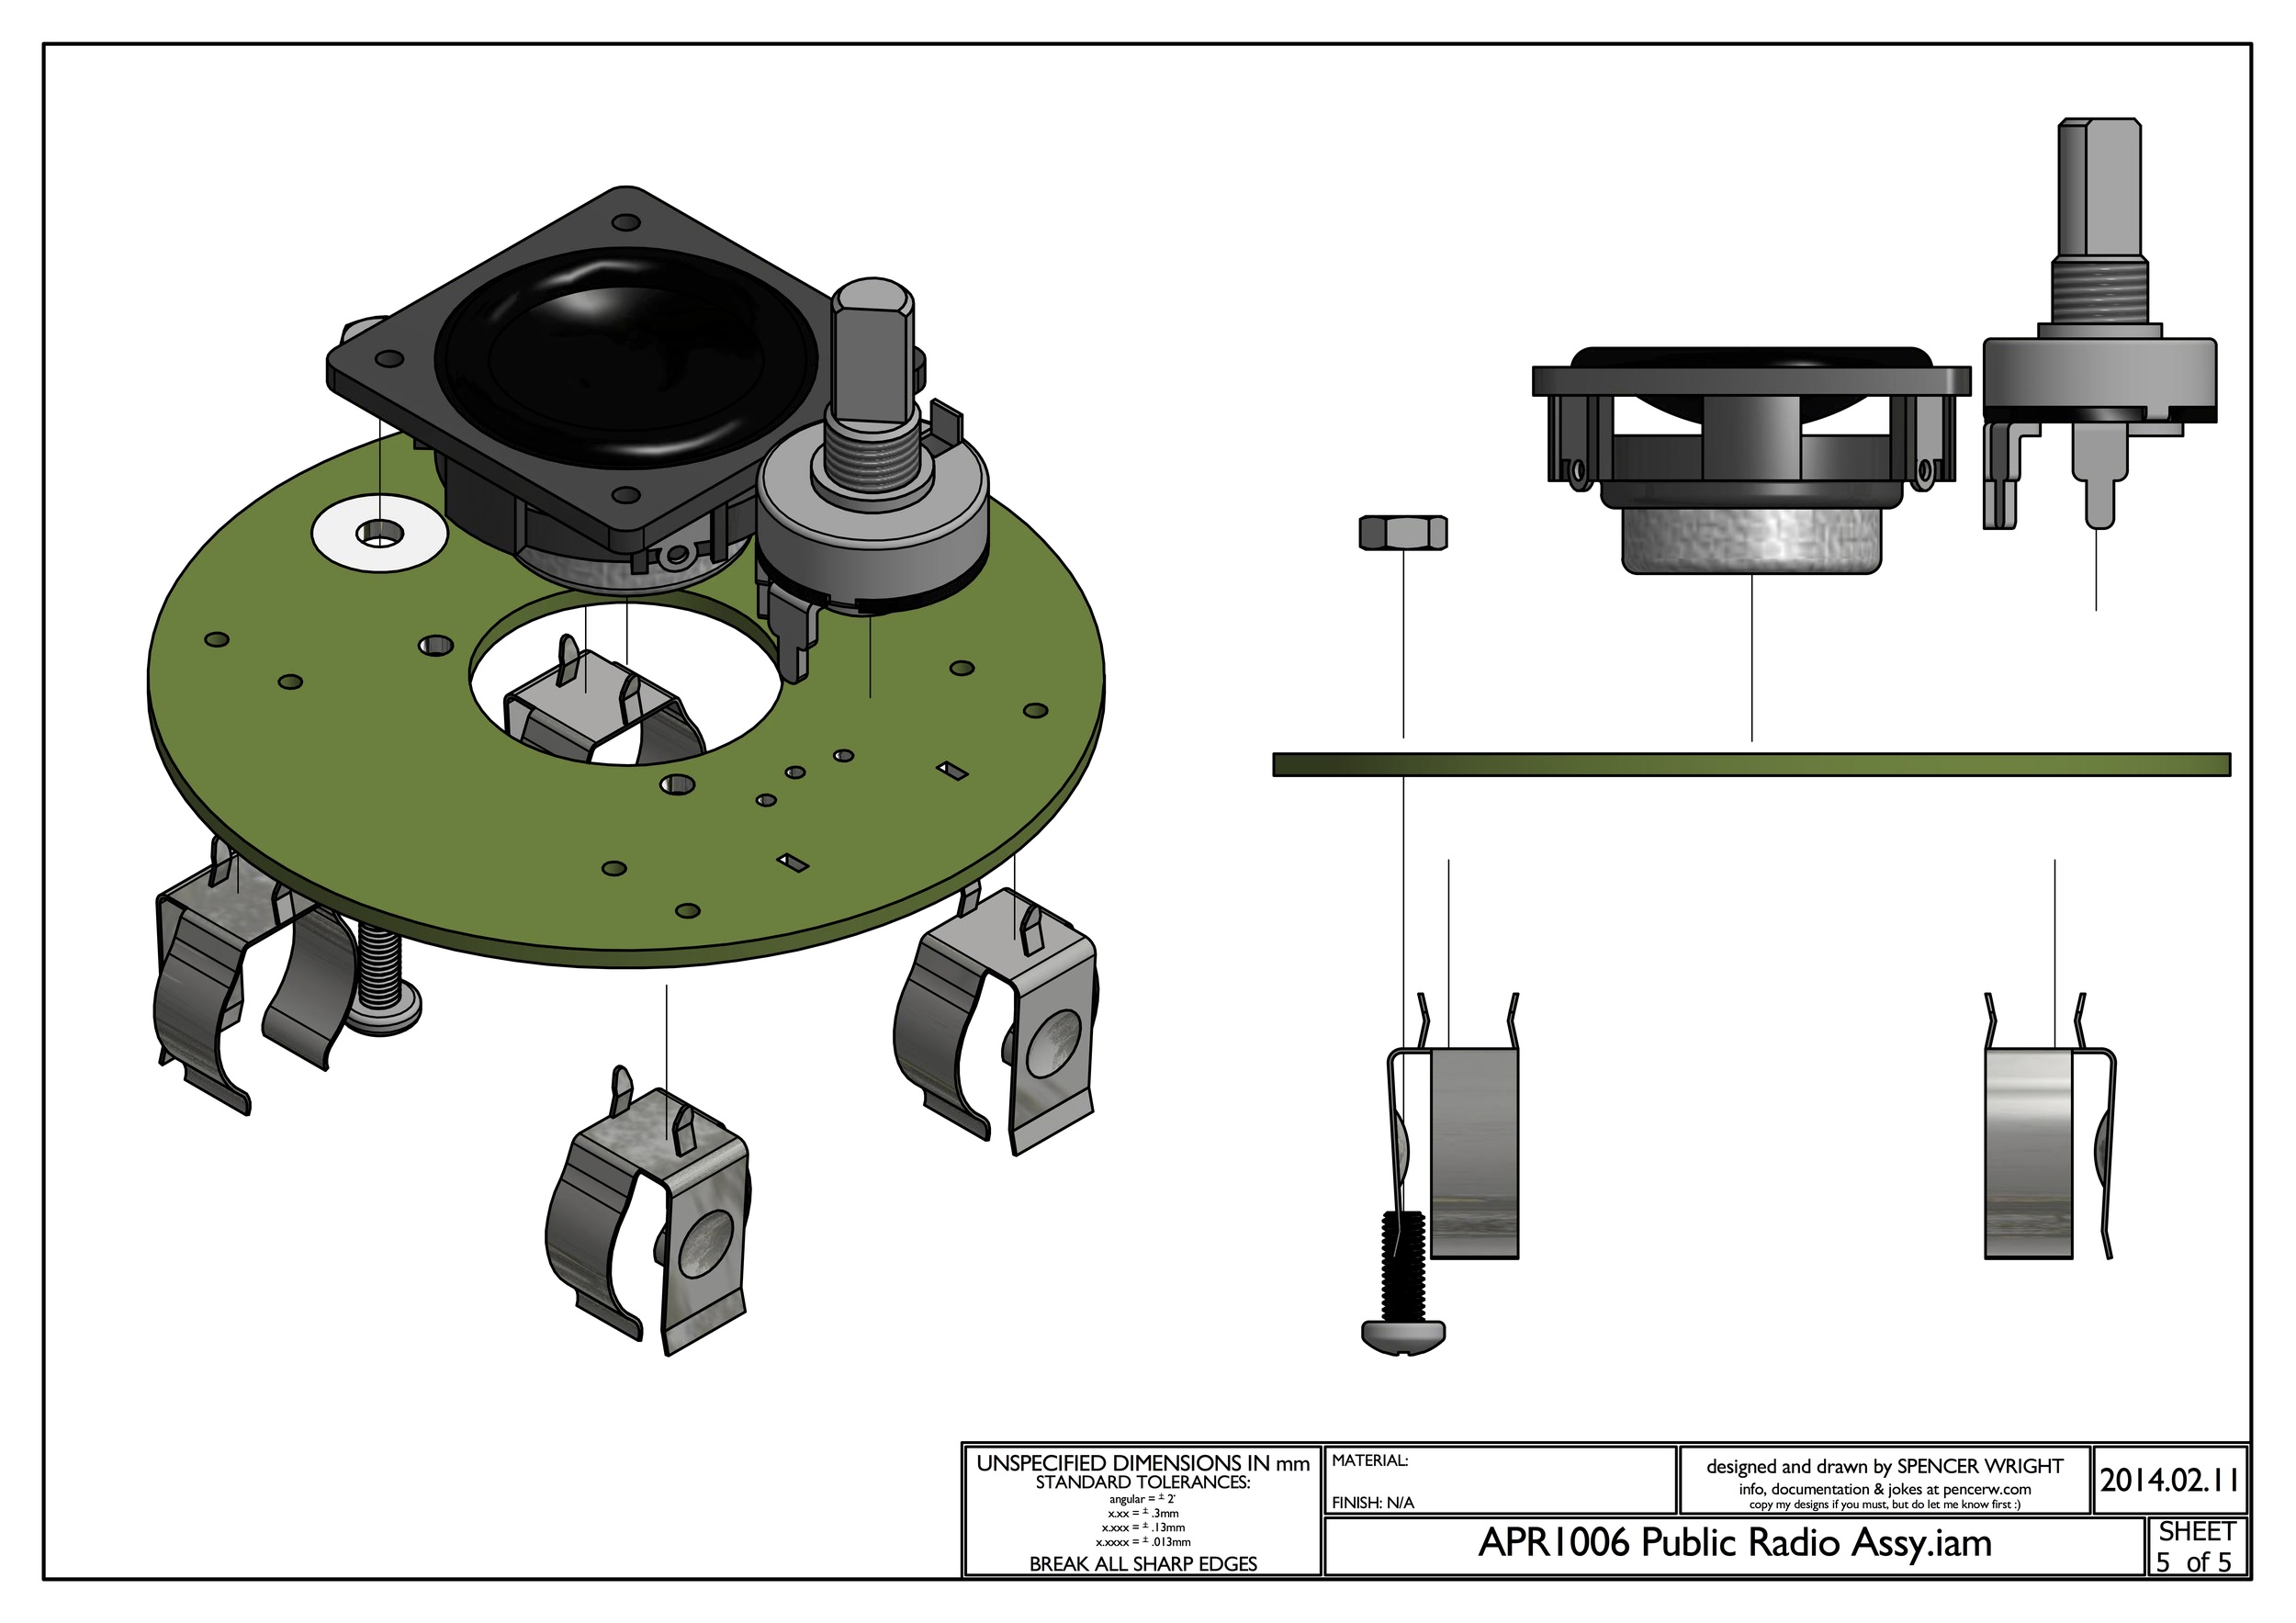
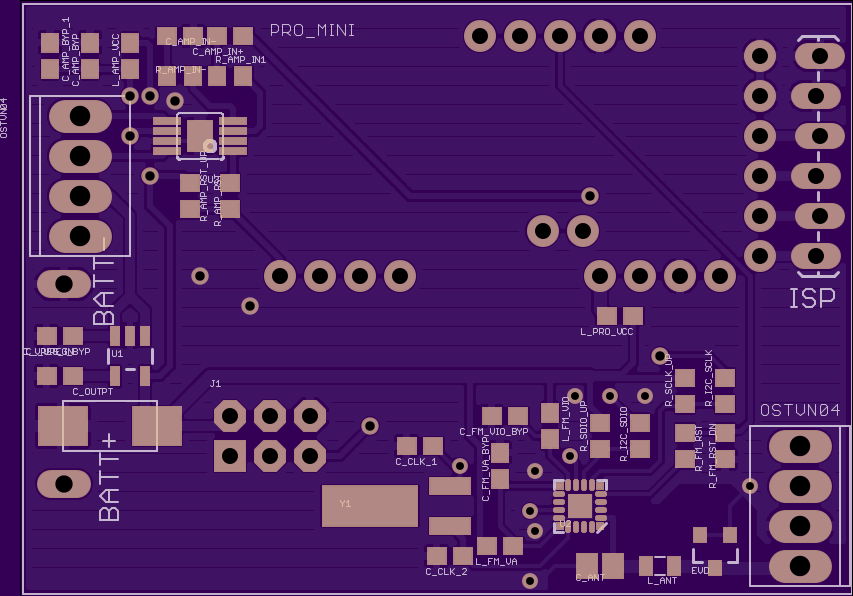
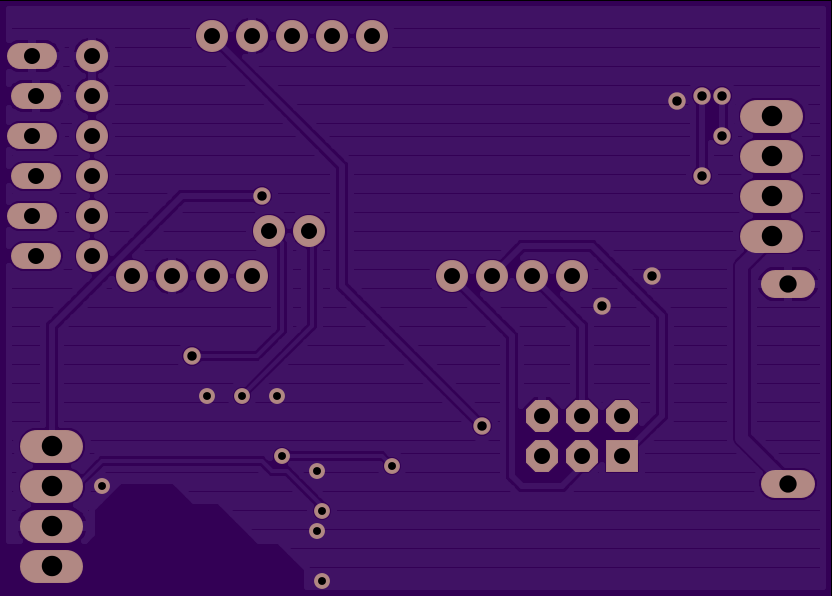
Yesterday I ordered parts for a 50-piece beta run. Our PCBs should ship in the next few days, and we've got speakers, potentiometers, and all our electronic components on the way too. I should pull the trigger on laser-cut stainless steel lids today, and will do knobs and antennas soon as well. The one thing that isn't fully secured is the antenna. We're planning on doing two different antennas - one telescopic, which will be made in Shenzhen to our specifications - and one solid, which will be Swiss turned. I should probably just pull the trigger on the telescopic version, but it requires a large order size and I've never dealt with this supplier before. The solid one we'll probably make by hand for this beta run, and will then order a larger quantity after it's fully tested.

The cost of all of this won't make or break anyone, but it's nothing to scoff at either. This beta run will cost us something on the order of $2k, and there will likely be a few snags along the way that'll require additional time, effort and money. 

This is a fun time. I really get a kick out of dealing with suppliers, and I (clearly) really enjoy learning about new manufacturing processes. And the rush of committing $500 to a run of potentiometers that you're almost certain will work is undeniable. 

The best - and the most potentially frustrating, too - part comes in the next week or so. I've planned our procurement fairly well, and most of our mission critical parts will be arriving within a few days of each other. But I'm sure I'm forgetting something, and even if I hadn't there are always times when you *really* want to start assembling parts but you're waiting on one little screw. 

Anyway. Fun stuff. Updates soon.

Graphs that go "like this: /"

Added on by Spencer Wright.

Well, it's official: The Public Radio soft-launched yesterday. And we even did it with a clever domain name (I think): 

thepublicrad.io

It's not as if I've got a ton of direct experience performing any of the tasks that Zach and I have managed over the past six months, but there's been something striking to me about the past two days. It's this:

Screen Shot 2014-02-13 at 23.12.50.png

This is a fairly big deal to me. The overall numbers are small relative to what can happen when web startups launch, but the quick jump in viewership of our product - this fucking *thing* that we've been working on for so long - is real a kick. In the past, my web presence has taken a much longer time to develop. TCD spent years in the dark corners of the internet, and this site has bumped along as well, growing slowly over time. But The Public Radio is a product that a certain type of person just gets, and we've stumbled upon a handful of those people.

The best part has been seeing the Mailchimp roster grow, and noticing "@npr.org" pop up way more than we had expected. It makes sense, of course - we got a few public radio folks checking us out, and they must have shared it with colleagues - but it's still a bit of a trip to see it actually happen

This next few weeks should be fun. We've got PCBs showing up from China in about two weeks, and I'll probably order prototype quantities of antennae ( :/ ) and lids tomorrow too. Our BOM is basically complete, and the majority of our engineering work is done, and so now is the time to really work on understanding our customers & suppliers.

On that note: We're actively pursuing partnerships with NPR and affiliate stations for The Public Radio. We think it would be a great fund drive gift for any station, and would love to be put in touch with anyone working in FM radio, public or private. If you're reading this and know someone in radio, I'd love an intro

We're also looking around for advance press coverage, so send me your ideas on those as well. And feel free to share! We love the attention :)

February is shaping up to be fun :)

PR5006 -> PCBCart

Added on by Spencer Wright.

We pulled the trigger on this today.

Screen Shot 2014-02-10 at 2.49.45 AM.png

There are a lot of small-to-medium changes here, even from the last photos I posted. 

Screen Shot 2014-02-10 at 2.52.11 AM.png

On the top edge of the board:

  • Station tune LED circuit moved to the right. 
  • Cap on the tune circuit changed to thru-hole.
  • Trimpot package changed, moved outboard.
  • Tune circuit moved up and out, to get farther from the antenna trace.
  • Big thru-hole coupling capacitor on the battery, in the middle of the right side.
Screen Shot 2014-02-10 at 2.52.23 AM.png

On the bottom edge of the board:

  • Speaker traces reversed. I had originally routed negative and vise versa, but apparently that's not cool :/ Oh well.
  • Power routed along the perimeter of the board - no longer needs a via to get under the speaker traces.
  • Audio in was turned up and to the right for shorter traces & less interference with power.

We should have boards back in roughly two weeks. In the meantime we'll be hustling in like twenty ways so that we can be totally ready. Should be fun :)

New Standards

Added on by Spencer Wright.

I've posted previously about my procurement process and elided a crucial detail: my part documentation for the past year has been pretty atrocious. Partly that's because I haven't been buying mostly 3D printed parts, which (when you buy from Shapeways et al) are documented only with STLs, but it's also because I haven't taken the time to set up my own drawing standards. Until yesterday.

This drawing is of the lid for The Public Radio. Depending on quantity it'll either be stamped or laser cut. I'd prefer stamped, but that's mostly because it'll be much less expensive at quantity - and I'd rather sell thousands of parts, not hundreds. 

The details of the drawing itself are rather mundane, but the title block and drawing format involved a number of weighty decisions. A few points:

  • I'm using an ISO A3 paper size. Because ISO is cool. 
  • I'm dimensioning in millimeters, and have default tolerances in millimeters too. This was a bit of a hurdle for me - I'm comfortable with metric dimensions but used to thinking of tolerances in thousandths of an inch - but I'm excited to be all (or mostly all) metric. Most of the tolerances here are three decimal places, which is basically the same at .13mm = .0051", is totally translatable for me. 
  • I'm using decimal points (instead of commas) between the ones column and the tenths column. Because Europe isn't right about everything.
  • I don't have any "approved by" field. Fuck standard title blocks, right?
  • "BREAK ALL SHARP EDGES." Yes.
  • Note: As I'm looking at this, I'm realizing that I should probably relax a number of these tolerances. Which often happens, the more you look at a drawing.
  • Revision tables. I start my drawings at "REV -", and then I increment alphabetically from there. This particular drawing was submitted to a few suppliers prior to this drawing standard, so I've incremented to "A" already... it's a little weird, but it works.
  • I'm not a huge fan of "TYP" or "typical," but in some cases it makes sense.
  • I'm using my part filename as a field in my title block. I considered separate boxes for part number and name, but I'm careful with filenames and this makes it easier.
  • I'm using an ISO time string (but with decimal delimiters) throughout. Because ISO is cool.  
  • I'm a little flippant in my title block (the "info, documentation & jokes" thing), but it's better than having to list my phone number.

Changes I should probably make:

  • I probably need a logo... or something. I don't know, a circle with a dot in it?
  • Line weights are off.
  • Do I really need to say what sheet it is? It's really only useful if you're documenting assemblies - at least with the simple parts I tend to design.
  • I guess I should be marking zones of the drawing space, but I've never done so in the past and never felt like I was missing anything.
  • I wish I could get rid of the file extension.

Overall I'm happy about this. Pretty fun.

Working on The Public Radio v1.3

Added on by Spencer Wright.

Screenshots from both Zach and myself - we've swapped back and forth on layout duties.

The FM IC (Si4831) is at the top of the board; to its left is the tuning circuit and trimpot. On the right edge of the board is the power & volume pot, and on the bottom is the amplifier, and on the left is the antenna connector. The middle of the board has a big cutout for the speaker body to fit through; we'll solder the speaker terminals directly to the board.

I got a little cute with the restricts near the antenna trace, and ditto on the power trace along the left edge of the board :)

Meanwhile, I spent a little time today modeling the battery connectors in Inventor:

Finding nice through-hole AA battery connectors is *tough.* I'm hopeful about these - I think they'll hold the cell firmly but allow for easy removal too. The only downside is that they're not polar in any way, so we'll need to mark the PCB clearly to show which direction the batteries need to face.

Our antenna standoff is kind of exciting too. We're running a trace to a plated hole (with a *big* pad) on the PCB, and then fastening a male-female threaded standoff to the hole with a hex nut. The antenna itself will thread into the standoff, making it easy to remove/install for shipping, transportation, etc.

We're in the process now of getting quotes for a couple of custom pieces of hardware: the antenna, the knob, the potentiometer, and the speaker gasket. We've also gotten a few quotes for the lid, which will either be stamped or laser cut stainless steel. And when PCBcart comes back from Chinese New Year, we'll order a batch of new boards to get into the hands of our beta testers.

This is an exciting time in the project. Things are coming together quickly :)

Public Radio Progress

Added on by Spencer Wright.

The last few days have been a bit of a whirlwind. 

First, we visited Todd to discuss some circuit layout concerns. On the way over we nabbed a cheap radio at RadioShack, and took it apart with Todd.. 

narrat1ve-1.jpg

What we found was really interesting. The device uses a different chip than we had been prototyping with, and as a result their circuit is *much* simpler. Our chip (Silicon Labs' Si4703) requires digital tuning, which we were accomplishing with a microcontroller. But RadioShack was using the Si4822, which is mechanically tuned. The result is drastic from a circuit standpoint - they no longer need a voltage regulator, or a microcontroller, or a bunch of additional passive components on the board. They're also in a better position re: noise on the board: an MCU (and a voltage regulator too) will produce a bunch of noise that might get on the antenna, affecting reception. RadioShack doesn't need to worry about this at all.

Over the past few weeks, we've been looking for just a breakthrough like this - a way of rethinking the problems we were dealing with. Our issue was that we were stuck conceiving this as an Arduino-descended product, which it doesn't need to be. 

public radio hammer nail-1.jpg

We also made a bit of progress reengineering the hardware layout of the board. Our new design (this is just the board layout, not the circuit schematic) will be significantly easier to assemble, program & service.

public radio hammer nail-2.jpg

We're also pretty sure we can shorten the antenna *significantly.* The mockup here shows a custom solid stainless steel antenna, 50mm long. I rather like it, and it's designed such that a longer telescopic antenna can be swapped in easily. 

short antenna round pcb full assy.jpg

Our PCB will now be circular, and we're soldering the potentiometer and speaker directly to the board. There will be a bunch of SMT stuff on the top (same side as the speaker & pot) and a battery back and trimpot (not shown) on the bottom.

I *really* like where this is headed. More updates soon. 

Radio Monogamy

Added on by Spencer Wright.

"Radio monogamy" was suggested by a few friends during discussions on The Public Radio. I'm mulling a storyboard for a short video, and jotted this down last night :)

Every once in a while, paper prototyping is really effective.

Notes on Powersaving modes

Added on by Spencer Wright.

Today Zach and I are playing with powersaving modes on The Public Radio. This was all done with this commit; cases were tested by commenting out lines 42, 45 and 46 and varying volume via our potentiometer. Current is being measured on Vout of the VREG on hardware v1.1. 

  1. MCU ON (sleep disabled)
    1. Amp OFF (shutdown enabled)
      1. Si4703 ON
        • .019A
      2. Si4703 OFF
        • .004A
    2. Amp ON (shutdown disabled)
      1. Volume @ 100%
        1. Si4703 ON
          • .050-.100A
        2. Si4703 OFF
          • .004A
      2. Volume @ 0%
        1. Si4703 ON
          • .026A
        2. Si4703 OFF
          • .004A
  2. MCU OFF (sleep enabled)
    1. Amp OFF (shutdown enabled)
      1. Si4703 ON
        • .016A
      2. Si4703 OFF
        • .004A
    2. Amp ON
      1. Volume @ 100%
        1. Si4703 ON
          • .030A-.090A
        2. Si4703 OFF
          • .004A
      2. Volume  @ 0%
        1. Si4703 ON
          • .023A
        2. SI4703 OFF
          • .004A

There are some weird things going on here. Our powersaving mode isn't having quite the effect we're looking for, either.

More work to come.

The Public Radio v1.2

Added on by Spencer Wright.

Ordered yesterday from OSHPark. 

This board uses an Arduino Pro Mini, which can be programmed from either an FTDI cable or via an AVRISP (which we'll do to shorten powerup time). The rest of the circuit is all discrete components, mostly SMT. The whole thing mounts on the backside of a 3xAAA battery pack.

We should receive these boards around Valentine's day, and will be testing and iterating on them shortly afterwards.

The Public Radio on GitHub

Added on by Spencer Wright.

The Public Radio is now contained on three repositories on GitHub. They're all within the same "organization," which is an improvement over the previous implementation. You can find it all here, and I encourage anyone and everyone to check it out and log issue requests/make whatever contributions they can!

The goal with The Public Radio is to maintain it as an open source project. Currently we've got embedded systems hardware data (BRD and SCH files from EagleCad), Arduino sketches, and C++ libraries all in their own repositories. I'm not certain this is the best way to organize everything, but it's a start. When I look at the physical hardware again (probably not until next week), I'll create a new repository for that and put STEP files there. I'm not sure that DXFs or STLs will make the cut, though I suppose they ought to. We'll see how the hierarchy works out.

We will, of course, sell The Public Radio as a fully assembled product, but we'll also maintain the GitHub repositories and try to support anyone who'd prefer to assemble/hack/repurpose the designs instead. We're also intending to sell a barebones kit - assembled PCB only, I think - and allow users to use their own speaker, UI, and enclosure.

GitHub isn't integrated into my workflow, and maintaining the repos will take a bit of elbow grease on my part - but I'm confident it'll be worth it.

Please check the repository out and give your feedback!

Yes.

Added on by Spencer Wright.

This is basically what I want. Still no ATTiny, but otherwise I think it's pretty rad.

If anyone out there reading this has some PCB layout critique in them, I'm all ears!

Likely Changelog

Added on by Spencer Wright.

I like having multiple projects going. While I've been working on other things the past few days, I've had a chance to reflect a little on The Public Radio's current configuration. Zach has been doing other things too, but we've had a few chances to reconvene and have assembled a short, rough wishlist:

  • Programmable by AVRISP. This means breaking out 6 additional pins on the Pro Mini and adding a 6-pin programming header. Doing so will allow us to remove the bootloader, shortening startup time and pushing us towards an eventual transition to ATTiny.
  • Cut parts where possible. The one place this is really possible is on the screw terminals, where we can replace two 2-terminal parts with one 4-terminal part. That'll save up to $.09 per board - not exactly champagne-and-caviar money, but it's something.

The effect of just these two changes means laying out basically the whole board again. The 4-terminal screw block will screw up my whole amp & voltage regulator layout - basically the whole left side of the board. And the programming header (which I'll probably put in the bottom left) will require a few traces crossing the board up/down - likely causing trouble for some of the FM chip circuit. 

Tonight I began playing with this a bit, though I didn't get far:

The other thing I'd really like to do is plop a DIP package ATTiny on here somewhere, but there'll be a pretty significant redesign associated with that too, plus a learning curve re: getting off of Arduino, and all in all I think I should just wait until v1.3.

I'm hoping to get a big chunk of this work done early next week, as it's continuing to slip a bit. Still, we're definitely getting closer to our end goal - and learning a ton in the process.

Yet more Eagle

Added on by Spencer Wright.

This is getting closer.

Zach has been doing crazy research on the minutiae of our circuit and figuring out ways to mitigate noise, especially on the antenna line (to improve reception). I've been deep in Eagle, which is still a PITA but is getting to be more fun :)

Extra special crazy thanks go to Todd Bailey for walking us through the datasheets on a few of these components. Todd has saved my ass more than once, and he continues to have a huge influence on this project.

More EagleCAD

Added on by Spencer Wright.

This layout is a bit uglier than the one I did yesterday, but it has a few significant improvements which I don't have the energy to describe right now. 

More tomorrow :)

Public Radio v1.2 PCB

Added on by Spencer Wright.

Today Zach and I spent most of the day laying out new boards for The Public Radio. Here's mine:

There are a handful of obvious errors here. The top edge is too tight, and I've packed a *lot* in near the FM chip. I've totally ignored most of what the datasheets says about locating blahblah next to whatever (doing that tomorrow), and I could probably take a *lot* of style tips from someone with more experience.

But the basic concept is there. The PCB mounts to a 3xAAA battery holder on its back, and has SMT and thru-hole components on the front.

Tomorrow we'll spend the AM scouring the datasheets and then will likely end up totally rebuilding the boards. Plans have been discussed to make them round instead, and mount them directly to the lid of the jars, though that's a bit more than we can/should bite off for now.

Today the two of us were working in parallel, which was great for jumpstarting each of our abilities. We'll probably do the same thing for most of tomorrow, but eventually transition to one design and operate more in a pair-programming mode. We'd like to get a design to a board house tomorrow afternoon, though it could slip till Tuesday or Wednesday *possibly* - but only in the service of getting a better finished product.

:)

The Public Radio v1.1

Added on by Spencer Wright.

Today Zach and I completed v1.1 of The Public Radio

public radio shelf-1.jpg

I'll write more about our hacknight in the next few days, but for now I wanted to give a brief description of the project - for any latecomers, you know :)

The Public Radio is a collaboration between myself and Zach Dunham. It is an ongoing project; we are planning a full launch this spring.

The Public Radio is an FM radio which is not tuneable by the user. Instead, it is purchased pre-tuned to your station of choice - whether that be your local NPR affiliate (Zach prefers 93.9 WNYC) or your favorite pop station (I prefer HOT97). Once you receive your Public Radio, it's set to your station only, and that can only be changed by sending the unit in to us.* The radio only has one knob; it controls power and volume only.

If you use FM radio to discover new content - if your Scan/Seek controls are in heavy use - then The Public Radio may not be for you. But if you discover new content as we do - mostly online - but still want to maintain the personal, emotional connection that you've built with your favorite local station - then The Public Radio is a convenient and appropriately understated way of doing that. Its design fits in anywhere, and its portability makes it easy to use in areas of your house where you don't have easy access to iTunes or Spotify.

The Public Radio is currently available for beta testers; if you're interested, send a note and we'll put you on our list :)

Eagle, etc.

Added on by Spencer Wright.

Today Zach and I spent most of the day laying out a new PCB for The Public Radio.

battery-1.jpg

I'm trying to implement pair programming on the project, and so far that's been really helpful for me - especially right now. To date, I've only designed one PCB in Eagle, and The Public Radio is quite a bit more complicated. Zach's no expert either, but he's got a bit more experience than I do. Regardless, working together on it feels a bit slow, but I'm confident that we'll make fewer mistakes and will eventually move a lot faster as a result.

One thing we're revising is the battery setup on the PCB. On the last board we just used screw terminals and plugged old 9V batteries into them. It worked, but it's an inefficient use of space and energy. On this version we're probably putting a 3-pack of AAA batteries (hence the photo above) right on the board, and are getting a little cute with the layout.

More details to follow; we'll be working on this most of the day on Sunday, and hope to get designs out to a PCB shop on Monday.