Manufacturing guy-at-large.

Only the last 10%

Added on by Spencer Wright.

From a conversation on engineering between Arup's Dan Hill and Tristam Carfrae:

In response to fears that this kind of 'algorithmic architecture' will marginalise engineers and architects, Carfrae states that this kind of approach is only really "optimising the last 10% of a problem." The software has to be described and tuned with a particular strategy or problem in mind, and that comes from the designer, not the software. 

The point here is one that I've argued many times in the past: Today's optimization approaches (and any in the adjacent possible future) do not, in fact, put computers in the driver's seat of engineering or design. Instead, they use computers to automate rote tasks that an engineer is interested in exploring.

I believe this distinction is critical, as it affects both the direction of CAD companies' efforts and the enthusiasm of a new generation of engineers. It's my desire to see the CAD industry prioritize efforts that'll have big, positive impacts on the world, and it's my goal to keep smart, driven people from becoming disillusioned with engineering. As a result, I'd encourage marketers, journalists and onlookers to seriously consider what they believe about optimization, and to be wary of anyone who tries to sell them an AI enabled Brooklyn Bridge.

For more background on optimization and the future of CAD software, see Displaced in space or time, The problem with 3D design optimization today, Computer aided design, and Exploration and explanation.

Fostering the conditions

Added on by Spencer Wright.

From a recent Stratechery article on Amazon & Alexa:

You don’t make good products because you really want to, you make good products by fostering the conditions in which great products can be made.

This is something I've put a lot of thought into, starting around mid 2012. At the time I was leading development of a highly complex electromechanical system (robot doors), a process which was itself embedded into pretty much the most complicated residential construction project you can imagine. The engineering tasks we faced were formidable, and the schedule was extremely tight - but in many ways the cultural aspects of the job had an even bigger impact on what we built.

Since that experience - and urged along by my time at Undercurrent and my work studying product companies like McMaster-Carr and Amazon - I've only become more convinced of how critical it is to foster the kind of engineering, product, and project cultures that are appropriate for what you're building. 

Build what's right for the team that you are; Be the right team for what you want to build. 

My ideal, practical, engineer's desk

Added on by Spencer Wright.

Note: I'm considering making a small run of these desks available for sale. If you're interested, let me know!


Last week I finished assembling the new desk I've been working. It's been a big upgrade to my home office, and I'm really happy with how it turned out. 

To recap:

The goal was to create a functional workstation that could be assembled (and disassembled) easily. It should have a distinctive aesthetic, use durable materials, and be sturdy as all get out. Its primary use will be as a computer terminal; but as it's designed for engineering work it'll also serve as a de facto hub for parts inspection, reverse engineering, and the occasional wrenching. 

Initially, I had wanted to get a slab of live edge walnut and make something classic. But after some consideration I realized that wasn't really appropriate. Wood's fantastic, but it offers zero modularity (making the desk difficult to move - bad for expanding workshops) and is rather messy to work with (bad for making changes down the line). In addition, the aesthetic of live edge desks tends towards cast iron and welded steel: beautiful materials in their own right, but not ones that are convenient for me to work on.

Unidirectionally wound carbon fiber tubing is subtle, but when it catches the light it looks *great.*

So: Carbon fiber legs. I've worked with composites since my bike days, and found that it offers some nice benefits over metalwork. Carbon tubing is light (not critical when you're using the desk, but sure is nice for shipping/moving), stiff, aesthetically distinctive, and easy to cut to length. 

To finish the legs' structure, I used 3D printed resin nodes. I wanted something that had good surface finish and high tensile strength, and I wanted good elongation so that nothing would break if I *really* hammered on something on the desk. Formlabs came through on all counts; their Tough resin performed fantastically. 

Formlabs' Tough resin (which I painted a matte black) make excellent connection points for the desk's structure.

Next, I needed a suitable surface to work on. After researching a variety of composite surfaces, I settled on phenolic resin. It's impervious to all sorts of harsh chemicals (including coffee cup rings), is cost effective, and has a nice monolithic feel that laminates just don't. It's also easy to machine and adhere to, which came in handy when attaching the subframe.

In order to reduce deflection in the work surface - and to allow for continuous attachment points under and on the sides of the desk - I designed an 80/20 aluminum extrusion subframe. Aluminum extrusions are fantastic for this kind of thing; they're light, strong, and easy to fasten to. And 80/20's selection of brackets and attachment options allow me to add accessories and even reconfigure the desk down the road. I attached the subframe with two machine screws and two strips of VHB tape.

Right off the bat, I knew I wanted three accessories attached to my desk:

  • A two-arm monitor stand outfitted with a laptop tray. I swap back and forth between a MacBook and a CAD laptop, and this setup has proven *really* convenient.
  • A serious, 12 outlet power strip. This mounts directly to the 80/20 subframe, and offers plenty of fixed and flex space for whatever I need to plug in.
  • Hooks for hanging my briefcase & camera bag. I mounted these to 80/20's sliding hangers using stainless steel twist shackles - an excellent setup.

Since finishing the desk, I've settled into it nicely. I love the feel of the phenolic, and *really* appreciate how stable the whole setup is. I'm continuing to play with my exact layout - my home office is a bit in flux - but having this as a new centerpiece makes me feel much more grounded.

A big thanks to Formlabs for helping out with the node engineering & printing - and for sharing a complete guide on painting SLA parts! 

Desk fab

Added on by Spencer Wright.

This weekend, in addition to setting up an Abaqus beam sizing optimization on my lattice bike stem, I got about 80% of the remaining work on my new desk done. Completing it (which I should get done in the next week) will be a long awaited upgrade to my home office, and I've put a lot of research and care into selecting my materials and designing a system that's functional, lightweight, aesthetically pleasing, and modular. The structure is based on unidirectionally would carbon fiber tubing - the same stuff that I use for my titanium-carbon road bike seatpost

I cut the tubing to length with a 10" diamond grit blade, and use a piece of aluminum oxide wet/dry cloth to knock down any slag (stray, partially cut fibers). I then wiped the tubes down with tack cloth and used a two-part high gloss clear coat to seal and protect the tubes. The result looks great - it's hard, smooth, and allows the fiber to shimmer when it catches the light. 

The last pieces to prep before assembly are the frame's nodes. These were printed on a Form 2 in their "Tough" resin, which most people would use for functional prototyping but which I'm planning to use indefinitely. I considered leaving the nodes in their natural blue-green (you'll note that I even changed the color on the parts in my model a few months ago), but ended up deciding to paint them black. 

I was a bit hesitant to take on a finish paint job - I've been painting more and more recently, but my spray skills are mostly untested on small, intricate parts - but Formlabs has a good two part (one, two) guide and anyway I didn't have any other options. I used the Tamiya primer and spray paint they suggested (a note on this: Tamiya's bottles are pretty small. I ended up buying three bottles of primer and five bottles each of black topcoat and matte clear.), which goes on soft and easy - much nicer than the big rattle cans that I'm used to.

I've still got to sand, prime and paint three more of the nodes, but once that's done I'll be able to assemble the entire desk and start attaching accessories - which, because I'm particular about my workspace, will be more complicated than maybe most people's setups :) 

More soon!

Snapshots of a day

Added on by Spencer Wright.

Some semi-random screenshots from a day's worth of lattice design in nTopology Element Pro:

There have been a bunch of big updates to Element recently, and this workflow takes advantage of a few of them. In particular, the new Warp to Shape tool is very helpful; I also used the Extract tool and the Remesher to make some nice selective surface lattices.

The last, and really the biggest, thing here is the conversion into Abaqus for beam analysis & sizing optimization - see the last photo above. I'll be working on & posting more about that in the next few days - stay tuned :)

An ode to VHB tape

Added on by Spencer Wright.

I mentioned VHB tape in a post a few weeks ago, and last week a friend, who had read it, looked at me quizzically and asked "what's up with VHB tape?"

The thing is, VHB tape is awesome. It's an industrial strength, double-sided foam adhesive, capable of creating *really* strong bonds between basically anything that you'd want to stick together. I've used it in a few contexts, and encourage anyone who takes hardware projects seriously to keep VHB tape in mind as an alternative to welding, bolting, or gluing parts together.

I first became aware of VHB tape when building bikes, and used it (as part of 3M's "mushroom head" tape, which is the same stuff that EZPass uses to stick sensors to your windshield) to create a modular front rack system that didn't require bungee cords. Later, when I was working on robot doors, I seriously considered using VHB tape to bond mahogany cladding to the doors' aluminum frames; we eventually decided on structural adhesives, and dealt with a slew of issues resulting from differences in thermal expansion rates.

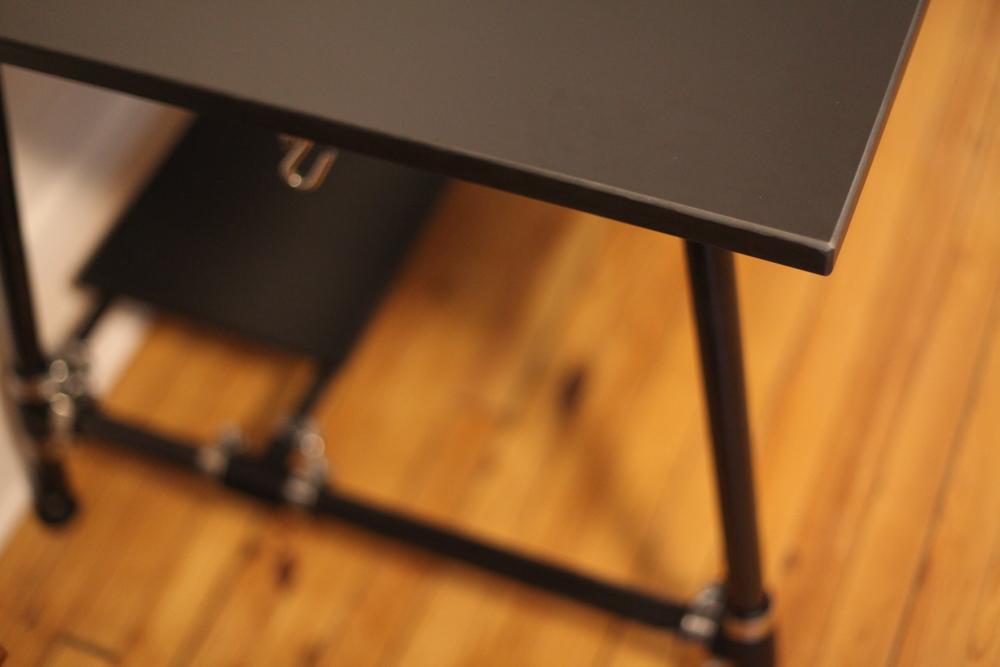
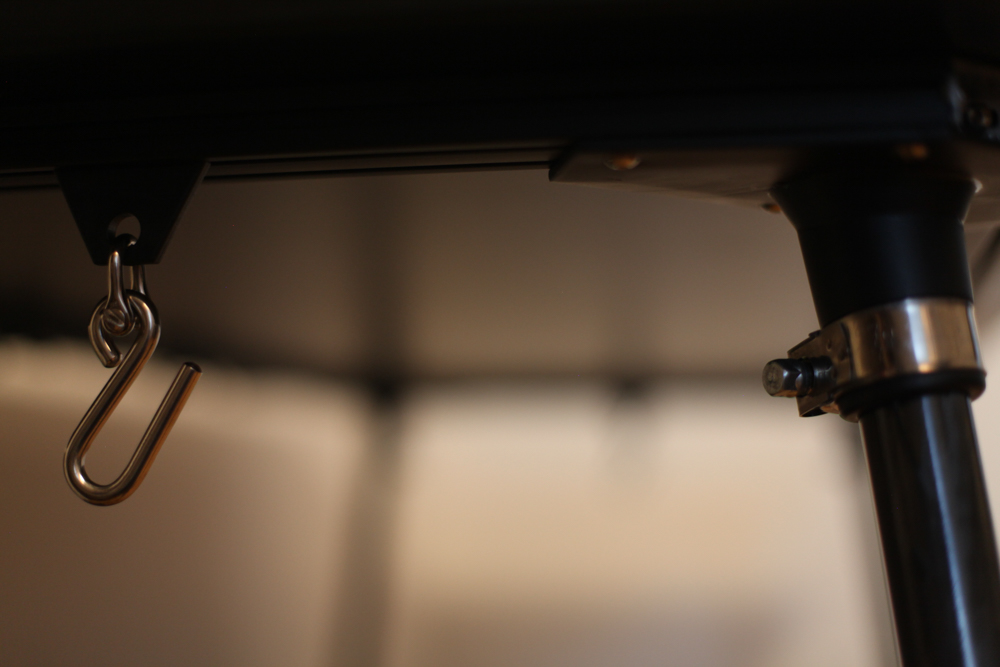
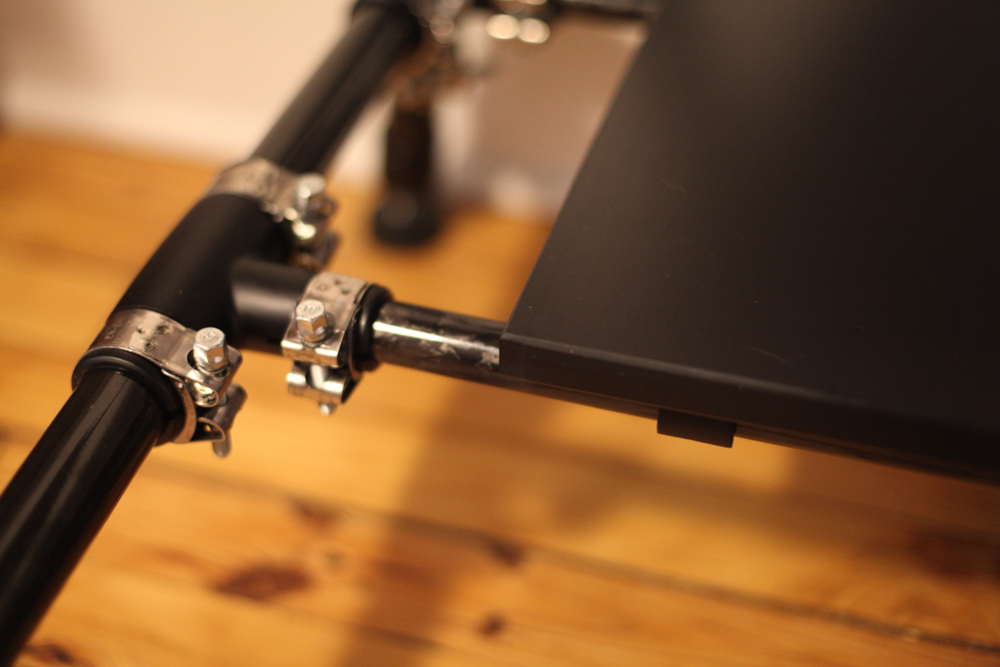
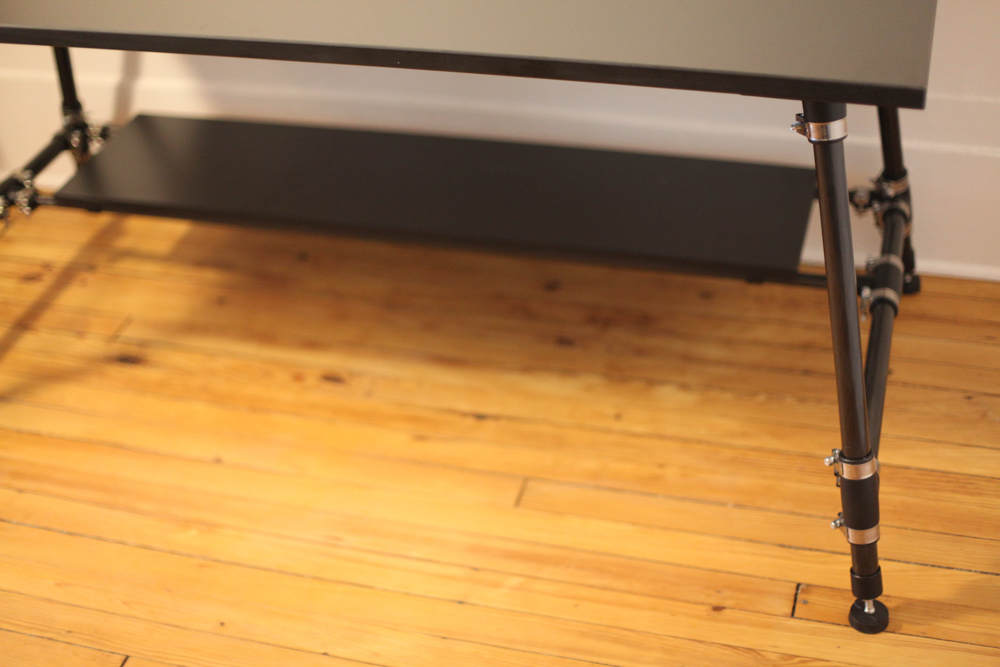
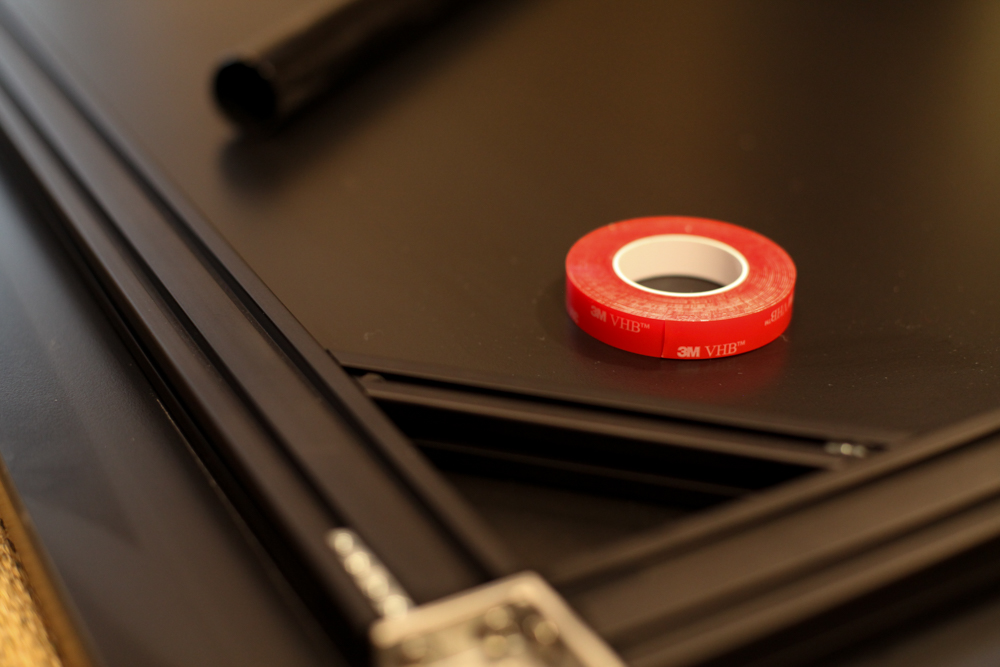
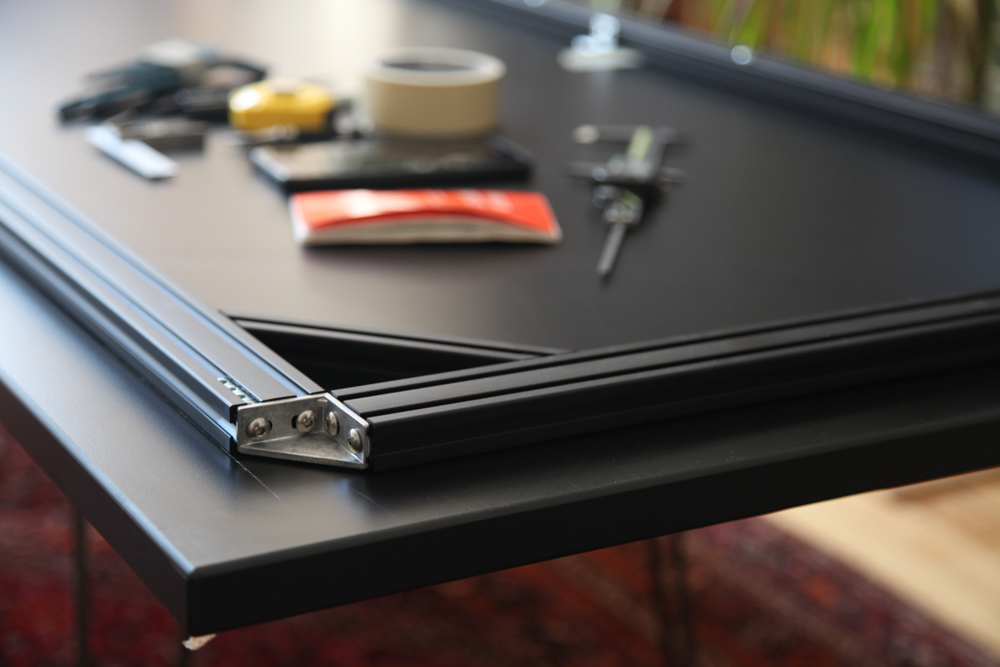
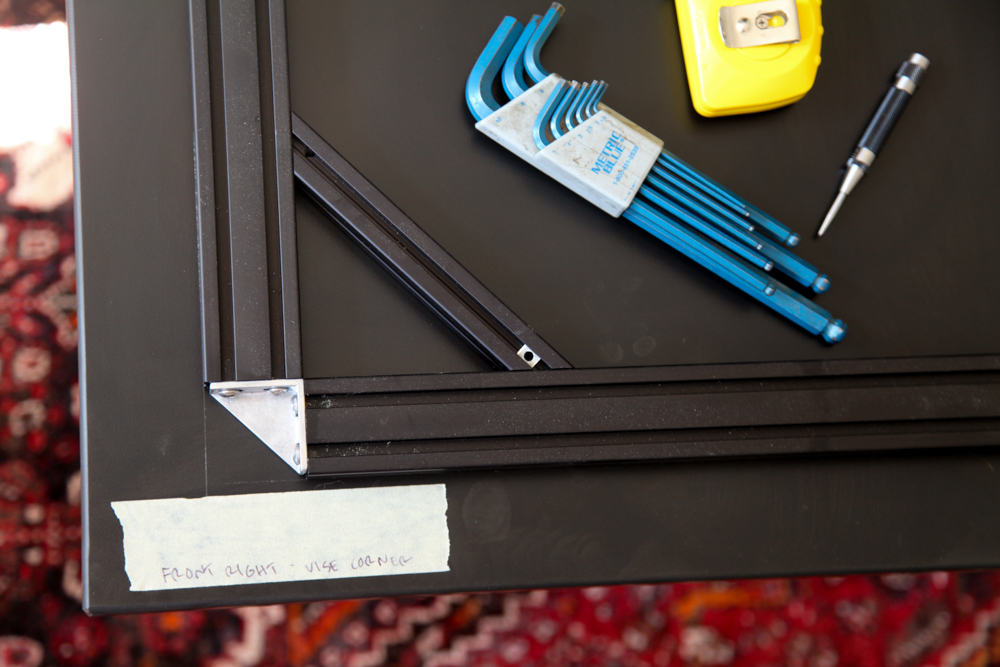
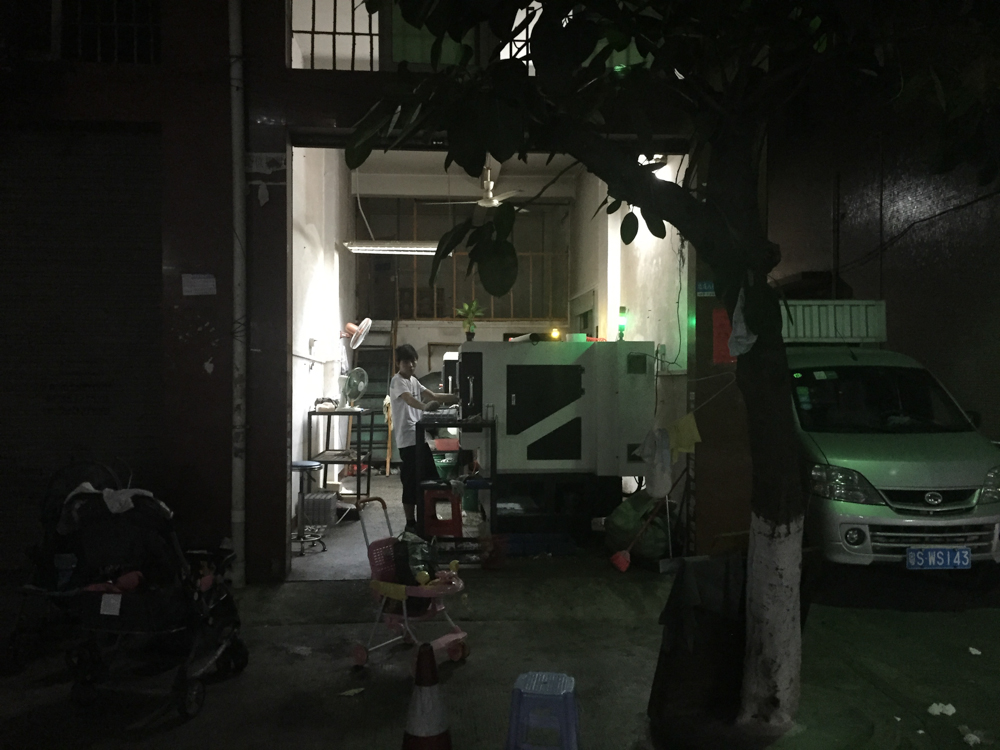
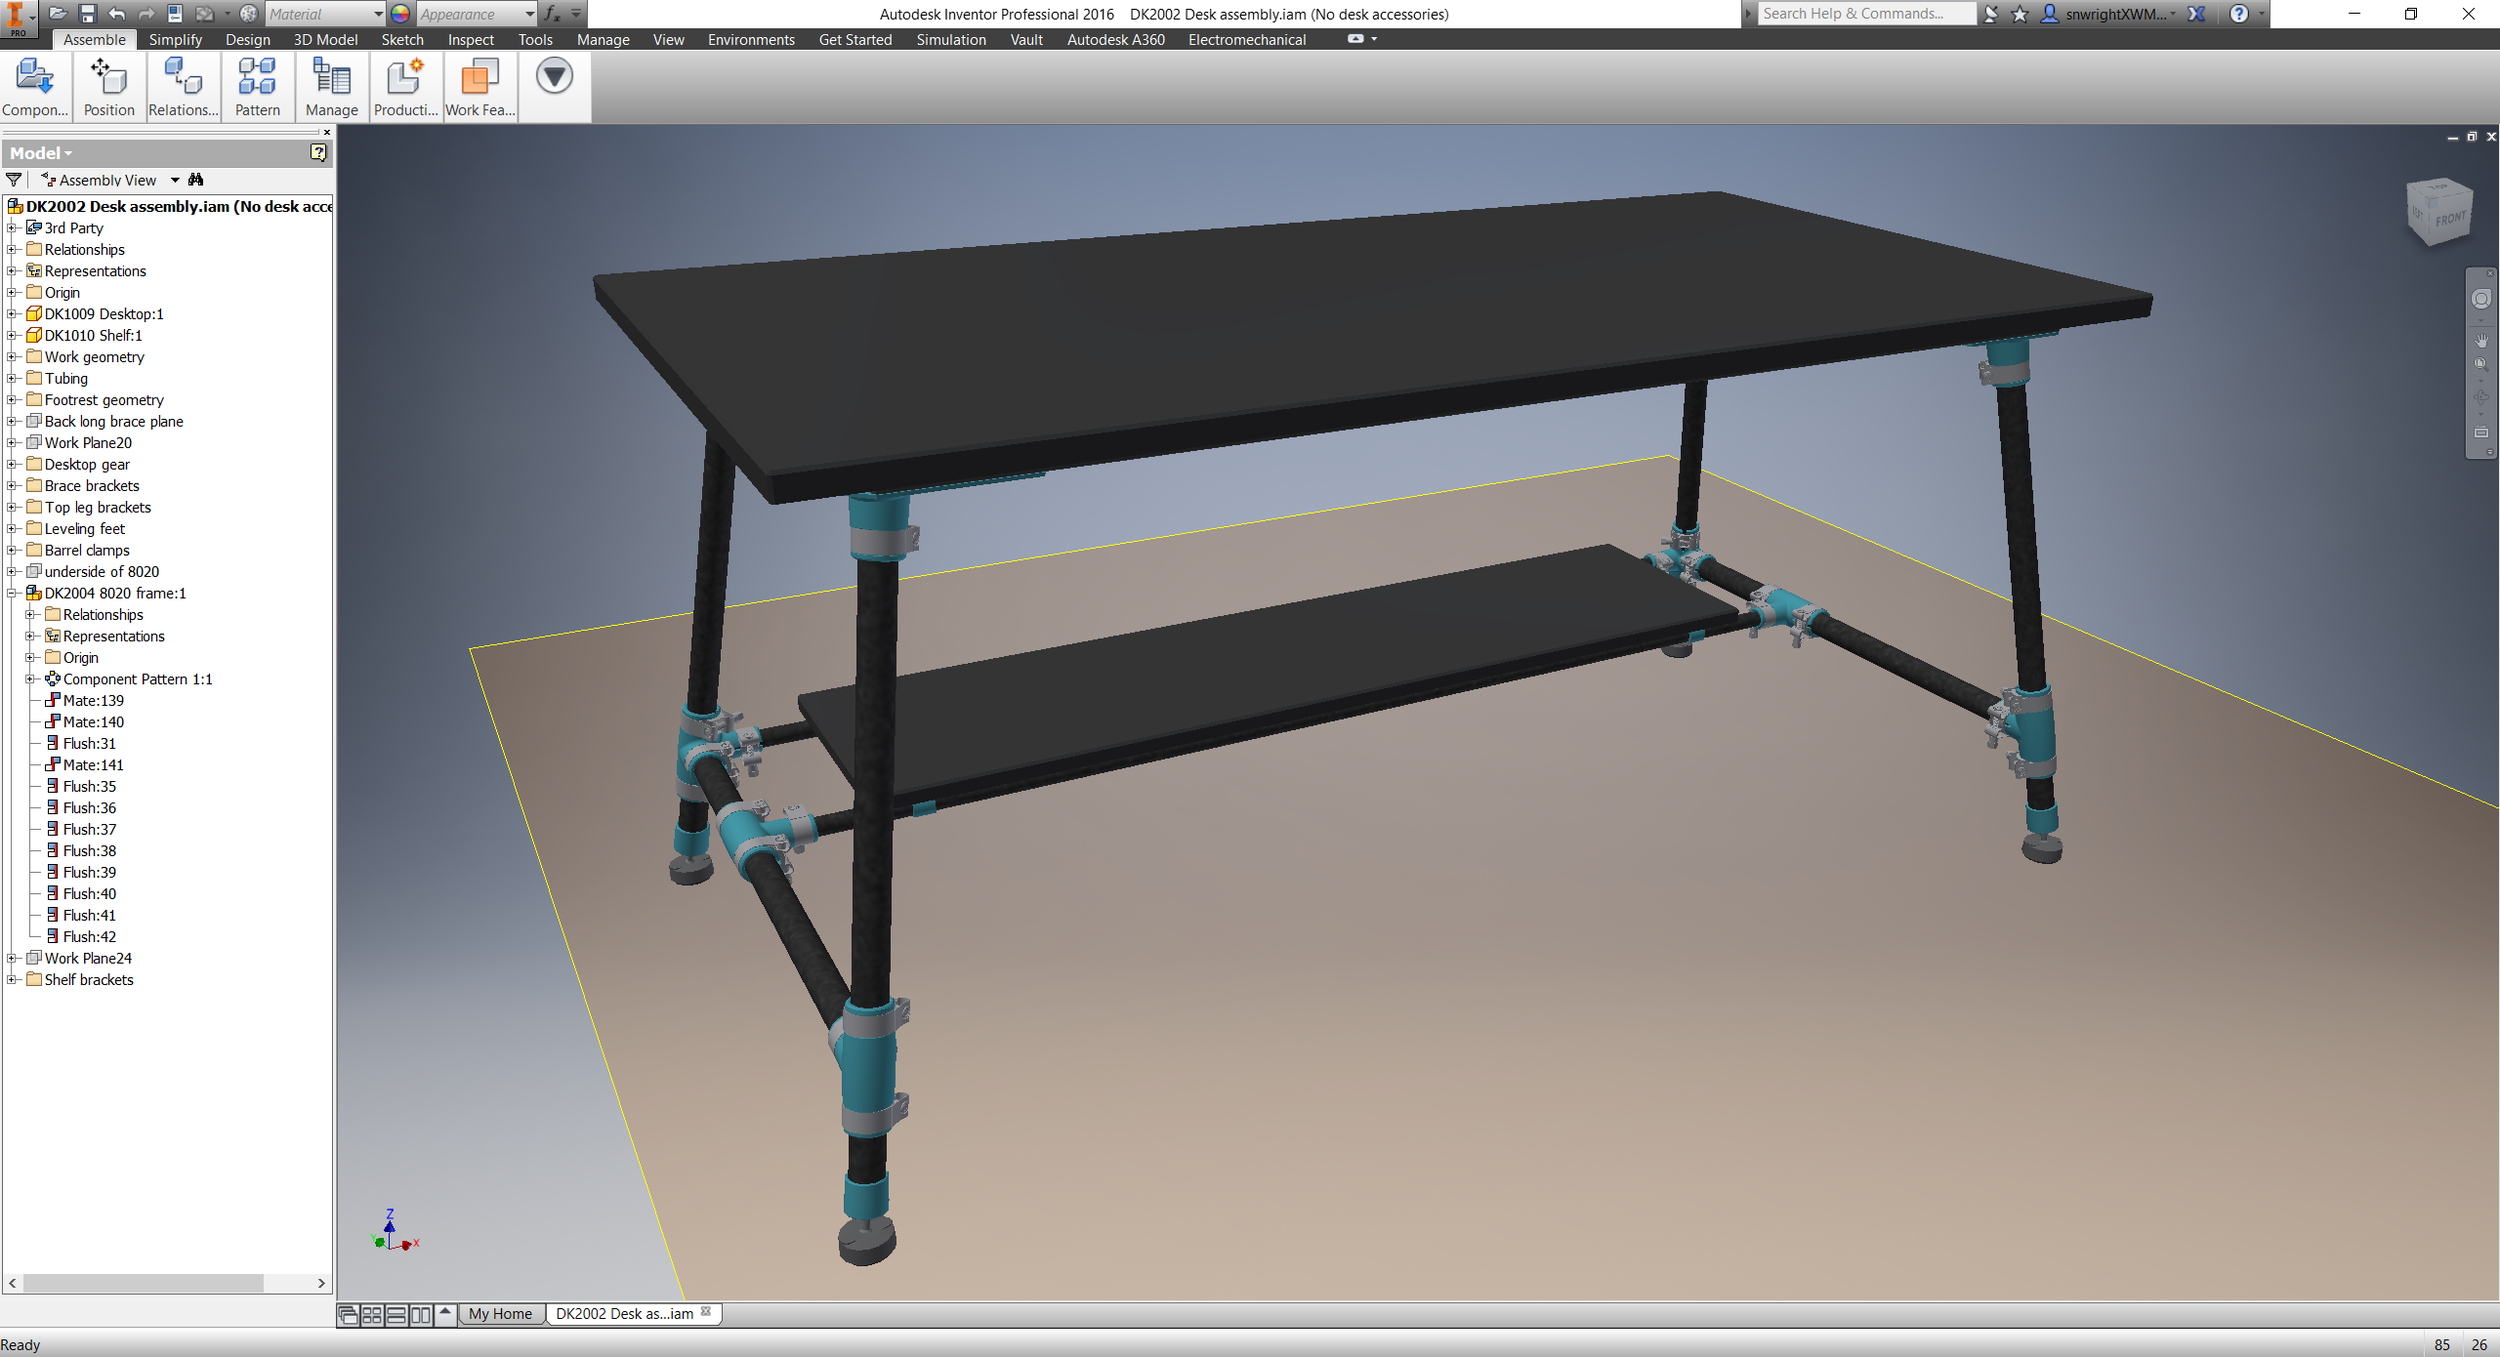
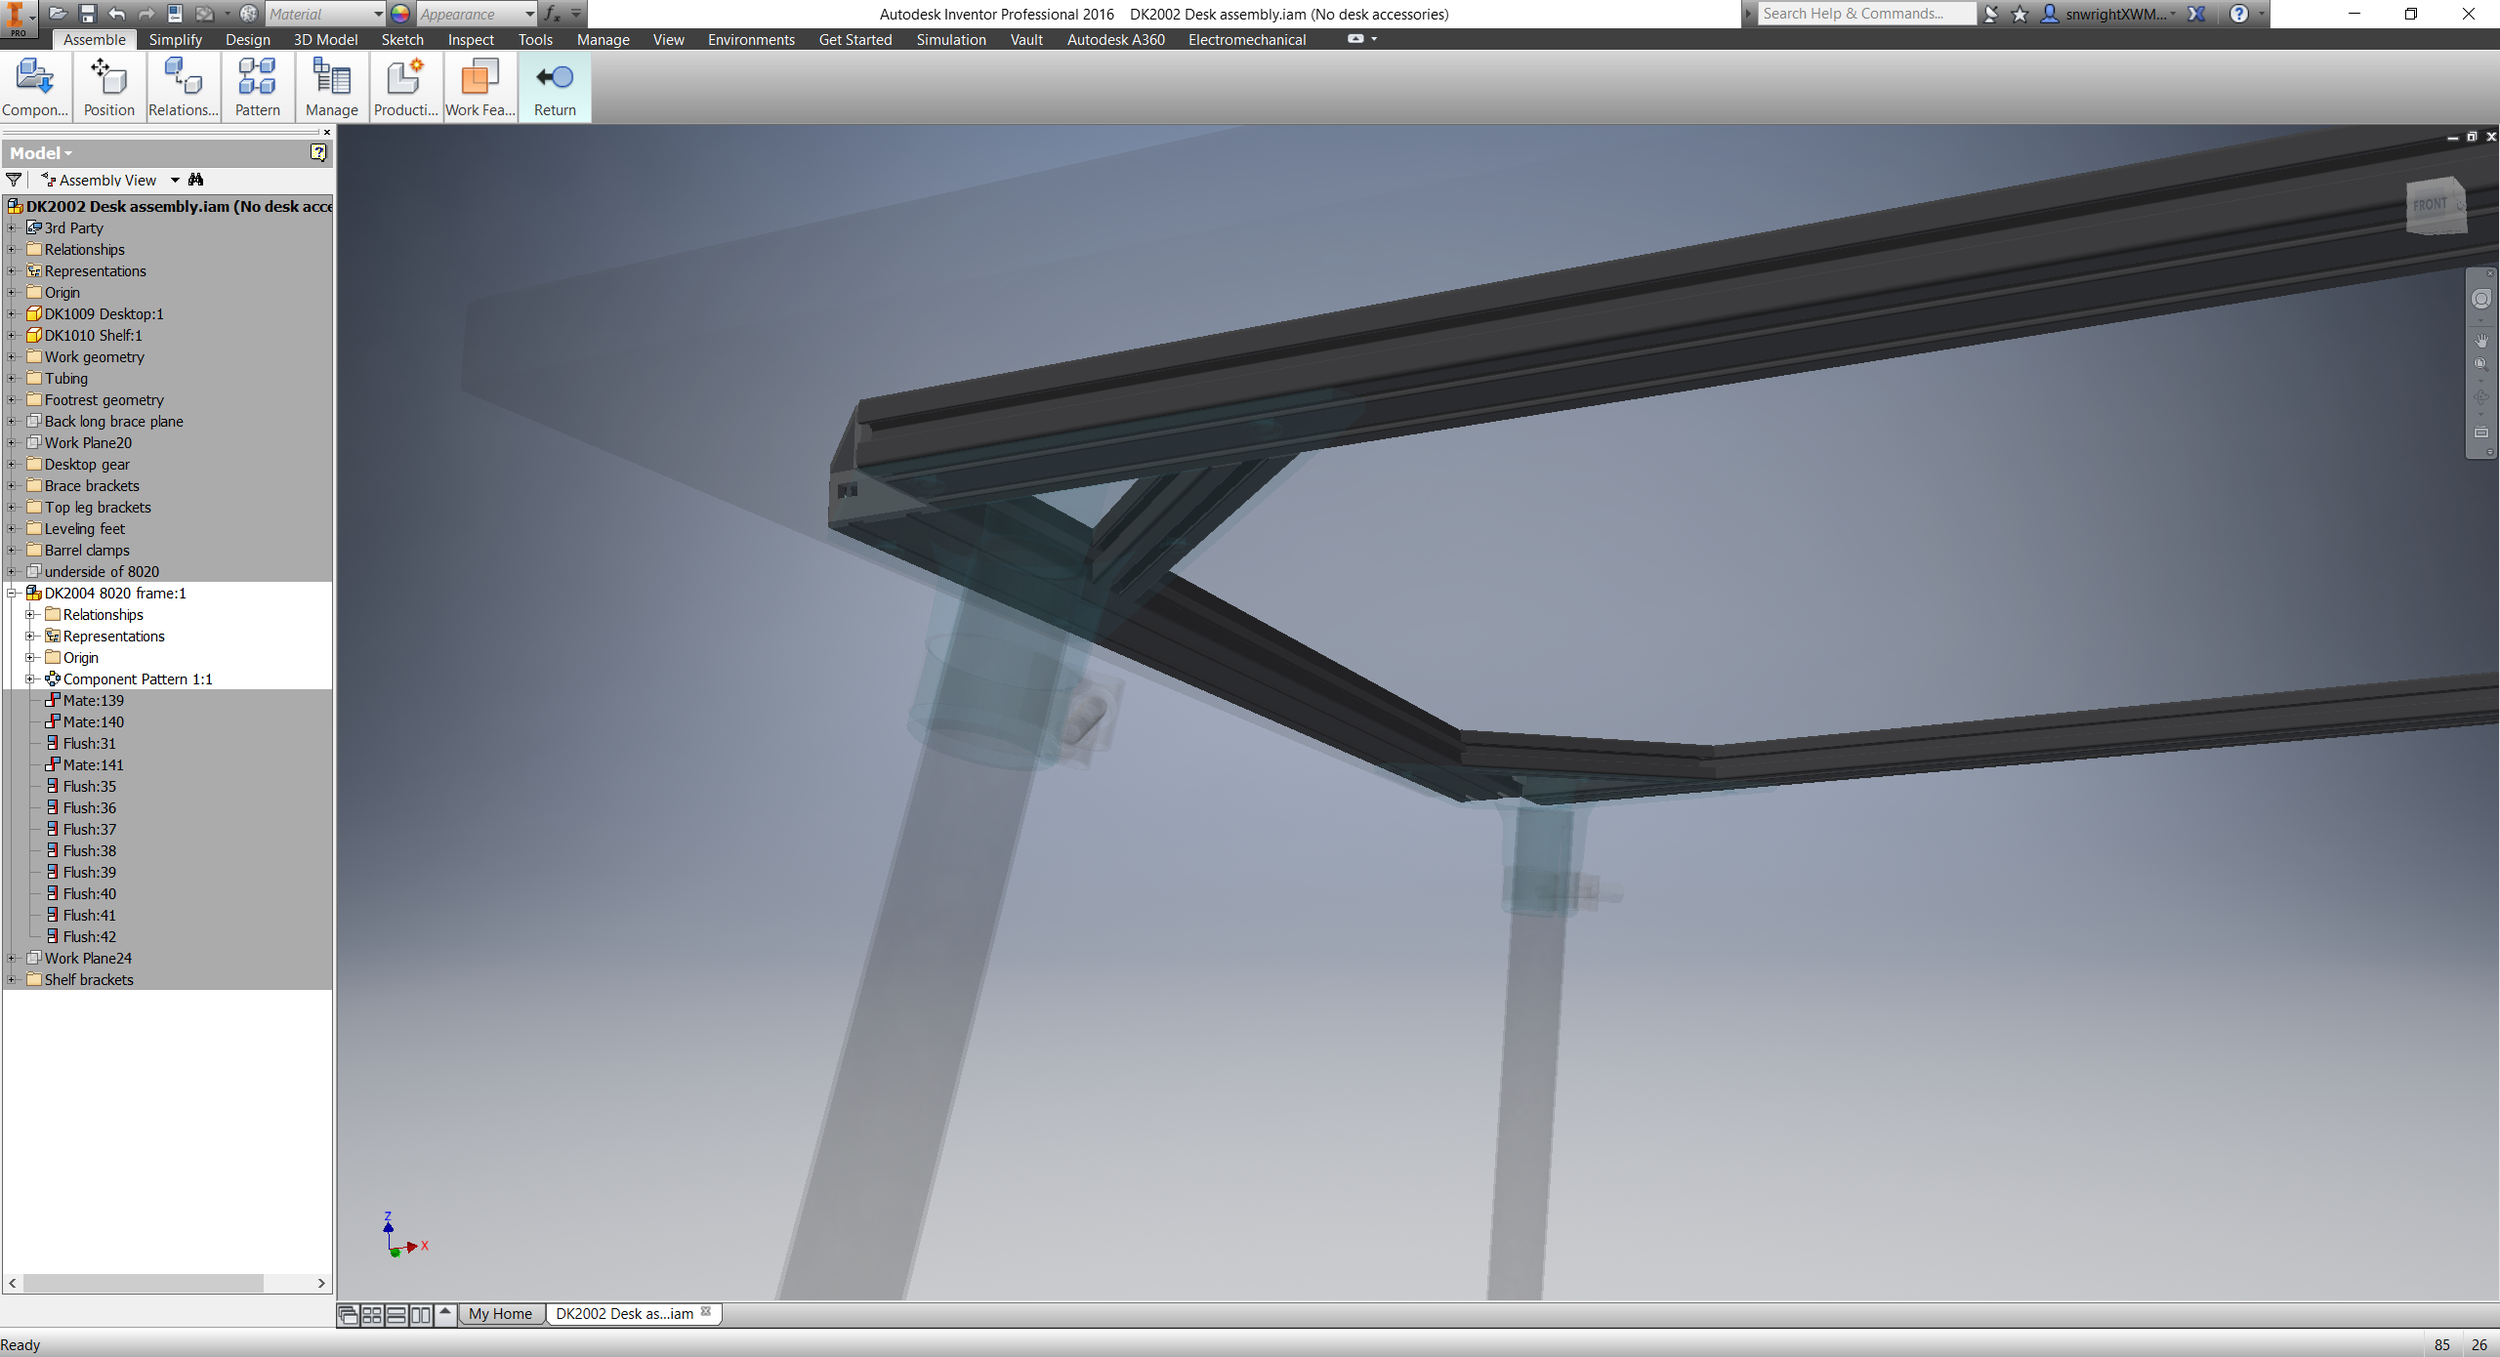
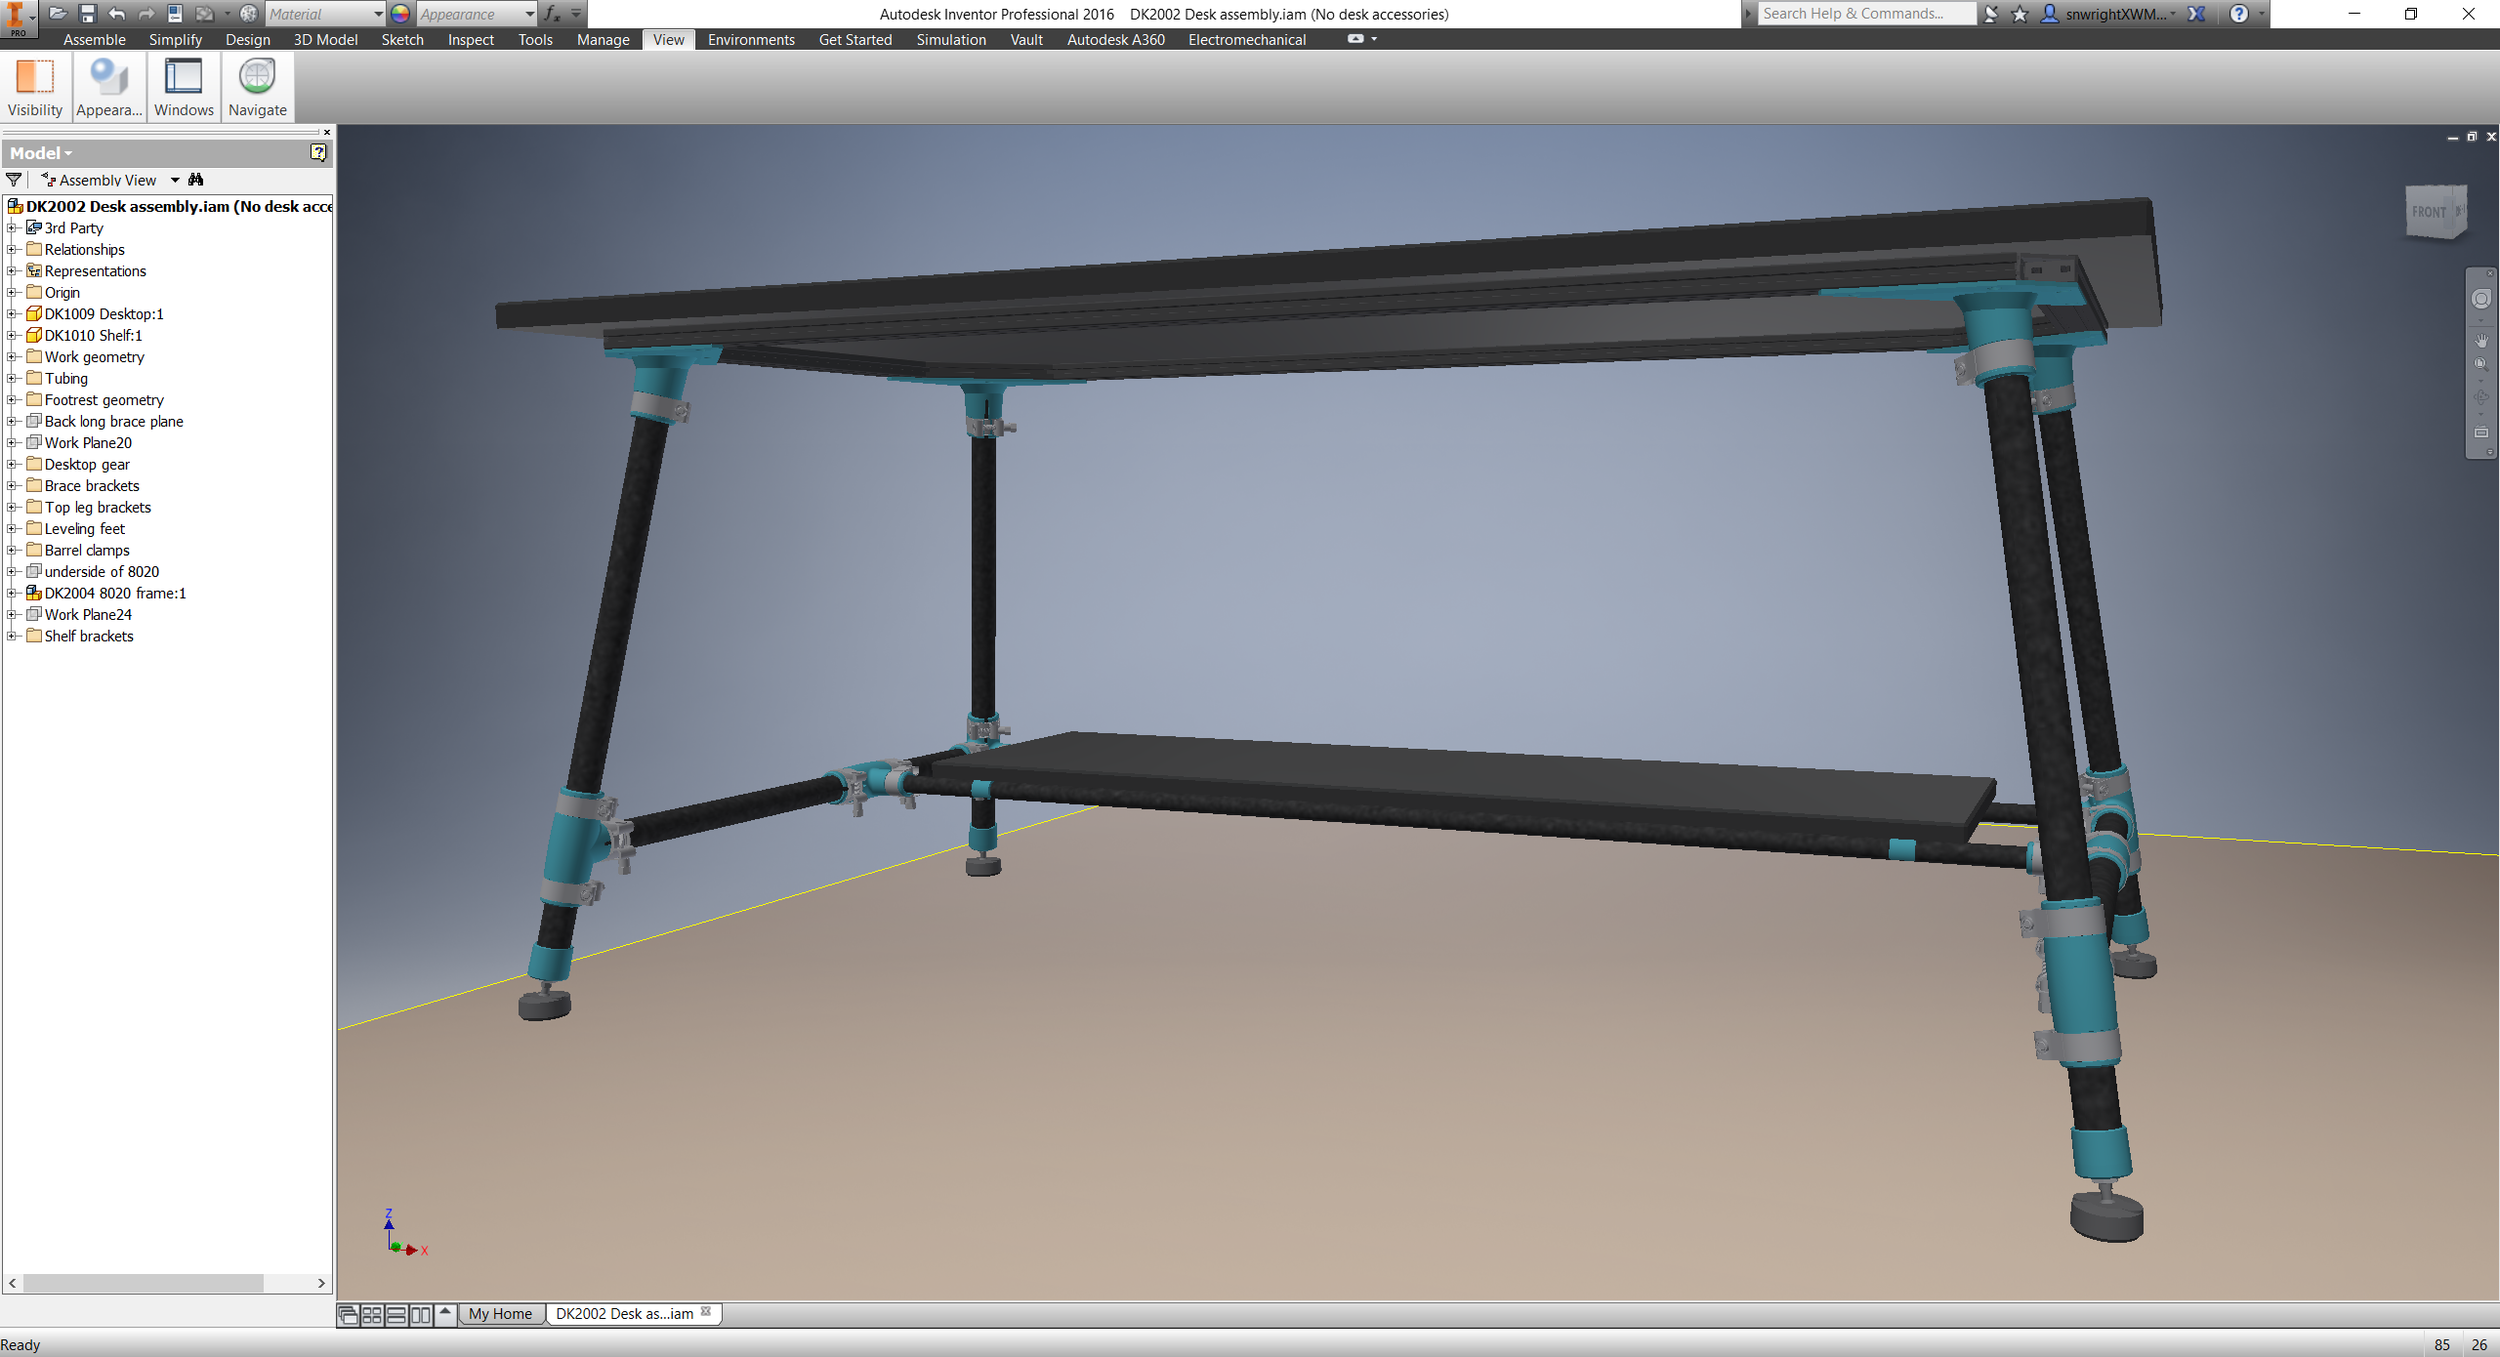
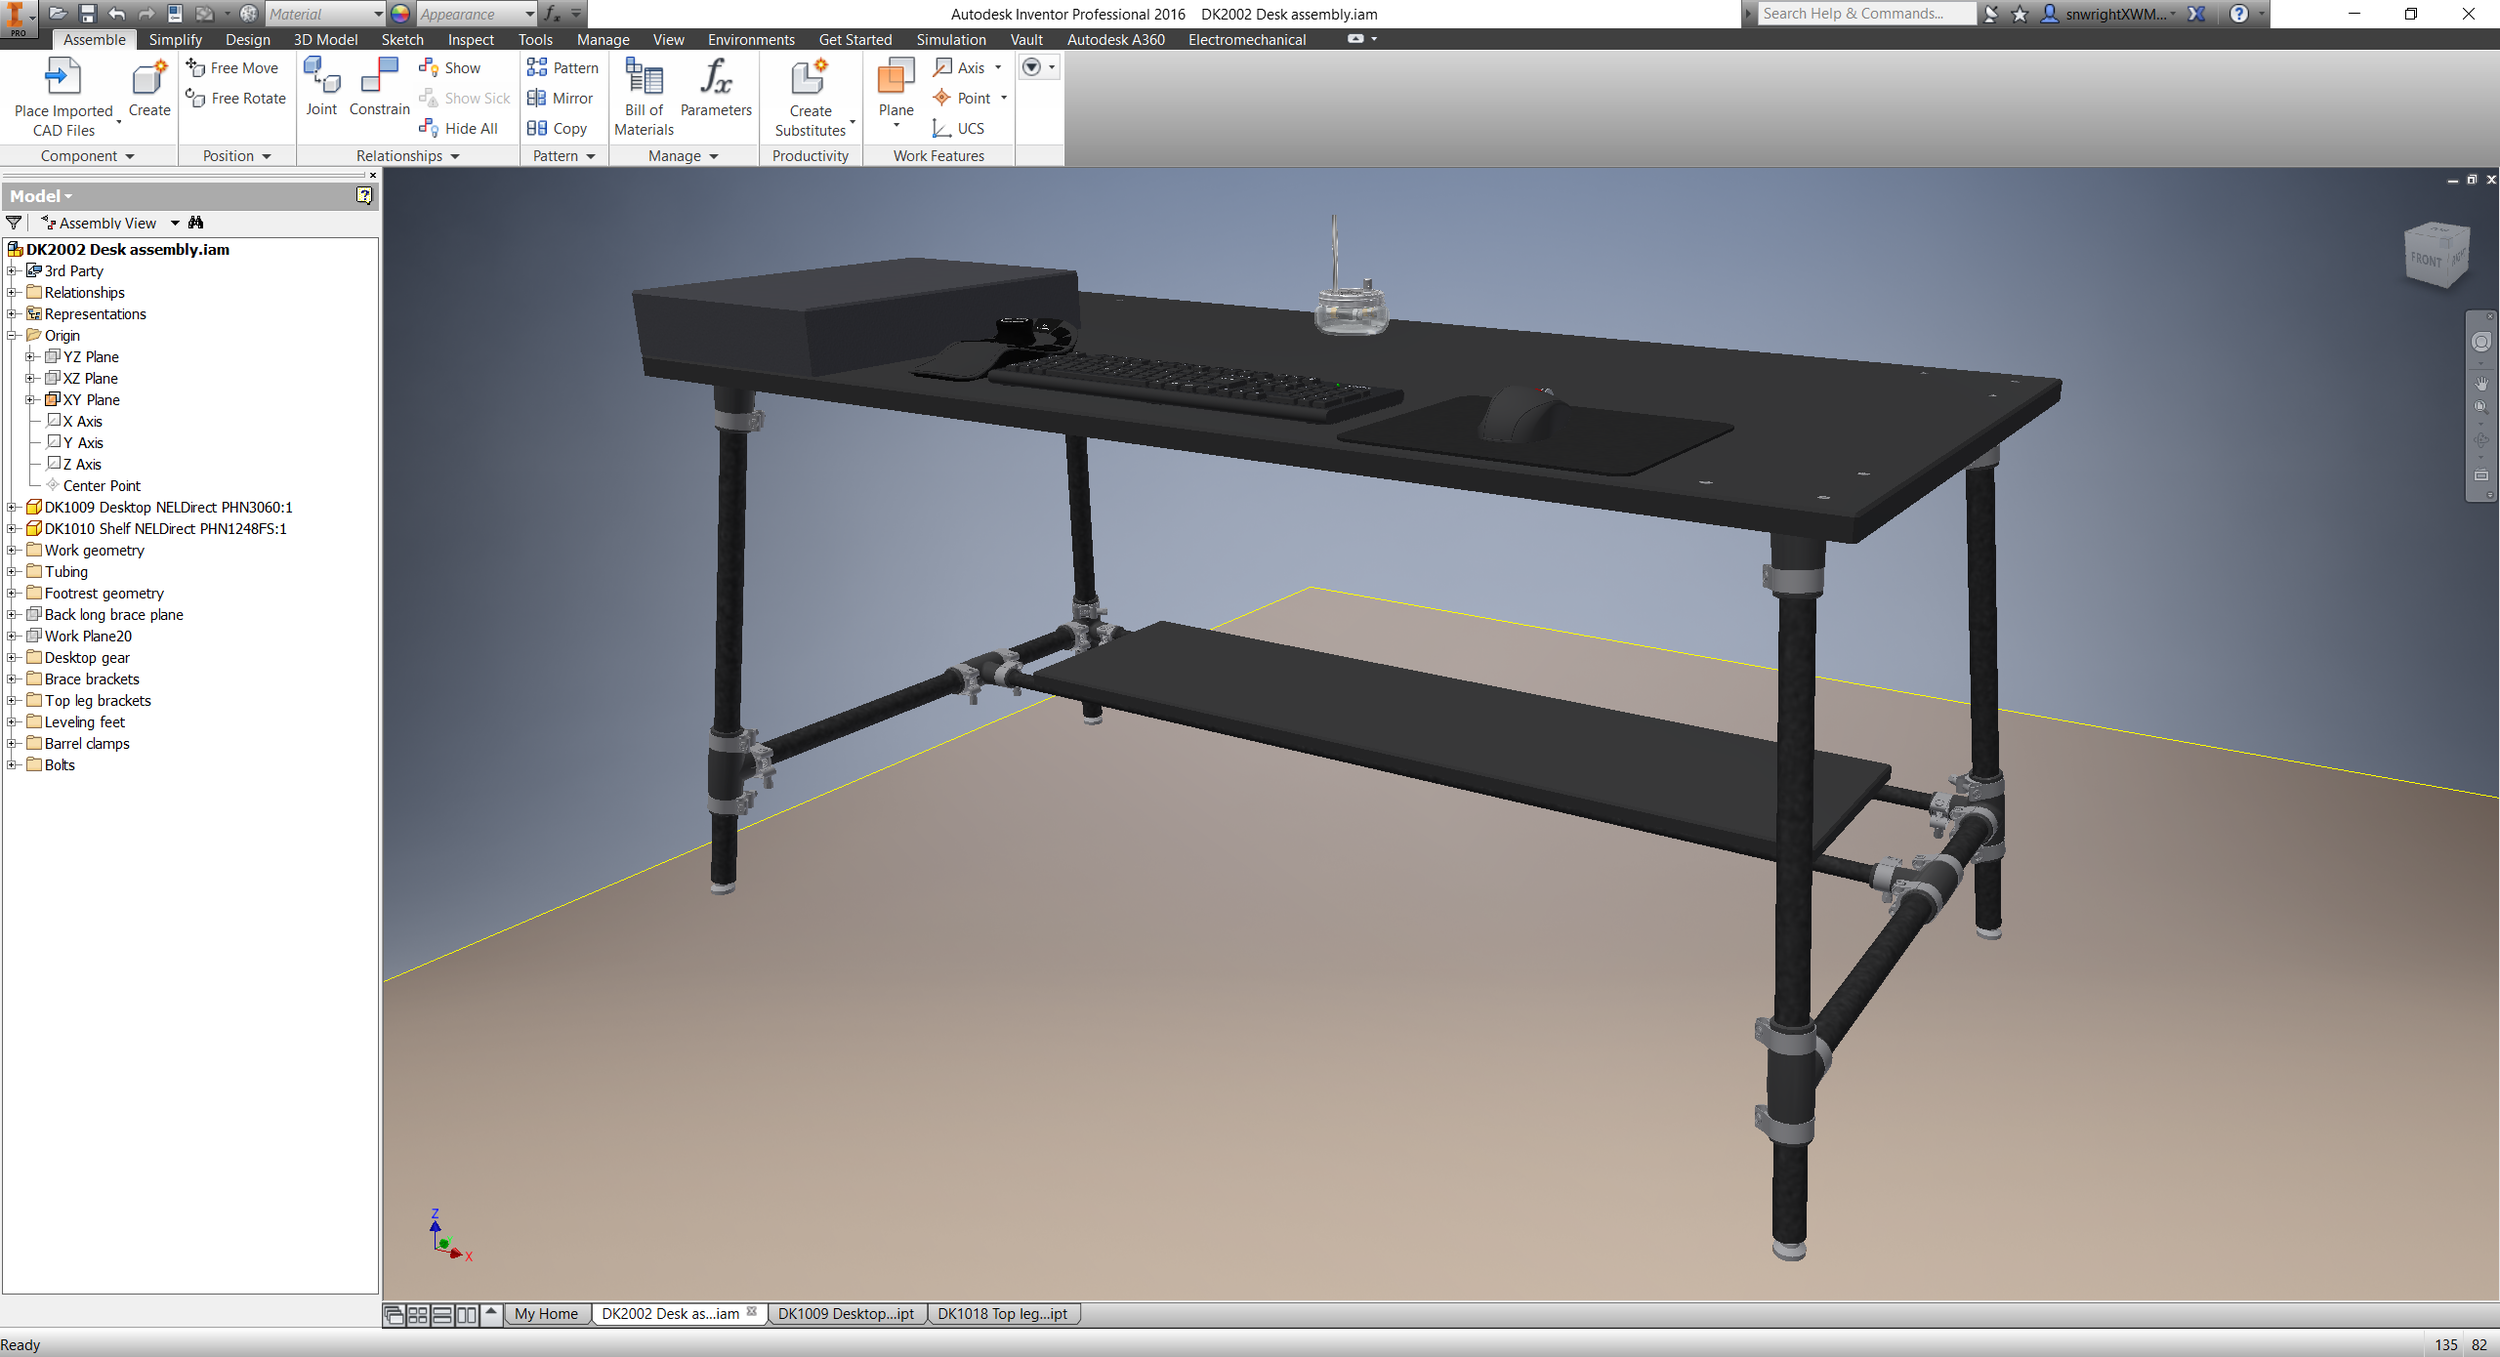
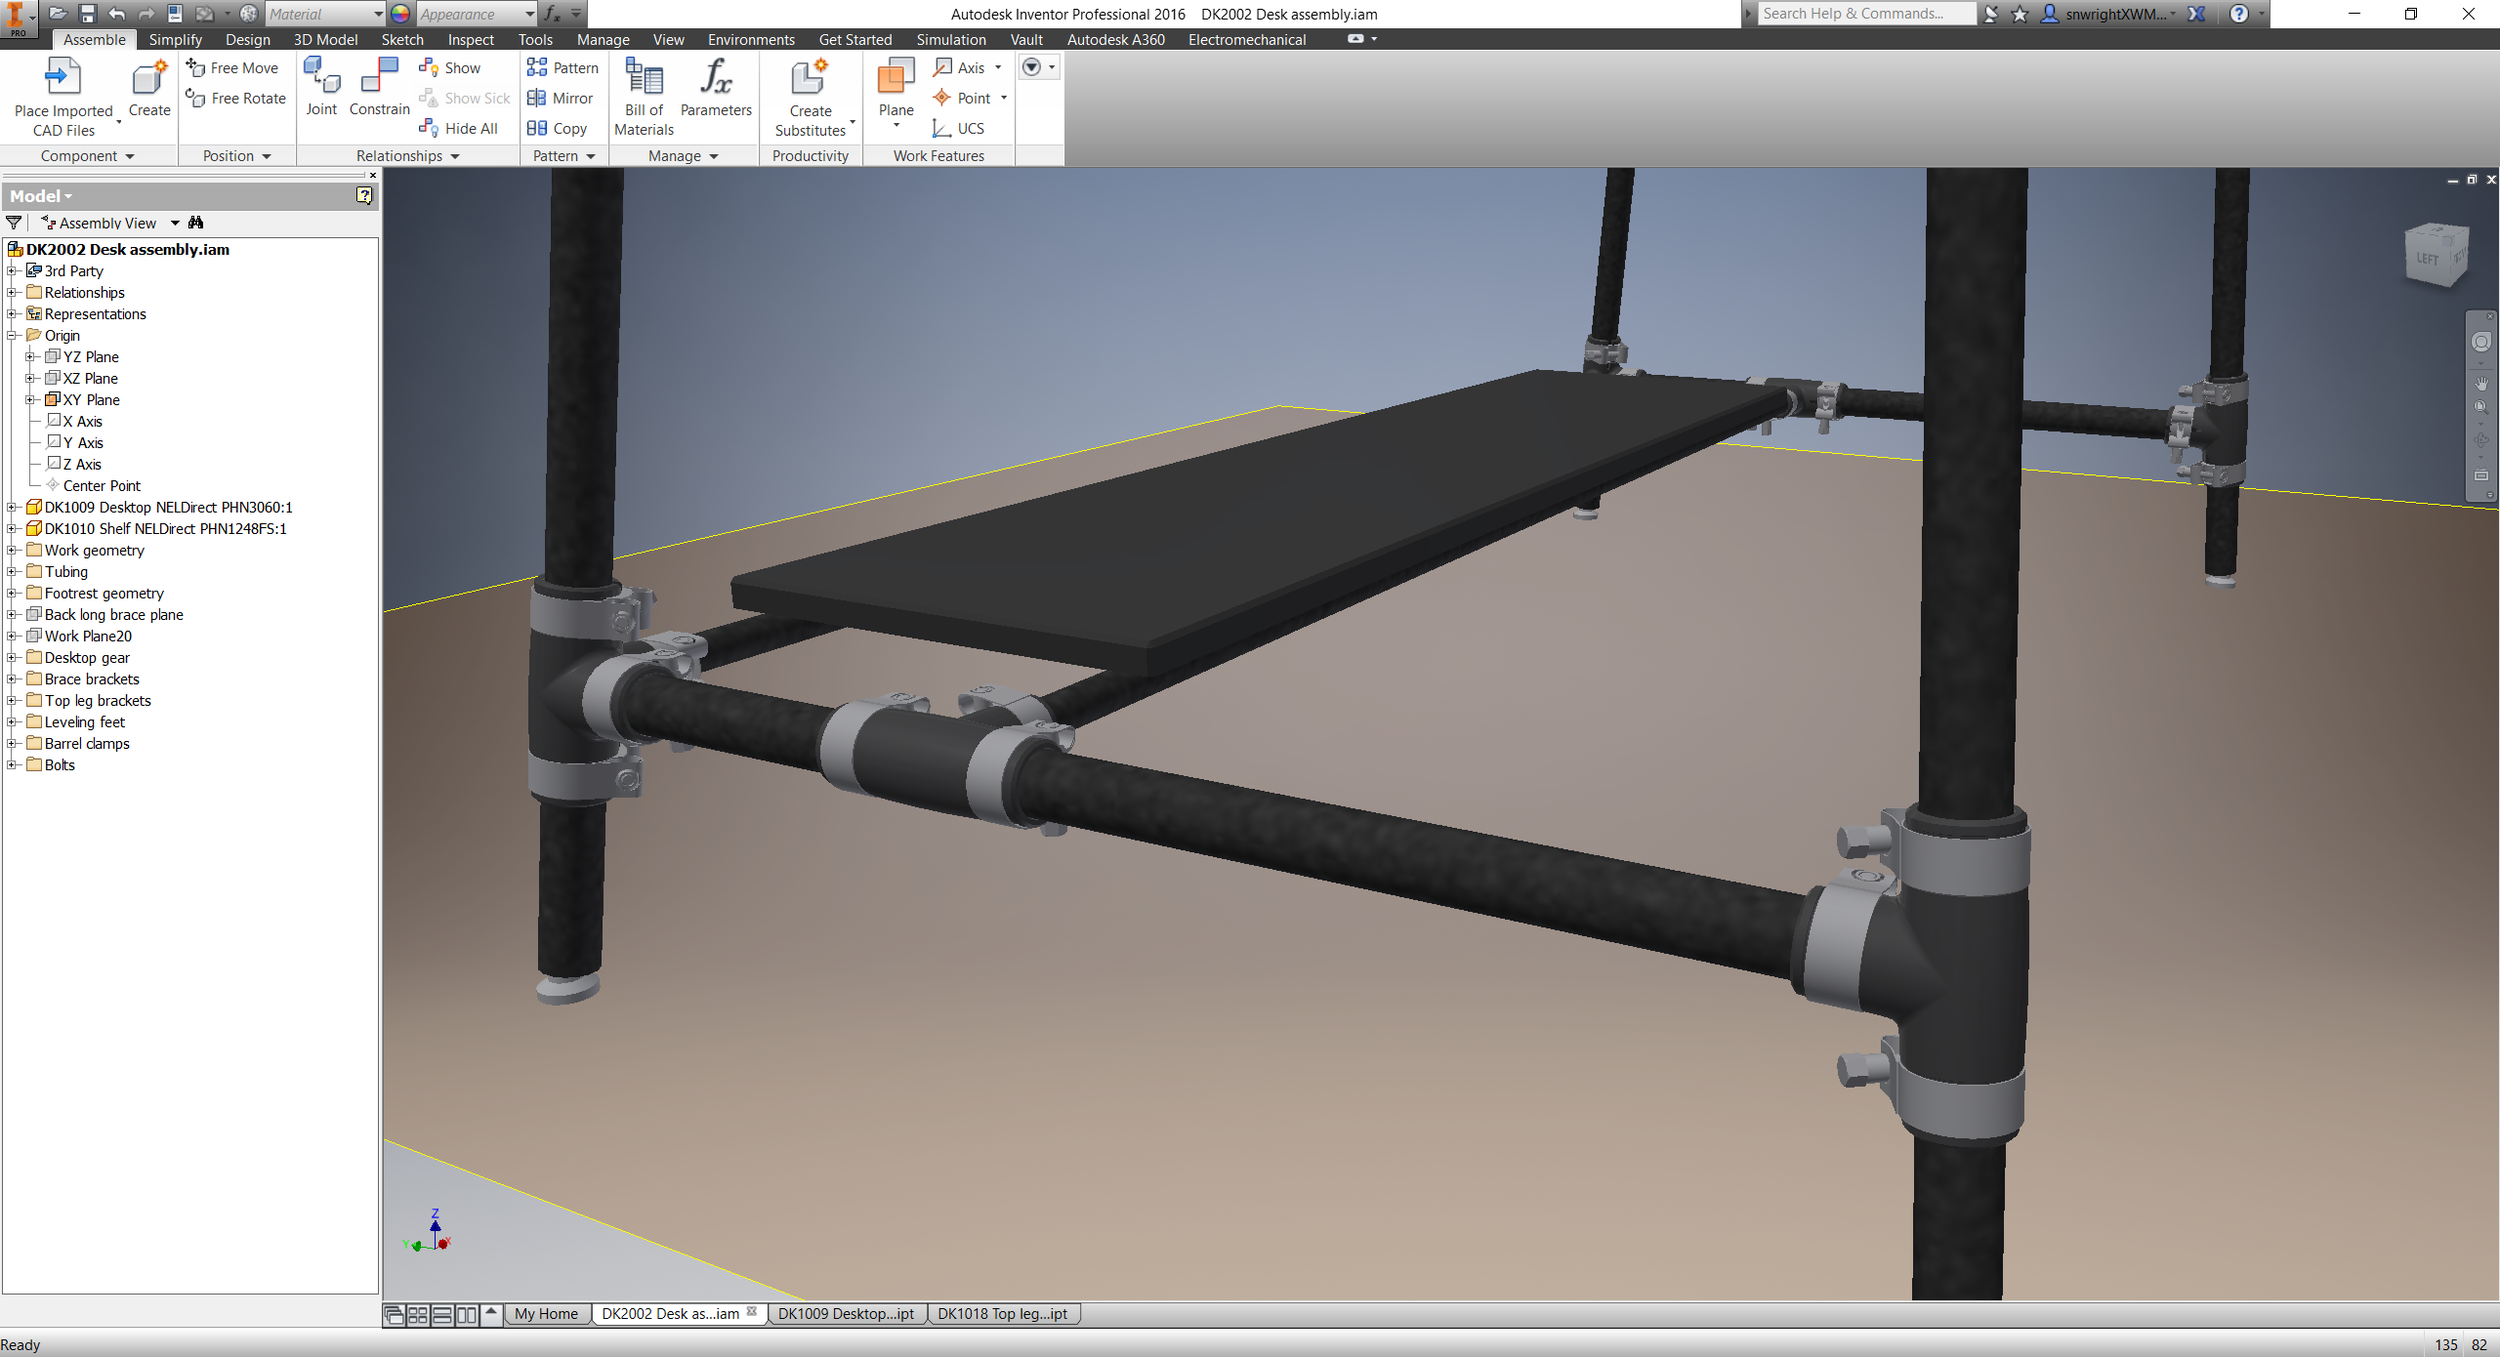
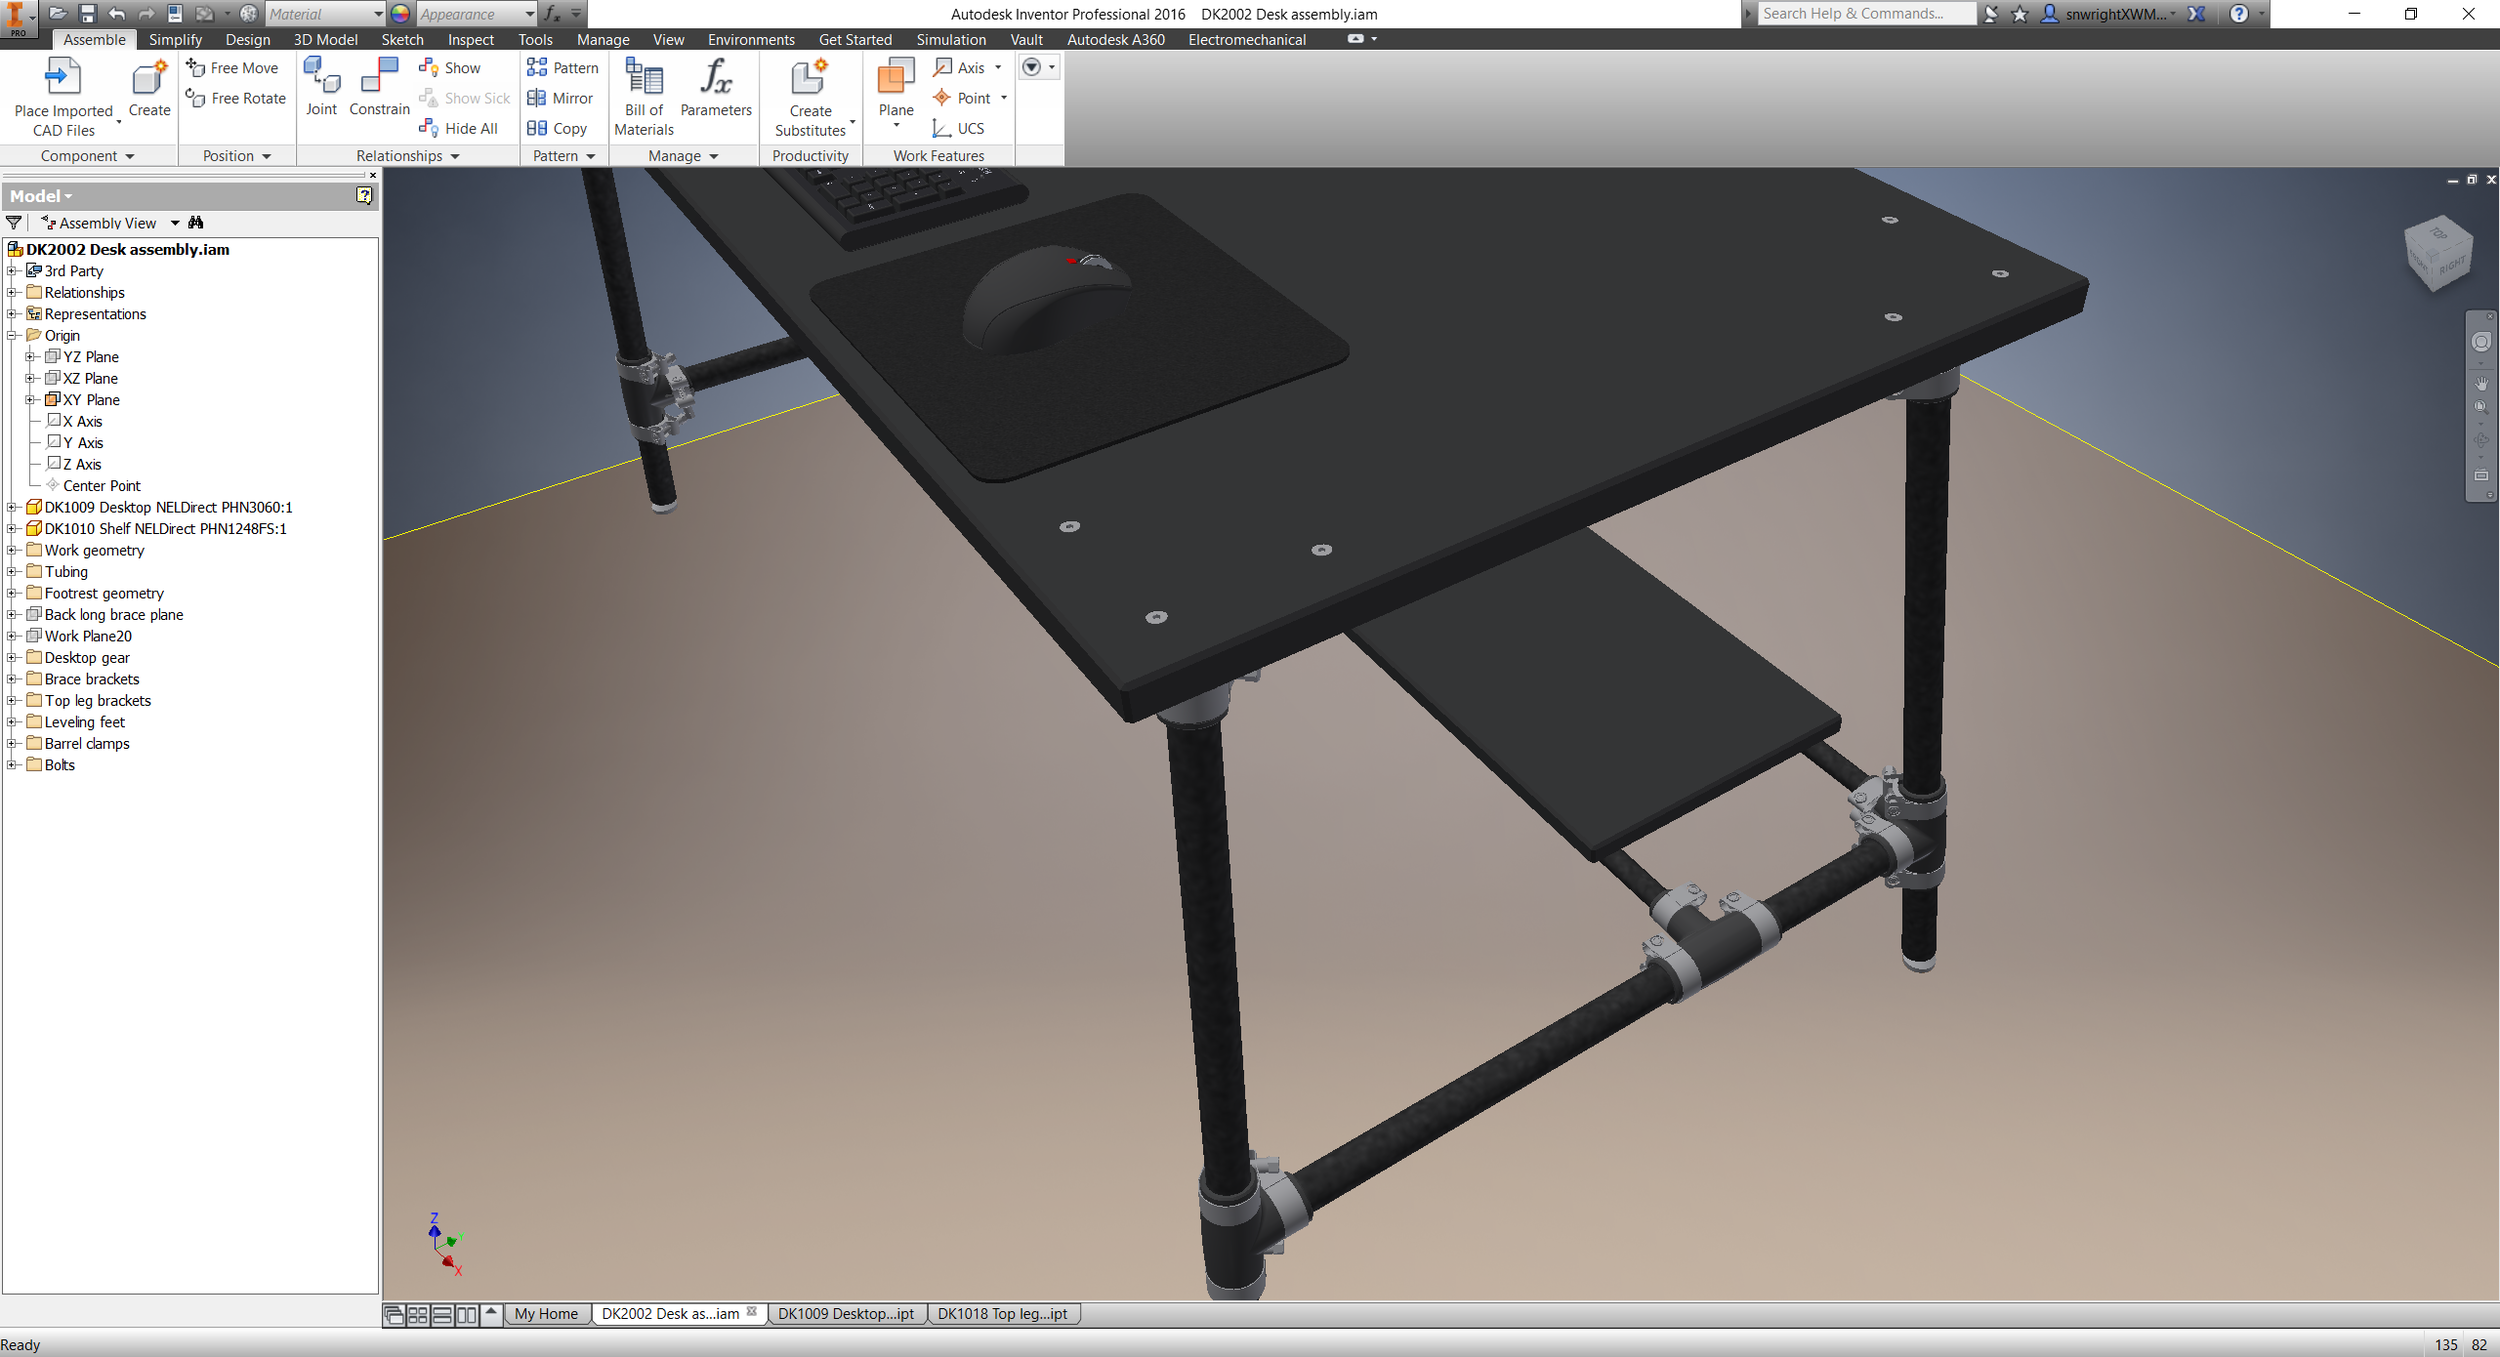
Most recently, I'm using a small amount of VHB tape to adhere the 8020 subframe to the phenolic resin top of my desk. I chose a thin tape - 1/2" wide and .020" thick - and am using it on the short ends of the desktop as a secondary fastening method (the primary connections are two M5 bolts). I'm using it here for a few reasons, which highlight VHB's advantages:

  • It's really strong. Not as strong as a structural adhesive like DP420 (with its overlap shear strength of about 4500 PSI), but for applications like the ones above, VHB's ~100 PSI dynamic tensile and 1000 PSI static shear strengths are *well* within my design objectives. 
  • It's really easy to apply. In most cases, isopropyl alcohol is all I've needed to prep the surface, and it's kind of nice to not have to manually mix up epoxy or get out a mixing gun. 
  • It stretches to accommodate differences in CTE. In this way, VHB is *much* better than rivets or nuts/bolts, and has big advantages over structural adhesives as well. According to 3M, VHB tapes can be stretched up to 50% of their thickness, making them ideal for applications where dissimilar materials need to be bonded, or where some shock absorption & vibration dampening is desired.
  • It has a predictable thickness. Glue is great, but planning for a consistent glueline can be tricky. VHB is available in a variety of thicknesses, allowing you to design the assembly just the way you want it.
  • It's relatively easy to remove. Disassembling a glue joint can be a major pain in the ass, but VHB is just acrylic foam; if you can fit a knife into the joint, you can usually cut the tape in half and pull the assembly apart. 
  • It's easy to keep in stock. Glue is great, but inevitably I end up with a hardened tube laying around, or run out of mixing nozzles right when I need them. VHB doesn't need any supporting equipment, and is shelf stable for two years - whether or not you've opened the package. 

Don't get me wrong - I keep a big selection of bolts on hand, and usually have a active tubes of cyanoacrylate, Titebond, and DP420 on hand. But my shop is much better for having VHB in stock, and my desk is much better off for having used it :)

Recent lessons, pt. 2

Added on by Spencer Wright.

More lessons from the past few years and beyond - these more personal than my previous post. 

  1. Few things feel better than getting consistent exercise, but few things feel worse than being told that you should be getting more exercise.  
  2.  There's nothing more fulfilling than setting someone else up to do what they love. Corollary: few things hurt more than to be denied the chance to do something that you're great at. 
  3. People will hate you for saying that having a baby is like having a dog - and for sure, there are significant differences - but that doesn't change the fact that it's true.
  4. Unless you have access to an actual soda fountain, you should add the ice cream to the root beer and NOT the other way around. 
  5. The ability to give advice well is a direct outgrowth of understanding and judgement; the ability to receive advice well is a direct outgrowth of humility and a sense of politics.

Desktop fabrication/assembly

Added on by Spencer Wright.

In between bouncing Nora around the past few weeks, I've been able to sneak in a little work on my new desk. I now have both the desktop (a 30" x 60" x 1" phenolic resin surface from JHC Lab Resin) and its subframe (a 20 mm x 40 mm extrusion frame from 8020), and have partially assembled them to each other:

The subframe only attaches mechanically to the desktop in two places - one bolt in the middle of each of the long frame legs. I *think* I'm also going to use VHB tape between the frame and the desktop, but I'm holding off on that until I get a few more of the parts in & prepped.

I also received the shelf (which is 12" x 48" x 3/4") and all of the carbon fiber tubing. I'll be cutting the tubing to length with a diamond grit saw blade, and need to drill & tap a bunch of holes in the shelf still as well. I'm also planning on mounting my old Wilton Bullet vise to the desktop using some nut inserts, but I'll probably hold off on drilling more holes in the desktop until I get the whole thing together and use it for a few days.

I should be getting the printed parts back from Formlabs in the next week or so, and because of the way it assembles I should be able to get the desk put together really quickly once they arrive. Fun :)

Recent lessons

Added on by Spencer Wright.

I've been on paternity the past few weeks, and have spent some time reflecting. Below are some lessons - thoughts, really - that might have been useful had they occurred to me earlier. Note: The list below is decidedly incomplete; your mileage may, also, vary. 

  1. It's really hard to overcome a bad say/do ratio. Some people prefer to use ambitious time estimates as an incentive to work harder, but I've never seen that approach work. Do what you say you're going to do, when you say you're going to do it.
  2. If you're not being listened to, stop talking. I learned this first while training my dog. Being ignored doesn't help anyone.
  3. Strong argumentative skills beat weak argumentative skills, but it's only a debate if the other person cares.
  4.  "No" is a vastly underrated  answer. One would expect it to be right about half of the time, yet most people (citation needed) are shocked when someone actually says it. 
  5. Long games are really hard to win if you don't pace yourself. Know what kind of game you're playing, and calibrate your patience level accordingly.
  6. Jobs only add up to careers if you're capable of sacrifice. If not, you'll probably need a business of your own. 
  7. The satisfaction of watching Michael Clayton again never really translates into material effects on the rest of your life. Escapism has diminishing marginal returns. 

Distributed Manufacturing

Added on by Spencer Wright.

Note: This draft was started about a year and a half ago. In the name of valuing what's shipped more than what's (theoretically) perfect, I publish it now with considerably less preciousness than originally planned. 

When I took these pictures - on the street in Dongguan, PRC, in the summer of 2015 - I was thinking about the emphasis that American startup culture has placed on distributed manufacturing over the past few years. According to the narrative, distributed manufacturing is being enabled by a combination of 3D printing, streamlined digital documentation standards, and web/mobile outsourcing marketplaces. Through these, we're ostensibly moving towards a paradigm that offers unparalleled improvements in efficiency, variety, and speed-to-market.

Parts of this narrative may well be true. I'm certain, however, that neither additive, nor the model-based enerpeise, nor any digital matchmaking service is a prerequisite for distributed manufacturing. Really, all you need is real estate and some demand for (in this case) overnight EDM and machined parts. 

I tell you, seeing this was really breathtaking.  

Desk update

Added on by Spencer Wright.

I was able to spend a little more time on my desk this past weekend, and got it nearly done:

A quick changelog:

  • Added a frame to the desktop. I'm planning on using 1" phenolic resin (or *maybe* epoxy resin, if I can afford it) for the surface, and it needs to span almost 5'. At that length it seemed like a good idea to support the span, and I'm using an 8020 frame to do so. It's not the cheapest option, but means that attaching the surface will be easy. It also has the advantage of allowing me to attach other accessories (a power strip, my monitor stand, an architect's lamp or two) really securely as well.
  • Added adjustable feet. These are nylon with a rubber pad, and they thread into nut inserts that'll be installed in the leg caps. 
  • Added shelf clips to hold the lower shelf onto its supports. I think that the shelf will just rest there - the clips should snap more or less securely onto the supports, and I don't think I need to attach them any more firmly than that.
  • Other small changes to the leg brackets. I had an early prototype printed by Form Labs in their "Tough" resin, and was pretty impressed with the results; the part came out true to size and clamps onto my carbon fiber tubing really well. I'm having a few more parts printed now, and will rig up a bigger test assembly to confirm - but with the combination of my leg geometry and the Form Tough's high tensile strength and elongation at break, I'm confident that it'll work well.

Time allowing, I'll order the rest of the stock and cut-to-order parts in the next week or so. Pretty excited :)

DMLS lattice sample prints

Added on by Spencer Wright.

I'm *very* excited about these parts from C&A:

These parts were printed in titanium 6/4 by C&A Tool in Churubusco, Indiana; they were designed in nTopology Element. 

This is a pure lattice structure - the entire geometry is designed as beams and nodes, with no explicitly defined solid regions. The beam lengths are on the order of 2-3 mm; their thicknesses range between .45 mm and 1.1 mm. In some areas (for instance, the bolt holes) this results in a fully solid part, but the transition from lattice to solid is continuous rather than discrete. The result is a structure that's solid where it needs to be and sparse elsewhere, with no stress risers where solid and lattice meet.

The parts are, of course, sample regions of the bike stem that I've been working on for some time now. The intent of the samples was to prove the printability of the structure and identify any potential difficulties. The results were overwhelmingly positive: With the exception of a few small flaws, the parts printed very well, and I believe the problematic areas can be addressed in the design pretty easily.

Given the good quality of the sample prints, I'm planning on printing a full version of the part soon. I'm also experimenting with a few other design variations (intended for a variety of different metal AM machines), and am running them through a beam sizing optimization process with Abaqus and Tosca in order to reduce mass and decrease strain energy. More on these soon :)


Thanks to Rich Stephenson for his ongoing help on this project - and for continuing to educate me on the metal AM industry.

Build process simulation

Added on by Spencer Wright.

Early last year, Andrés Bellés Meseguer reached out to me with a proposition. He had read my piece in Metal AM magazine, and wanted to use my printed parts from DRT Medical Morris to verify a build process simulation workflow that he created using Abaqus. I agreed, and with Dave Bartosik's help I got him the build files necessary to simulate the print.

Andrés' full results were published in a paper titled Prediction of Distortion of a Titanium Bike Part Built by DMLS, which he presented at a NAFEMS conference in November. The simulation used a fine hexahedral mesh at the part itself, and a coarser mesh for the surrounding powder bed and the build platform. At each timestep, heat (representing energy applied by the laser) is applied to nodes throughout the model; it then dissipates throughout the structure. Below, see a thermal map of the part about 70 minutes into the build:

Image courtesy Andrés Bellés Meseguer and Prime Aerostructures

You can also use this simulation to model distortion in the part - seen here at the end of the build:

Image courtesy Andrés Bellés Meseguer and Prime Aerostructures

The distorted areas in the simulation correspond well to the as printed part, but Andrés notes that the magnitude values don't match perfectly; it's likely that some of the discrepancy can be narrowed by adjusting thermal coefficients.

This field - simulating additive processes to predict and compensate for built in stress and distortion - is one that I've been excited about since I began working with AM. Thanks to Andrés for sharing his work - I'm looking forward to more progress on this soon.

Desk update

Added on by Spencer Wright.

Some changes to my desk design:

In no particular order:

  • I rebuilt about 90% of the model so that it's driven off of an Excel spreadsheet. It took a little while, but makes updating tubing diameters *so* much faster.
  • The tabletop and shelf are designed to be phenolic resin; the shelf doubles as a footrest. I'm a bit worried that the long span on the tabletop will result in bounce, but that'll be relatively easy to fix if it happens.
  • The frame tubes are filament wound carbon fiber throughout.
  • The lugs/brackets are all slotted; they'll be printed. The band clamps are a little bulky for my taste, but the practicality of making the frame modular is just too appealing to me. Plus, I'm pretty sure they'll distribute the clamp force evenly and be plenty strong to hold the frame together.
  • My current plan is to drill and countersink the tabletop and then use flat head screws with washers & nuts to fasten the leg brackets. 
  • The legs are angled, and I'm planning to use swivel mount feet with rubber pads on them. I'll install nuts in the bottom of the legs (method TBD) to hold the feet in place.
  • Having dummy models to serve as Utah teapots is *really* nice. I'm still missing my Wilton vise, Gerstner tool chest, and monitor/laptop stand, but none of those is worth the time it'll take to model them.

I'm pretty happy with this so far - hoping to have it together soon :)

EBM and chemical surface finishing

Added on by Spencer Wright.

As I've written here before, the field of high performance surface finishes is fascinating - and complex. Surface finish plays a big role in the mechanical and aerodynamic properties of a part, and (in the case of consumer products) it can have a huge effect on marketability too. And so, as I've gone through the process of developing my titanium 3D printed bicycle seatpost, I've been conscious to evaluate many different surface finishing options to find a manufacturing process chain that's both effective and economical.

And so, this past spring, I reached out to Dr. Agustin Diaz to see how REM Surface Engineering could help my parts.

For a bit of context, allow me to quote myself (from EBM surface finishes and MMP):

The part's nomenclature

The part in question is the head of a seatpost assembly for high end road bikes. The part itself is small - about 70mm tall and with a 35mm square footprint. As built, it's just 32g of titanium 6/4. Add in a piece of carbon fiber tubing (88g for a 300mm length) and some rail clamp hardware (50g), and the entire seatpost assembly should be in the 175g range - on par with the lightest seatposts on the market today.

As a product manager who's ultimately optimizing for commercial viability, I had three questions going into this process:

  1. How do the costs of the different manufacturing process chains compare? 
  2. How do the resulting parts compare functionally, i.e. in destructive testing?
  3. Functionality being equal, how do the aesthetics (and hence desirability) of the parts compare?

Towards these ends, Dr. Diaz and REM finished three parts for me:

The parts were printed in titanium 6/4 on an Arcam A2X by Addaero Manufacturing. They were then HIP'd (hot isostatic pressing is a whole other area of interest - more on it soon, I hope) before being treated by REM's isotropic superfinishing process.

The results are very interesting, and contrast in many ways with MicroTek's MMP process. REM ISF is a chemical accelerated vibratory finishing process. In it, parts are placed in vibratory finishers with a nonabrasive media and a chemical activating agent. The chemical agents are selected by the part's composition: Different metal alloys will react to different chemicals. The media, on the other hand, is selected depending on the part's geometry: Parts with small features will require smaller media, etc.

As with any vibratory finishing process, then, REM tunes the frequency and amplitude of the machine to adjust the aggressiveness of material removal. The media chambers in these machines are shaped like toruses, and parts take a rotating helical path around them as they vibrate. Adjusting the frequency and amplitude of the vibration affects that helical path, and REM tunes the rolling angle to produce the result that's needed. "It's an art and a science," Dr. Dia zaddtold me.

REM finished three parts for me, in two slightly different design variations. The first part went through their Extreme ISF process - a quick treatment that removes excess powder and some higher-order roughness. The second two parts went through Extreme ISF *and* an additional ISF treatment, removing .020" (about .5 mm) and producing a much smoother surface. In order to compensate for the material removal, one of the Extreme ISF + ISF parts was printed with .020" of  extra stock on all of its surfaces (if you look closely, you can see the additional stock as a stair-stepping effect on the inside of the skirt edge). The results are below - click on the photos to enlarge.

Incidentally, I found REM's process nomenclature a bit confusing at first. As described above, all of these processes include some chemical agent and some media. The difference in the different processes has to do with the balance of those two factors: Extreme ISF uses aggressive chemistry but relatively little media interaction, whereas ISF is a longer process with less aggressive chemistry and more media interaction. REM also offers a Rapid ISF process, which is to ISF much as a lathe is to a milling machine. In it, the parts are fixtured and then moved through the chemical/media mixture. It's a much faster process, but one which requires more tooling and setup and hence is reserved for high volume parts.

The surface character of the REM parts differs significantly from the parts that I had MMP'd. ISF interacts with the full surface of the part, with the result being that both peaks and valleys are rounded out. Note that the color scale in the images below are not constant; click on the images to see the color scale key.

The roughness values for the two methods are also quite different. The key metrics are below; full roughness profiles & filter data are here for Untreated, Extreme ISF, and Extreme ISF + ISF parts (thanks to REM).

Ra - Roughness average

All values in µm. Evaluation length = .5"

Rq - Roughness, root mean square

All values in µm. Evaluation length = .5"

Rsk - Roughness skewness

All values in µm. Evaluation length = .5"

Rt - Roughness total

All values in µm. Evaluation length = .5"

As with most things, the numbers above both a) capture interesting differences between these five finishing methods, and b) are abstractions which ultimately fail to capture the entirety of the physical parts. Such is the nature of data; in and of itself, it's not particularly insightful.

As I've described previously (and above), my interests are functional, aesthetic, and economical. The latter two of these sit more or less in balance, but the former is bound by the composition & arrangement of matter. To that point, Agustin referred me to a paper by Kwai Chan called "Characterization and analysis of surface notches on Ti-alloy plates fabricated by additive manufacturing techniques," which shows a correlation between notch depth and a shortened fatigue life in EBM parts. To quote:

The presence of surface notches is likely to promote crack initiation and reduce the fatigue performance of LBM and EBM materials. Since the depths of the surface notches correspond to the maximum valley depths on the surface, fatigue life of the various Ti–6Al-4V materials is expected to decrease with increasing maximum Rvm values...
To improve fatigue performance, the surface notches on the EBM and LBM materials must be removed by machining.

Of course, those last two words - "by machining" kind of begs the core question that I'm asking here. To wit, see the Rvm numbers from REM:

Rvm - Maximum valley depth

All values in μm. Evaluation length = .5".

The goal, here, is to improve fatigue life - and avoid the fate that my last parts met during testing. My hope - and one that's balanced by my lingering concerns about my glue joint design - is that the much reduced Rvm numbers here will help significantly.

More soon.

Intellectual influence

Added on by Spencer Wright.

From a 2011 review of Daniel Kahneman's Thinking, Fast and Slow - which, as I've written before, is very good:

But intellectual influence is tricky to define. Is it a matter of citations? Awards? Prestigious professorships? Book sales? A seat at Charlie Rose's table? West suggests something else, something more compelling: "Kahneman's career shows that intellectual influence is the ability to dissolve disciplinary boundaries."

That's a pretty compelling definition to me.

My favorite tools of 2016

Added on by Spencer Wright.

I like tools a *lot*; my favorite gifts (both given and received) have been tools. So I thought: Wouldn't it be fun to put together a guide for folks like myself who want/need gifts for loved ones & themselves?

Aside from five items here (each marked with an asterisk), I own and have used all of the stuff below extensively. My filter: It's gotta be a tool; it's gotta be a pleasure to use and/or be exceptionally useful; and it's gotta be something that you might not think about or stumble across otherwise.

And so, without further ado: My favorite tools of 2016!

Planning & Strategy.

  • A serious particulate respirator. You know those paper dust masks? They're BS, and you'll never look back once you use a real respirator.
  • Eye protection! I have a pair of these. I've had foreign objects (metal, sand) removed my my corneas on more than one occasion - it *sucks.*
  • Workflowy. The free version is everything you'd ever want out of a list app - iOS or web access, supports hashtags and sharing, etc. It's a *great* tool for task & information management.

Making & Manufacturing.

Maintenance, Repair & Operations.

Distribution & Logistics.

Inspection & Testing.

Tangents.

And.

A Lego model of the Panama Canal (which you can only buy in Panama).


Good at it

Added on by Spencer Wright.

This week I experienced a few moments - fleeting, but palpable - of being good at it. 

It was a nice feeling: A combination of knowledge, experience, and at least a bit of maturity. It was the feeling of having all of your tools laid out in just the right place. The feeling of finding a rhythm. The feeling of knowing exactly how much energy you've got, and pacing your sprint so that you *just* exhaust all of it.

Of course, I continue to make mistakes. Things rarely move as quickly as I hope, and rarely am I satisfied with the results. But when I look back, I can see my own work working - and I'm pretty sure it's not accidental.

I know the feeling isn't permanent; even writing this now, it seems a far way off. But I've been building for a while now, and even a fleeting reprieve is pretty great :)

New desk

Added on by Spencer Wright.

About a year ago, when I refurbished an old Wilton vise for my home office, I noted that I intended to build myself a new desk as well. Like many projects, I ended up moving a bit more slowly on that than I expected - which in this case was convenient, as it allowed me to settle into a new house and think about what my work will look like over the next few years. And so last weekend I opened up Inventor and started putzing with my desk design again:

Like so many of the things I've designed in the past few years, the idea here is to use modern materials & assembly methods, and make something that is highly functional and also aesthetically pleasing. The tabletop will be lab-grade phenolic resin - a material that is strong, seamless, and durable to impact, scratching, and liquids. The legs will be monofilament wound carbon fiber tubing, which I'll probably apply a clear sealer to. And the whole structure will be held together with - you guessed it - 3D printed node connectors.

The exact dimensions and assembly methods are still TBD; I'm also considering a few details for attaching/mounting things (my vise, my monitor stand, lighting, the power strip that I like). I'm also still considering integrating the desk with the 7-drawer tool cabinet that I have, although at this point it's more likely that they just sit side-by-side.

Timeline on this moving forward is... medium? But hoping to show some progress soon :)