Manufacturing guy-at-large.

Notes from Tesla's Fremont factory

Added on by Spencer Wright.

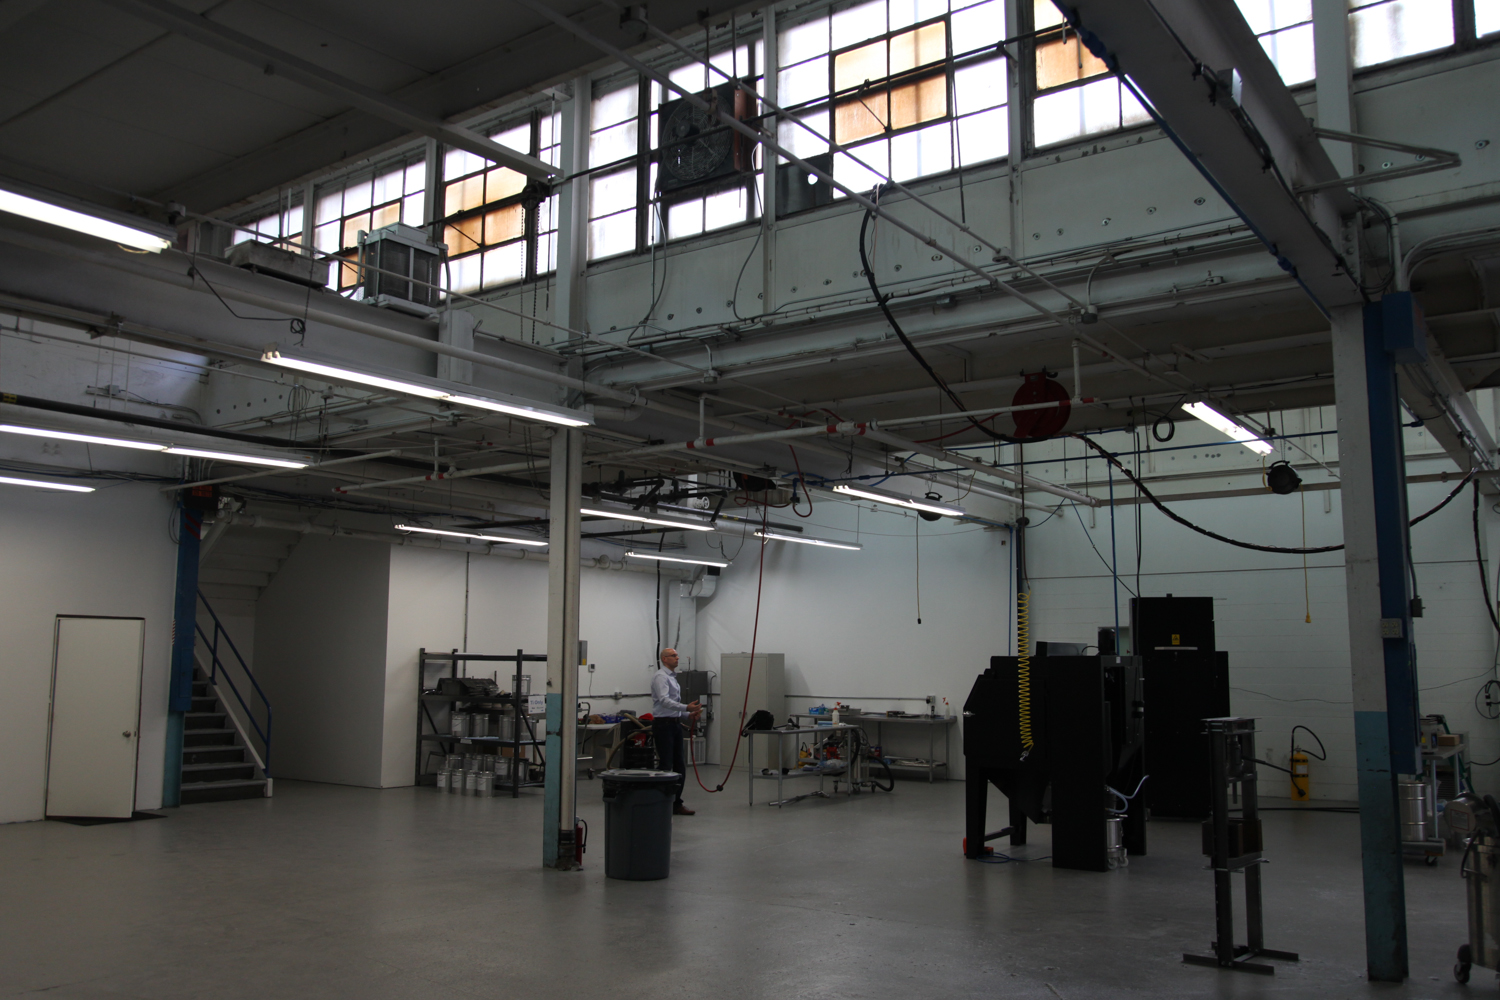
Today I had the pleasure of visiting Tesla's Fremont factory, where every single Model S is built. While they don't allow photos on the tour, I did take this pano to prove that I'm not fabricating the whole thing (but seriously though, a Google Image search does a decent job at showing you what it looks like inside):

IMG_1450.JPG

Anyway, a couple of thoughts came to me on the tour, and I wanted to share them:

  1. First of all, the whole place is an information overload. It's noisy (not at all unbearable, but still), and the tour is a whirlwind - the whole thing took just over an hour. Moreover, the entire building is filled with visual clutter. It's all stunningly beautiful, but there's just so much going on, and it's nearly impossible to see, analyze, and understand what you're looking at, what's being done to it, and which direction it's headed in the assembly line, before the train of golf carts that you're being dragged around in speeds off to the next thing. This is not meant to be a criticism of either the tour or the factory itself, and I'm sure an automotive engineer would have an easier time soaking things in than I did, but for the majority of the tour I struggled.
  2. Lot of emphasis on sheet metal. Elon Musk loves his aluminum, and the tour itself is expressly directed towards the hydraulic presses that Tesla uses to turn rolls of aluminum sheet (from what the tour guide said, I suspect it's 16ga) into a car. 
  3. The tour also emphasized the economy that Musk/Tesla employs in building up their capabilities. The core story here is that American manufacturers (GM is called out by name, mostly due to the fact that they're the former owner of the NUMMI site, which you should learn about) don't want/need big equipment or industrial space in the US anymore, and so Tesla has been able to buy this stuff for a song. So the purchase of their largest hydraulic press (the biggest in North America); the decision to use a Lotus platform for the Roadster; Tesla's use of the factory itself; - all of these are described (not inaccurately) as shrewd financial decisions.
  4. Interestingly, the only other brand names that get shout-outs on the tour are all Robotics companies: Kuka, ABB, and Fanuc. That fact - combined with the legendary stuff (all apparently real) about many of these robots having X-Men names - and the fact that the tour also highlights the human craft that goes into a range of sexy (and not-so-sexy) features of their cars - gave me the distinct feeling that Tesla consciously makes their industrial automation efforts seem as anthropomorphic as possible.
  5. This has been reported before, and it's worth noting again: Tesla's current production is about 1,000 vehicles per week. In the NUMMI days, this same facility turned out about 6x that.
  6. One thing that I was somewhat surprised by: Towards the end of our tour, the guide paused to explicitly note Tesla's purpose: To help expedite the move from a mine-and-burn hydrocarbon economy towards a solar electric economy. To be sure, I personally find this statement to be the most compelling thing about Tesla/Musk, if not the most compelling thing about any public company in the world (if you haven't read Musk's Secret Tesla Motors Master Plan, I'd really implore you to do so). But to hear it called out on a factory tour, to an audience which was made up almost exclusively of Tesla owners (besides a Tesla employee who had brought their family, I believe I was the only person *not* picking up a Model S right after the tour), seemed downright canny. Which leads me to my real observation:

Tesla is not, first and foremost, a manufacturing company; to wax on about the factory tour would miss the point. Their focus is simple: Musk has a singular vision for how the global energy lifecycle should work, and Tesla is doing whatever's necessary to bring it to fruition. Tesla is an energy company, and they're a "we're doing this because we believe in it and goddammit nobody else will" company. Which is really admirable, and it pleased me to see them use their factory - which, in spite of its relatively low throughput, is certainly a spectacle to behold - as a way to convert people to their mindset.

First EBM prints

Added on by Spencer Wright.

A few weeks ago I visited Addaero Manufacturing, one of the very few EBM (electron beam melting) service providers in the US. After my recent trials (and successes) with laser powder bed fusion, I wanted to try building parts with EBM. EBM is used extensively by aerospace and medical OEMs, but its penetration into the job shop world is way behind laser. Addaero, whose founders (Rich Merlino and Dave Hill) both worked at Pratt & Whitney before striking out on their own, is located just a few hours from New York City, and they were gracious enough to build two parts for me to evaluate the process.

I'll be writing up a longer post on the unique design considerations that EBM poses, but for now I wanted to share the pictures I took while there:

At this point, the parts Addaero made for me still need post processing before they can be assembled and tested. I'll be working on that over the coming weeks, and will update soon on my progress.

Things that are on my plate right now

Added on by Spencer Wright.

Mostly for my own benefit & the sake of catharsis, here are the things that are consuming my attention over the past & for the next few months:

  • Planning my own wedding in October.
  • Having fun this summer.
  • Getting more exercise.
  • Writing a long blog post on the seatmast topper that I had printed (DMLS) by Layerwise, and then tested by EFBe
  • Writing a long blog post on the seatpost that I had printed (EBM) by Addaero.
  • Digging more into McMaster-Carr's iOS app, and comparing it to Amazon's recently rebranded Business offering.
  • Planning a sourcing trip to Shenzhen, where Zach and I will investigate a significant redesign of The Public Radio's speaker & mechanical assembly.
  • Getting more hands-on experience with metal powder bed fusion machines. Because there are none in the New York metropolitan area, this inevitably means traveling for a few days to somewhere where I have a friend in the industry.
  • Doing a deeper dive into the variety of design tools that are cropping up for additive manufacturing. This includes getting better at T-splines (Autodesk Inventor), working with topology optimization software (SolidThinking Inspire; Frustum Cloudmesh), and doing some experimenting with lattice structure generation (with nTopology).
  • Doing a deeper dive into build preparation software, namely Materialise Magics.
  • Building myself a real desk, preferably with a proper toolchest integrated into it. I also want 2x24" displays, a proper Windows computer for 3D design, a new Mac for daily use, and a place for both a Wilton "bullet" vise and my 12"x18" granite surface plate.
  • Writing a presentation on metal 3D printing that covers both my experiences over the past two years (a case study), and my broader observations on the industry. 
  • Getting said presentation accepted to an industry conference (likely either AMUG, RAPID, or Inside 3D Printing).

There are a few more longer-term things, but this is a pretty good list for now. 

Measuring process signatures is hard

Added on by Spencer Wright.

From a NIST report titled Measurement Science Needs for Real-time Control of Additive Manufacturing Powder Bed Fusion Processes:

Finally, metallic debris from the [heat affected zone] can coat a window or viewport used in an AM imaging system, and disturb temperature measurements by changing the radiation transmission through the window. This is particularly troublesome in electron-beam melting (EBM) systems, and prompted Dinwiddie et al. to create a system to continuously roll new kapton film over the viewport in order to provide new, unsullied transmission.

This is a very important and totally nontrivial challenge. Measuring process signatures (which this report defines as "the dynamic characteristics of the powder heating, melting, and solidification processes as they occur during the build") is key to the industrialization of additive manufacturing. If the systems we have for measuring those factors are unreliable, machine manufacturers need to develop improvements for them ASAP.

The six questions I think about when I think about industrial additive manufacturing

Added on by Spencer Wright.

Prompted by an impromptu back and forth with Jordan, I was compelled to write down the things I spend so much of my time thinking about. Some of these I have a better grasp on than others, but they're all problems that I'm excited to see developments on - and work on myself.

1. What are the process parameters that affect finished part shape?

I'm in the middle of a NIST report that goes through many of these. The sad thing is that knowing what the parameters are is only half of the battle; then, you need to control those parameters on-the-fly (which is not something that all machine manufacturers currently allow).

2. What are the most reliable and effective methods of measuring, recording, and processing those parameters?

Industrial additive manufacturing machines tend to be harsh environments for sensors and sensor hardware. Once we know what parameters to measure, we'll need to build measurement systems that are robust, accurate, and reliable.

3. Given two identical finished parts with two different production process chains (additive, subtractive, etc.), how can one determine which process chain will be more expensive to complete?

This is hard. I believe that it'll be easier to automate process chain comparison than it will be to automate process chain creation; in other words, coming up with a list of steps to manufacture a part will remain hands-on, but assessing the cost difference (time/money/energy) between two process chains will be increasingly automated. Regardless, these are big problems.

4. Given two different designs, each of which has the same end functionality, how can one determine which design will be more expensive to build?

This feeds into question 3. In many cases today, design decisions are made based on a hunch. If it were easier to estimate the production cost for parts with complex production process chains, designers would be able to make more informed decisions.

5. Given the same input design and two different additive build orientations, how can one determine which build orientation will produce the most high fidelity net near shape, at the lowest cost?

Also feeds into question 3. Manufacturing engineers need to pick a build orientation quickly and be guaranteed high fidelity end parts; today, those decisions are made mostly by gut. Bonus points if this data is also made available to designers, so that they can make even more informed design decisions.

6. Given the same input design and build orientation, how can one determine which support structure design will produce the most high fidelity net near shape?

Given the early effort that startups (namely 3DSIM) are putting into this question, it stands to reason that it's an easier one to solve than question 5. It's also possible that they think it'll be easier to commercialize support structure optimization software in the near future. Either way, I see this as just part of a bigger need that 5 and 6 are pointing at together: additive manufacturing engineers need better tools to set up and process builds.


These issues outline the biggest roadblocks that I've experienced on my path to commercially viable additively manufactured parts. If you have different experiences, or know of developments on what I've described here, I'd love to hear from you.

CT Scanning of 3D printed parts

Added on by Spencer Wright.

A few weeks ago I visited CIMP-3D by invitation of its co-director, Dr. Tim Simpson. I was there partly just to visit (I love these kinds of places), but also to see first-hand the role that CT scanning can play in non destructive testing of additively manufactured parts.

CIMP-3D is located at and operated by Penn State University, and serves as part of Penn State's Applied Research Lab - and as an Additive Manufacturing Demonstration Facility for DARPA. In aggregate, they help both government agencies and commercial partners qualify and improve parts made by powder bed fusion and directed energy deposition. In their well-equipped shop, they have two powder bed fusion machines: an EOS M280 (EOS calls their process "DMLS", a term that I continue to get flack for using generically :) and a 3DSystems ProX 200 (3DSystems calls their process, which was developed out of their 2013 acquisition of Phenix Systems, "DMP" - for "direct metal printing). For their work on directed energy deposition, they also have an Optomec LENS MR-7 (a laser based powder deposition machine), and until recently had a Sciaky EBAM (a large scale wire fed electron beam welding machine, which had been sold just prior to my visit).

While I was excited in see their directed energy deposition machines, the real attraction was their GE phoenix v|tome|x m300 CT scanner. This machine is made by GE Measurement & Control division, which is part of GE's Oil & Gas business unit (it should be noted that I've done consulting for both M&C and O&G, though not for the people who make CT scanning equipment). CT scanners are *expensive* (close to $1M, depending on options), and are basically unheard of in private service providers. They can be used to analyze both the as-built form of a part (which will often deviate from the as-designed form significantly), and also any flaws (cracks and voids) which would make it unusable.

Before I visited CIMP-3D, Corey Dickman (an R&D Engineer there) was kind enough to print one of my seatmast toppers, in aluminum, on their EOS M280. It came out well, with only a small defect in the seatmast clamp area. Corey used some pretty clever support structures, tapering them in order to provide a balance between a solid grip on the plate on the one hand, and relatively low material usage on the other:

CT scanning uses a series of 2D X-ray images to reconstruct a 3D part. In CIMP-3D's scanner, the part is placed on a turntable in the middle of the machine. The X-ray projector, on the right side of the machine, shines X-rays through the part onto a sensor on the left side. Solid parts block X-rays, creating shadows on the sensor, and the result is a greyscale image where dark areas correspond with solid mass and light areas correspond with empty space. 

The scan moves pretty slowly. My part was scanned in 3500 slices, or one scan every ~.1 degrees. At this rate (and at a voxel size of 58µm), the total scan time was about an hour. Each scan takes about a second, and between scans you can see the turntable rotating slightly.

Fixturing the part in the machine presents an interesting challenge. You want it to be held securely, but you don't want any other solid things touching it - as they will cast their own shadow in the X-ray images. As a result, parts are often held in place by simply sticking them into a piece of styrofoam - as mine was.

Once the data is captured, it's loaded into a separate workstation to be reconstructed. The amount of data that needs to be processed here is staggering - my scan generated about 25 gigabytes of image data, which reconstructed into a 5.7 gigabyte model.

Once the reconstruction was complete, Griffin Jones (the R&D Engineer responsible for CIMP-3D's CT scanning) was able to do a visual analysis of the as-built part, checking it for voids and flaws. The as-built model can also be overlaid on top of the as-designed model, allowing for deviations to be easily quantified. The model can also be explored layer by layer in any orientation, allowing for a really complete understanding of what the solid part looks like:

A word on resolution: this scan was performed at a voxel size of 58µm, and each voxel is assigned a greyscale value that corresponds with the material's radiographic absorption coefficient at that location. However, any given voxel is subject to some amount of randomness as well; if a voxel has a vastly different value than its neighbors, then the operator needs to determine whether that's a result of a microscopic void, or a result of random variations. 

As a rule of thumb, Griffin assumes a void when he sees three voxels in a row with low grey values. Interestingly, the scan did reveal a few tiny voids in my part. They're mostly near the edges - specifically, the zone right at the boundary of the profile scan (the perimeter of the part's cross-section) and the infill hatching. Since the scan was performed at a voxel size of 58µm, and Griffin was looking for three voxels in a row with low grey values, the voids we detected were about 180µm - just larger than the diameter of a human hair. 

My suspicion - which would need to be verified by destructive testing - is that voids of this size are probably well within the functional requirements of my design. Of course, this particular model is aluminum, and the design is meant for titanium - but I'm looking forward to having a ti model scanned and destructively tested in the future.

For most product development teams, non destructive testing (NDT) is just one part of the process of qualifying a new part. My part, for instance, is being put through physical load testing this week - and I'll use the data I get from that test to improve my design. But for early on in the build planning process, having a tool that allows you to dive inside otherwise obscured areas of your part is incredibly helpful. Especially in the case of complex, topology-optimized parts with organic forms, it can be difficult to impossible to measure a part's deviation from the underlying design. Moreover, there may be regions that it's impossible to inspect without destroying an expensive prototype. My part has just this: the front of the neck section contains a completely hidden hollow zone. And as I move into redesigning for EBM, knowing the areas where powder tends to cake up will be even more helpful.

Thanks so much to CIMP-3D for hosting me!

Looking for a machine shop in NYC!

Added on by Spencer Wright.

Posting this here because twitter/email isn't panning out so far:

I'm looking for a prototyping machine shop in NYC! Must be interested in working on some pretty futuristic stuff (metal 3D printing, etc), and must have a knack for fixturing irregular & rough parts.

Please give me an email if you know of one!

Public Radio Fulfillment

Added on by Spencer Wright.

I can barely speak:

By the end of today, there will be about 1100 Public Radios in the mail. They should start being delivered to backers tomorrow.

We owe *so* much to our family, friends, and random interested people who helped us get this far. We're so lucky to have had the help, and it was really fun getting to work on a fun project with interesting, interested people.

Without a trunk

Added on by Spencer Wright.

Tim Urban, writing about learning about Tesla (emphasis mine):

I’ve heard people compare knowledge of a topic to a tree. If you don’t fully get it, it’s like a tree in your head with no trunk—and without a trunk, when you learn something new about the topic—a new branch or leaf of the tree—there’s nothing for it to hang onto, so it just falls away. By clearing out fog all the way to the bottom, I build a tree trunk in my head, and from then on, all new information can hold on, which makes that topic forever more interesting and productive to learn about. And what I usually find is that so many of the topics I’ve pegged as “boring” in my head are actually just foggy to me—like watching episode 17 of a great show, which would be boring if you didn’t have the tree trunk of the back story and characters in place.

First out

Added on by Spencer Wright.

Yesterday Zach and I packaged up the very first Public Radios.

This is the first 71 radios to come off of our (much improvised) production assembly sequence. We've relied *so* much on our friends, family, and employers over the past few months, and absolutely could not have done this without all of them.

Next weekend we'll finish building the remaining ~400 radios, which we're still waiting for PCBs for (we had a SNAFU - totally my fault - with our battery clip inventory). We're also planning on shipping out 1000 radios, which would comprise all of our base level ($48) Kickstarter backer rewards. 

Looking forward to getting it done :)

"Just Press Print"

Added on by Spencer Wright.

This is a total load of crap:

The high cost of tooling up a factory has long been a barrier to developing niche products. But now anyone with an idea and money could go into small-scale manufacturing, using computer-aided design software to create a three-dimensional drawing of an object and letting a commercial 3-D printing firm do the rest.

Some of the shit that's written about 3D printing *really* irks me. The above quote totally misses two key truths:

  • 3D printing - regardless of the technology - is highly immature. The idea that a designer can "let [someone else] do the rest" is just plain false.
  • Conventional manufacturing is actually *really* easy to do fabless; the "barrier" they refer to is a total misrepresentation.

I'm honestly excited for the future of manufacturing, but articles like this one only froth the market - resulting in less focus on the today's most interesting and pressing problems.

Speed to product != Speed to learning

Added on by Spencer Wright.

When I joined Undercurrent, I found one phrase to be in particularly heavy use: "Speed is the new IP." I liked it, and I'm sure I used it in arguments from time to time. But over the past year I've developed some skepticism - especially given the wide variety of contexts in which we encourage our clients to go faster.

You see, I'm focused on learning as fast as I can. At times, that will mean releasing products really quickly. But immature products rarely teach you anything useful. In order to learn - in order to get the IP, the competitive advantage that you really want - you sometimes need to hold back. 

Sometimes that may seem slow; hell, sometimes it may actually be slow. But fast product cycles in and of themselves aren't worth shit. The goal is to know how to fulfill your customers' needs better than anyone else, and to be prepared to fill those needs. And if you can do that without a strenuous series of rapid product releases, all the better.

A successful print

Added on by Spencer Wright.

The other day I got a package from Layerwise. In it was the second titanium seatmast topper of mine that they printed, and this one is ready to ride.

...but actually, this part might not actually be ridden - it's off to Germany to be tested. I'm in the process of writing up a longer report about how the project has gone over the past month or so - expect that soon!

Production sequence report

Added on by Spencer Wright.

First: Big thanks to Sam, Tieg, Buenas, Amanda, Jenny, Daniel, Lisa, Jordan and Sasha for helping Zach and I assemble the first 65 Public Radios. The day went really well, and we really appreciate everyone who helped out.

A few things we learned:

  • Antenna screw installation can probably be staged separately from the rest of the operation. It's a fairly rote task, and can be done with little concentration. In the future, we'll probably do the antenna screws at its own station, possibly on a totally different day than the rest of the assembly process.
  • We need *way* more speaker alignment & assembly fixtures. We had 7; I think I want to have 25 next time.
  • We need a foolproof, mechanical method of making sure the speaker screws are all equally (and appropriately) tight. 
  • Scanning the barcodes (which are on the underside of the lids) is kind of a pain in the ass, but could be worse.

In total, the mechanical assembly process takes about 6 minutes per radio. I'd like to cut that in half; I really want the full box build (taking raw components in and ending up with a tuned, packaged radio at the end) to take about 4 minutes. I think the stuff above will help, and I'm hoping to make more progress towards this goal over the next week.

Production sequence questions

Added on by Spencer Wright.

Early this week, I handed over 250+ of The Public Radio's "Maker Kit" Kickstarter rewards to a friendly USPS employee. It was a big step forward, but the fact is that the real production hurdles are all ahead of us. Although we have most of our tools built and tested, a few steps still need to be ironed out, and we have a bunch of work to do this weekend to secure the mechanical assembly workflow.

So this evening I spent a while setting up an assembly line at the Undercurrent office. We have a handful of volunteers coming by tomorrow morning, and it was great taking a little time beforehand to get things arranged how I *think* they'll be most efficient. It was also just good to think about what the possible bottlenecks could be, which to be honest I haven't had much time to do.

I documented the hand-assembly process of The Public Radio here, but what I didn't show is how it might work in a small scale production line. I also glossed over a few tricky steps, and the weird anomalies that I'm sure will come up. For my own benefit as much as anyone's, here are the questions that are foremost on my mind right now:

  • Can we use an offset screwdriver (like this Klein one) for the antenna screw, or do we need to use traditional electronics type screwdrivers (like this Wiha one), which will probably be slower?
  • Is the hot glue on the speaker going to be a total pain in the ass to apply? Do we need a different glue formula, or application method?
  • Will the speaker wires get in the way of the speaker screws? This was a bit of an issue with late prototypes, and I'm anticipating a bit of manual manipulation (read: fucking around with the wires with your fingers before the speaker is glued down) in order for everything to work out. Is that going to be problematic?
  • Will the speaker wire length be appropriate? We made the wires a bit long to start, figuring that it's better for them to be long than to be too short. How will the extra slack affect assembly?
  • Both the speaker nuts and screws are tiny. Do we need a customized tool to help install the nuts into the speaker assembly fixture? Is there some way that we can orient or direct the nuts and screws so that they're easier to grab and put into the assembly?
  • Putting the lid onto the assembly can be a bit wobbly - especially because the lid spacer tends to swivel around while you're putting the lid on. Do we need a separate fixture or tool to hold the spacer in place while the lid is being screwed on?
  • How long will the little hex recesses in the speaker assembly fixture last? We need to put a bit of torque on the screws, and I'm concerned that the recesses will strip out after not too many units.
  • How do we store the potentiometer washers so that they're easy to pick up and install? The washers are pretty thin, and they're kind of hard to handle.

So, that's a pretty good list. But that's just what I *know* that I don't know; I'm sure there are many other questions that I *should* be asking.

While I'm trying to find those questions, Zach will be leading the effort to get our tuning & shipping procedure mission ready. There, we had a *great* advance yesterday: Jordan found a way to get our Raspberry Pi tuning fixtures to actually broadcast audio on the FM spectrum. We'll use that feature to test every single radio we ship: after the radio is tuned, the Pi will start broadcasting the default Cisco hold music on the same frequency the radio was just tuned to. If you don't hear Opus Number 1 when the tuning is complete, then something's wrong.

So. By this time tomorrow, we should have about 70 mechanically assembled (and possibly tuned) Public Radios. We won't ship them immediately - our jars haven't arrived yet - but everything we learn will be immediately turned around and improved for the next time we build radios - probably a week from now.

Fun.

The Container Guide

Added on by Spencer Wright.

This week, as Zach and I shipped out The Public Radio's first ~250 Kickstarter rewards, I received the Kickstarter reward that I was waiting most anxiously: The Container Guide.

Craig and Tim are personal friends, and I've been so happy to read about the struggles and achievements they've made on this project over the past year. It's also great to see The Infrastructure Observatory spawning physical output.

The Container Guide is now available for purchase - get yours now!

T-spline redesign

Added on by Spencer Wright.

As my seatmast topper has been moving towards destructive testing, I've been playing with a new seatpost design. This part would probably be EBM'd, and then bonded (with 3M DP420 or similar epoxy) to 27.2mm carbon fiber seatpost stock. I suspect that this design will be a bit more economical, and would work on a wider range of bicycles - including my own.

I've been pursuing the redesign in a few ways. First, I've been working with a few NYC folks to develop designs that incorporate either topology optimization, or lattice structures, or possibly both (more on this soon). Second, I got a trial license of SolidThinking Inspire, and have been using that to reduce mass within a design space that I set up in Inventor. And third, I took a crack at designing the part from scratch with T-splines in Inventor, which I *really* enjoy.

T-splines are a totally different way of approaching design, and they allow you to manually create organic looking structures. Once I've created the organic shape, I apply a bunch of features to it in Inventor's solid environment - allowing me to blend precise mechanical aspects within an otherwise fluid shape.

Ultimately, I'm optimistic that topology optimization & lattices will offer a less labor intensive workflow. T-splines are *awesome,* but editing them is a bit of an art, and I'd like to be able to redesign the part quickly to accommodate different saddle offsets, strength limits, seatpost diameters, etc.

Expect more progress soon :)

Big ship

Added on by Spencer Wright.

Yesterday Zach and I (with the *so* gracious help of Nick, Wing, Dara, Daniel, and Tracy) packed up about 300 of The Public Radio's Maker Kits and got them ready to ship to our Kickstarter backers.

As the day progressed, the magnitude of effort it's taken to get here became more and more evident to me. We're about 5 weeks late shipping these kits, mostly as a result of last minute hangups in the production of our custom lids and speakers. While the lateness itself doesn't bother me *too* much, this milestone has been a big focus for both of us, and last night it struck me that I'm not sure I ever expected to reach it. 

While I was packaging kits and wrangling our backer report into a format where our postage software could process it (at least for our purposes, Kickstarter's data management system leaves much to be desired), Daniel and Zach spent most of the day setting up our tuning script for the fully assembled radios. We'll start receiving those in about a week and a half, and the logistics around making sure they're tuned and shipped to the right backer is a pretty hefty task. We'll spend most of next weekend working on that, and in the meantime will continue to bug all the backers that never sent us their shipping info (if you're out there, HOLLER AT ME).

There is still a *ton* of work to do, but there will be a few more milestones like this in the next few weeks - and I'm *really* looking forward to them :)