Me, late in 2009.
Filtering by Tag: tcd
On Set.
Product photography is fun, and weird.
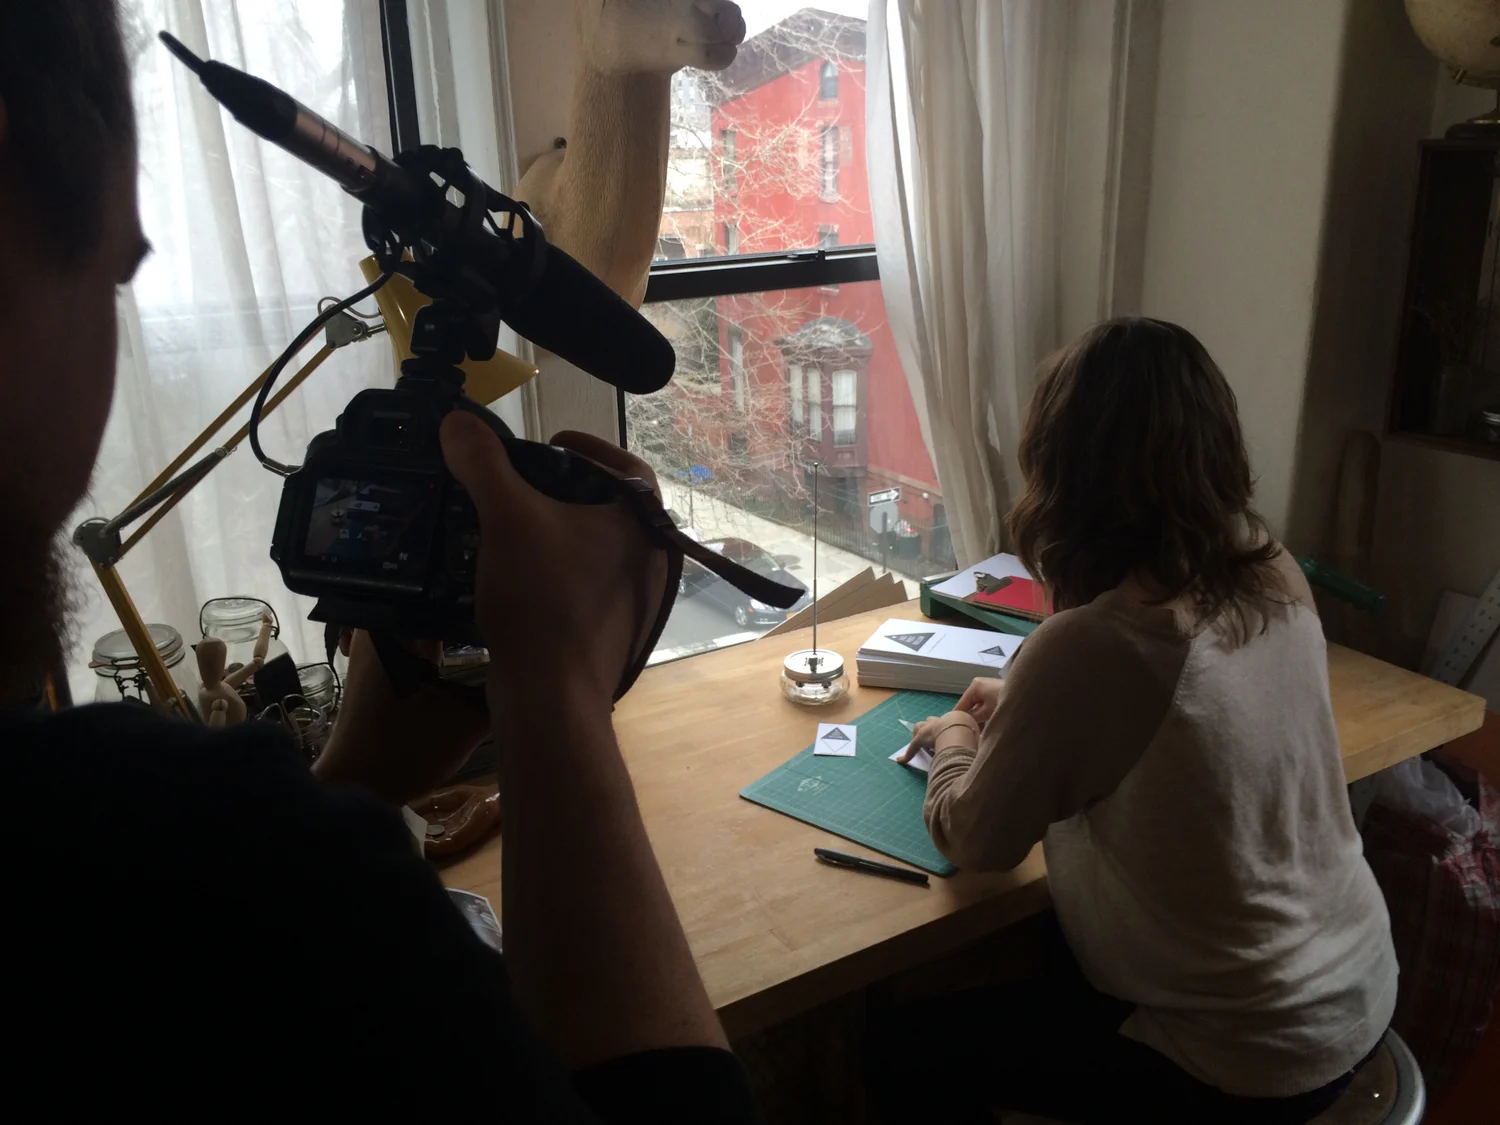


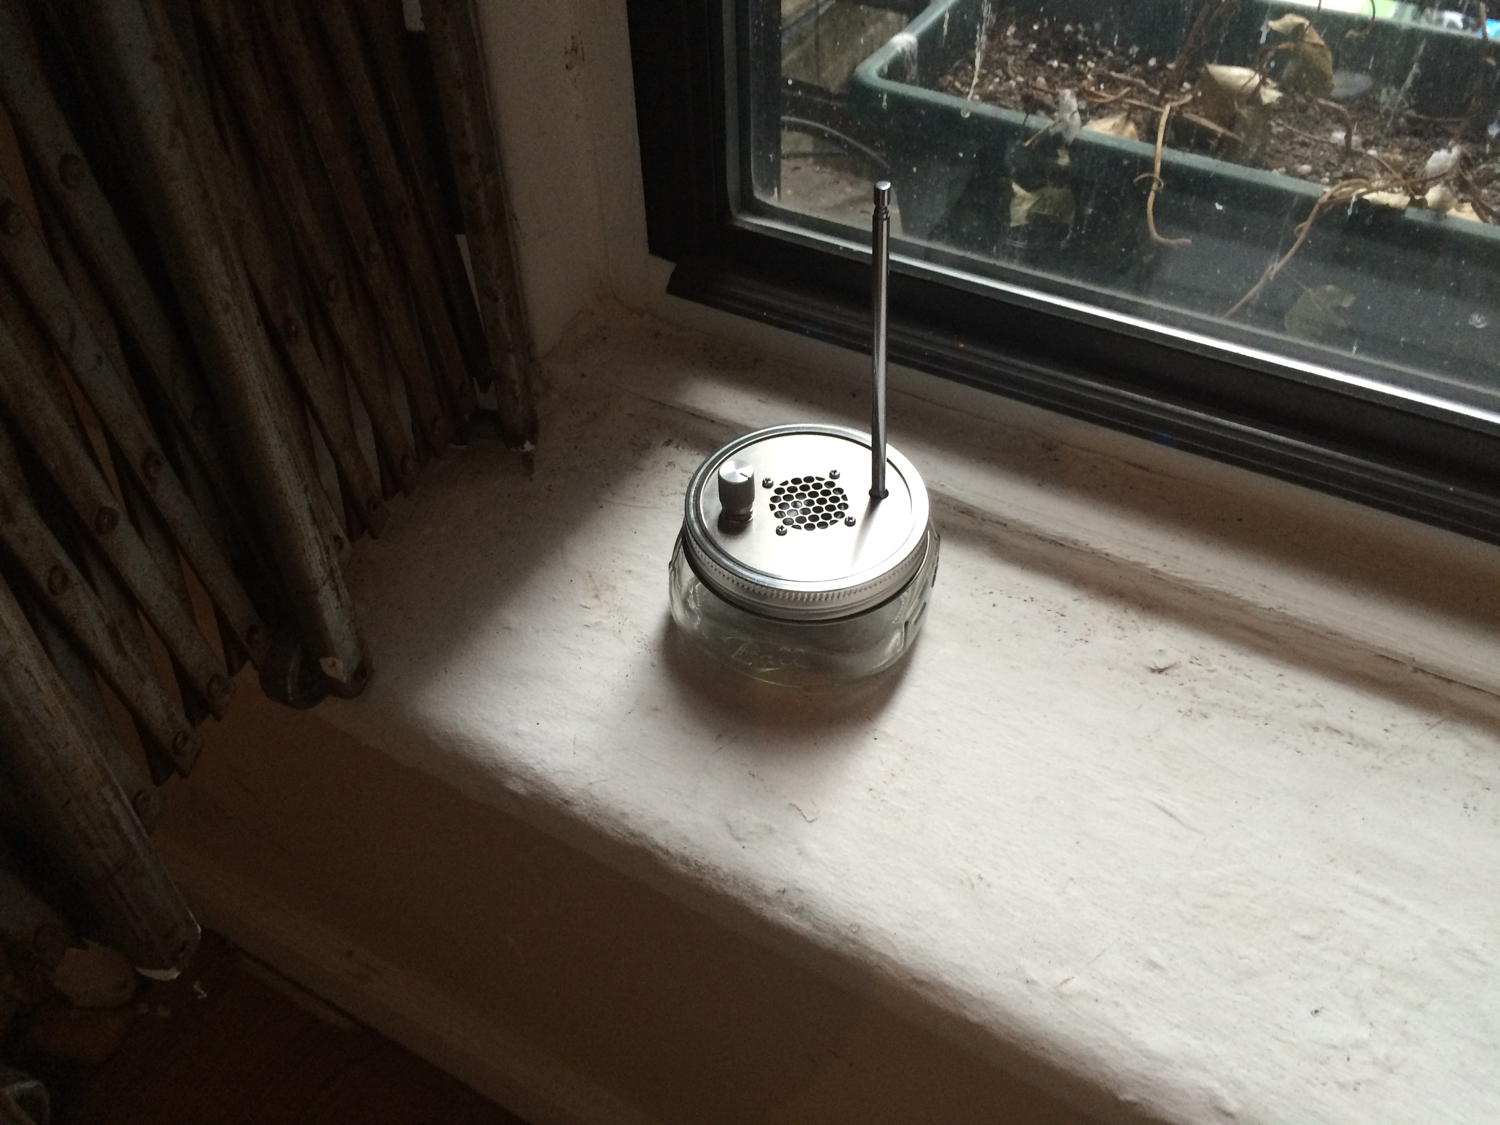
Today I spent the majority of my day on-location shooting The Public Radio with Zach and Colin (and with help from Hannah, Lianna and Chris). It was good, and exhausting, and fun.
When I was building bikes, I self-consciously photographed a huge portion of my life. My aim was presumably to build a personal brand that would improve the appeal of my company, but looking back I wonder how much of it was pure narcissism.
Now it's (ostensibly) different; I'm part of a larger team, and in many ways the aesthetic that we're selling is distinct from my own. Sure, I use Mason jars, and I truly enjoy FM from time to time - and when I do, I only listen to one station. But the challenges that interest me about The Public Radio are largely distinct from the reasons that (I believe) our customers would buy it, and that has a huge effect on the way I present it to the world. It frees me up, and removes self-consciousness from the equation. It makes it much easier.
Anyway. Consider The Public Radio's crowdfunding campaign begun. Stay in touch for updates.
Quick Scheme - Top Rack mount
Just had a quick brainstorm re: rack mounting. My 4-A rack ends address the bottom of the rack, but the top of the rack is equally challenging. One common way to attach a rack is through the brake hole on the frame/fork. I would always turn down the head of a M6 SHCS so that it could be inserted into the rack tubing; I'd then use a standard recessed brake nut on the backside. I made a quick & dirty sketch:
It might be useful to have these parts pre-made, so that rack builders don't need to turn their own on a lathe. If you'd be interested in a part like this, holler at me!
My Realster
In 2010 I built a short production run of singlespeed bikes, dubbed The Realster. They were intended to be a practical take on the urban fixed gear. From the original product copy:
I believe in minimizing the degree to which my customers need to reorganize their lives in order to ride their bikes. On this project - a short production run of five framesets - I wanted to design a fixed gear bike that would be easy to use on a daily basis. The bike needed fenders, a rack, a comfortable riding position and a bell. It also needed good brakes, generous tire clearance and a reasonable pricetag. It should reward, not punish, you for riding it.
Enter the Realster. It's an upright, practical fixed gear for urban use. The stock version, shown below, sports swept-back handlebars, natural contact points (cork grips and a leather saddle) and a custom made porteur rack with salvaged cross-sawn hard maple slats.
I was in my old shop the other day and snapped a few quick photos of the stock Realster, which I kept for myself. The build is really casual, which is rare for me - but I really like it. I'm particularly fond of its rack, which was an early project that used my rack ends.
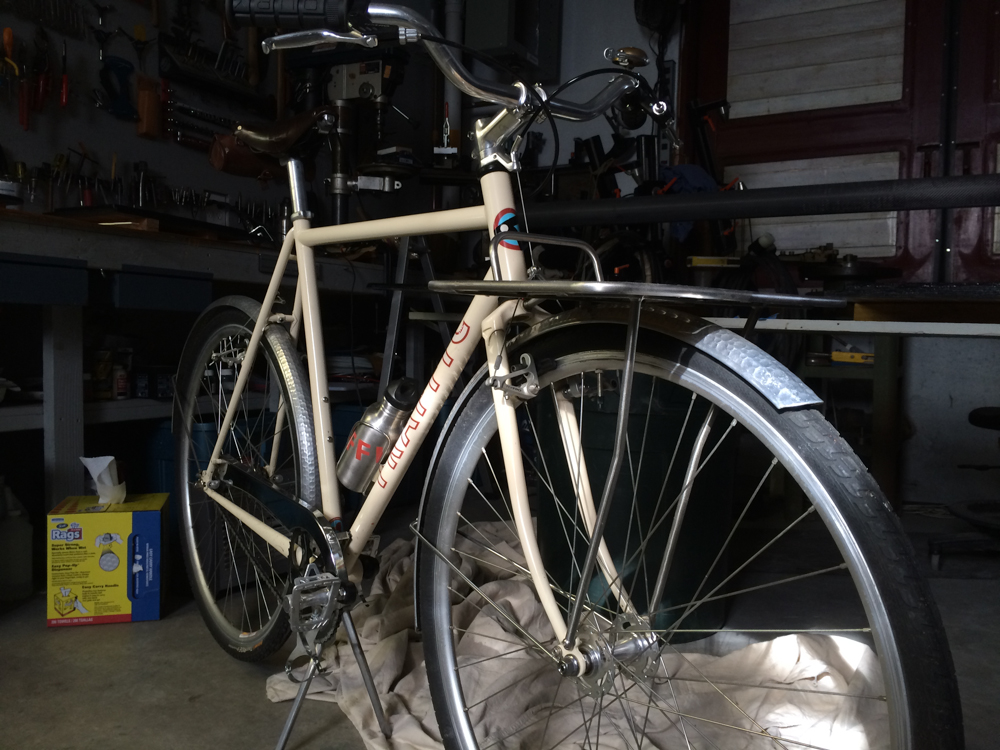
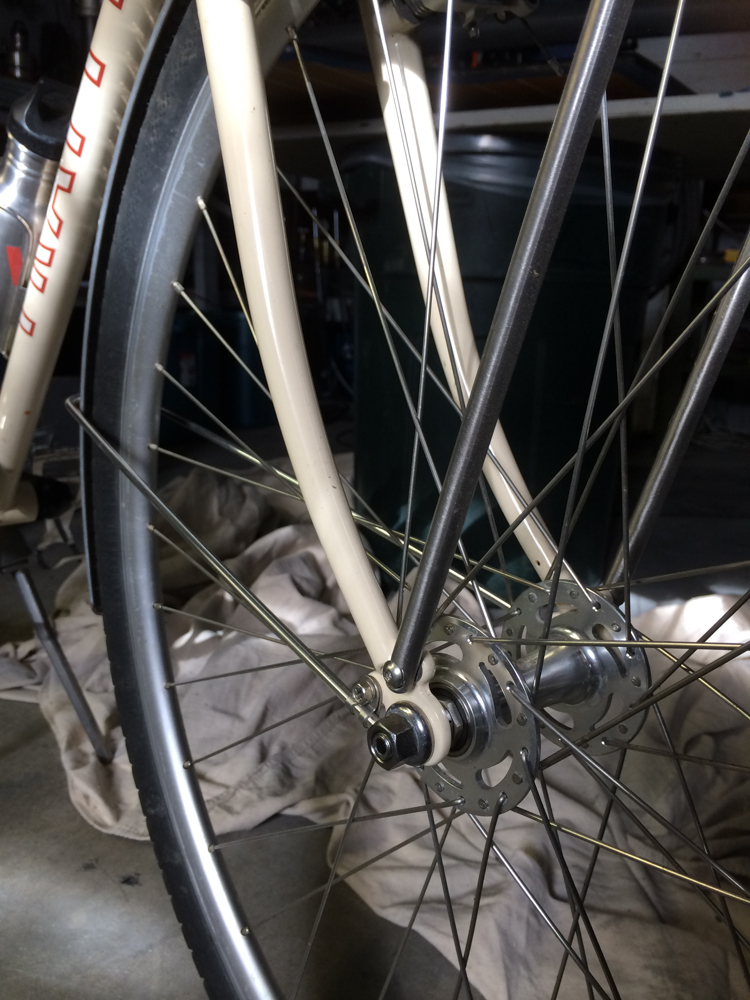
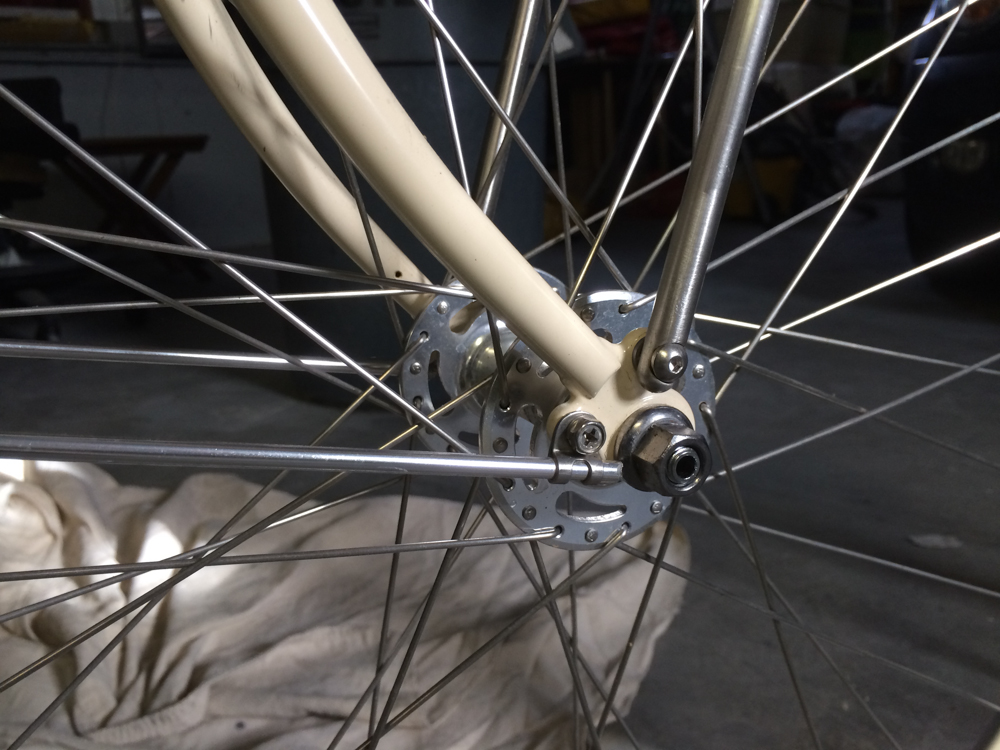
There's one of these framesets that never got built up; I recently put it on Etsy.
Stainless steel bike
This is from a while ago - late summer 2010. At the time, it was one of my proudest pieces of physical output, but somehow I never got around to properly sharing it on the internet. I never photographed it properly either, so these iPhone shots will have to do for now :/
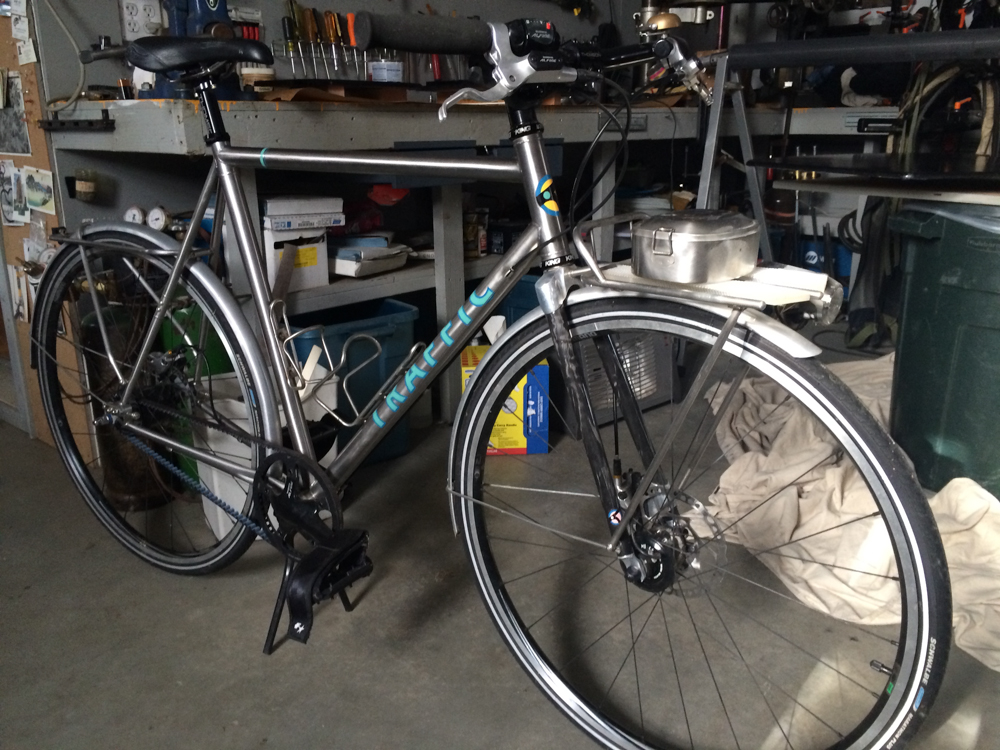
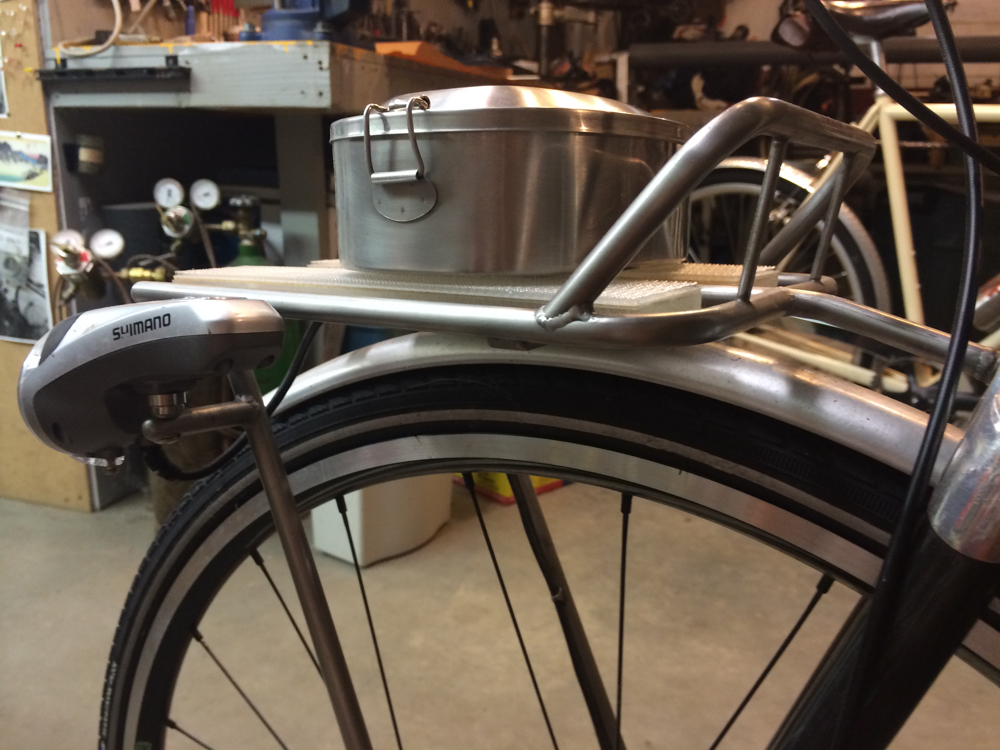
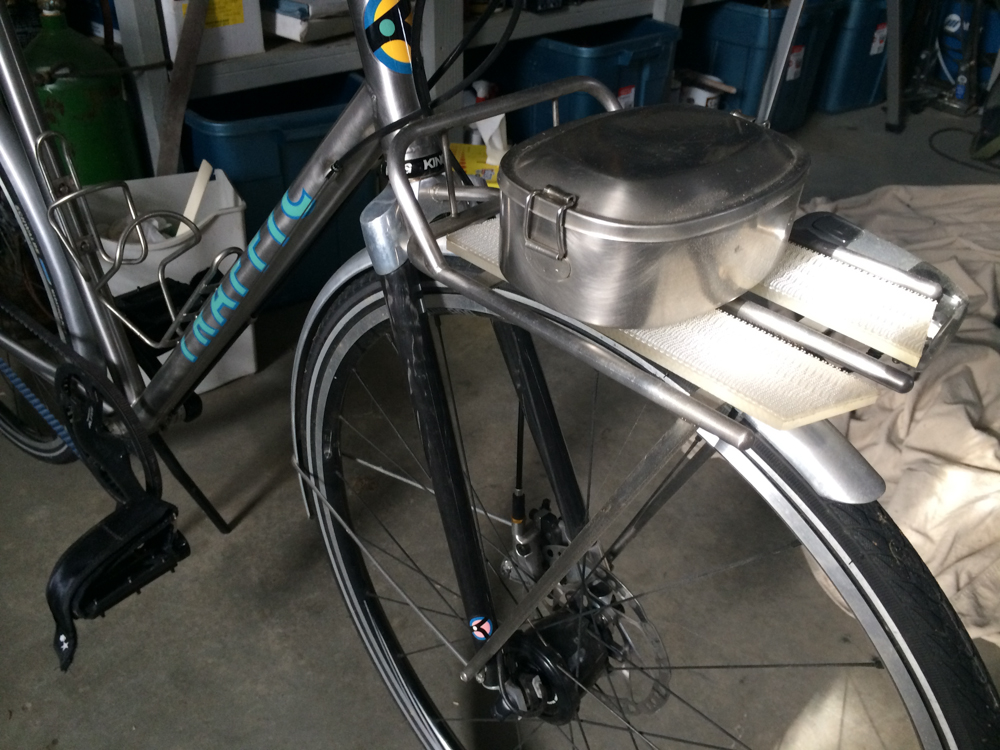
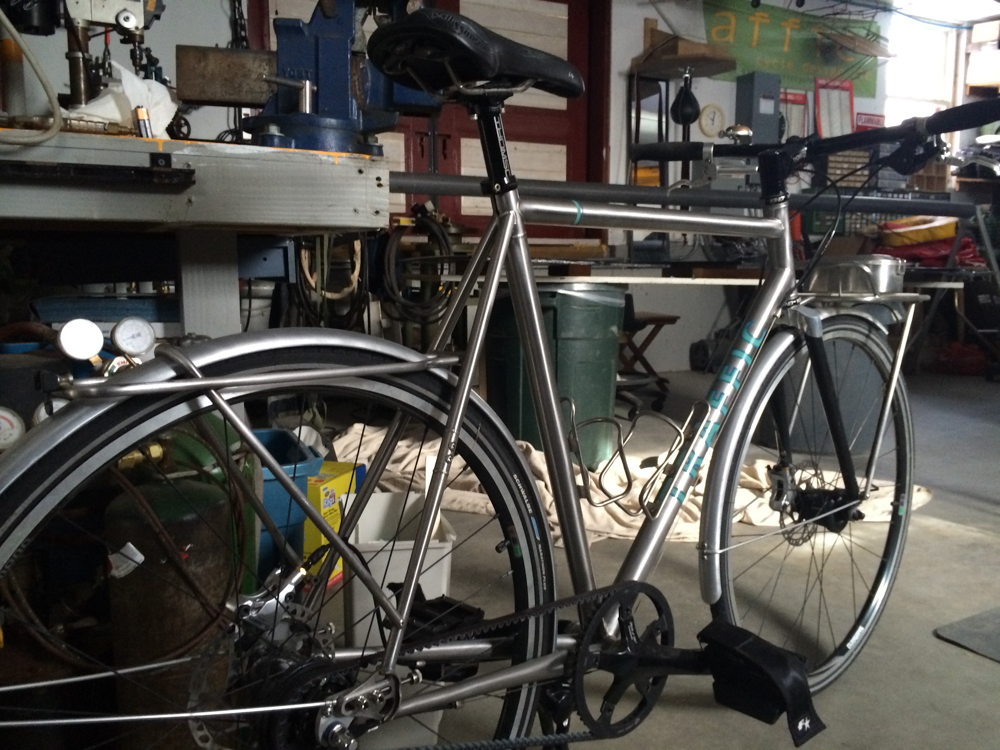
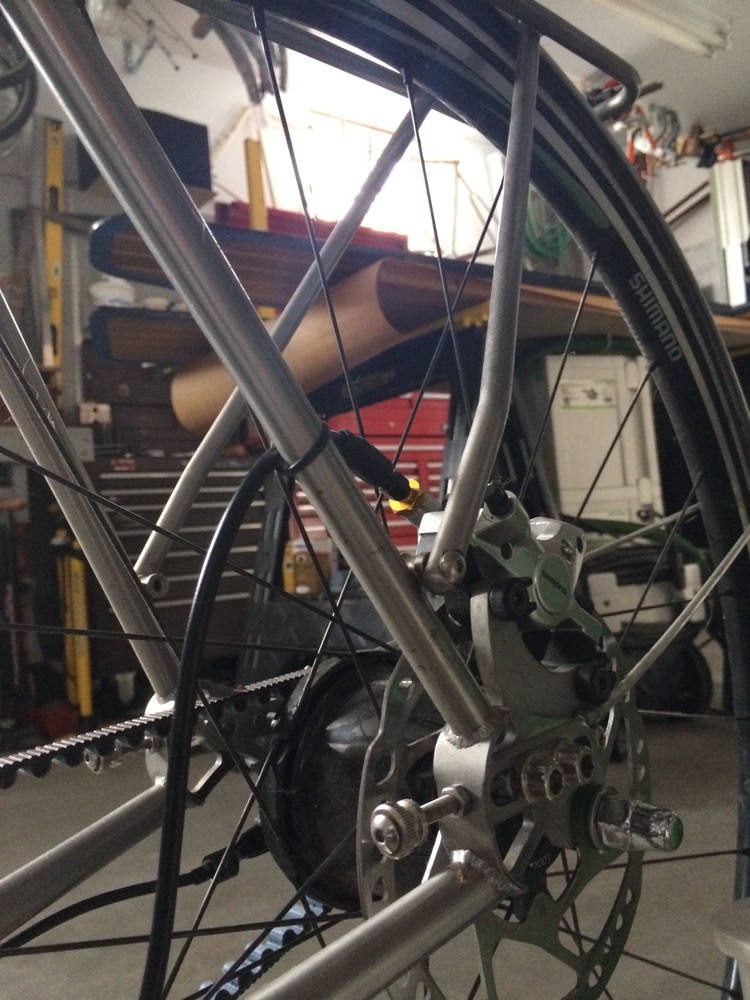
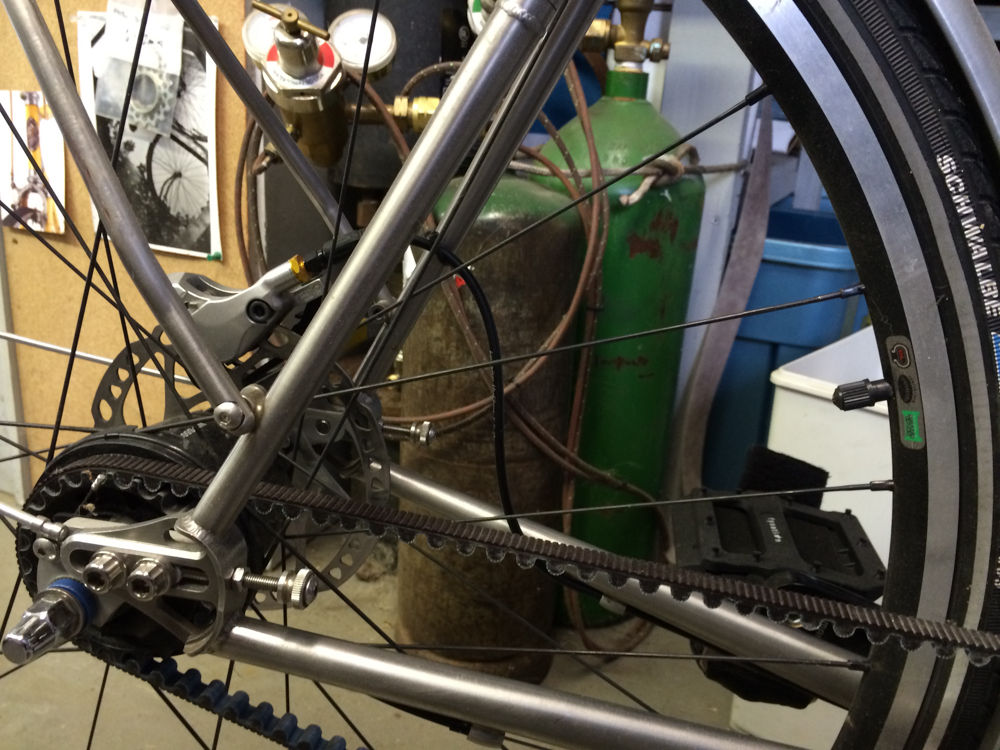
I love the belt drive, but am now quite a bit less enamored of the Alfine setup. The frame is pretty awesome, though (it's all Reynolds 953 mar-aging stainless steel), and I'm *really* proud of the racks.
This bike was the real impetus for me to make my own rack ends. I also made a few other little bits on the bike, including a pretty cool seatstay bridge with hidden fasteners for the rear rack.
Incidentally, the mushroom-head velcro on the front rack is a pretty slick way to attach commonly used things to a rack surface.
Powder
An old photo, taken during a day of boots-on-the-ground research on clearcoatable decals with powder coating.
This process was a PITA but the result is pretty cool. The decals are basically baked right into the frame. The guy I had doing my powder at the time didn't understand the process fully, so I spent the better part of a day there with him, working through it.
Ai & Paint
Top: Illustrator artwork by yours truly. Bottom: Paint by Keith Anderson.
The funny thing about this is:
- I had so little experience with Illustrator! The whole Creative Suite is still pretty opaque to me, but back then... I was making it up *seriously.*
- I still really like this design. The customer didn't want any graphics, but I told him that I needed something on his frame. This was a pretty good compromise - I made it just for this one bike - and I think it holds up.
- It was *impossible* to photograph. Damn round tubes.
Marc Barros
From his very good post, "What Can We Learn from Beyoncé?" Emphasis mine.
Having a purpose in the startup world is hard. The culture is built around ideas instead of meaning. Which is best exemplified by everyone’s two favorite questions: What do you do? and How big can this be?
Surround yourself with creators who first ask why you do it.
I've been asking this question of more and more of the folks I come into contact with when discussing a possible collaboration. I'm always surprised how few people seem to question why they're doing what they are, though I can relate - I've spent much time pursuing things for totally backwards reasons. I explored this a few months ago in relation to my experience building bikes, and have spent a lot of time in the past year thinking about how I want to address the Why of the next steps in my career. I certainly don't have it all figured out, but I definitely want to work with people who are thinking along these lines.
Shop
From a long time ago (2010).
Update: Dropout protector
Stopped by NYCVelo today to get design review on a few parts I've been playing with. While there, I tried out the dropout protector I designed on a fork they had laying around. It was the first chance I've had to do so.
The fit is snug, just like it should be - it took a mallet to get the protector in place. There's no chance it's going move around during shipping, but with a little careful prodding I was able to get it back out just fine.
I also left one of my dummy headsets there for them to use on frames around the shop. Brett was pretty excited about it, and it was great to get some feedback on the execution and pricing. I'll probably redesign the part soon and get an injection molded part quoted. In the meantime, the dropout protector is for sale at Shapeways if you want to grab one (or a dozen!) for yourself :)
An old jig
Fixture building comprises a lot of a manufacturer's time, regardless of the scale of the operation. For small shops, designing fixtures that can be used repeatedly for different customers is extremely useful. I faced this challenge a number of times when I was working on bikes, and spent a lot of time setting up fixtures that helped my productivity a lot.
In 2010, I built the brake boss mitering jig below. It mounts to a tiny little rotary table that I bought for my Benchmaster, itself the tiniest horizontal mill that I owned and still one of my favorite tools.
It seems quaint, but little productivity tools like this are how shit gets done in even big production style factories around the world. I kid you not - little manual mills, drill presses and lathes are in operation as I write this, performing some little repeatable operation on high precision parts for demanding customers.
Eventually a lot of these things are likely to be sold for scrap and passed down the line to developing economies. I've been to a few tooling auctions, and have seen 75 year old punch and foot presses that weigh (literally) a ton being sold for under $100. I understood that they would be loaded into a container and shipped to Asia, and it's likely that they got a new life there making good parts for another decade or so at least.
I generally think that that lifecycle is a healthy one, though it does have the strange effect that nowadays, even the most industrious kids are likely to end up knowing additive manufacturing in lieu of conventional (mostly subtractive) methods. Schools around the country are buying up MakerBots by the truckloads, and with good cause - to fail to do so would be an offense on par with teaching me cursive in 1992, when what I should have been learning was C or HTML. But all those 3D printers have got to go somewhere, and I suspect [citation needed] that they're supplanting Heavy Tens and J-Heads, which anyway don't get too much use as it is.
While I'm reasonably unromantic about that transition, it does strike me that subtractive methods are likely to remain, for the long time, significantly more efficient and effective for making certain types of products. Just as CNC machining hasn't replaced casting, forging, and sheet fabrication, additive manufacturing won't totally replace those methods either. All of these tools will, instead, complement each other - and the institutional knowledge pertaining to traditional manufacturing will, I hope, be not supplanted but enriched by newer paradigms of manufacturing philosophy.
A thing from a while back
In 2009, I made a trio of seat lugs. They were intended for a batch of Dutch bikes that remain not much more than an idea.
The way one makes these things is silly, but it offers the designer considerable creative freedom. You essentially build the joint twice, and carve a lug in between. I made these when my file handling was at its zenith, which is both worth noting (file handling is underrated) and also a totally silly skill to possess.
Logo
I remember wanting my logo *so* *much.*
Throughout its development, I worked with Grady Klein, who was a great collaborator and communicator.
When I was younger
I built this frame in 2008. It was the first belt drive bike I built, and hence it was an experiment that I financed on my nonexistent R&D budget. I probably spent $2500 on it, plus something like 40 hours of build time. But that paled in comparison to the time I spent *thinking* about it, which was likely in the 80 hour range. I also developed the graphic design myself, teaching myself Illustrator in the process - add another 20-30 hours there.
I like the bike. It was a pain in the ass, a challenge. I tested out a bunch of new things on it - the S&S seatstay coupling, a new waterjet head tube badge, a new (fancy) paint job with painted-on graphics. I think it came out great, though paint isn't exactly notable for its durability, and now the frame - despite being woefully underused - is chipped and scratched in all manner of places.
Regardless, I love it. I don't know what I thought I was doing, but I fucking took this bike on, and I'm proud of myself that the project being a bit over my head - and over my budget - didn't stop me.
Chris
I know it's hard to tell, but this is Chris, engraving some parts on my old pantograph in early 2010.
I like dark photos :)
Parts
I took these photos in 2009, and meant to do something with them for a long time.
The seat lug remains unused, though I'd like to change that. The stem went on Ian's bike. The hand vise is actually very handy, though career shifts mean that I don't use it often anymore.
Notes on a Square-shaped career
A jack, and his trades, on a quest for some type of mastery.
In the interest of self-congratulation, and because (who knows?) maybe it’s better to mix some parody into one’s résumé:
Things I have done in the past, and will do again if you pay me.
Worked in subzero conditions for days on end.
You know how they say some things build character? Well, being cold is miserable, but I always remember it fondly.
Demolished a load bearing wall.
This shit is tricky. You gotta build a temporary wall to keep the load supported, and then you get out your sledgehammer and knock the old wall out. Extra points if you actually *lift* the load up beforehand, using a bottle jack or similar.
Organized my music collection with a shell script.
Most practical use of my years on Linux. I had all these old Napster-era files on my hard drive and had (obsessively) named them all in a particular naming sequence (“Artist Name — Album Name — Track Number — Track Name”, if you must know). But a lot of them were just in the root of my “Music” directory, and I wanted them to be sorted into a directory structure that only halfway existed. So I wrote this script that identified all of the relevant fields in the filename and searched to see if the necessary file path existed, and then created it if it didn’t and moved the files into the right path. I was an amateur and spent like a weekend on the script. It executed (and probably sorted through a couple dozen gigabytes of music) in like five seconds.
(Shamelessly) done my own photography.
Hey, I’ve got nothing but love for your selfies. I spent *years* with a tripod and a remote trigger. About the best investment I ever made was a muslin backdrop, and I’ll curate & color correct the *hell* out of some soft-focus product shots.
Been to China.
Incredibly (and to no particular credit to myself), this is maybe my most marketable achievement in the past three years. I visited like ten factories while I was there, and was wooed by some number of dozens of potential suppliers of machined/extruded/moulded parts. I was apparently also charming enough to get a local girl to show me around working-class Pudong (in a non-romantic way). I was out of my element, and accidentally brilliant.
Spliced both three-strand twist *and* double braid rope.
Three strand is easy once you get the hang of it. Double braid rope comes in all varieties, and you really need to know what you’re working with to get it right.
Vetted SMT assembly shops.
Not that I knew the first thing about how SMT is done. But supplier vetting is more about understanding the people you’re talking to than it is about understanding the processes they’re performing.
Finished The Power Broker.
You want commitment? You got it.
Attended Edward Tufte’s one-day course.
Edward Tufte has a vanity gallery in Chelsea, and he seems pretty good at getting a couple dozen suckers to plunk down $380 to listen to him rap about information design for a few hours. Which, if you count my ability to gush about John Snow and claim expertise on the ways in which PowerPoint distorts intellectual discourse… Well, let’s just say it was money well spent.
Attended The Landmark Forum.
You have no idea how many things occur to me that.
Unlocked basically all the privacy settings on my Facebook page.
If you’re scared of hiring me because — gasp — there are pictures on the internet of me drinking beer with friends, well, move right along.
Had a letter to the editor published.
And let me tell you, there are some key phrases I wish I had reworded beforehand.
Been the president of a nonprofit.
You gotta watch out — speak up at the first meeting, and they just might call on you.
Derived the syntactical structure of sentences like “The man that the girl that is nice met is cool.”
If you don’t think that’s grammatical, well, check this out.
Made coq au vin.
Though I must say, chicken bones in my stew is a little weird.
Been at the helm, at the start of a race, in a 38' sailboat, when we crashed into the committee boat.
They were parked; we were probably doing 7-8 knots. Not my brightest moment. Everyone was okay, and after that was clear I accepted my lapse in judgment and got back at the helm.
Told a supplier that we were working on developing in-house capabilities in his field.
I had no idea how to splice rubber extrusion, but I pitched the idea to my bosses and eventually we figured it out. The supplier was really cool about it, too — we paid him a retainer and he taught us what he knew (which wasn’t very much) about the process. Rubber transfer moulding is really simple, but — even with our supplier’s support and advice — we struggled with the details for months. I still don’t understand precisely what is happening chemically as rubber cures, but in the end I guess that wasn’t really relevant.
Fired a subcontractor.
Guy was an asshole. I made a key mistake, though, and didn’t limit my list of reasons to “you’re an asshole.” If you’ve got that card, play it — and leave the rest to yourself.
Let my boss convince me to let an employee go.
This was a huge mistake. Ultimately he was right, but his lack of trust in my judgment was a harbinger of bad things to come.
Spent way too long sharpening a chisel.
But man, sharpening stuff on a Japanese style waterstone is so cool.
Stayed at home and written silly things for the internet.
:)
With apologies to Mike Arauz and his excellent post, Square-shaped is the new T-shaped.
Cold
My old shop. Truckee, CA, 2007. It was too small with the door closed to move around, and anyway it was unheated, so I would open it up and revel in the abject humor of the whole thing. I thought this photo (which I orchestrated with a tripod, etc.) was hilarious.
Rack Ends: Background, Requirements & Design
In the past few weeks, I've been reviving a product that I originally conceived of in 2010. I'll get more into its revival later, but I wanted to spend a little time documenting the development and design details here.
It was sometime in 2009 that I decided that rackbuilding was something I wanted to focus on. I had been building custom bike frames full-time for a year and a half, and had developed a sense that for most customers, custom frame geometry alone is just not sufficient reason to justify spending $3K+ on a bike. I had built a few nice road and mountain bikes in the $5-7K range, and I was proud of the results, but the value proposition for most customers just wasn't there. For that money, you can buy one hell of a Specialized off the rack at a LBS. And other than a sotto voce paint job (I tend to *hate* the design language that the big bike companies use), there was little I could offer to really distinguish myself.
I also wasn't totally immune to spotting trends. In March of that year, I attended a trade show and spent a while observing the way other folks were differentiating themselves. Fashion in the handmade cycling world tends towards the quaint, and rackbuilding offers framebuilders the opportunity to show their bikes carrying things like wine bottles and six-packs - stuff that most big companies would never display.
Around this time, I was living in Philadelphia and spending a lot of time biking around and eating pizza. I spent a while thinking about what kind of rack I'd want for my bikes, and the best combination of whimsy and utility that I could come up with was a front rack that would fit a large pie. I was riding around a hardtail mountain bike at the time, and decided to build up what would become The Utility Bike - and, once it was mostly done, went about building my first real rack.
At the time, most custom builders were just cutting their own rack eyes out of plate or bar stock (Rack Lady, who I have a *lot* of respect for, is/was a great example of this). A few folks (Signal stands out) were doing really beautiful things that more closely emulated lugged construction, but that was never really my aesthetic. Anyway, I wanted my rackbuilding process to be TIG only.
I started by having a bunch of plate-style eyes watercut from a sheet of stainless plate. The plate was .125" thick and came with a stain finish. The result was a pretty good start.
I used these on a couple of racks, and all in all they were a great improvement over cutting them by hand. I tried a few different methods. In at least one case I crimped the rack tubing over the tab itself, but it was a bit cleaner to slot the tubing and insert the tab into the slot. Welding the whole thing together was a bit sloppy (The wall thickness on the rack tubing is .028", which contrasts badly with the .125" thick plate eyes. The result is that keeping both parts right at melting temperature is tricky.) , but the result was passable.
This was my first nice rack. I eventually got Ian to make me some slats to fill in the deck and, and I made some custom length bungees too. I learned a lot in the process, and also tried out a detail that - although kind of silly - would end up informing the way my rack end design progressed. The rack required that a few tubes be terminated, and I turned down some solid stock to a point, relieved an area to insert into the tube, and lap welded the entire thing together. The result is below.
Right around this time, I started building bikes for both Saylor and Ian. Both required racks, and Ian got a chainguard as well. I spent a little while thinking about how to terminate all the tubing, and ended up making a batch of mill-turned rack ends that would become my go-to solution on a bunch of future projects. The process went turn-mill-turn, and included at least ten processes per part, described roughly below:
The end result can be inserted into a piece of .375"x.028" tubing (cut square) and lap welded. I generally would then file and sand the result smooth. This assembly technique offered me a key feature: If a strut was just slightly too long, I would shorten it (by rolling it against a benchtop disc sander) quickly and in small increments. In addition, the entire assembly is self aligning - the rack end bolts to the boss and slips into the tube, which can have any orientation necessary. This method was much easier than if I had been using tabs & slots, which take a lot of work to align just right and is difficult to adjust the length of.
I got a lot of mileage on these parts, and adapted them for a few alternate configurations as well. I developed something of a symbiotic relationship between their design and my rackbuilding workflow, and the result has been (to me) great.
I think these parts could be useful to a lot of framebuilders out there, and I'd be interested to hear from anyone who might be interested in them. Drop me a line if that sounds like you.
Hardtail
2008.


