Manufacturing guy-at-large.

Filtering by Tag: nTopology

Stem prints

Added on by Spencer Wright.

Almost a year ago, I posted a rendering of my printed bike stem on my blog here. Now:

These parts were printed by my friends at Playground Global on their 3D Systems DMP320 in titanium 6/4. Like the titanium parts I've had printed (and written about extensively) in the past, these are done via laser metal powder bed fusion - the generic name that often gets referred to as "DMLS". These parts were, of course, designed in nTopology Element Pro; you can see more of my design process here

As loyal readers will know, I've put a lot of time into using Abaqus to predict these parts' mechanical properties; more on that in the near future. For the time being, the goal with this print was to test the manufacturing process - and use any lessons here to guide future design iterations. As you'd imagine, there's a *lot* that goes into printing a part that has ~45,000 beams; establishing manufacturing parameters was a good way to filter out nonviable design strategies.

It'll take a bit more work to characterize the as-built design fully, but at first inspection it seems to have been a total success. I was careful to keep most of the beams' orientations at a high angles, thicknesses above .45 mm, and lengths below 3 mm; the result is a structure that's almost completely self supporting.

At this point, the part has been roughly cleaned up and bead blasted to remove any surface discoloration. The next step is to tap the holes, clean up the clamp surfaces, and mock the entire assembly up.

More soon :)

See also: DMLS lattice sample prints, where I describe the part's design a bit more.

Snapshots of a day

Added on by Spencer Wright.

Some semi-random screenshots from a day's worth of lattice design in nTopology Element Pro:

There have been a bunch of big updates to Element recently, and this workflow takes advantage of a few of them. In particular, the new Warp to Shape tool is very helpful; I also used the Extract tool and the Remesher to make some nice selective surface lattices.

The last, and really the biggest, thing here is the conversion into Abaqus for beam analysis & sizing optimization - see the last photo above. I'll be working on & posting more about that in the next few days - stay tuned :)

DMLS lattice sample prints

Added on by Spencer Wright.

I'm *very* excited about these parts from C&A:

These parts were printed in titanium 6/4 by C&A Tool in Churubusco, Indiana; they were designed in nTopology Element. 

This is a pure lattice structure - the entire geometry is designed as beams and nodes, with no explicitly defined solid regions. The beam lengths are on the order of 2-3 mm; their thicknesses range between .45 mm and 1.1 mm. In some areas (for instance, the bolt holes) this results in a fully solid part, but the transition from lattice to solid is continuous rather than discrete. The result is a structure that's solid where it needs to be and sparse elsewhere, with no stress risers where solid and lattice meet.

The parts are, of course, sample regions of the bike stem that I've been working on for some time now. The intent of the samples was to prove the printability of the structure and identify any potential difficulties. The results were overwhelmingly positive: With the exception of a few small flaws, the parts printed very well, and I believe the problematic areas can be addressed in the design pretty easily.

Given the good quality of the sample prints, I'm planning on printing a full version of the part soon. I'm also experimenting with a few other design variations (intended for a variety of different metal AM machines), and am running them through a beam sizing optimization process with Abaqus and Tosca in order to reduce mass and decrease strain energy. More on these soon :)


Thanks to Rich Stephenson for his ongoing help on this project - and for continuing to educate me on the metal AM industry.

The first 14mm

Added on by Spencer Wright.

This week I got some good news: Researchers at The MTC had begun printing one of my latticed bike stems.

The first 14mm of my latticed bike stem, printed in titanium on an Arcam A2x. The part is upside down (relative to the build orientation) in this photo.

This part was printed in titanium 6/4 on an Arcam A2X. Unfortunately the build failed at 14mm high; on the upside, it appears that the failure was *not* caused by my part. It's a bit early to make any judgments about its feasibility, but I'm pleased to see that these beam diameters (which are between .8mm and 1.8mm) seem to print without support structures. As you can see below, many of them (almost all, in fact) had very low angles relative to the XY plane.

The build orientation of my latticed bike stem.

I'm hoping to have more progress on this soon. Thanks to my friends at The MTC for their help with printing - and with debugging the design!

(Another iteration of my) Bike stem

Added on by Spencer Wright.

This.

The lattices here were, obviously, designed in nTopology Element Free (which is free!). I happen to have done the mechanical design in Inventor, but the rendering was done in Fusion 360 (effectively free, and totally capable of doing the mechanical design as well). I separated face groups and remeshed surfaces in MeshMixer (free!), and very well could have done the booleans there too (I used netfabb).

^ I just think that's a bit remarkable.

Anyway, it's ready. Printed part (DMLS titanium) soon.

Element Free

Added on by Spencer Wright.

When I joined nTopology, our flagship CAD software - Element - was in closed beta. I had used it myself over the fall, and was impressed at how quick and easy it was to generate variable lattice structures. But the GUI was often confusing and many of the core functions were still very much prototypes.

Today, I'm proud to announce that nTopology has released its first public product - Element Free. We've spent a ton of time on this over the past four months, and have both streamlined the workflow and improved the core design tools needed to design and edit complex lattice structures. 

We'll be working hard to integrate more features into Element Free over the coming months - and will be releasing a Pro version this summer. Head over to the nTopology Product page to download the software yourself!

Point modifiers

Added on by Spencer Wright.

Just a quick update to yesterday's post - here are some screenshots showing a little bit of how I'm controlling thickness on my lattice stem.

Our variable thickening algorithm allows the user to input minimum and maximum beam diameters. If a beam isn't within the range of any point modifiers, then it's thickened to the minimum value. If it's within range, then its thickness is determined by the falloff curve of the modifier that it's within range of. If it's within range of multiple point modifiers, then the greater thickness value is used.

As you can see above, the Modifier Editor allows the user to preview the effect that the modifiers will have on a part; blue means that a region is not within range of a modifier (and will be the minimum thickness), and red means that it's within range (and the maximum thickness will be applied). We allow you to preview this on any mesh in your project. Here I'm looking at a variably thickened lattice, but generally I'd start with a uniform thickness lattice and then play around from there.

The big change in the design yesterday was adding point modifiers in four locations: On either side of the handle bar clamp, and on the top and bottom of the steerer clamp. These modifiers have steep cosine falloff curves, meaning that they have a big effect on a relatively small region of the part. I've controlled the range and falloff so that just the beams on the edges of those surfaces are affected.

I also have point modifiers at all of the bolt holes, and a few that control thickness on the rest of the clamp surfaces, and then two point modifiers that make the transition from the clamp surfaces to the center of the extension a bit more gradual.

We've been thinking a bit more about how to develop modifiers in the future - stay tuned!

Stem update

Added on by Spencer Wright.

A friend asked me yesterday what was going on with my lattice bike stem design, and after telling him that it's been on the back burner I played with it a bit and made some real (if subtle) improvements. 

First, I should note here that I'm *not* worrying about overhanging faces. That's mostly because I'm working at nTopology to break down manufacturability of lattices into its component parts, and am tabling all of my DFM concerns until I have real data to back them up. In addition, I'm focusing on using variable thickening to maximum effect right now. I've used variable thickening a lot in the past, but the next software update of nTopology Element pushes it even more into the forefront, and I want to dogfood myself a little before we release it into the public :)

I don't have screenshots of the whole process, but this part was designed in much the same method that I was using last fall. I used Inventor to make a design space, and Meshmixer to generate surfaces to grow a lattice on. Then I used Element to:

  1. Create a surface lattice with beams at every edge in the Meshmixer model
  2. Create a volumetric lattice (based on a hex prism cell shape) inside the part
  3. Merge the two lattices by snapping nodes on the volumetric lattice to nearby nodes on the surface lattice
  4. Creating attractor modifiers at locations that I know I'll need more thickness in my lattice, e.g. mechanical features
  5. Applying variable thickness to the lattice based on those modifiers
  6. Refining the resulting mesh & reintroducing mechanical features via Booleans

The trickiest thing by far here is setting the attractor modifiers to the right range & falloff. I've got three things going on here:

  • Bolt holes. These need to be maximum thickness (1.5mm) to accept threads and distribute the load from the bolts.
  • Clamp surfaces. Where the stem clamps to the steer tube and handlebar, the part needs to have relatively high surface area. All lattice beams should lay on the surface itself, and thickness should be high as well.
  • Mechanical stress. I haven't done a full analysis of this part, but in general stress will be concentrated near the clamp surfaces and will be lower in the middle of the part.

Clearly this blog post would be more effective if I ran through every attractor one-by-one and explained how editing them changed the resulting structure, but we'll have to forego that for now. Suffice it to say that the part above weighs 105g and has roughly the mass distribution I was looking for; I'll update with more details soon :)

Joining nTopology

Added on by Spencer Wright.

Nine months ago I had one of those random conversations where you walk away feeling thrilled to be working in an industry with such compelling, intelligent people.

I had met Bradley before then (there are only so many people working on additive manufacturing in NYC), but only in passing. In the meantime our paths had diverged somewhat. He was working hard on design software, whereas I had focused on getting industrial AM experience through developing a physical product. But our approaches to the industry had converged, and we had developed a shared enthusiasm for addressing the technological problems in AM head on. We became instant allies, and started swapping emails on a weekly basis. 

In August, when nTopology launched their private beta program, I jumped at the chance to use it in my own designs. The engineering advantages of lattice structures were immediately evident, and nTopology's rule-based approach allowed me to quickly develop designs that met my functional goals. And as I spent more time with nTopology's software - and got to know Greg, Matt, Erik, and Abhi - my enthusiasm about what they were building only grew.

Today I'm thrilled to announce that I'm joining nTopology full time, to run business operations and help direct product strategy. nTopology's team, mission, and product are all precisely what I've been looking for since I began working on additive manufacturing, and I can't wait for the work we've got ahead of us.

For posterity, here are a few thoughts about nTopology's approach towards design for additive manufacturing:

  1. From the very beginning of my work in AM, it was evident that traditional CAD software would never let me design the kinds of parts I wanted. I was looking for variable density parts with targeted, anisotropic mechanical properties - things that feature-based CAD is fundamentally incapable of making. nTopology's lattice design software, on the other hand, can. 
  2. As the number of beams in a lattice structure increases beyond a handful, designing by engineering intuition alone becomes totally impractical. It's important, then, to run mechanical simulations early on, and use the results to drive the design directly. nTopology let me do just that.
  3. nTopology's approach towards optimization lets me, the engineer, set my own balance between manual and algorithmic design. This is key: when I intuitively know what the design should look like, I can take the reins. When I'd rather let simulation data drive, that's fine too. The engineering process is collaborative - the software is there to help, but gets out of the way when I need it to.
  4. Best of all, nTopology doesn't limit me to design optimization - it lets me design new structures and forms as well. That means far more flexibility for me. No longer am I locked into design decisions artificially early in my workflow, when a lot of the effects of those decisions are unknown. nTopology gives a fluid transition from mechanical CAD to DFM, and lets me truly consider - and adjust - my design's effectiveness and efficiency throughout the process.

The nTopology team has shown incredible progress in a tiny amount of time. They've built a powerful, valuable, and intuitive engineering tool in less than a year - and have set a trajectory that points towards a paradigm shift in additive manufacturing design.

In the coming months, I'll be writing more about our company, our mission, and our design workflow. If you're an engineer, developer, or UI designer interested in working on the future of CAD, send me a note or see our job postings on AngelList. To learn more about purchasing a license of nTopology Element, get in touch with me directly here.

Computer aided design

Added on by Spencer Wright.

Over the past week, one particular tweet has showed up in my timeline over and over:


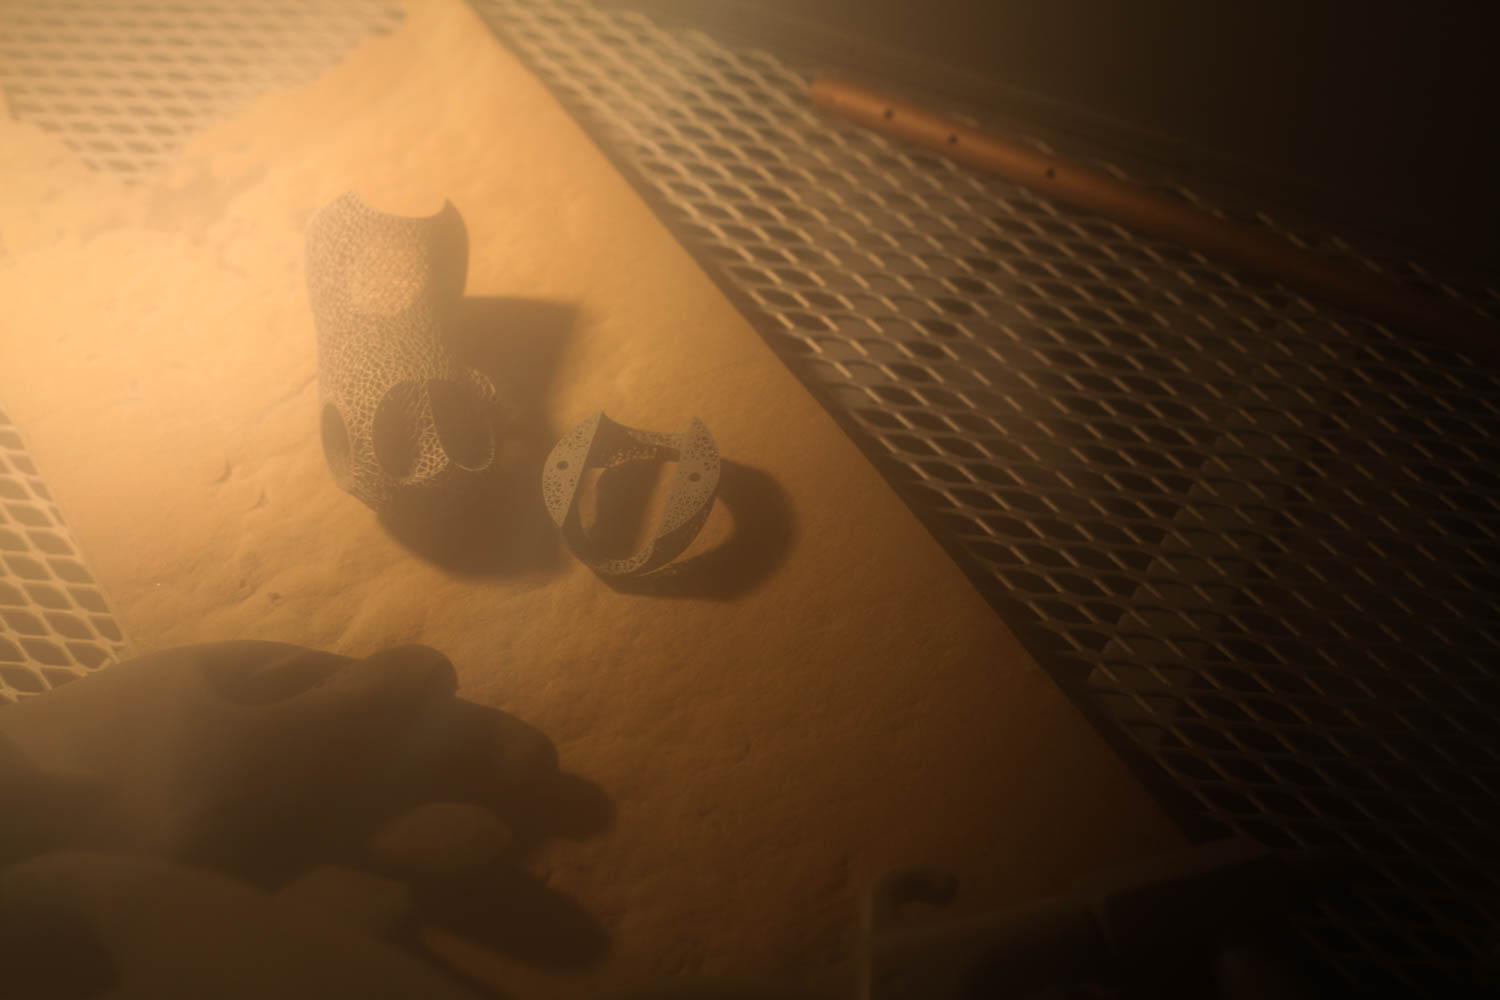
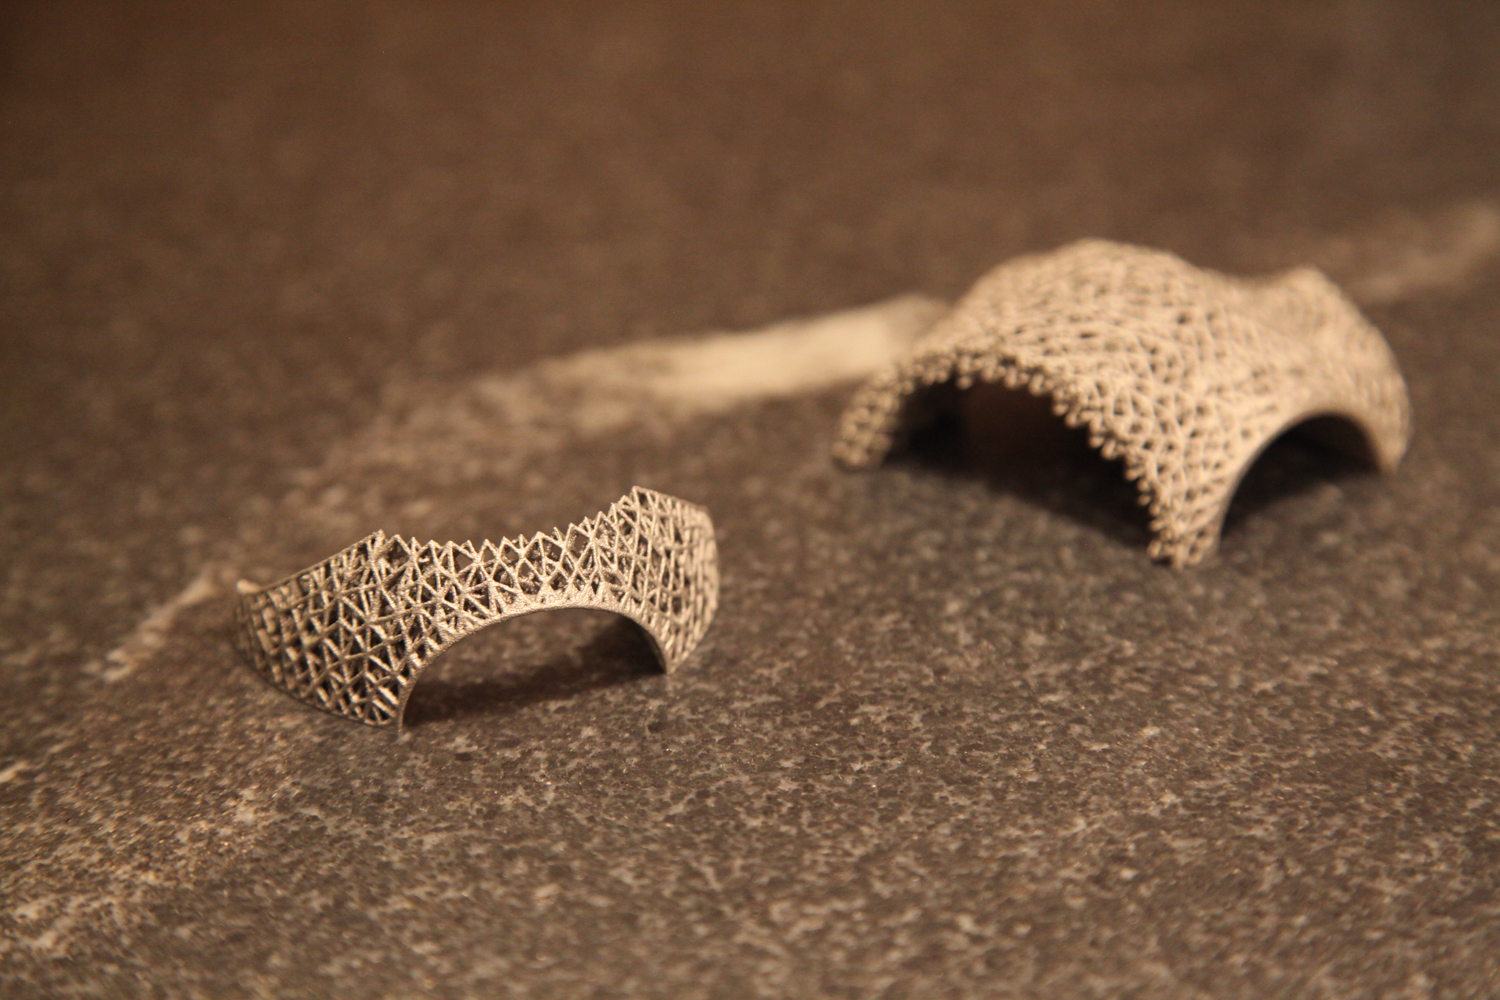
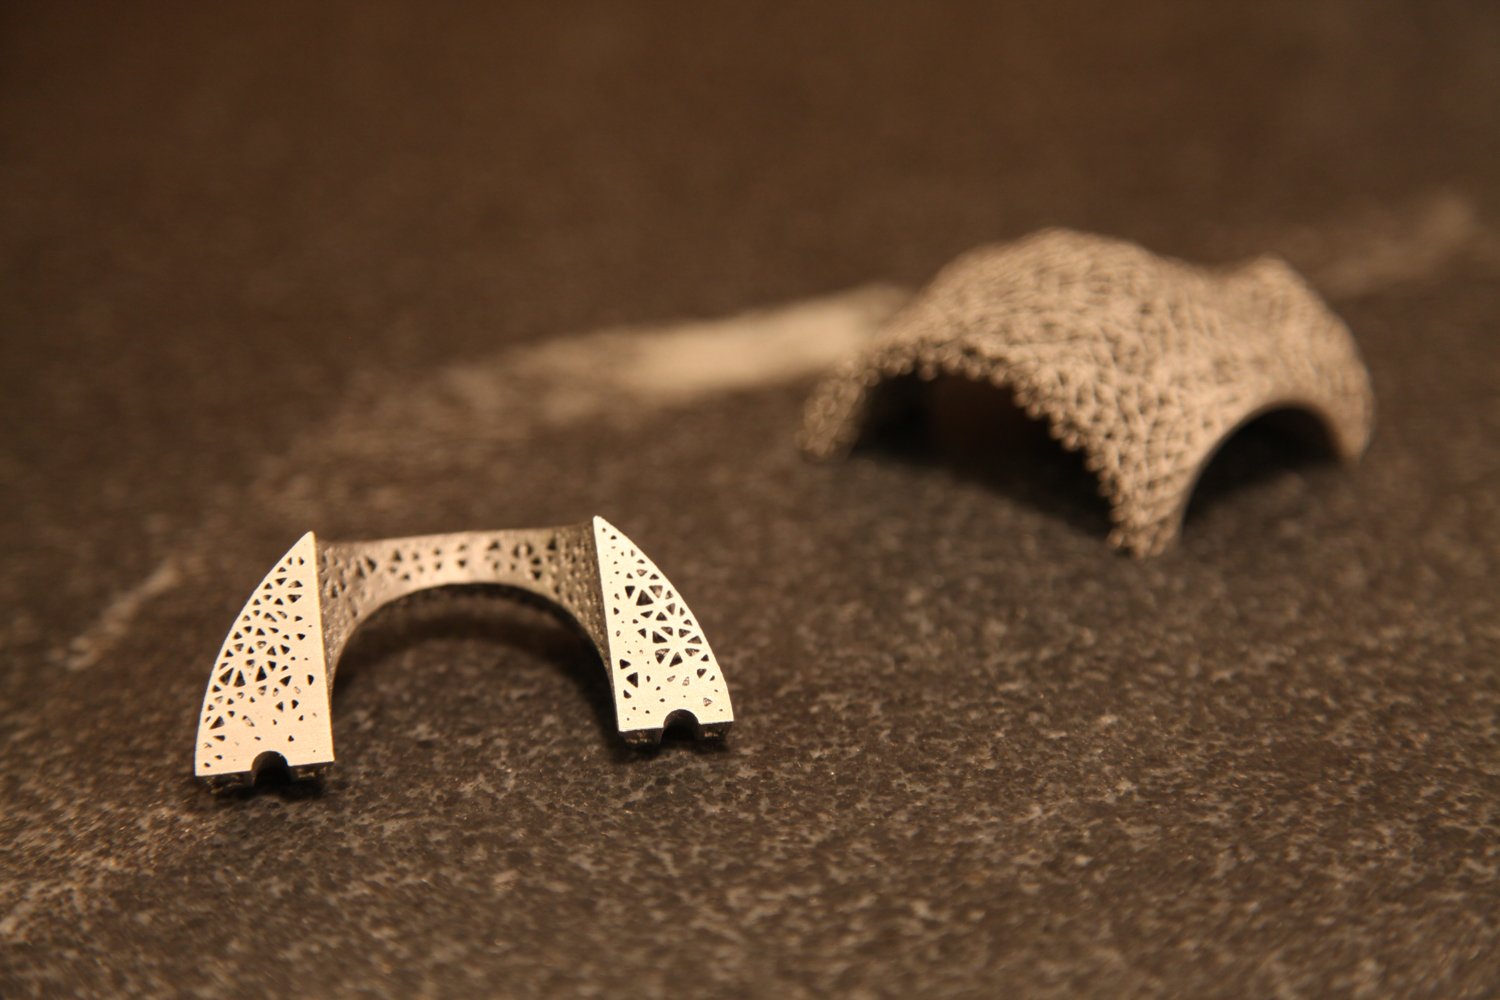
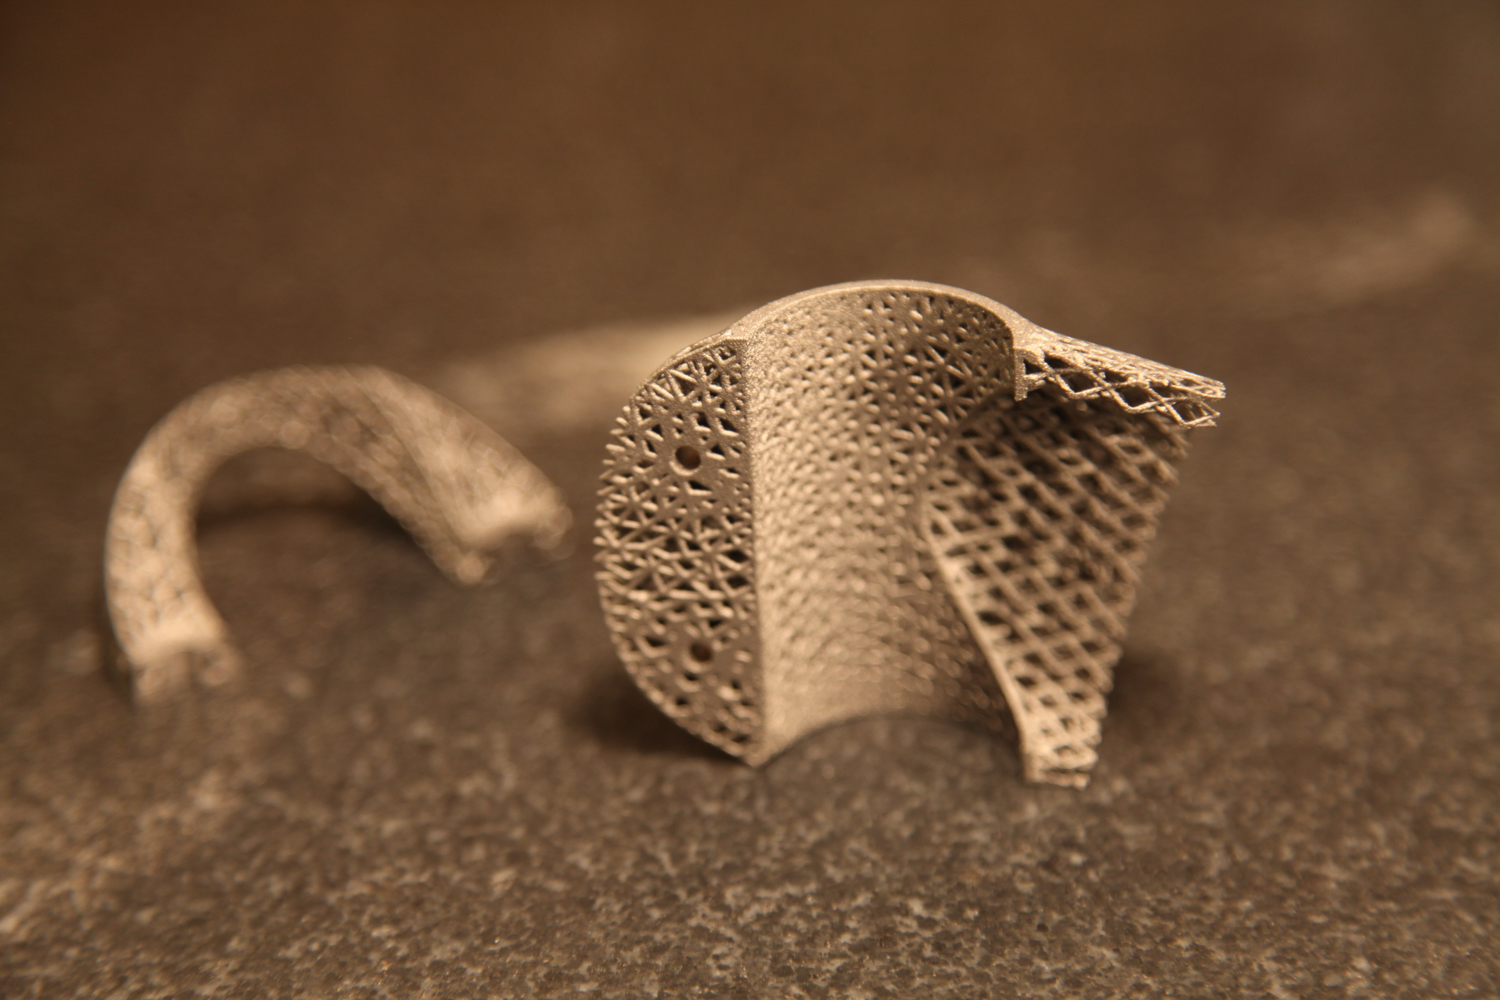
The photos in this tweet have been public for over a year now. I've been aware of the project since last June; it was created by Arup, the fascinating global design firm (whose ownership structure is similarly fascinating). They needed a more efficient way to design and manufacture a whole series of nodes for a tensile structure, and for a variety of reasons (including, if I recall correctly, the fact that each node was both unique and difficult to manufacture conventionally) they decided to try out additive manufacturing. As it happens, I was lucky enough to speak to the designer (Salomé Galjaard) by phone a few months ago, and enjoyed hearing about the way they're thinking of applying AM to large construction projects.

In short: I'm a fan of the project, and love to see it get more exposure. There's something about the particular wording of Jo Liss's tweet, though, that is strange to me. Specifically, I find myself asking whether a computer did, indeed, design the new nodes.

(Note: I don't know Jo Liss and don't mean to be overly critical of her choice of wording; it's simply a jumping off point for some things I've been mulling over. I also don't believe that I have any proprietary or particularly insightful information about how Arup went about designing or manufacturing the nodes in question.)

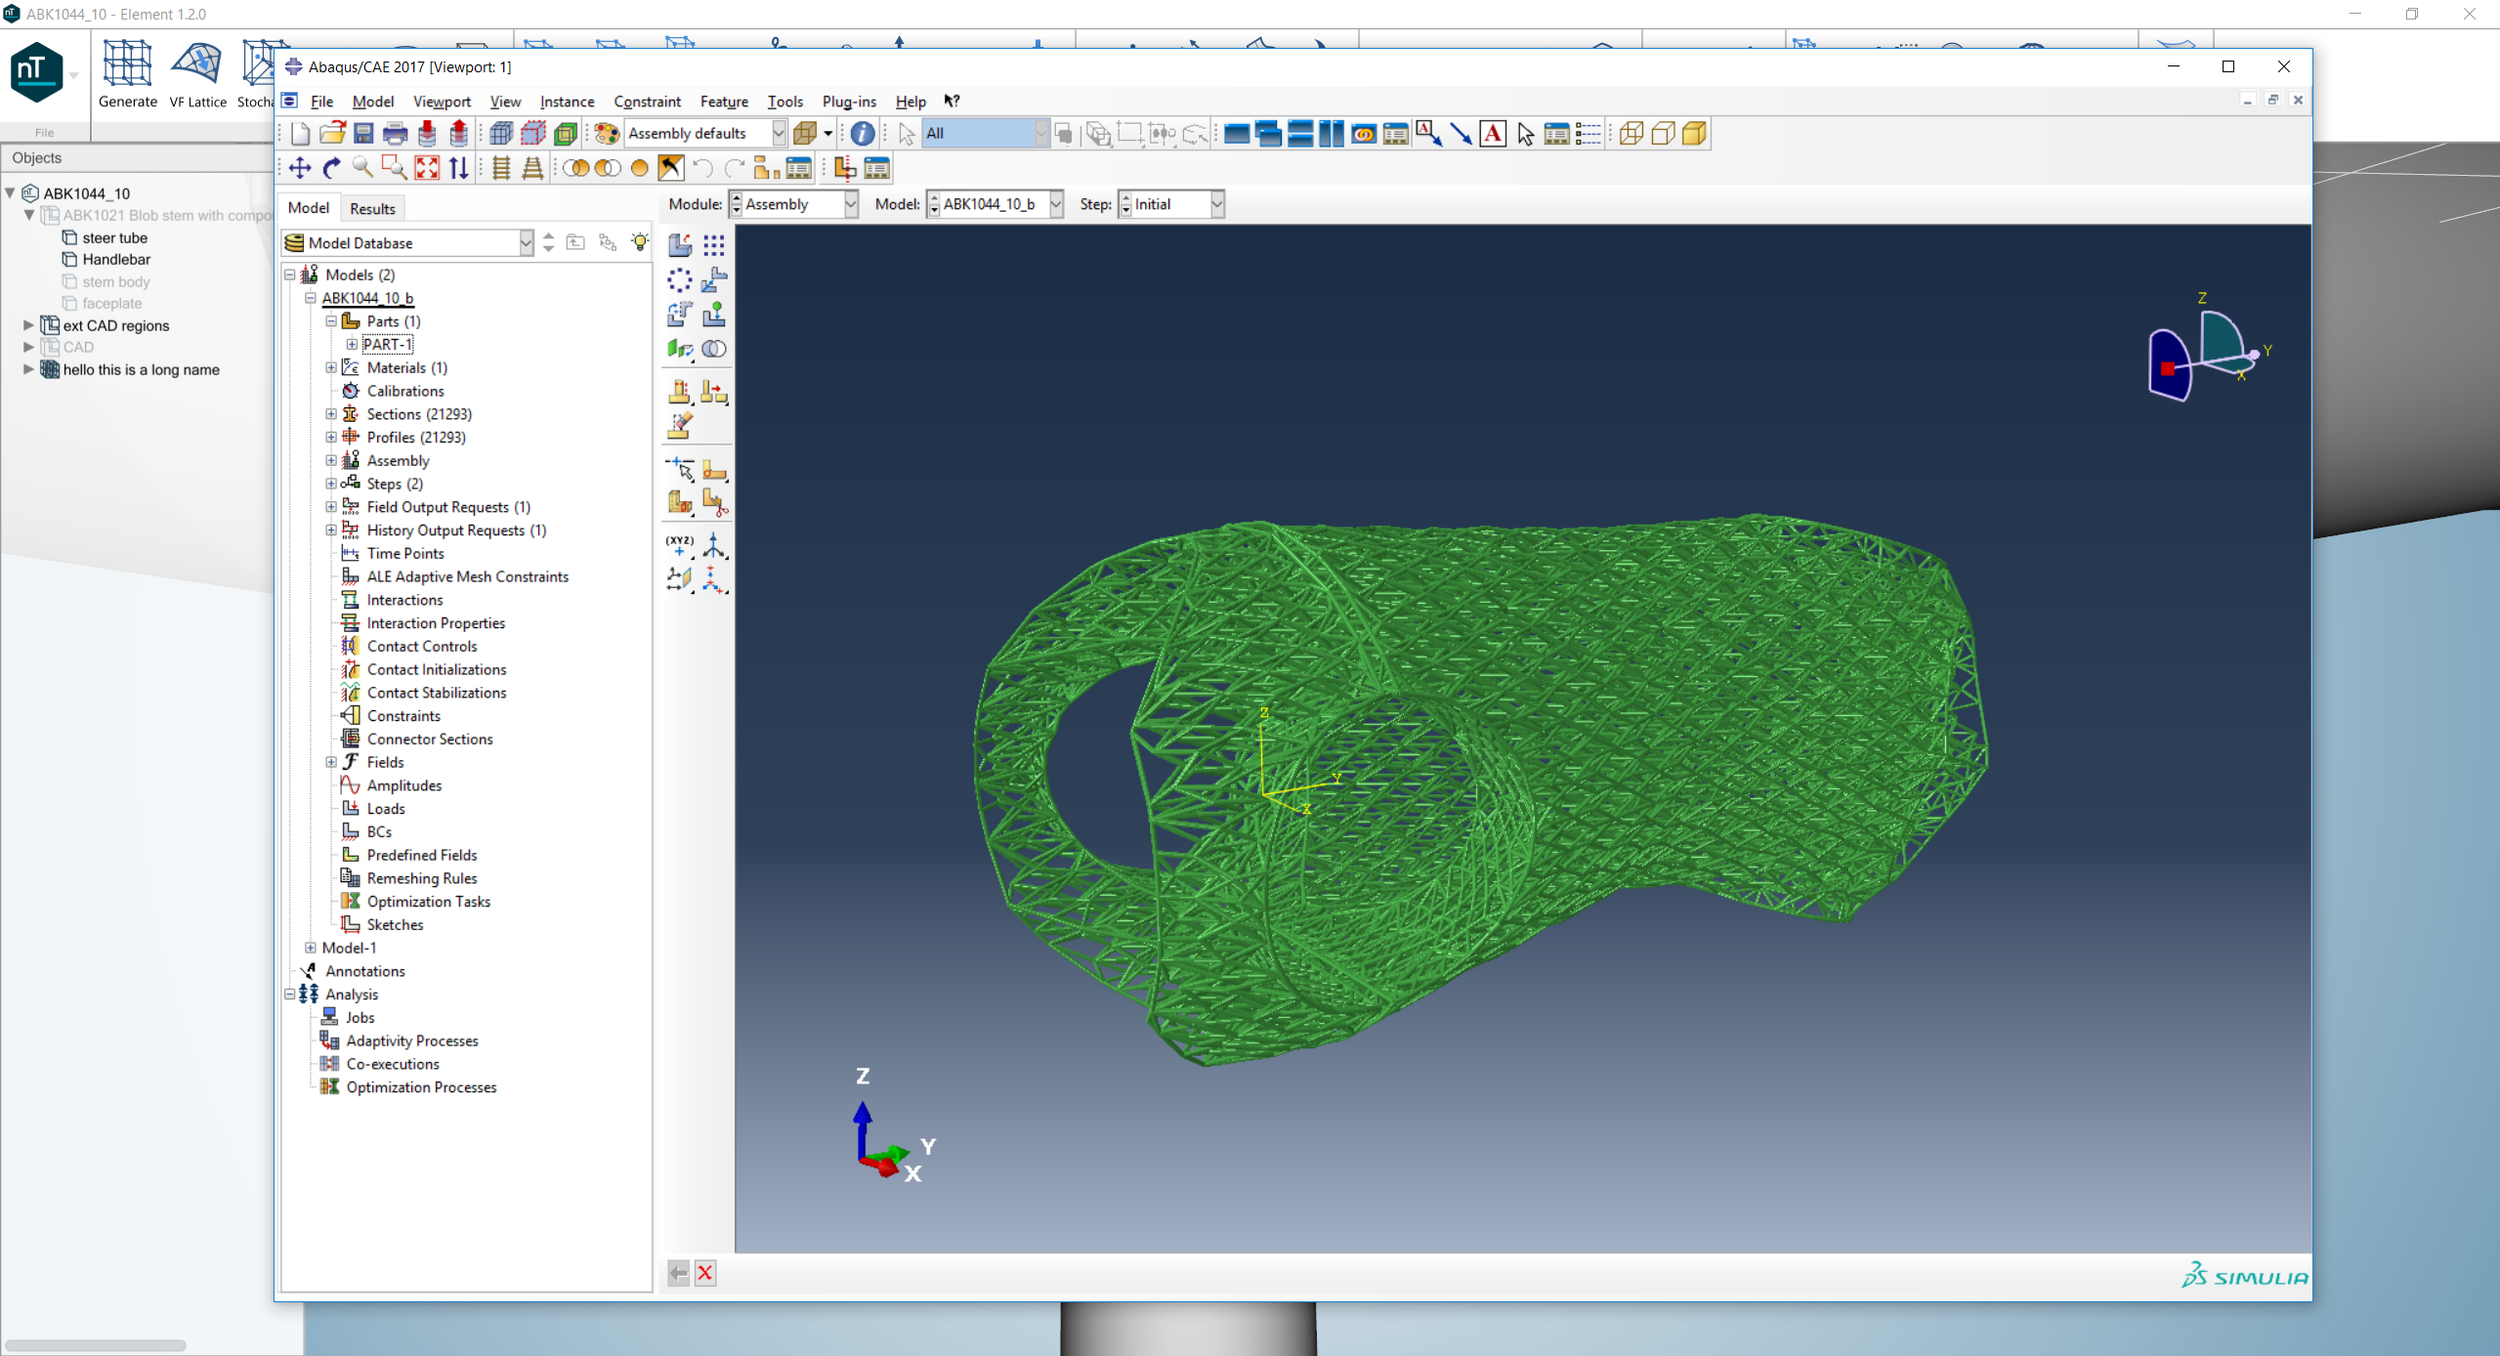
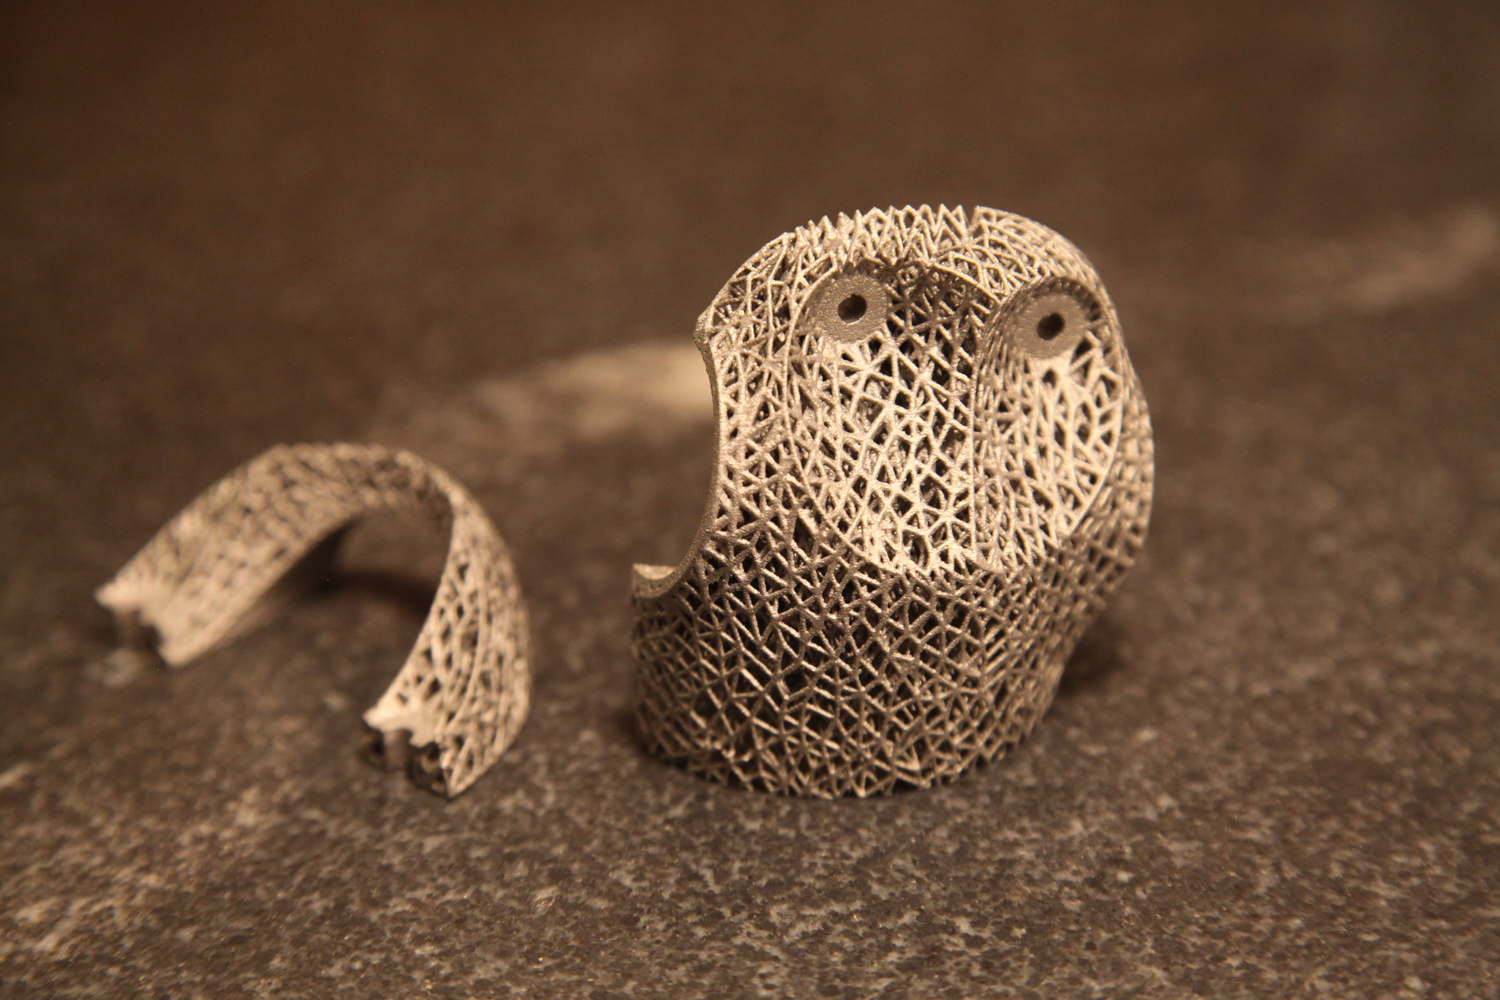
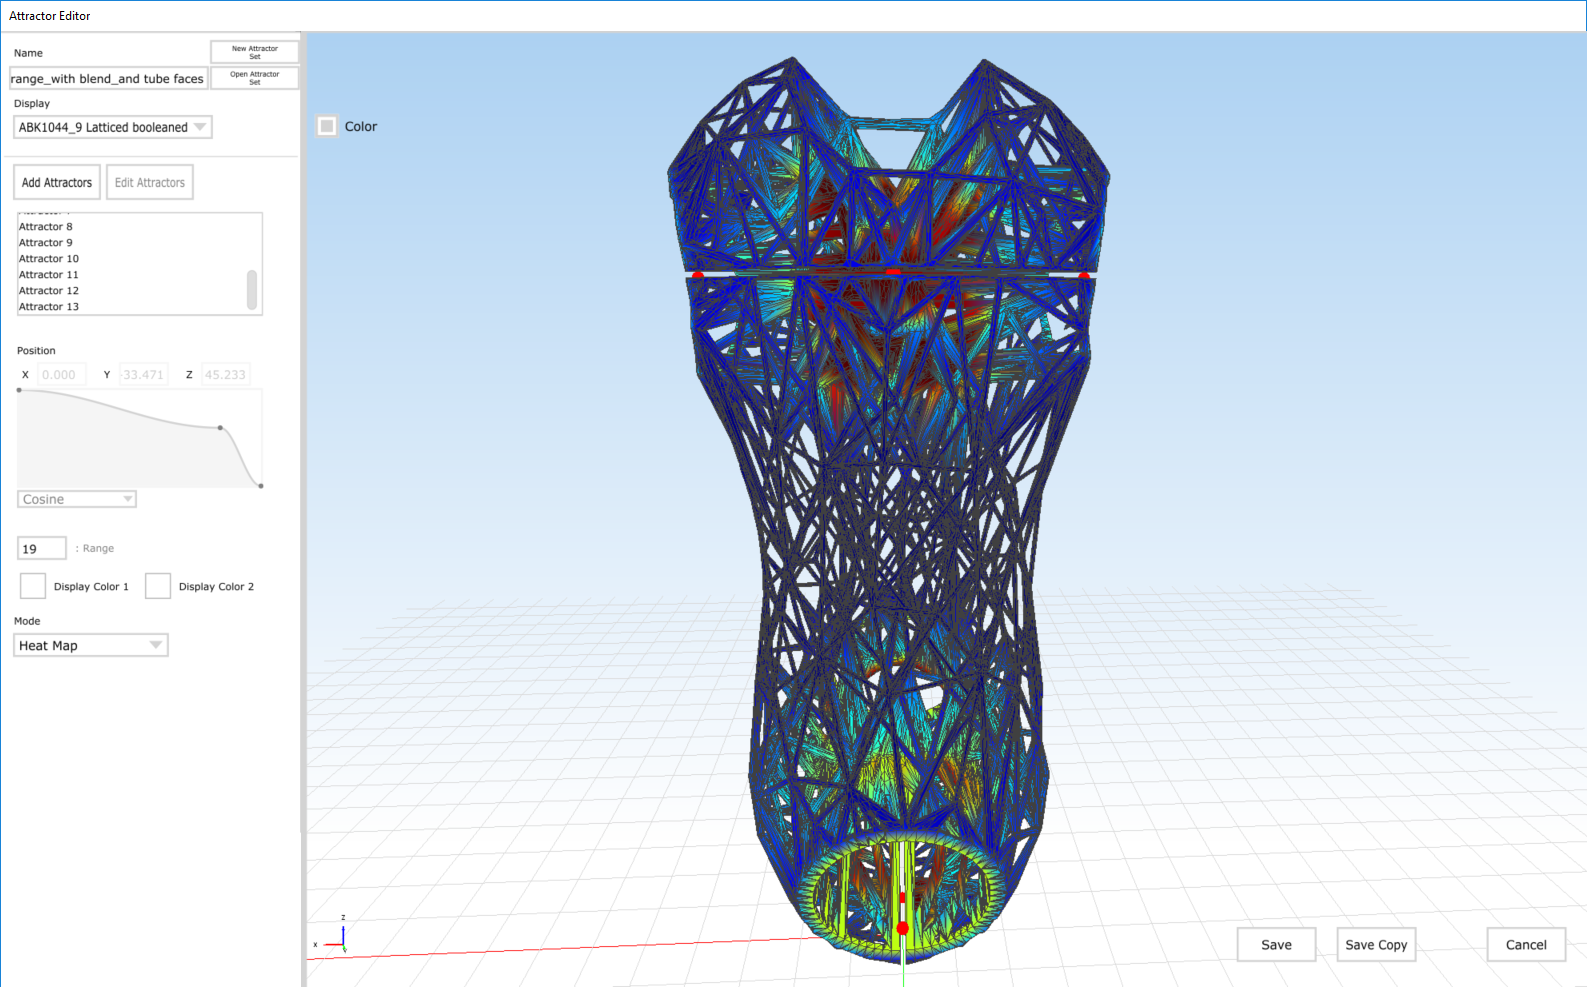
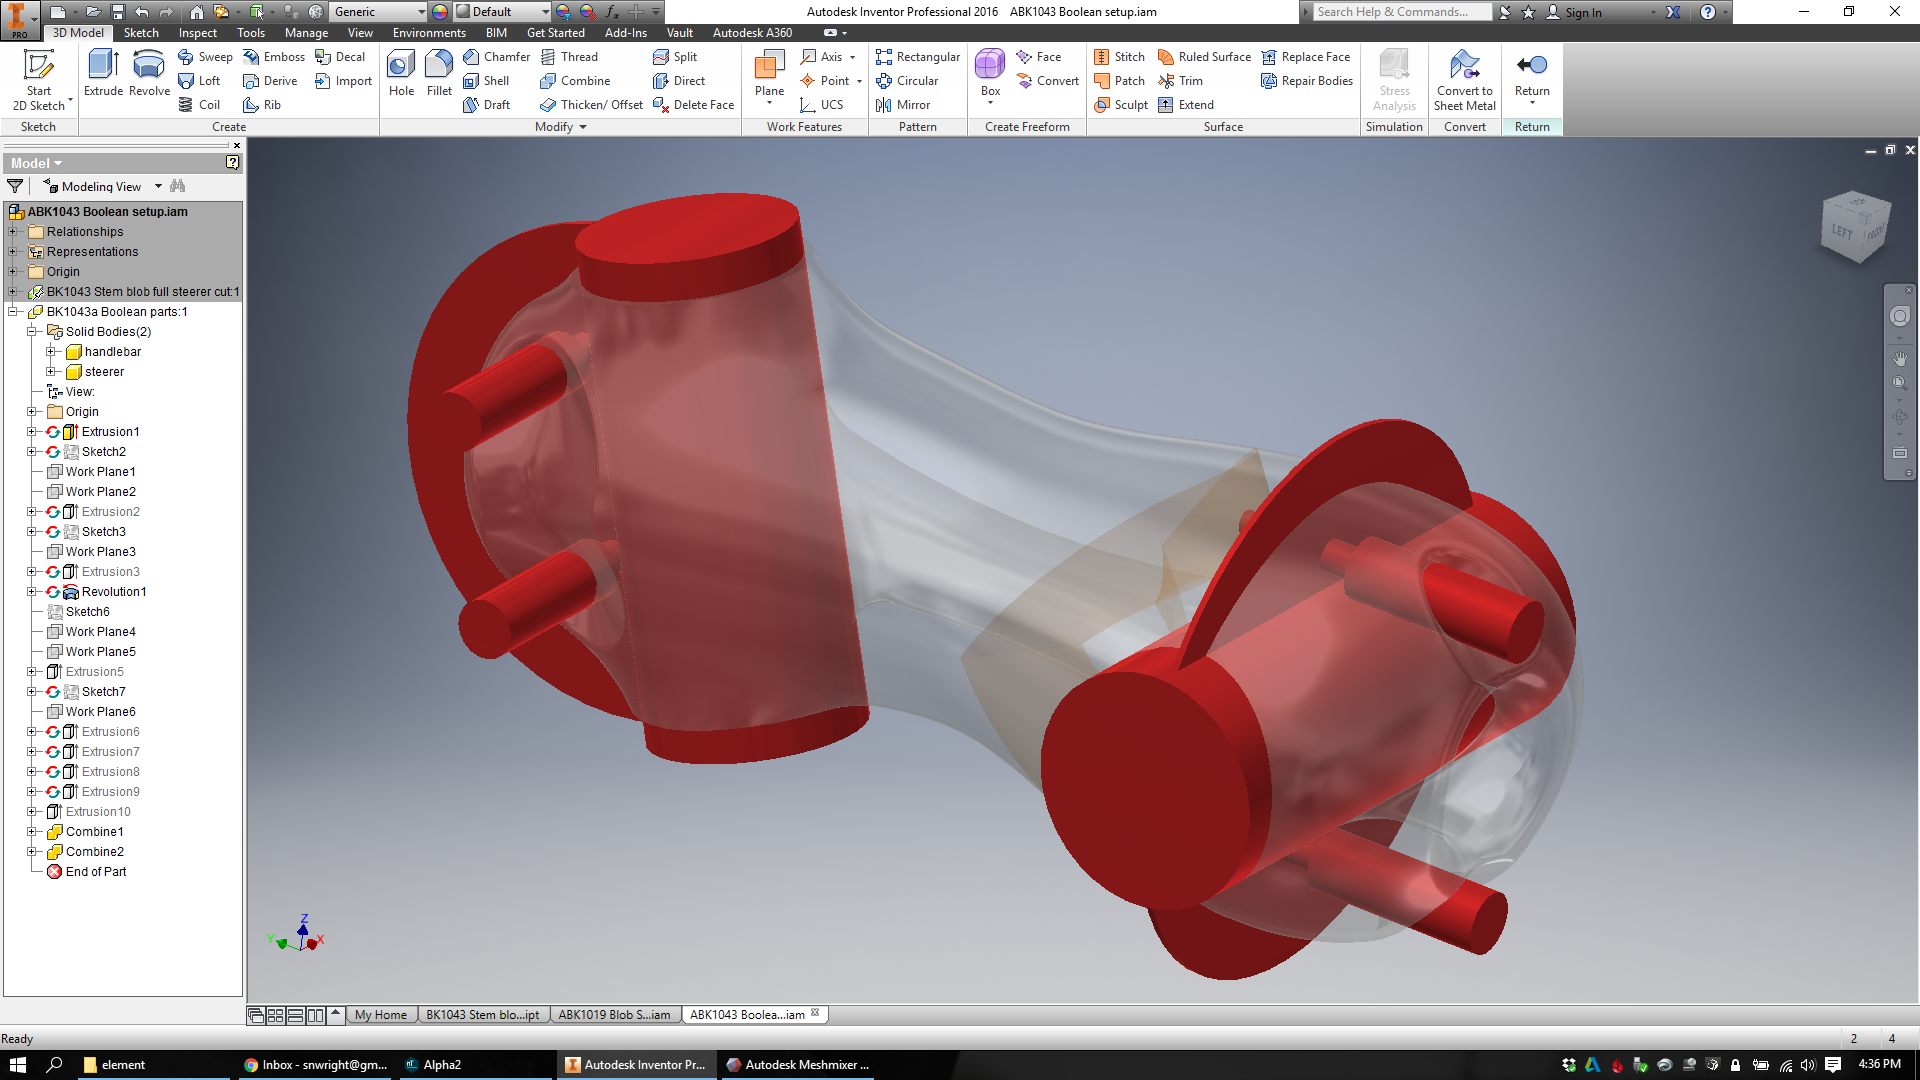
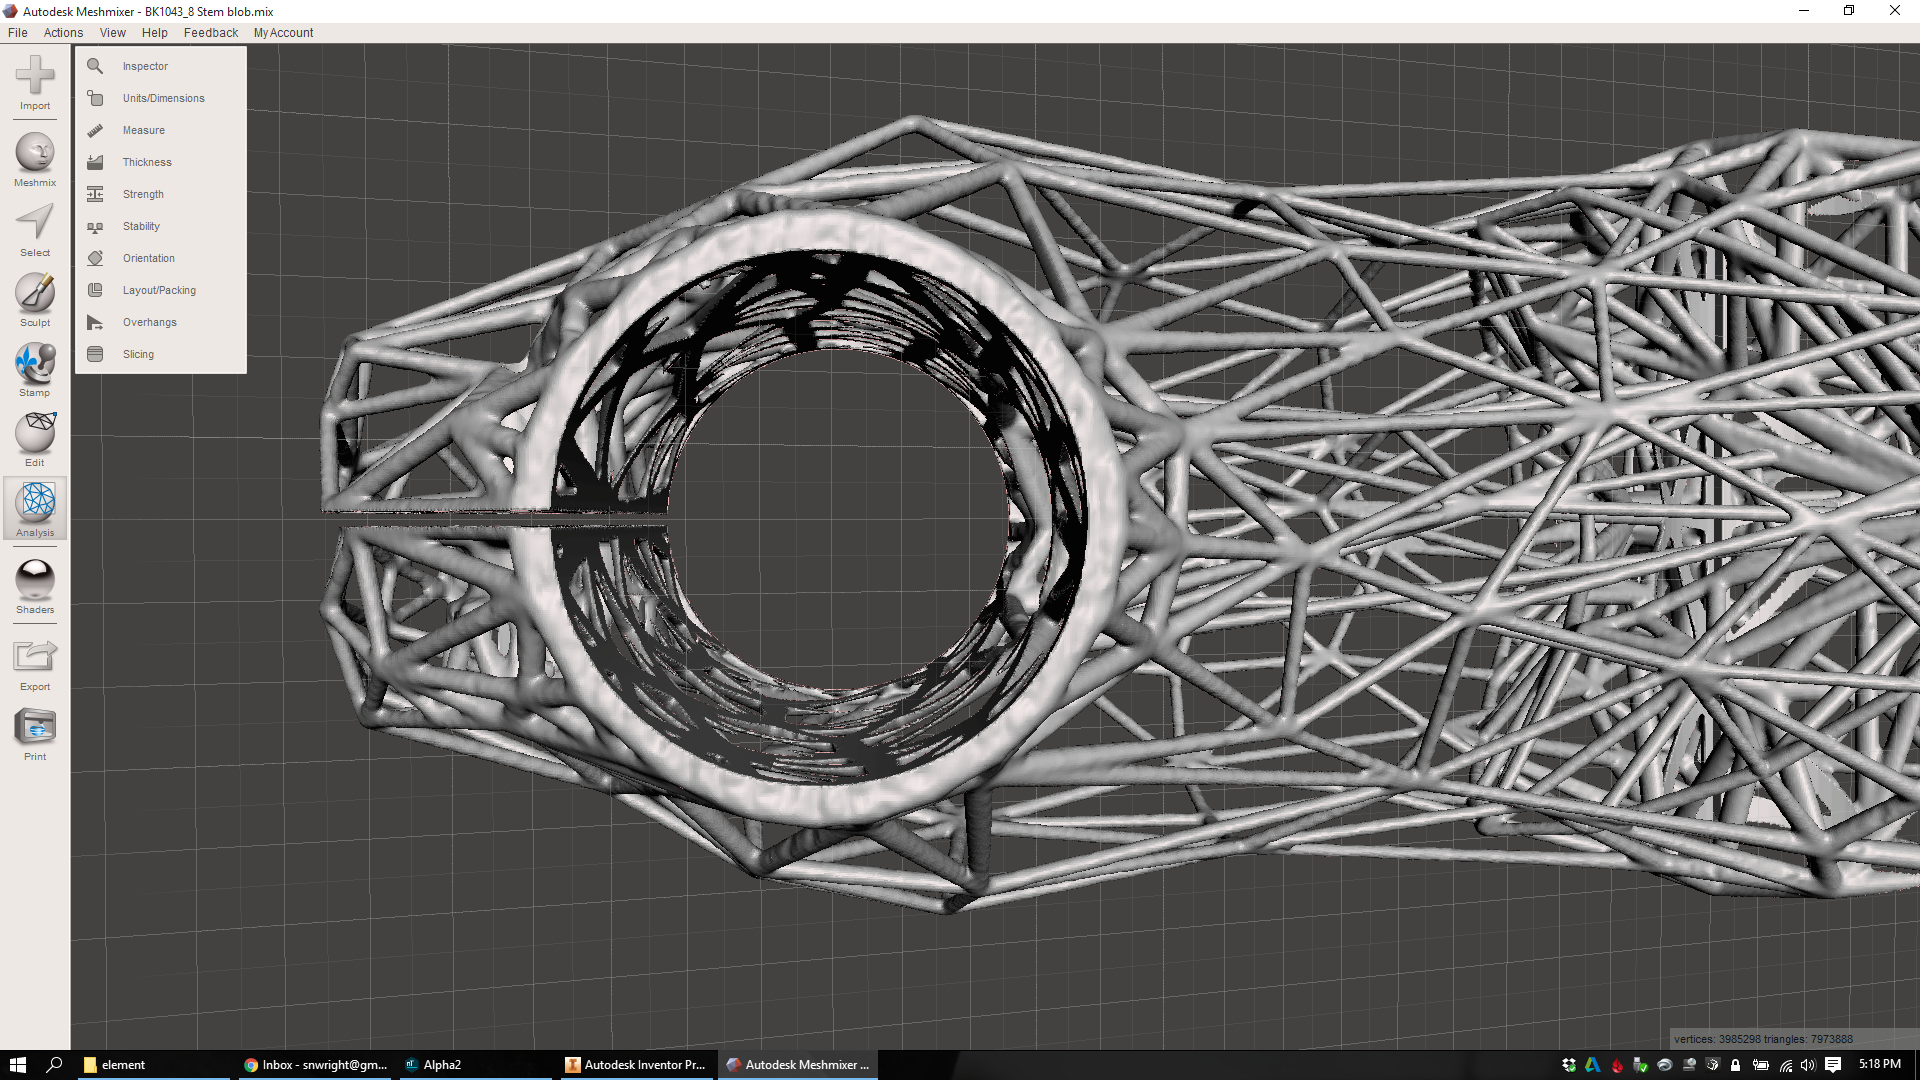
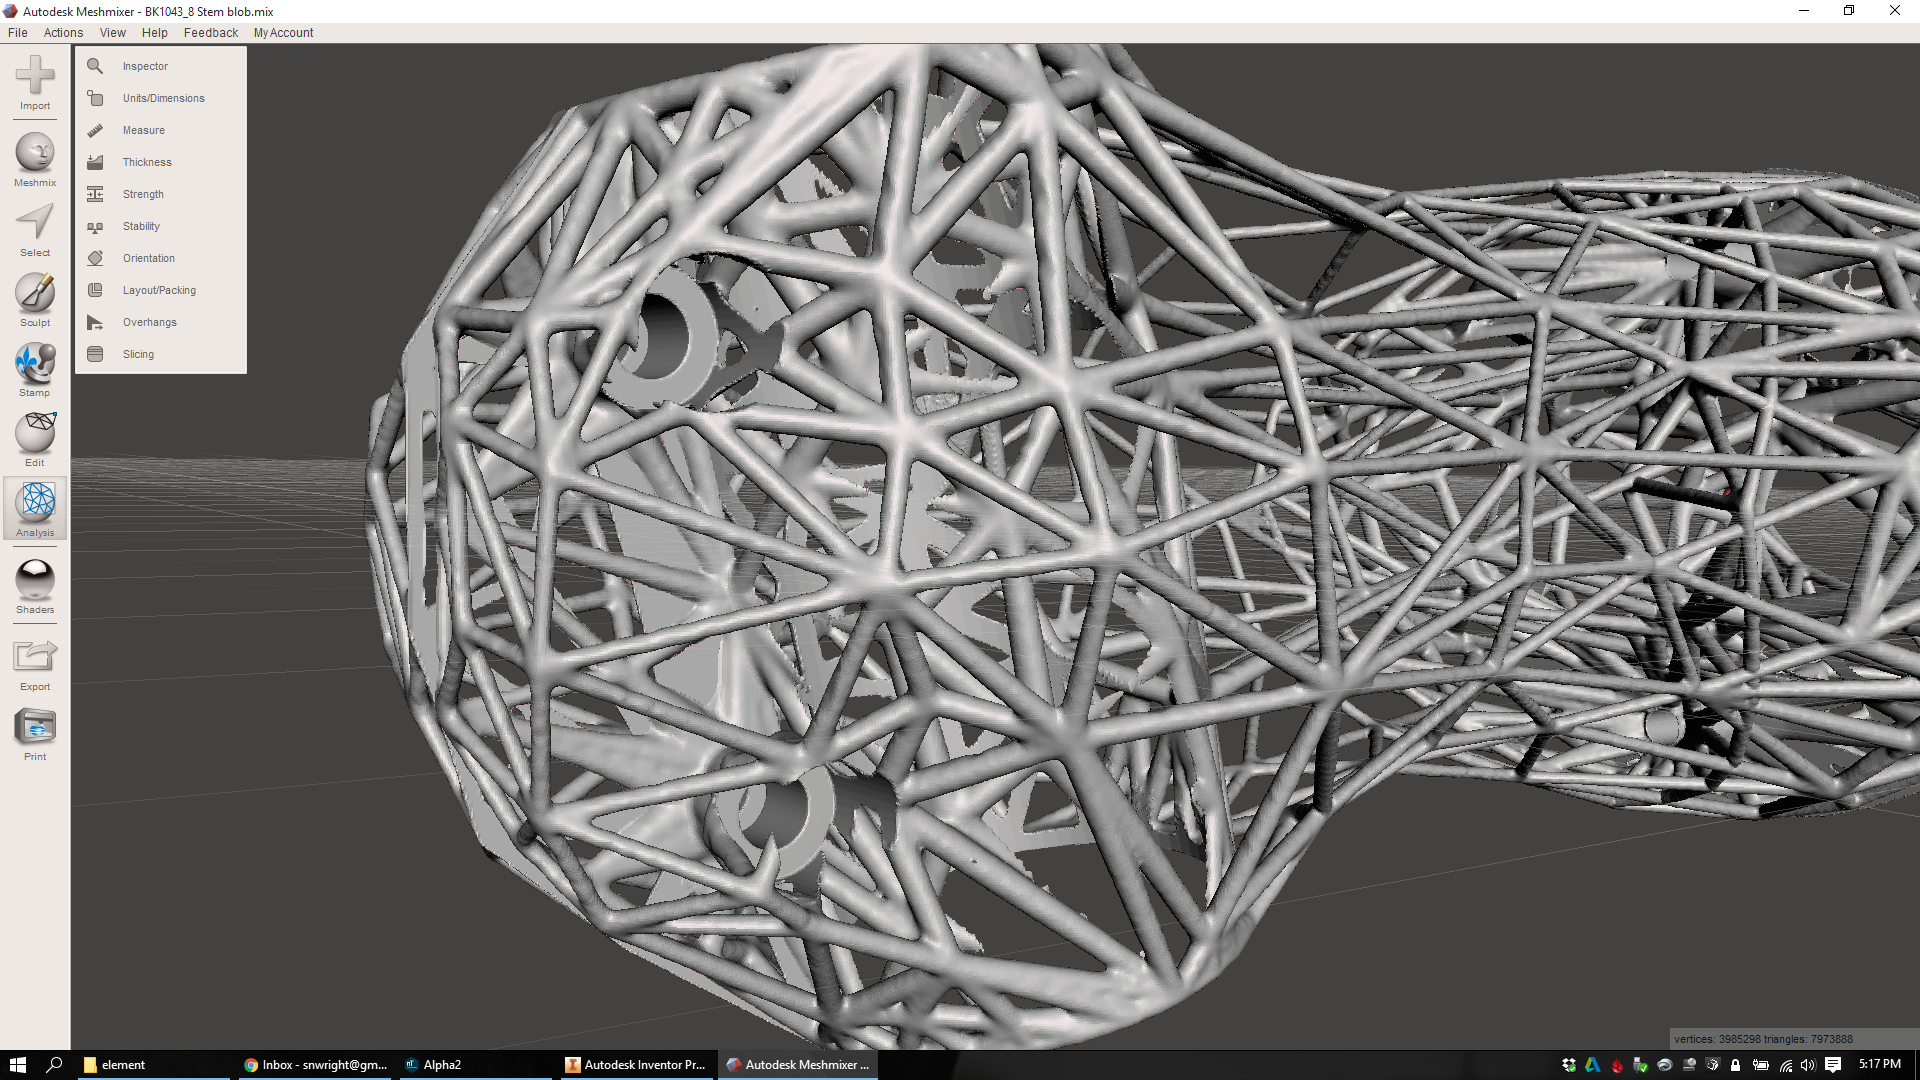
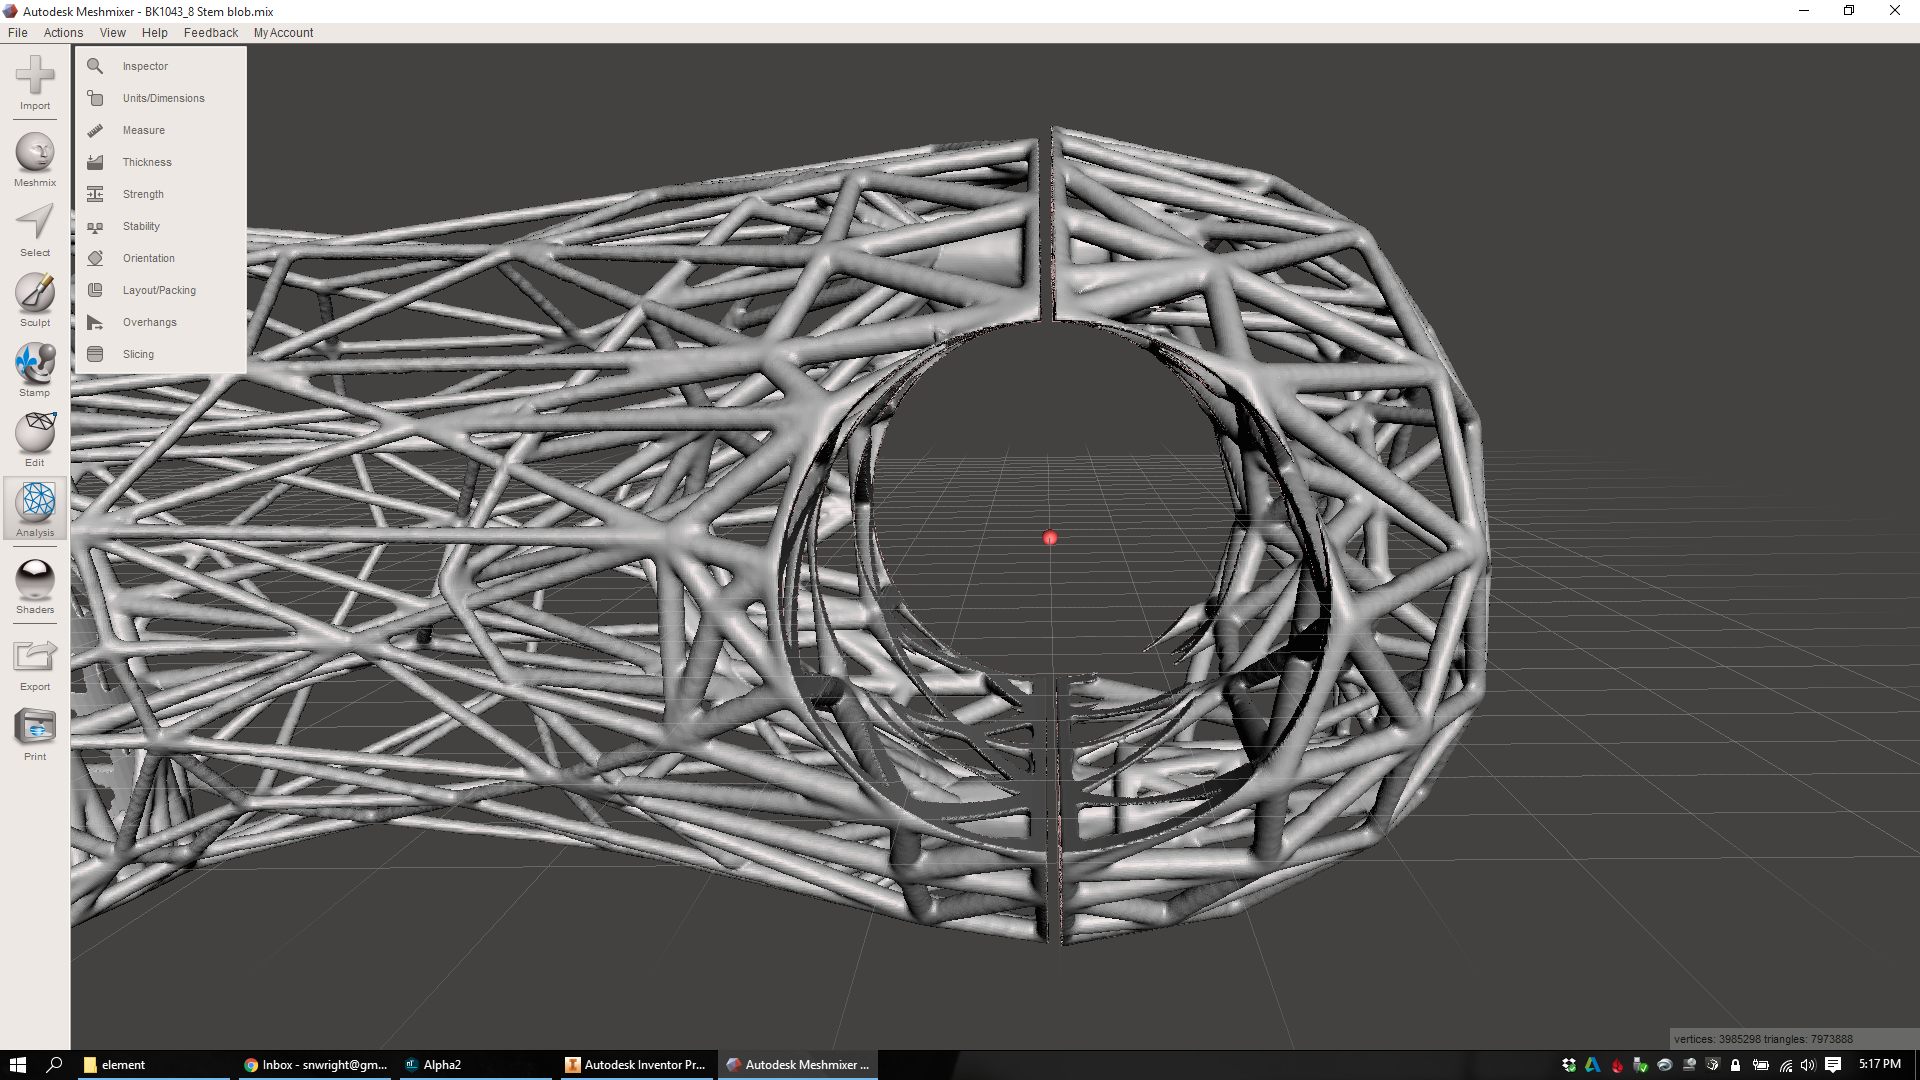
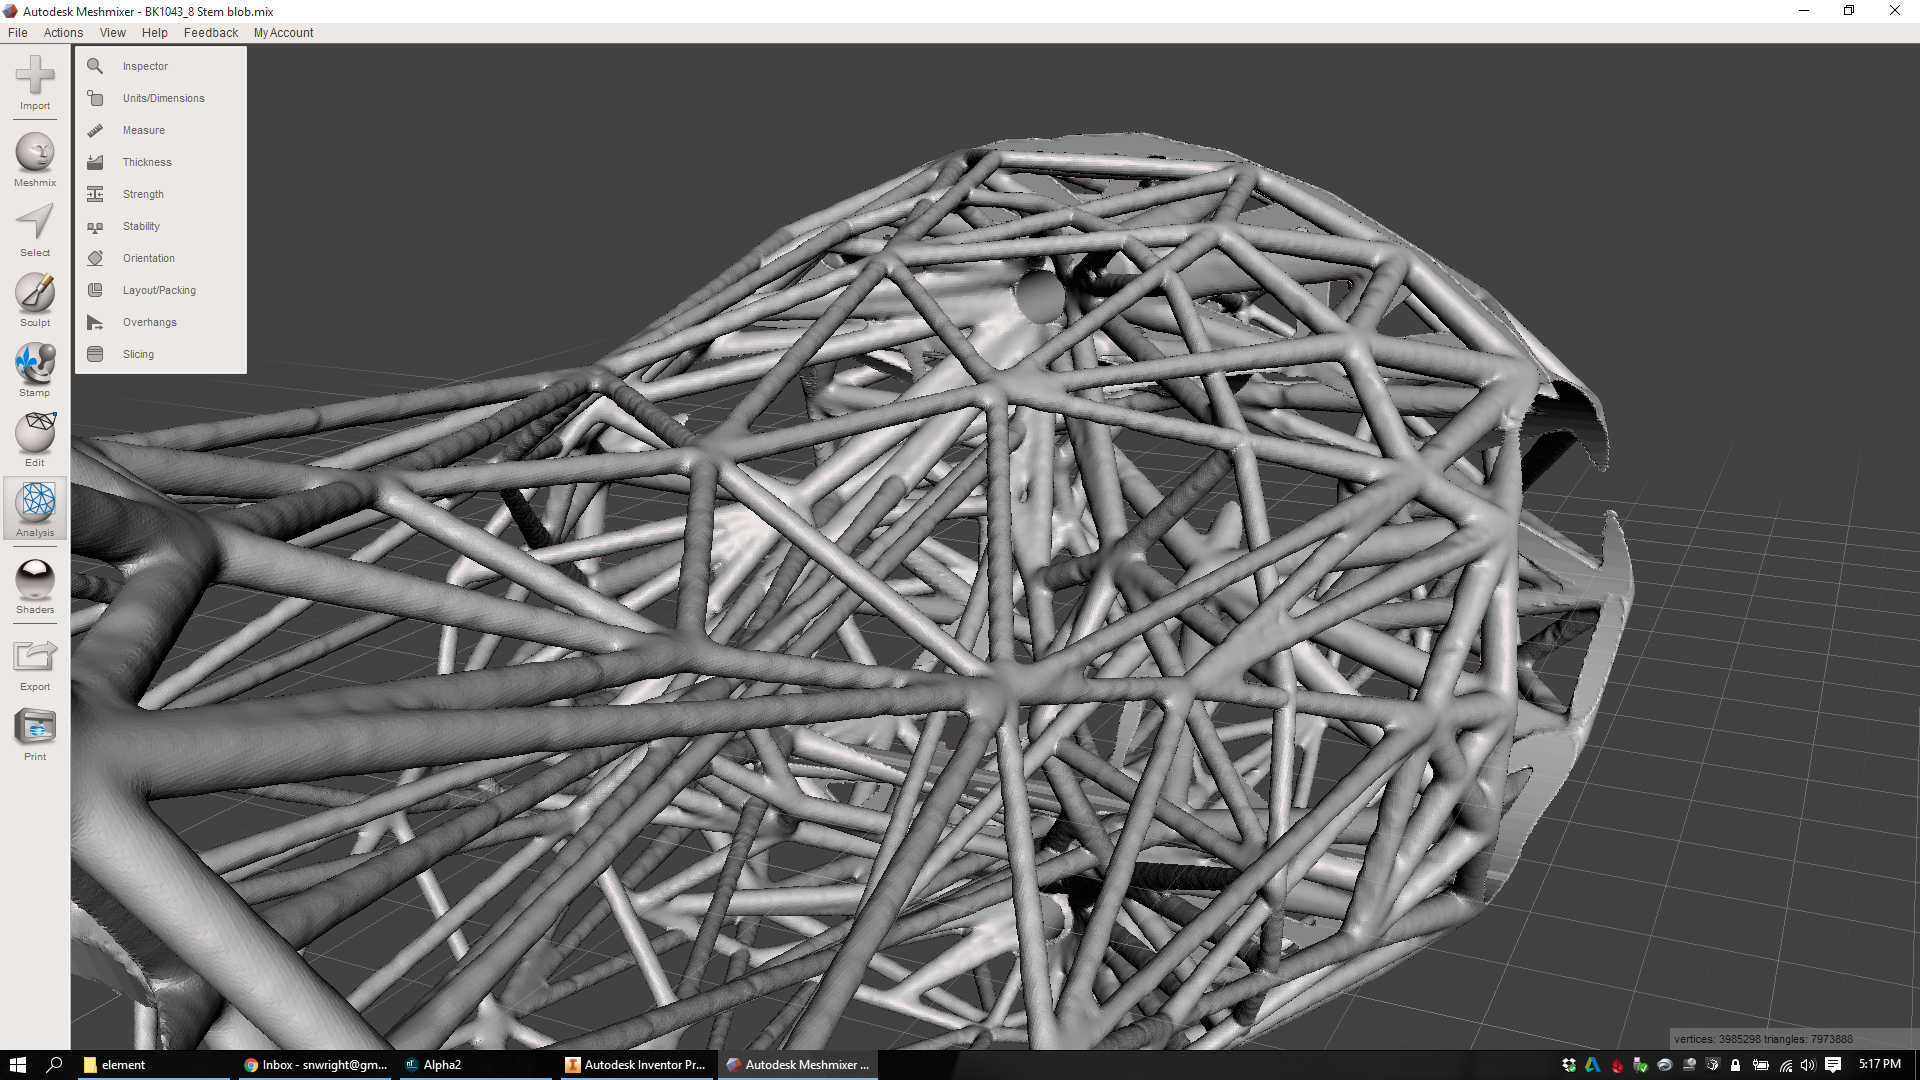
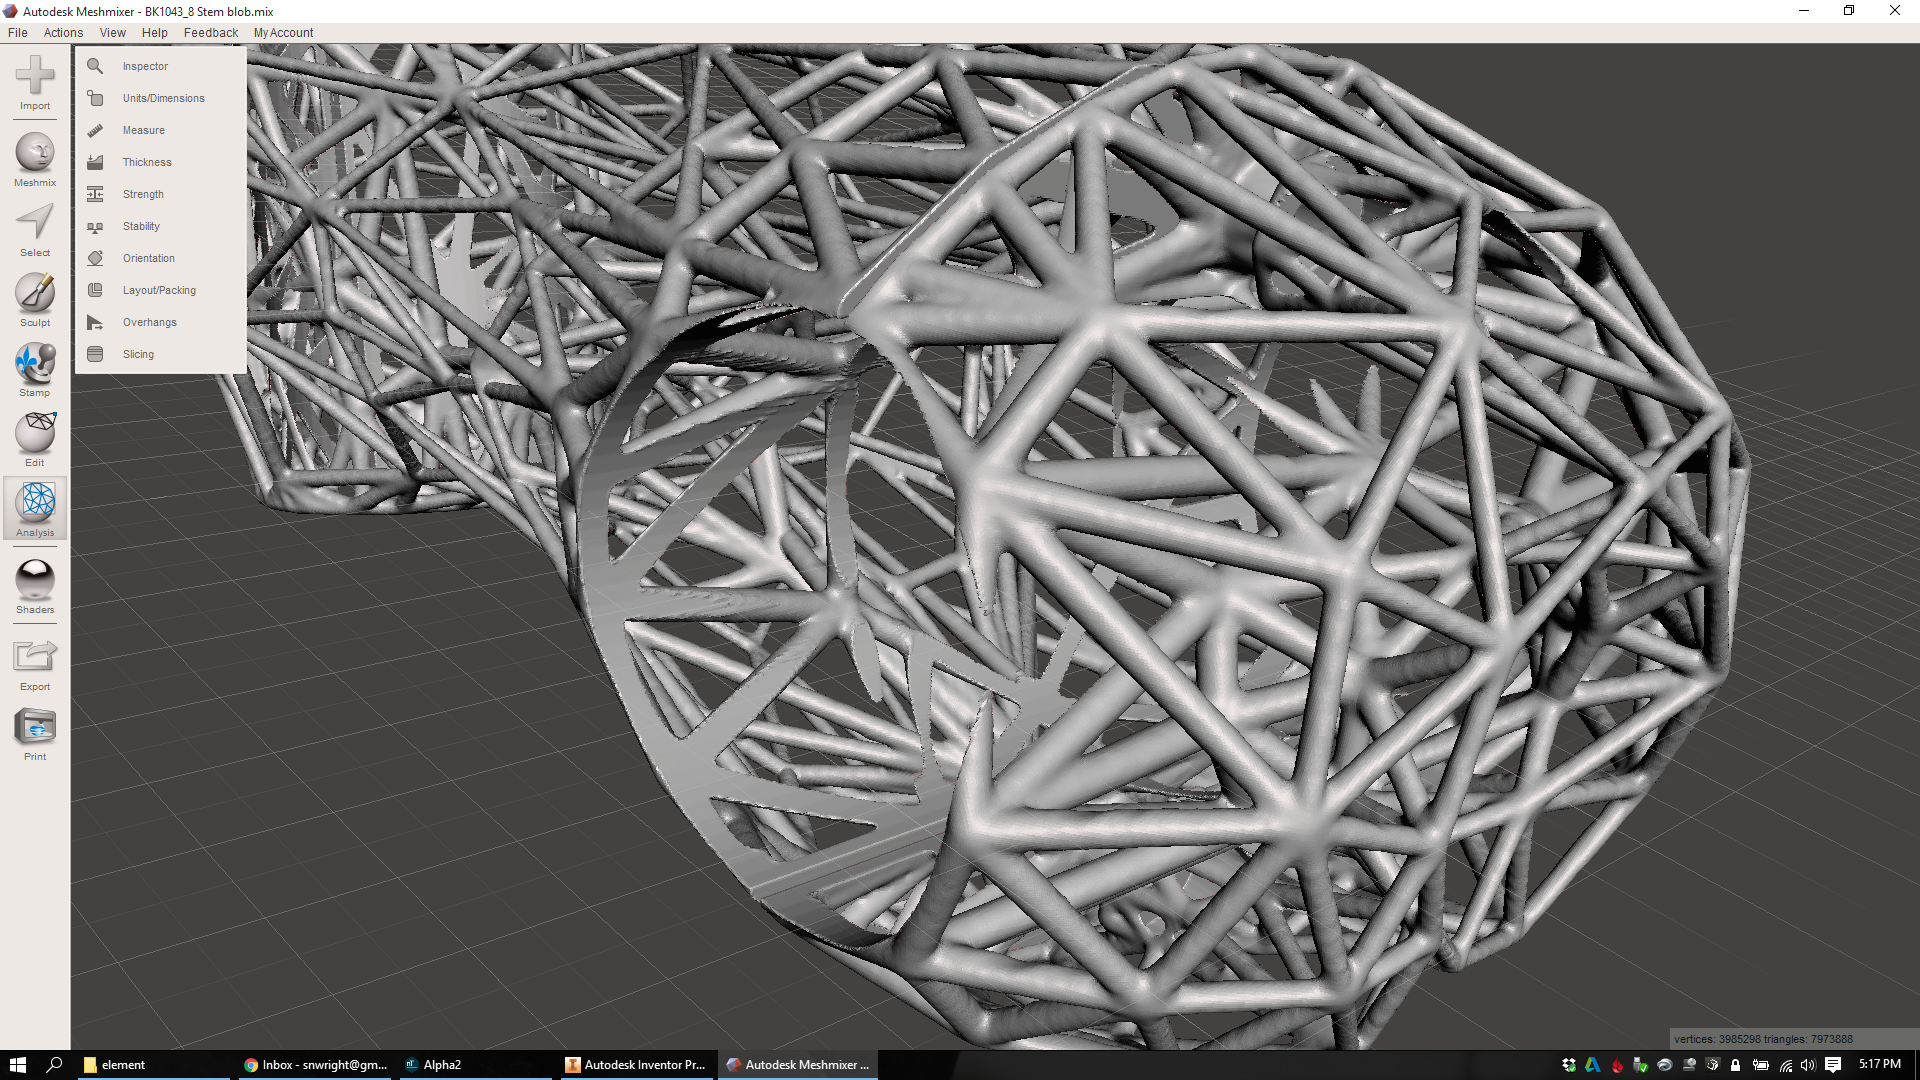
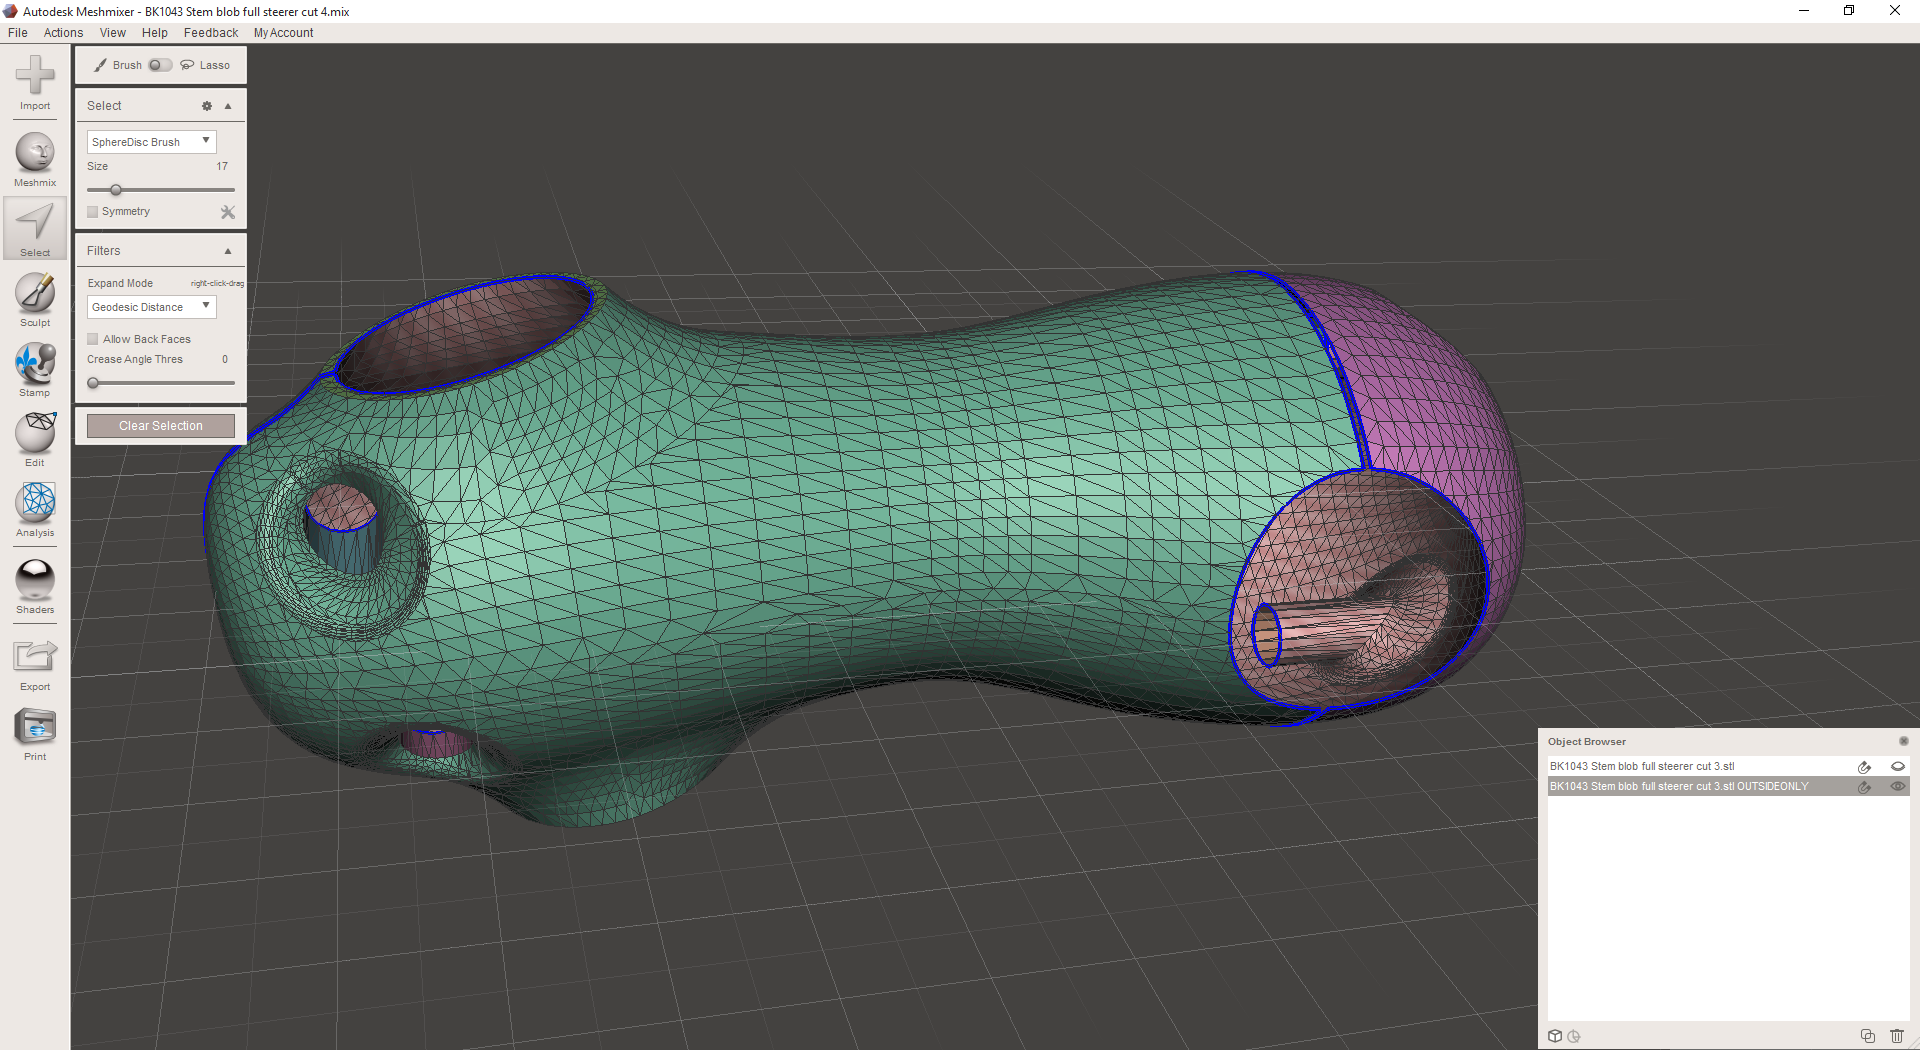
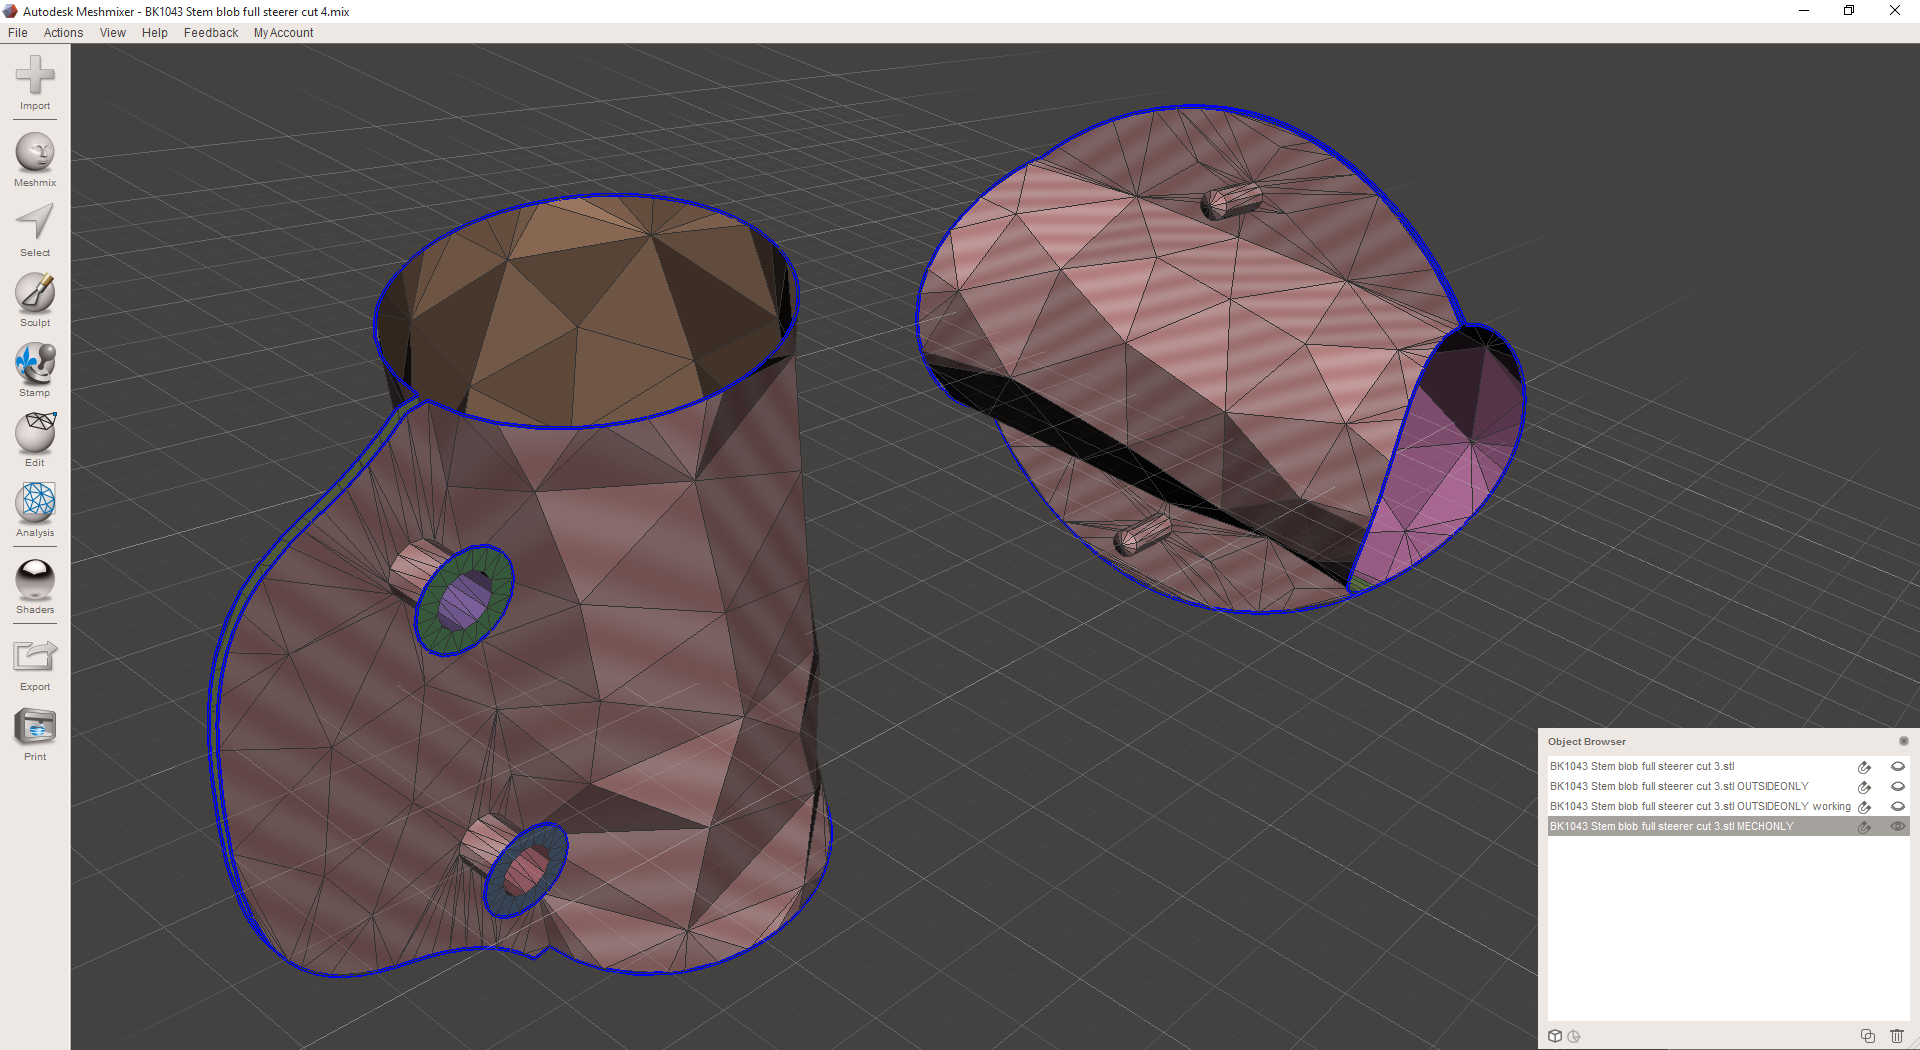
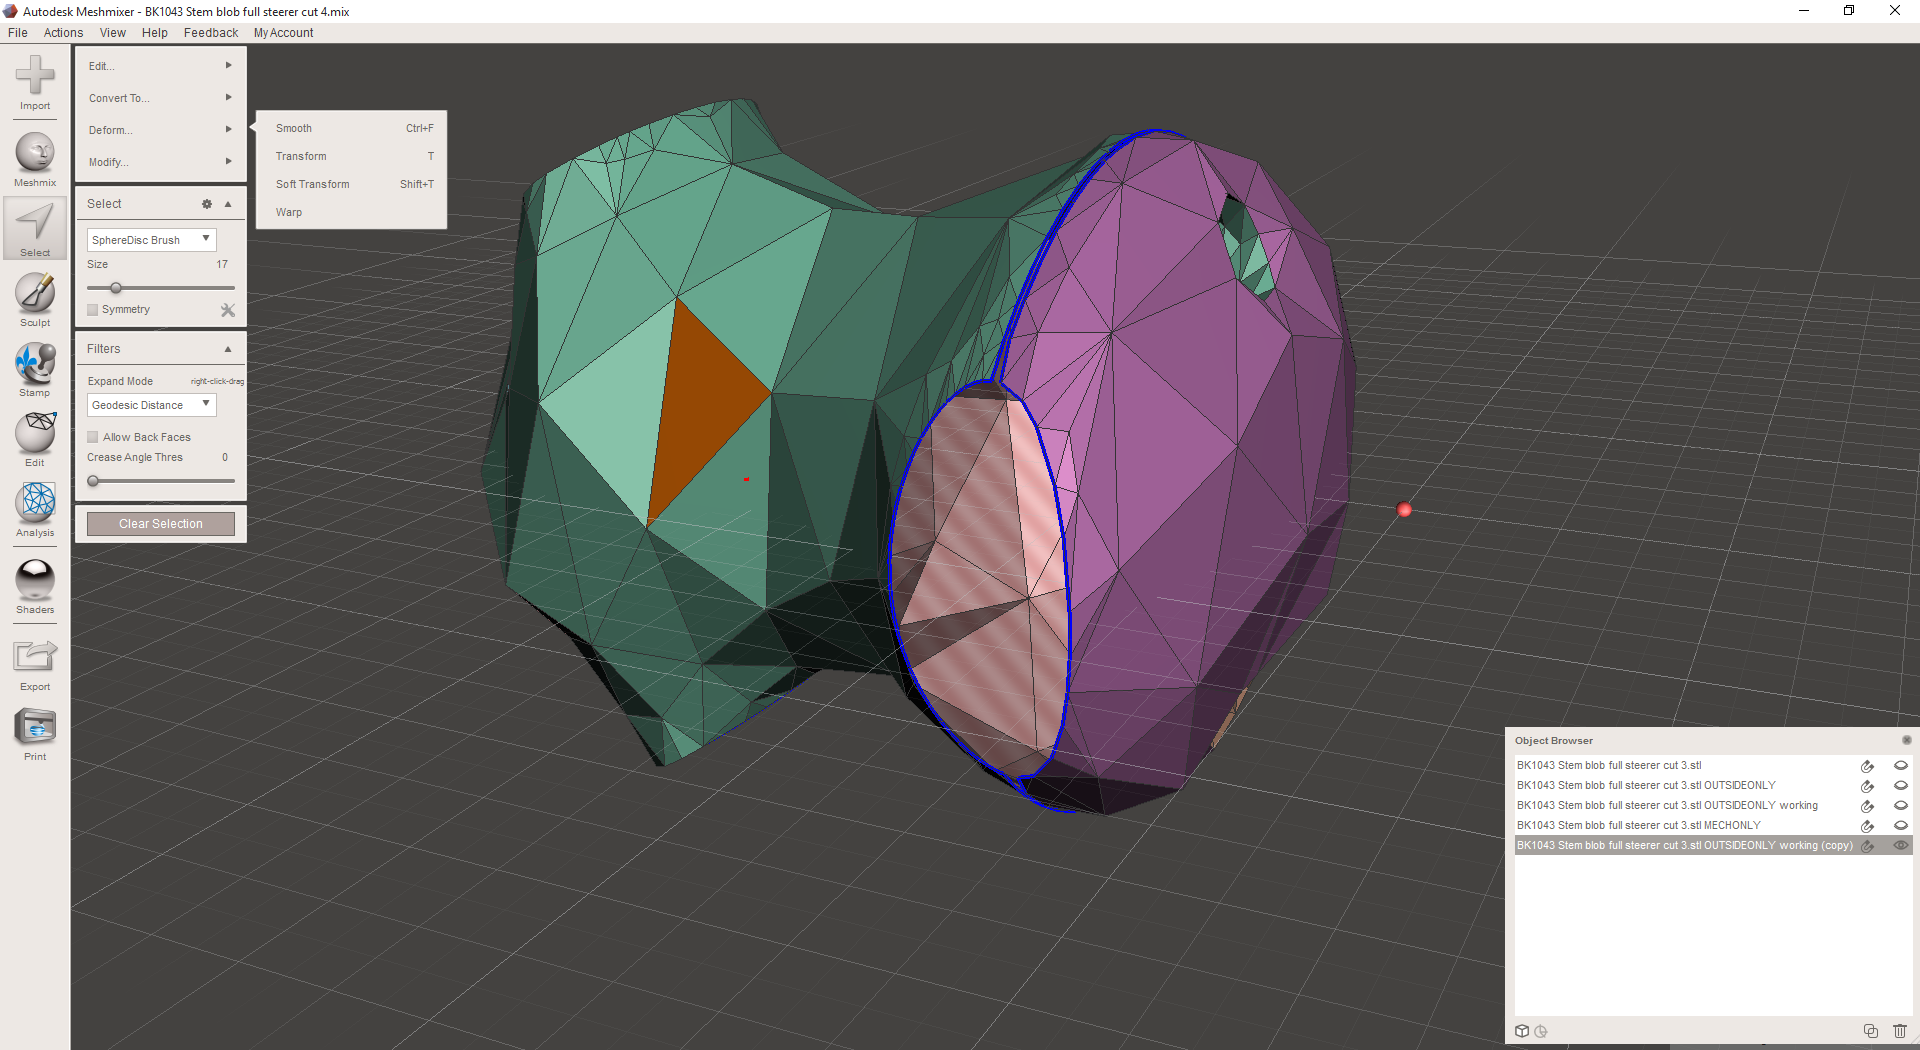
As far as I can tell, Arup's process worked like so: Engineers modeled a design space, defined boundary conditions at the attachment points (which were predefined), and applied a number of loading conditions to the part. Here the story gets less clear; some reports mention topology optimization, and others say that Arup worked with Within (which is *not* topology optimization). My suspicion is that they used something like solidThinking Inspire to create a design concept, and then modeled the final part manually in SolidWorks or similar. Regardless, we can be nearly sure that the model that was printed was indeed designed by a human; that is, the actual shapes and curves we see in the part on the right were explicitly defined by an actual engineer, NOT by a piece of software. This is because nearly every engineered component in AEC needs to be documented using traditional CAD techniques, and neither Within nor solidThinking (nor most of the design optimization industry) supports CAD export. As a result, most parts that could be said to be "designed by a computer" are really merely sketched by a computer, while the actual design & documentation is done by a human.

This may seem like a small quibble, but it's far from trivial. Optimization (whether shape, topology, or parametric) software is expensive, and as a result most of the applications where it's being adopted involve expensive end products: airplanes, bridges, hip implants, and the like. Not coincidentally, those products tend to have stringent performance requirements - which themselves are often highly regulated. Regulation means documentation, and regulating bodies tend not to be (for totally legitimate reasons which are a bit beyond the scope of this blog post) particularly impressed with some computer generated concept model in STL or OBJ format. They want real CAD data, annotated by the designer and signed off by a string of his or her colleagues. And we simply haven't even started to figure out how to get a computer to do any of that stuff.

I'm reminded here also of something that I've spent a bunch of time considering over the past six months. The name "CAD" (for Computer Aided Design) implies that SolidWorks and Inventor and Siemens NX are actively helping humans design stuff. To me, this means making actual design decisions, like where to put a particular feature or what size and shape an object should be. But the vast majority of the time that isn't the case at all. Instead, traditional CAD packages are concerned primarily with helping engineers to document the decisions that they've already made.

The implications of this are huge. Traditional CAD never had to find ways for the user to communicate design intent; they only needed to make it easy for me to, for instance, create a form that transitions seamlessly from one size and shape to another. For decades, that's been totally fine: the manufacturing methods that we had were primarily feature based, and the range of features that we've been good at making (by milling, turning, grinding, welding, etc) are very similar to the range of features that CAD packages were capable of documenting.

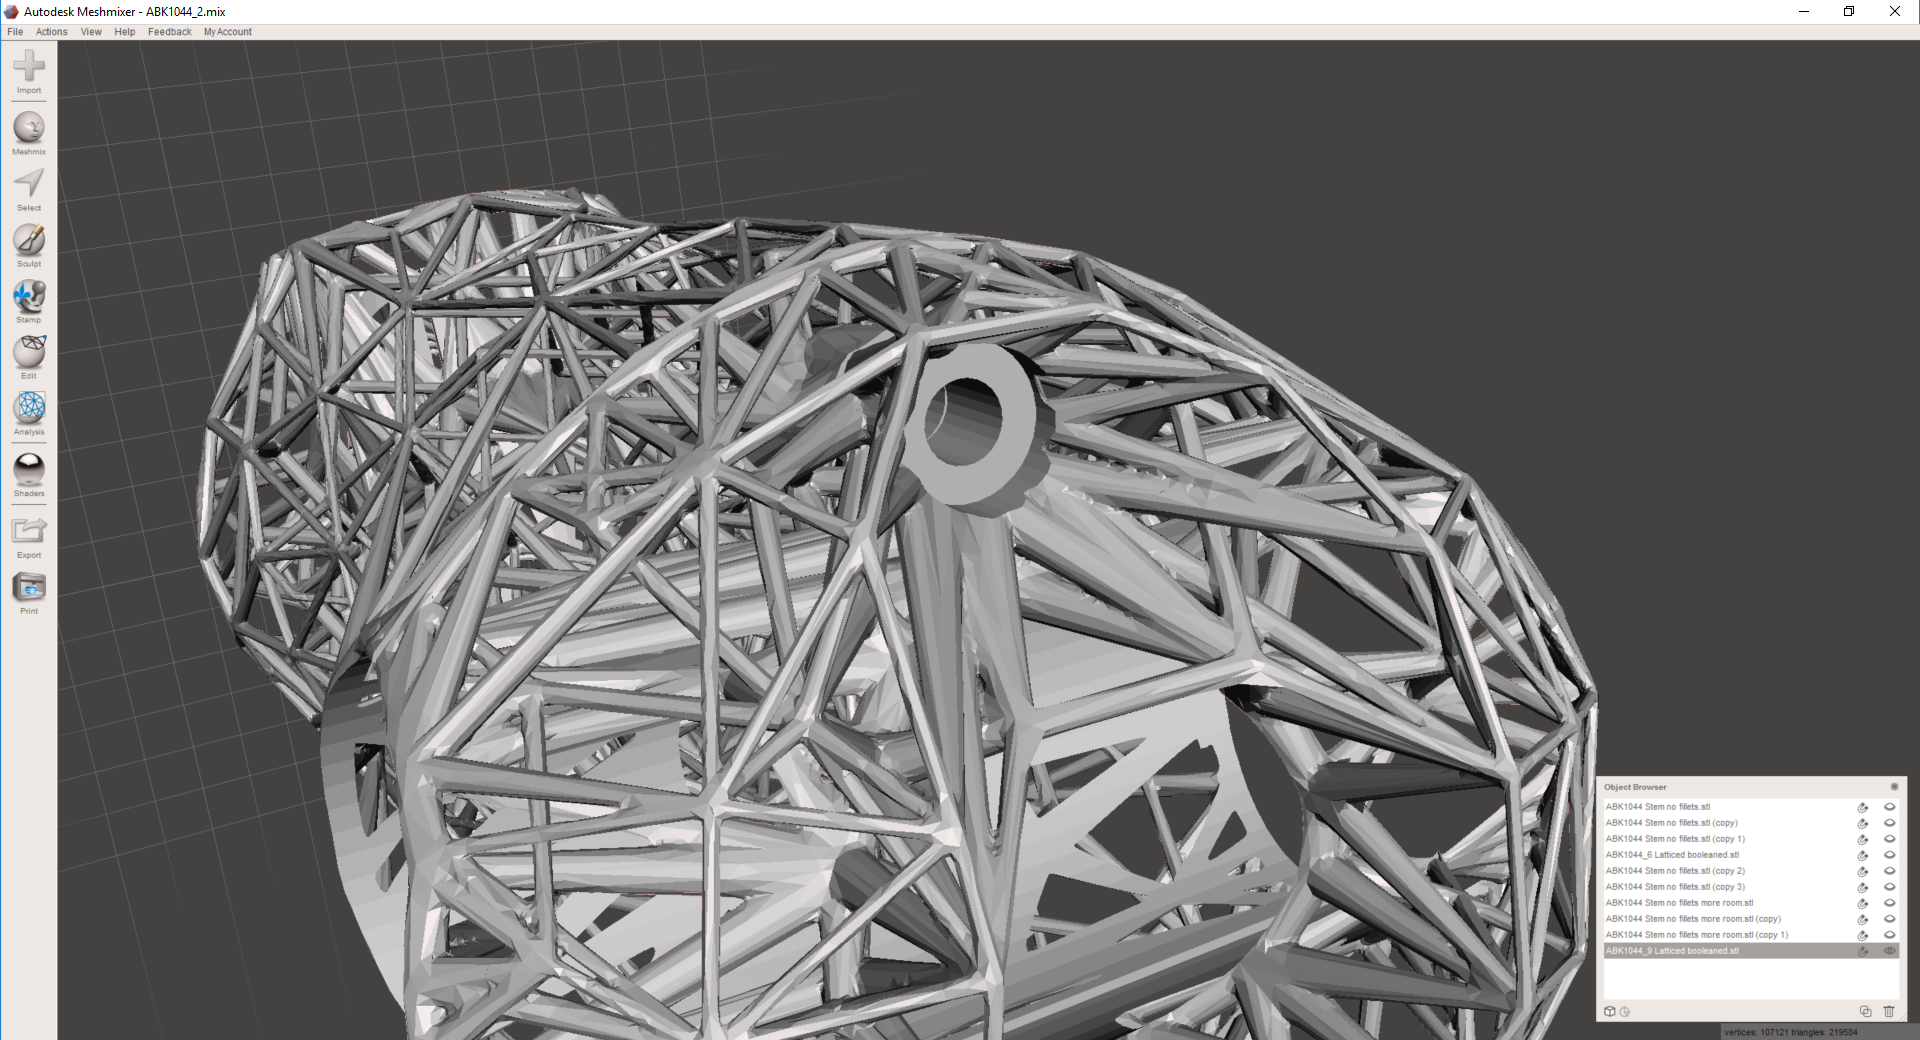
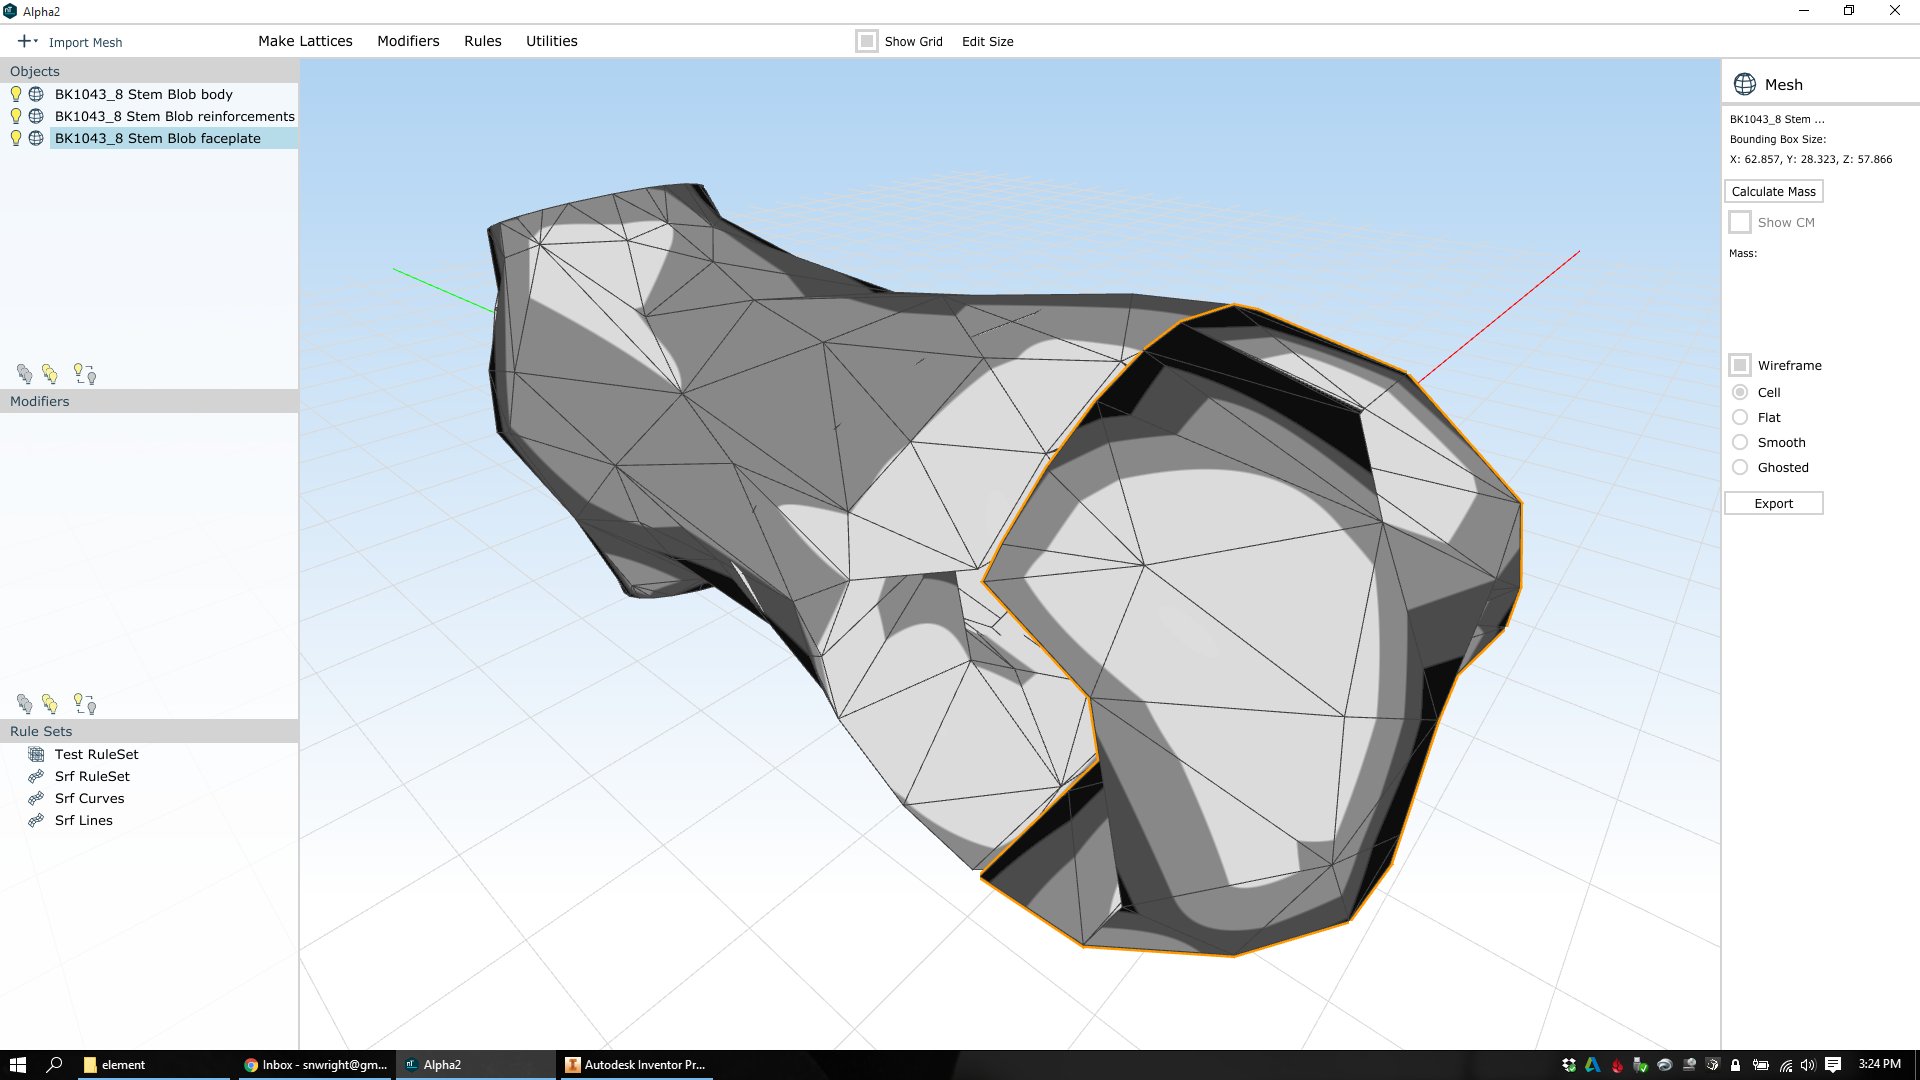
But additive manufacturing doesn't operate in terms of features. It deals with mass, and that mass is deposited layer by layer (with the exception of technologies like directed energy deposition, which is different in some ways but still not at all feature based). As a result, it becomes increasingly advantageous to work directly from design intent, and to optimize the design not feature by feature but instead holistically. 

One major philosophical underpinning of most optimization software (like both Within and solidThinking Inspire) is that the process of optimizing mass distribution to meet some set of design intentions (namely mechanical strength and mass, though longtime readers of this blog will know that I feel that manufacturability, aesthetics, and supply chain complexity must be considered in this calculation as well) is a task better suited to software than to humans. To that effect, they are squarely opposed to the history of Computer Aided Documentation. They want CAD software to be making actual design decisions, presumably with the input and guidance of the engineer.

If it's not clear, I agree with the movement towards true computer aided design. But CAD vendors will need to overcome a number of roadblocks before I'd be comfortable saying that my computer designs anything in particular:

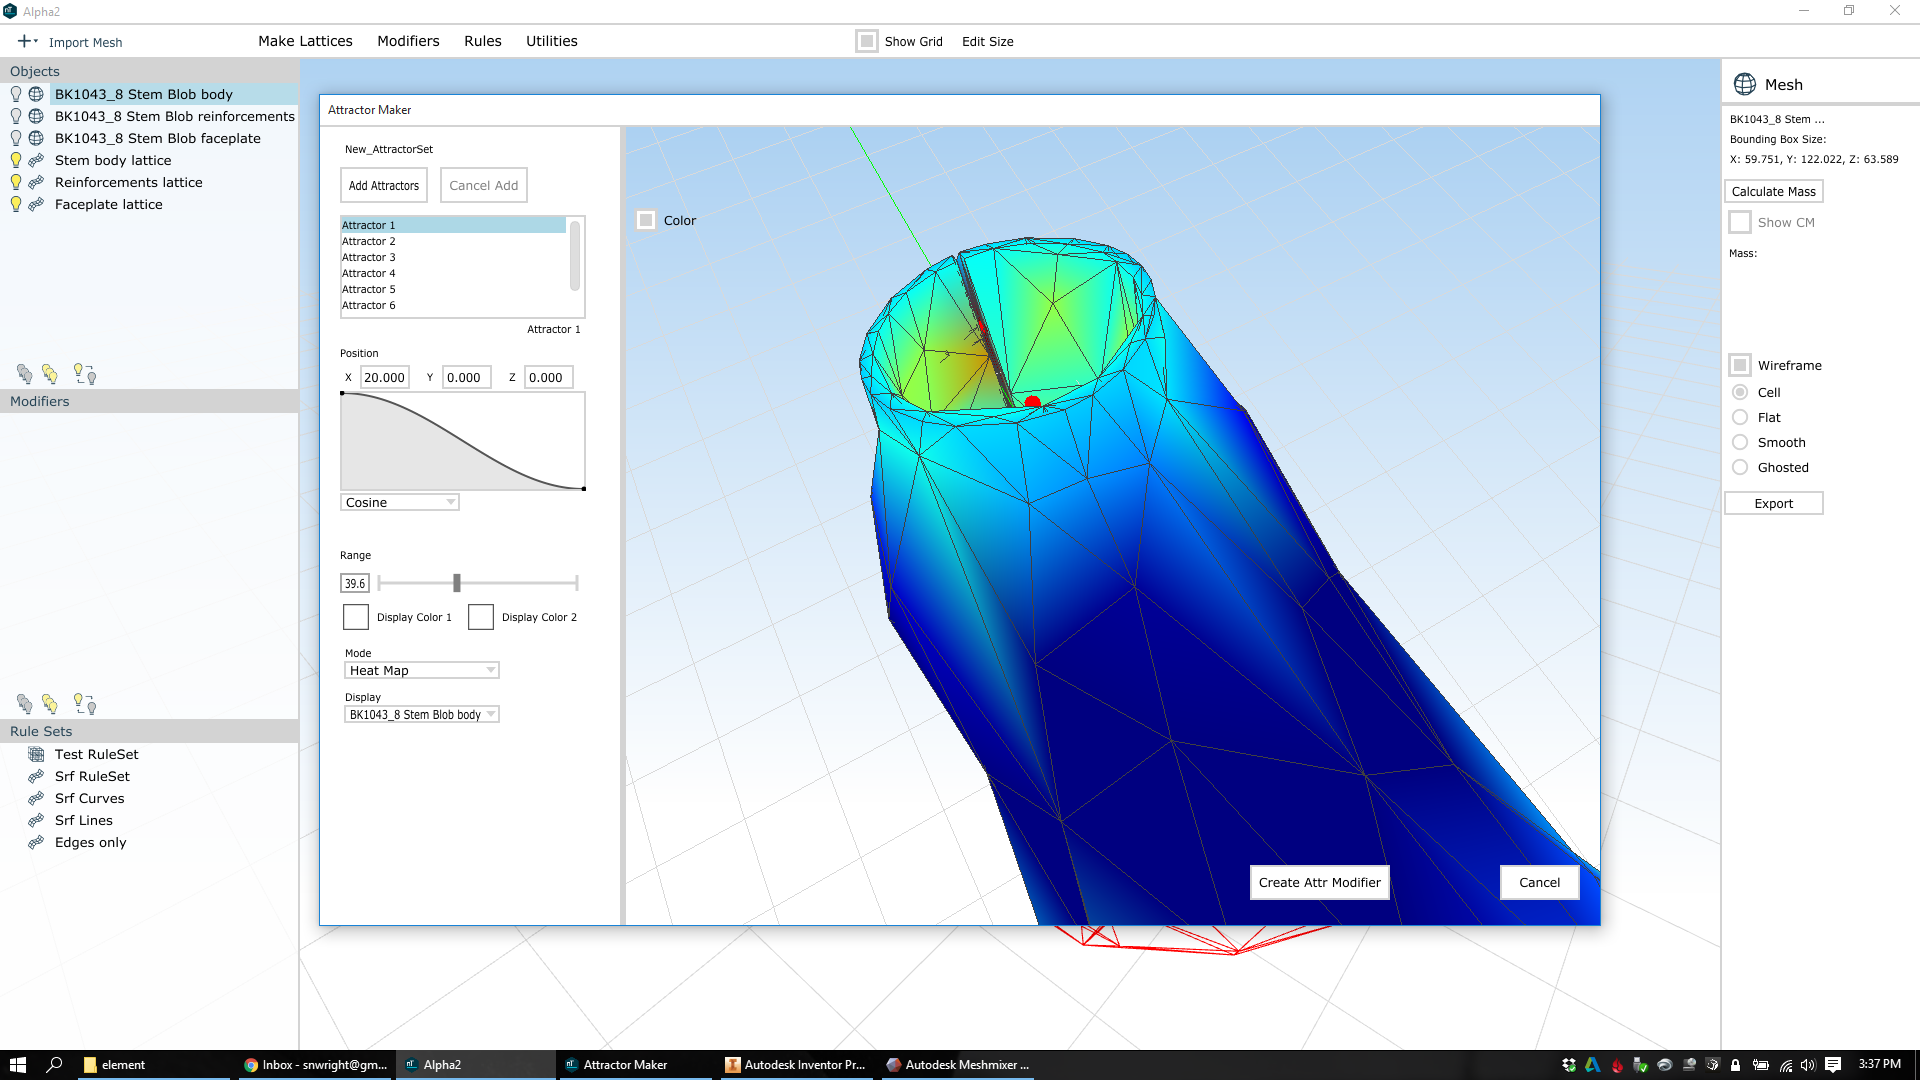
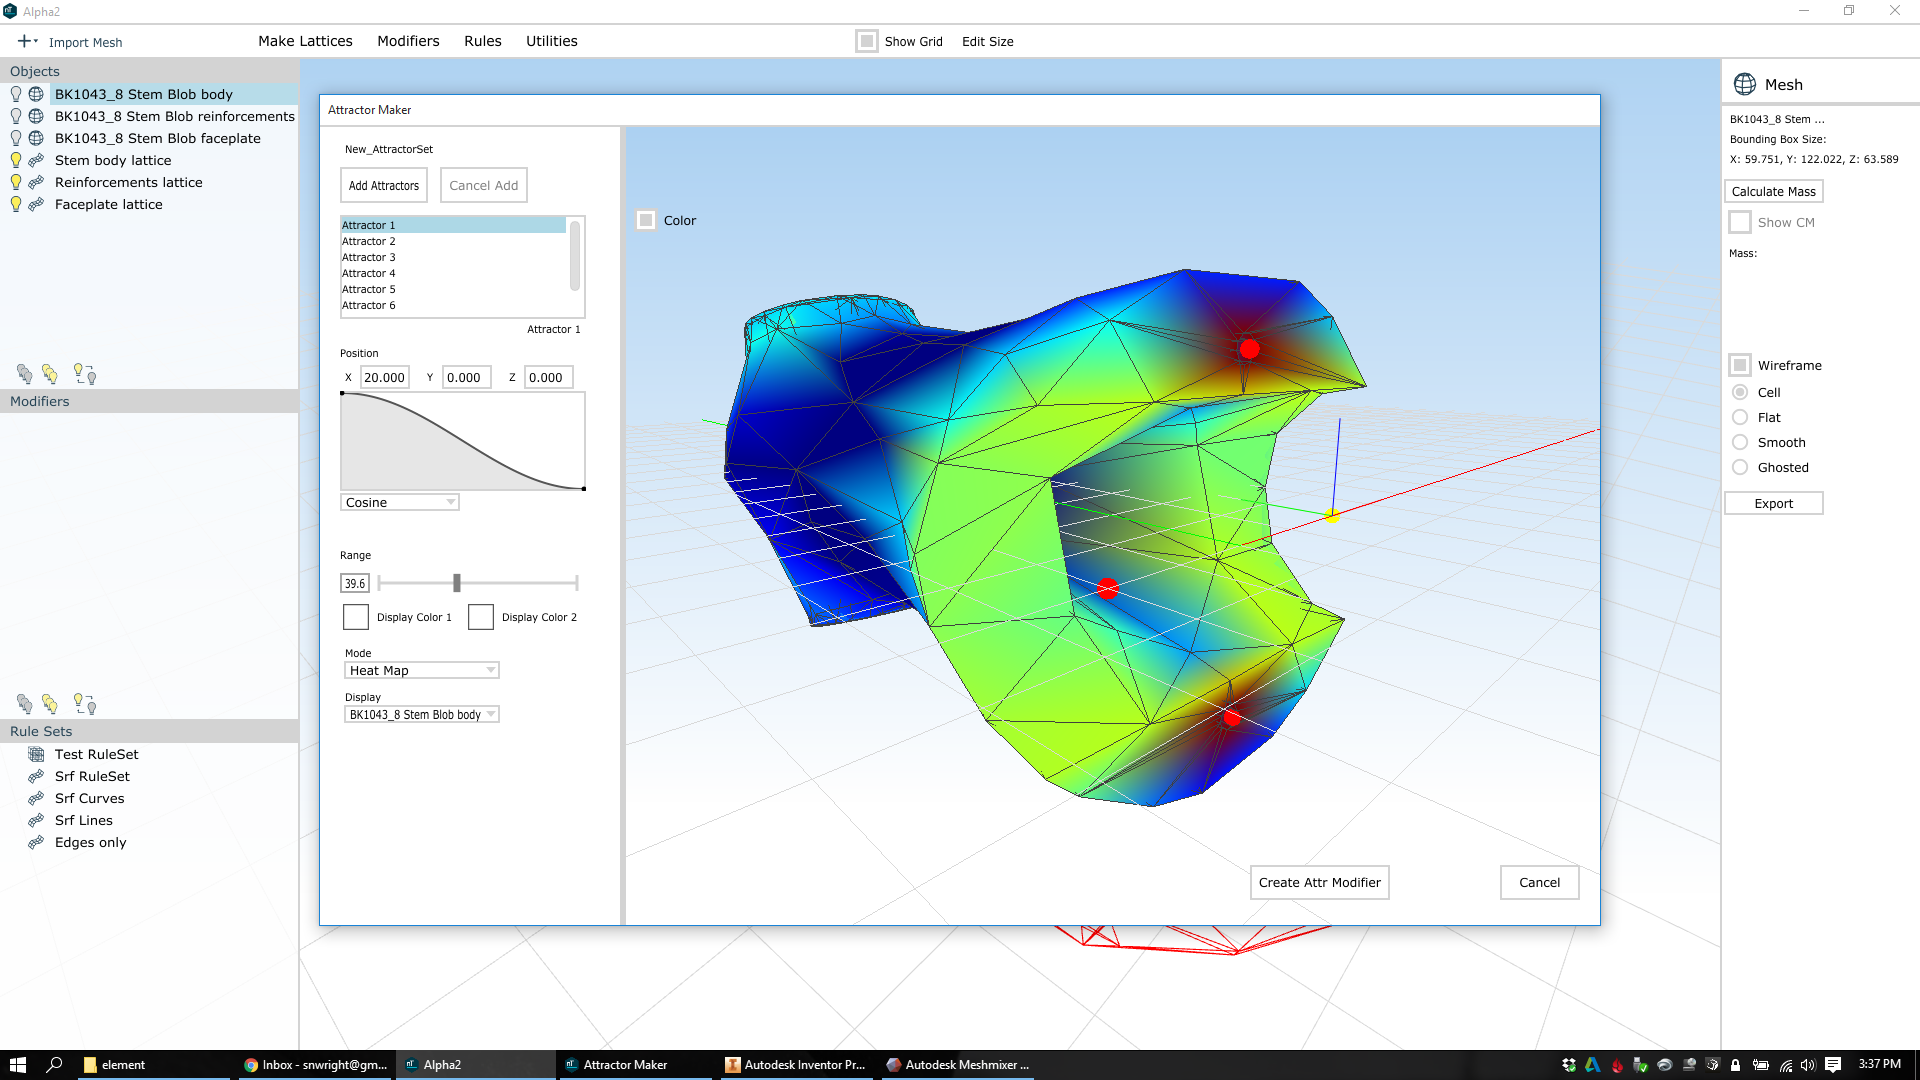
First, we need user interfaces that allow engineers to effectively communicate design intent. Traditional CAD packages never needed this, and optimization software has only just begun the task of rethinking how engineers tell their computers what kind of decisions they need them to make. 

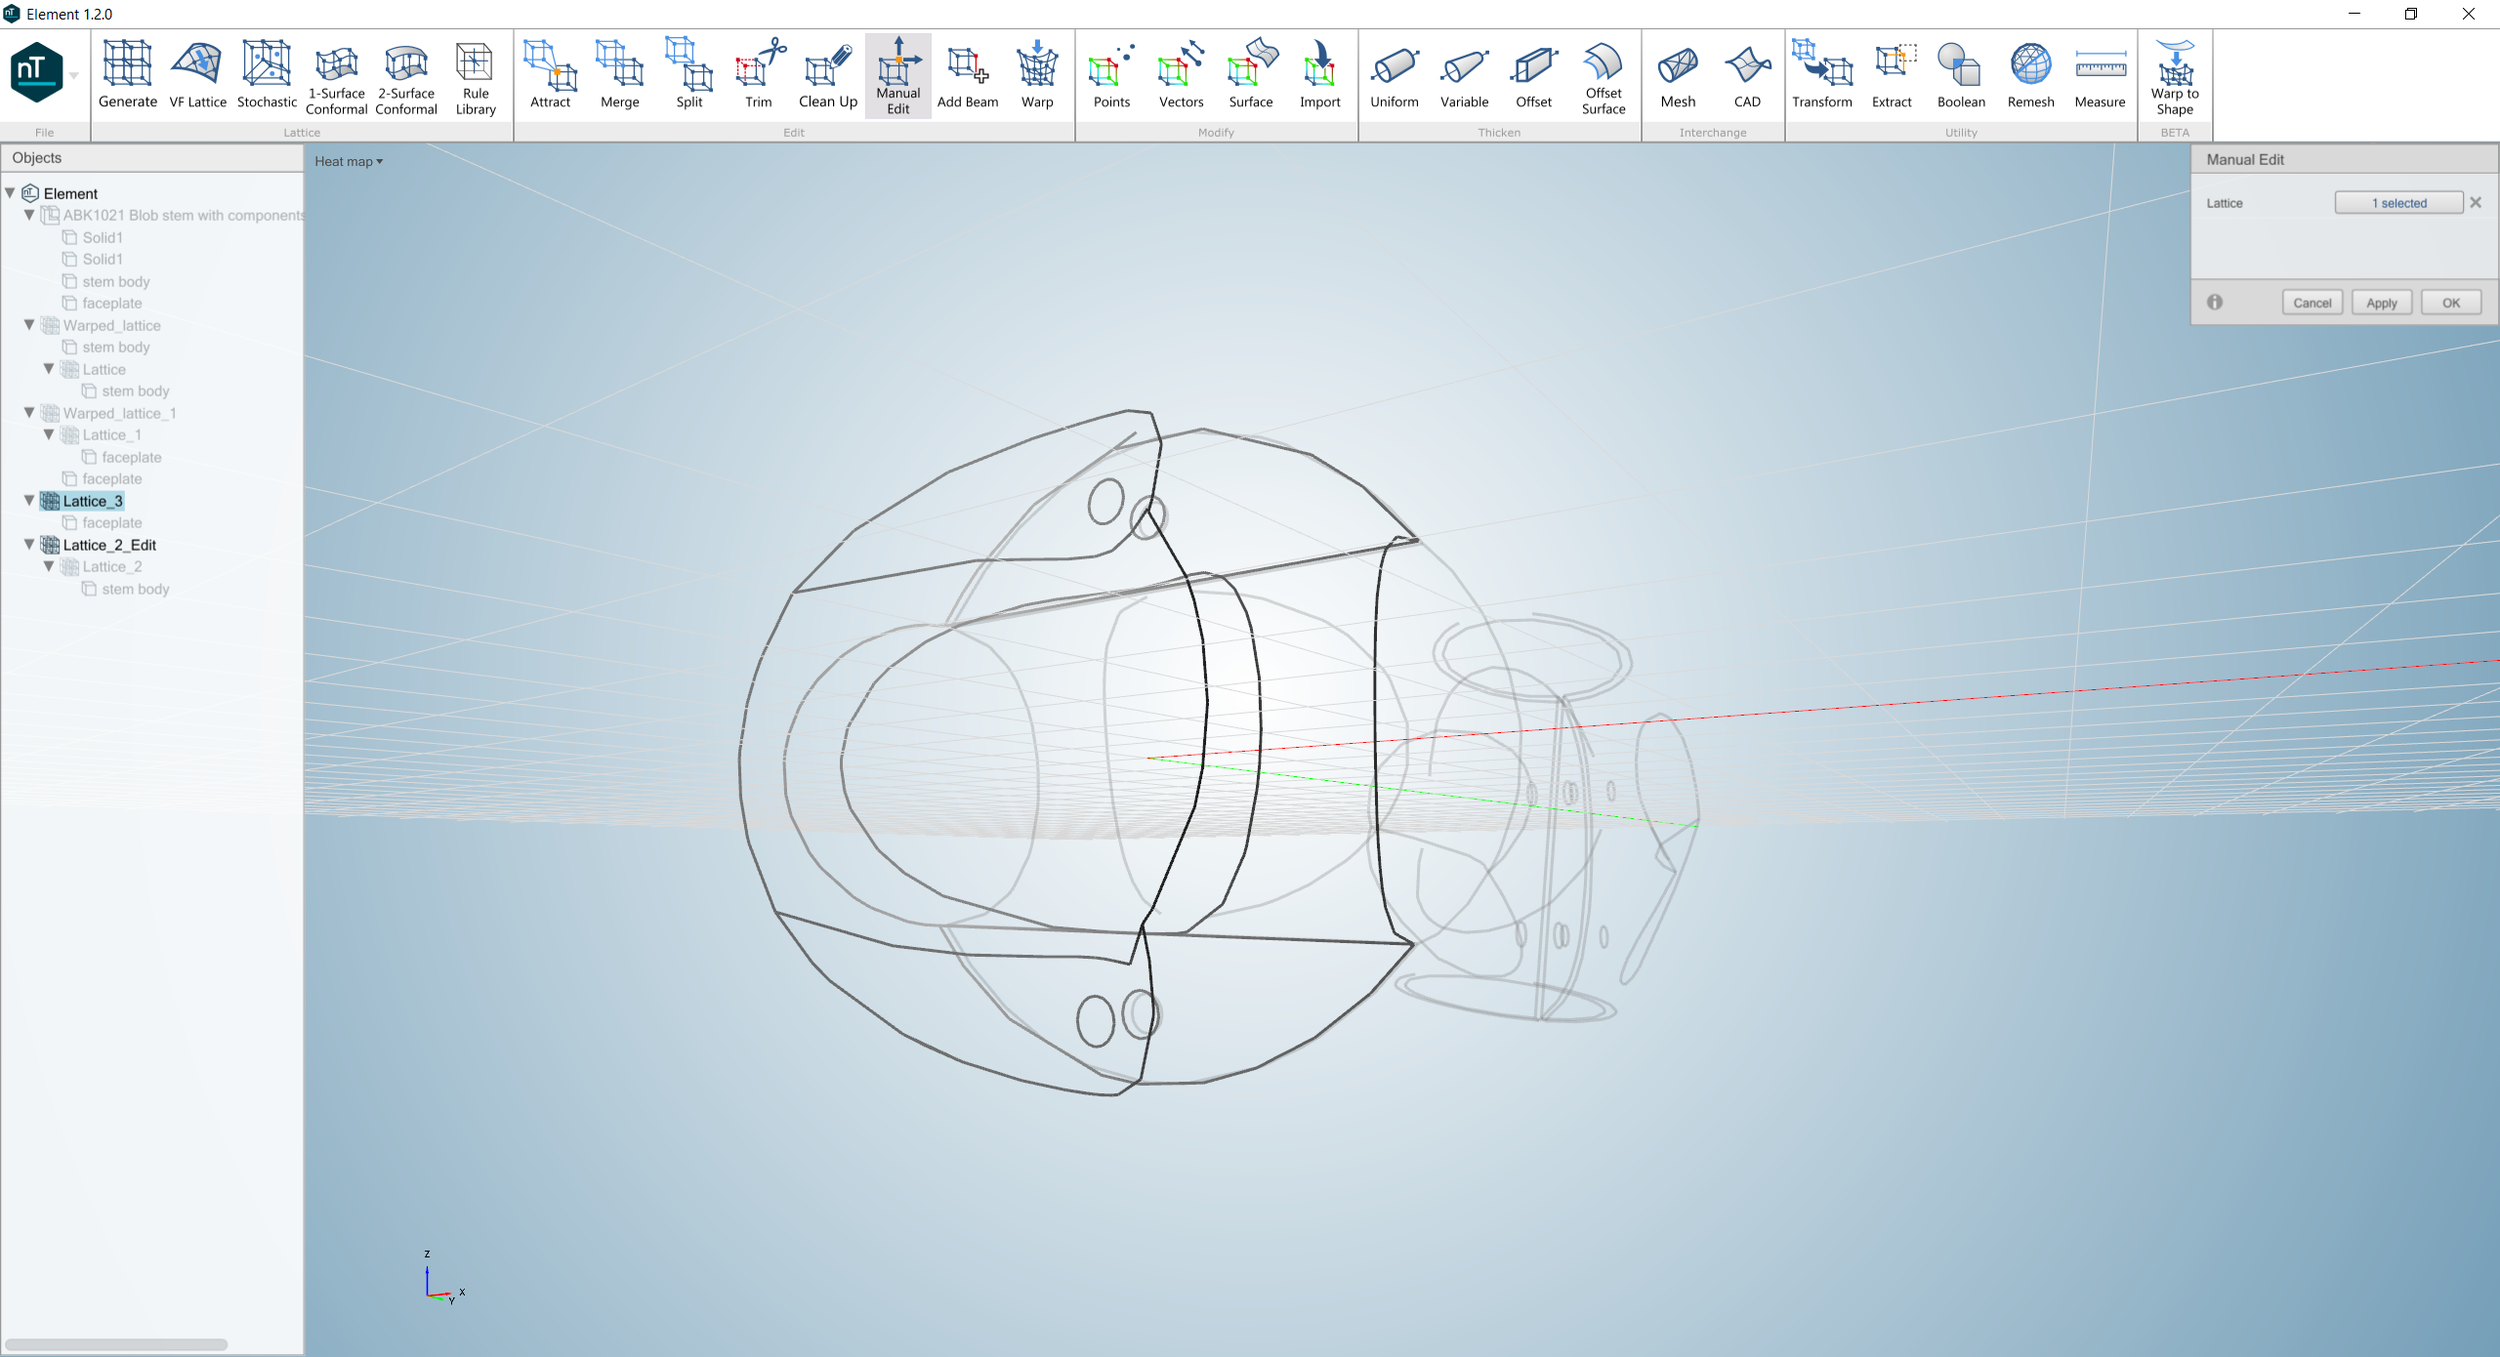
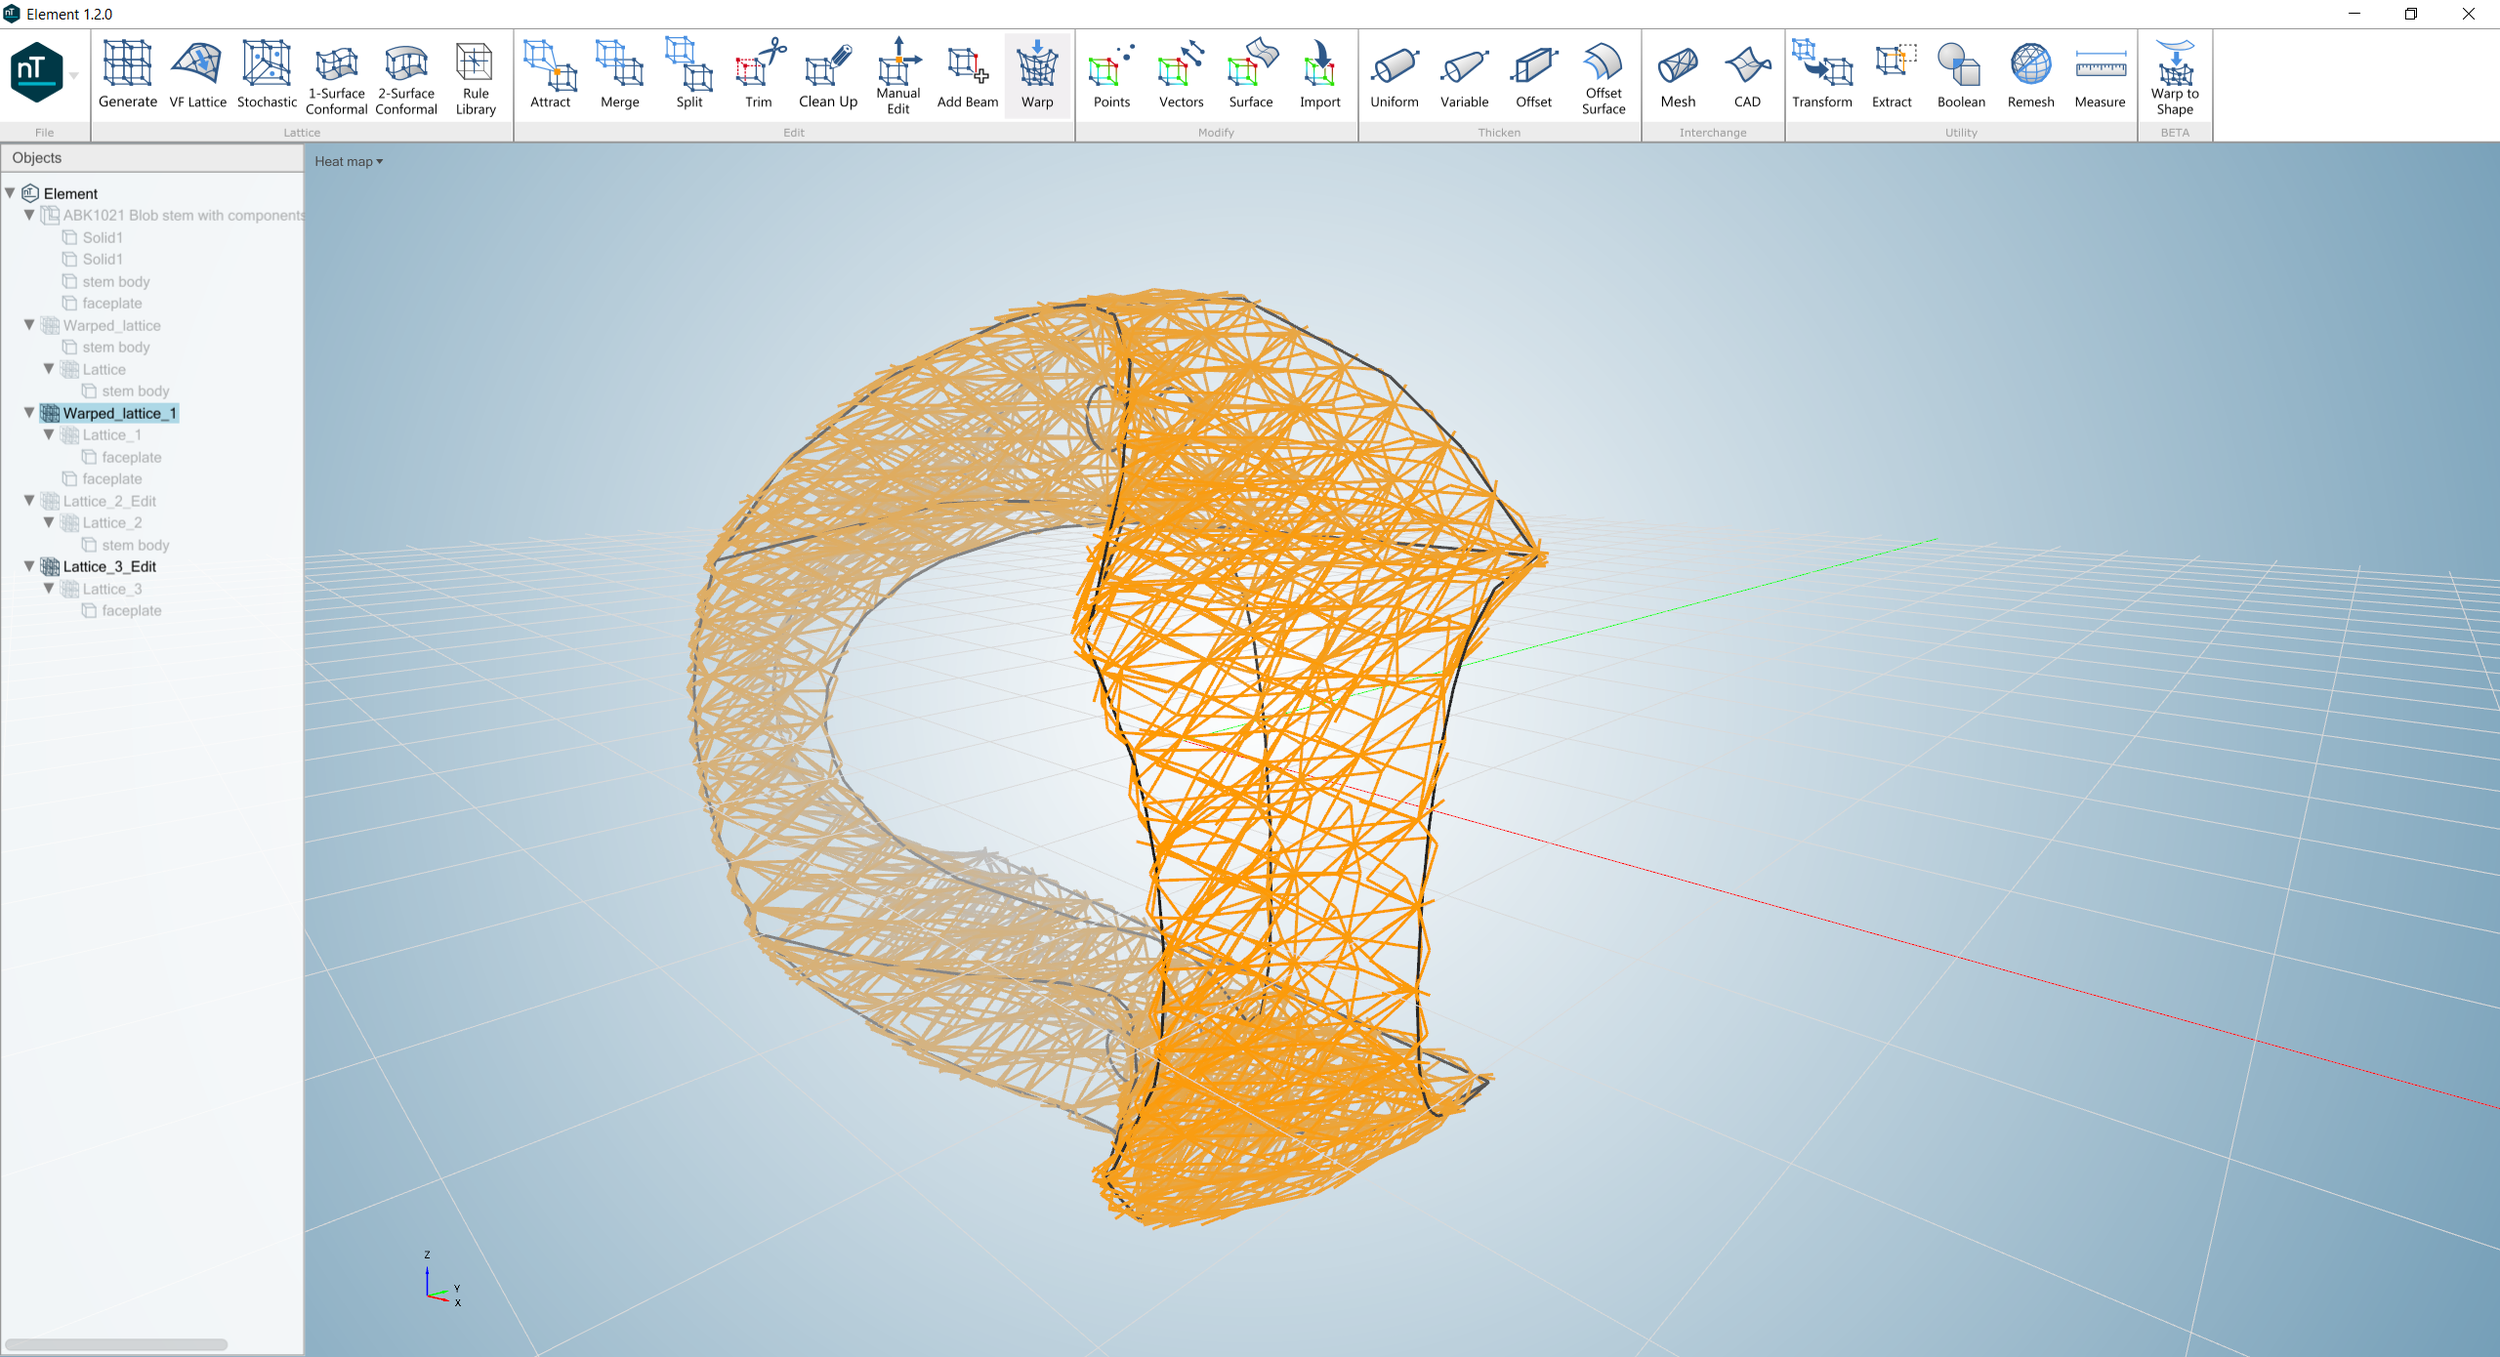
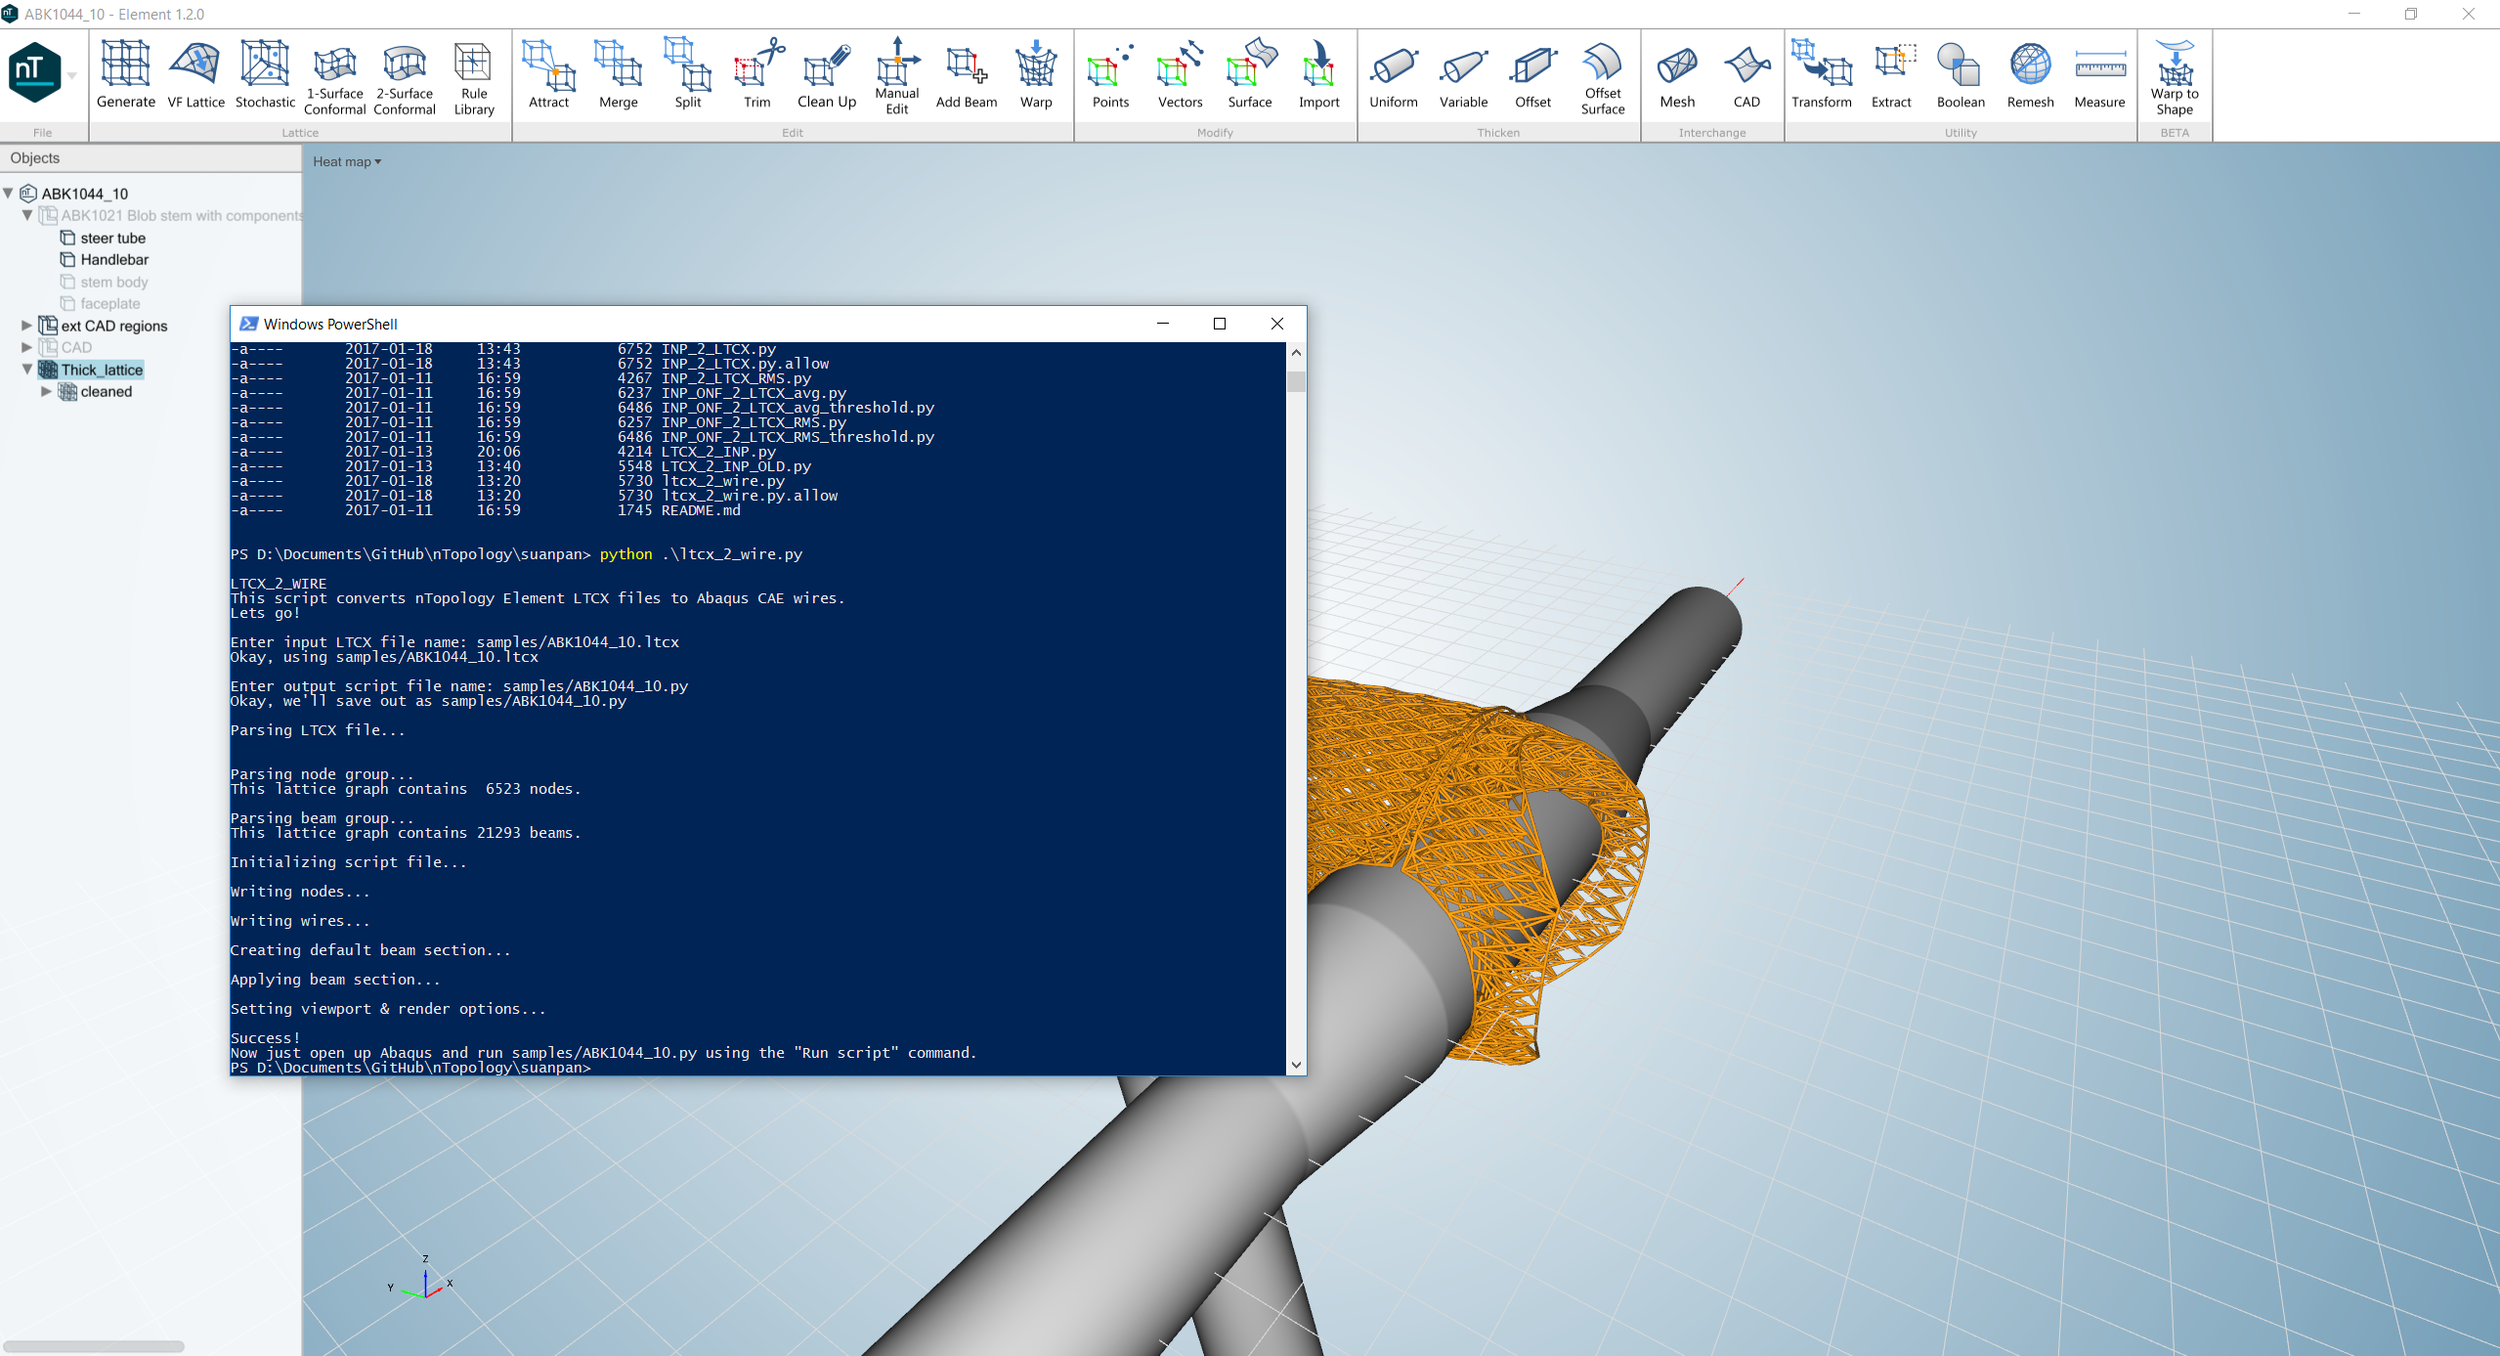
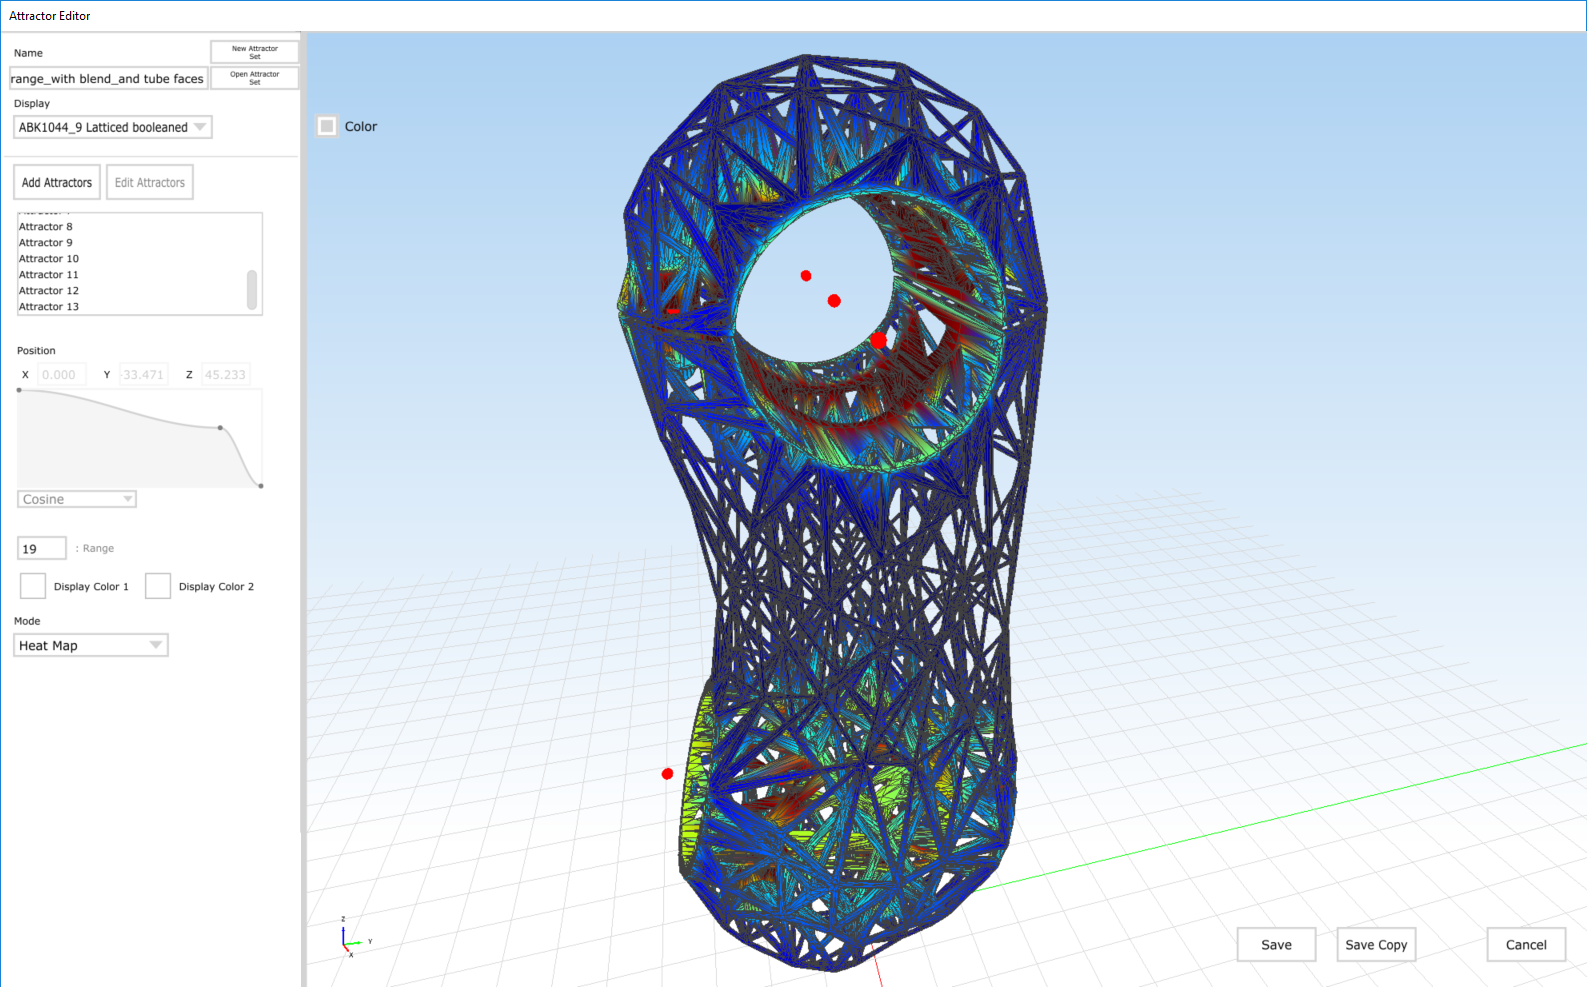
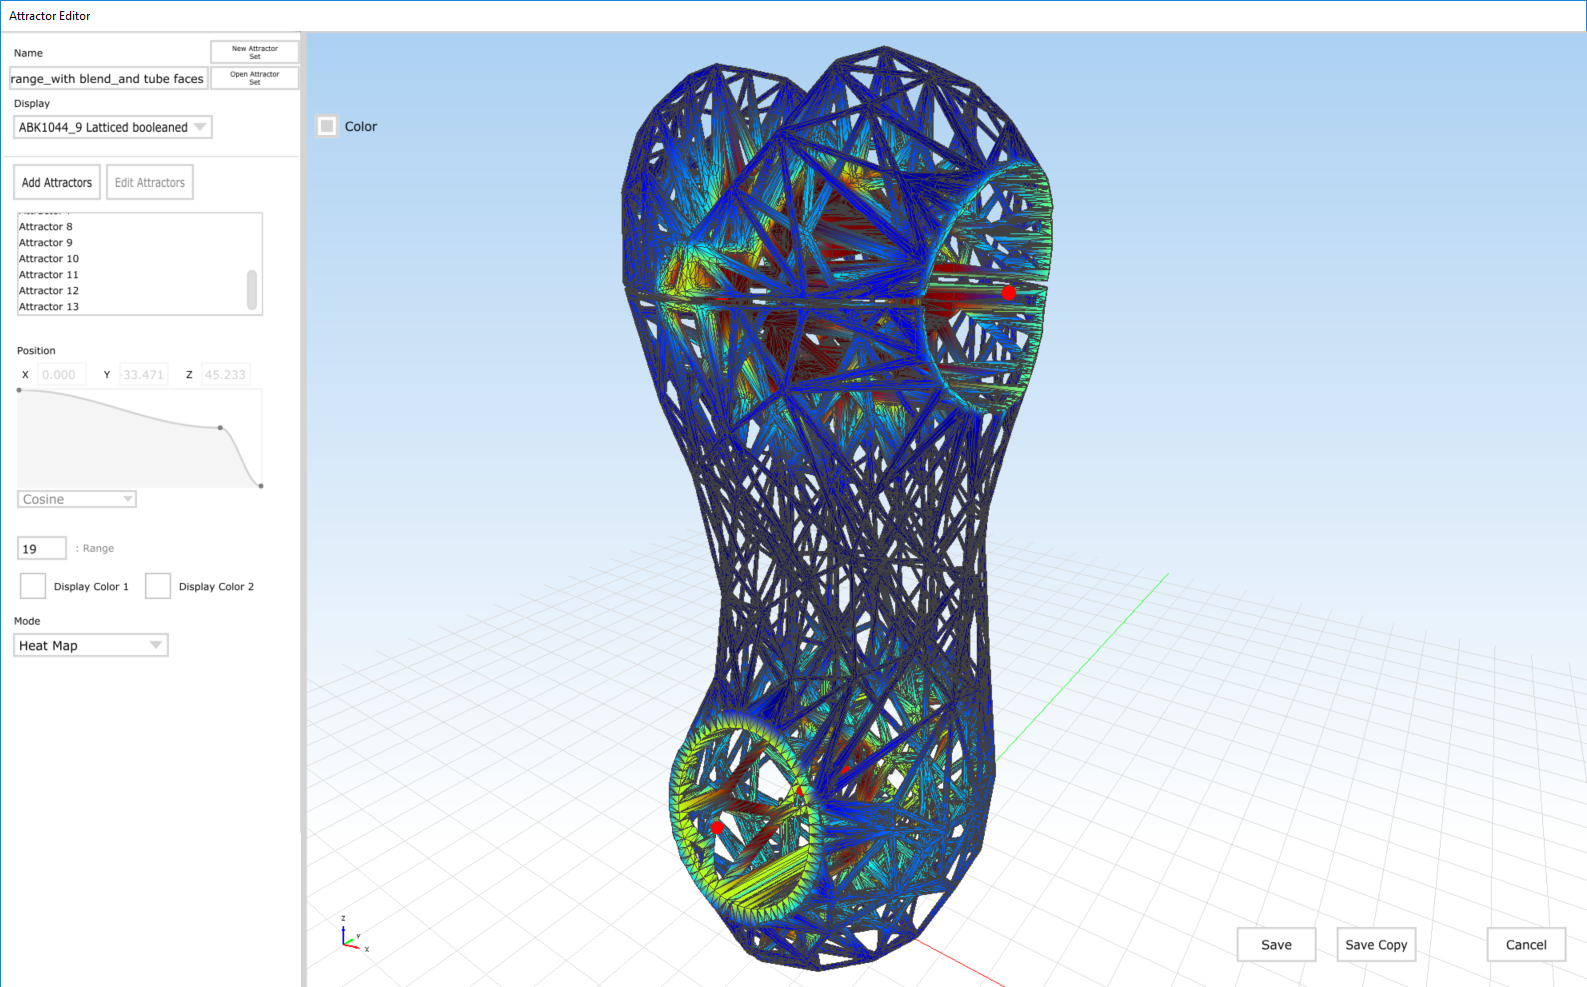
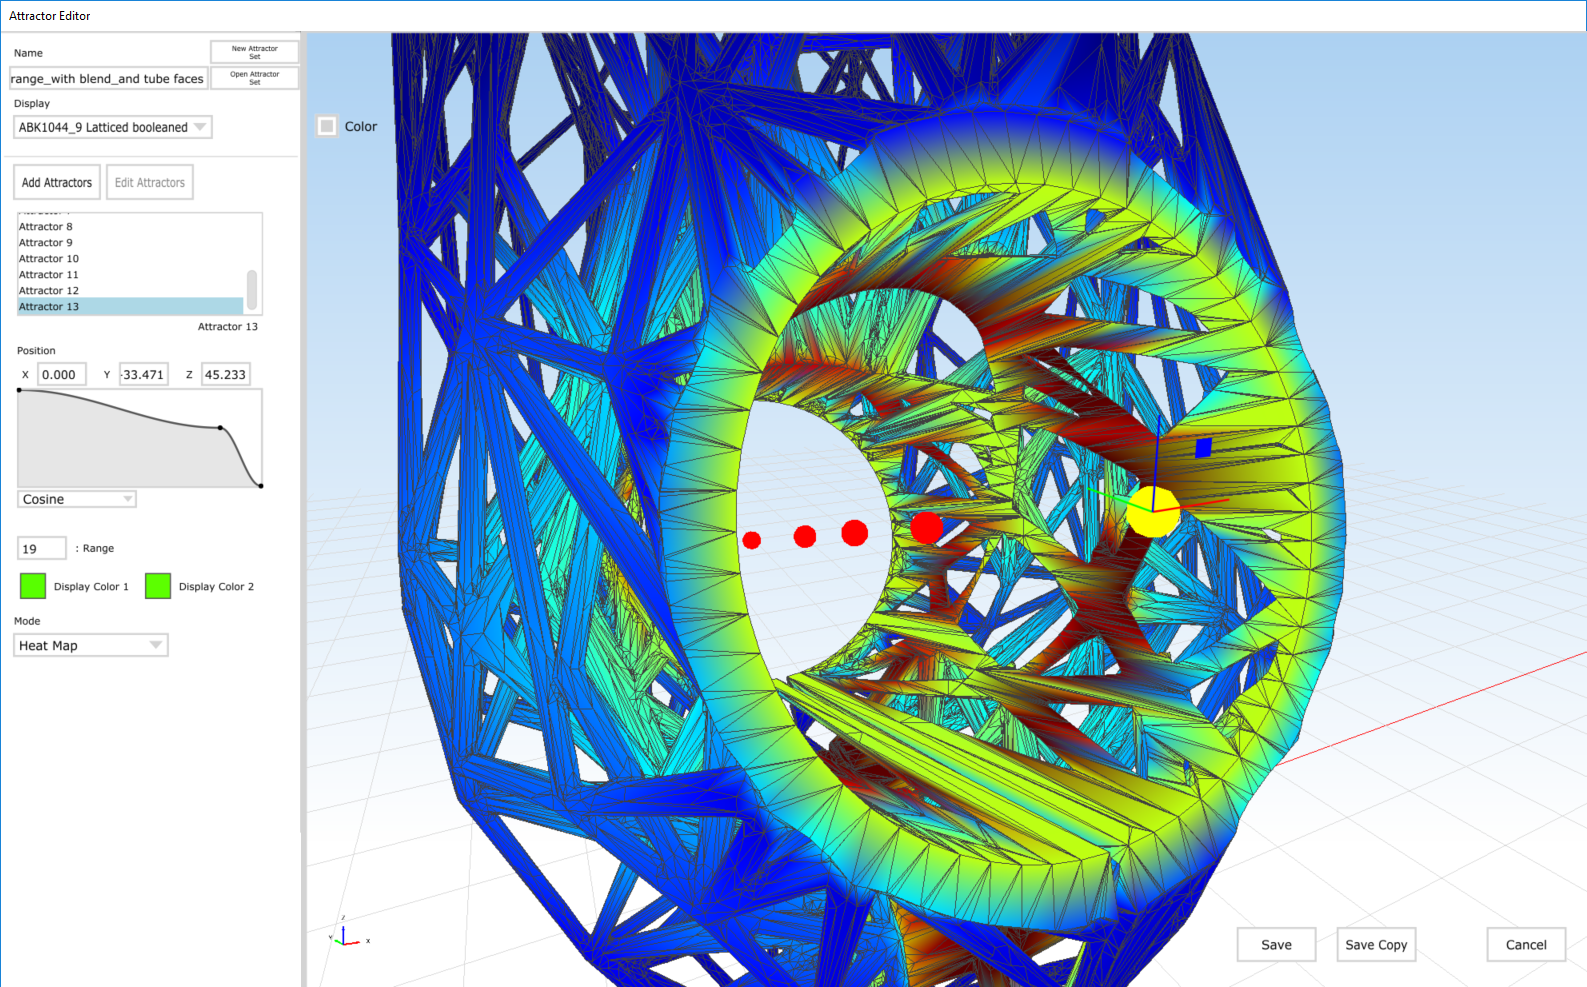
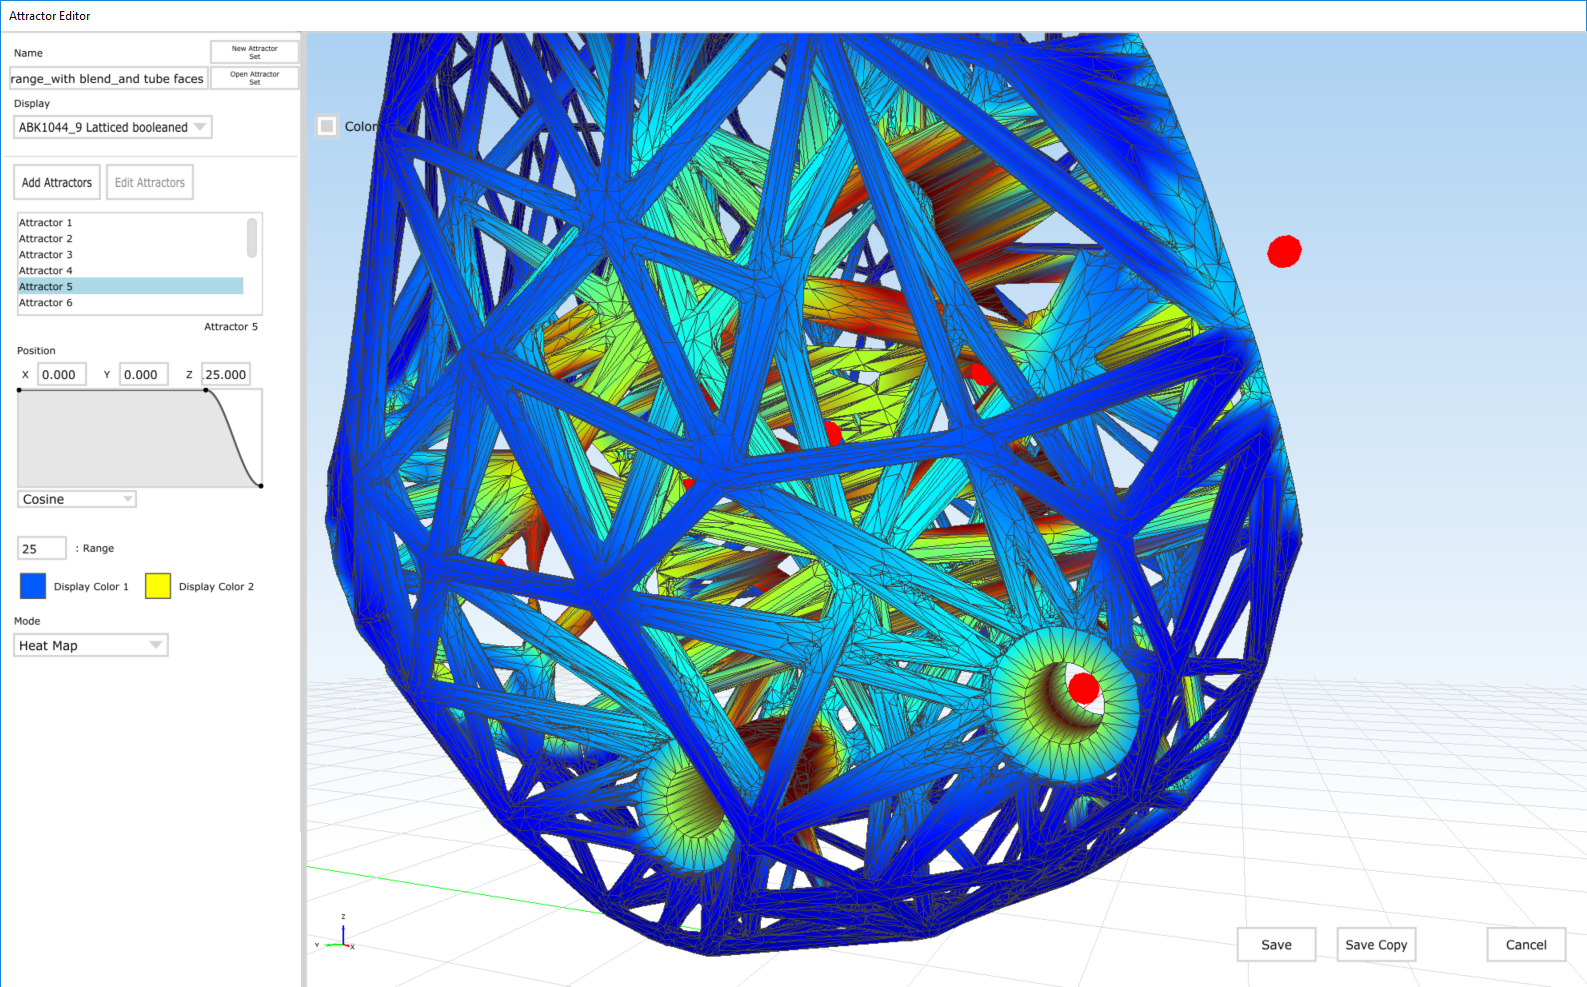
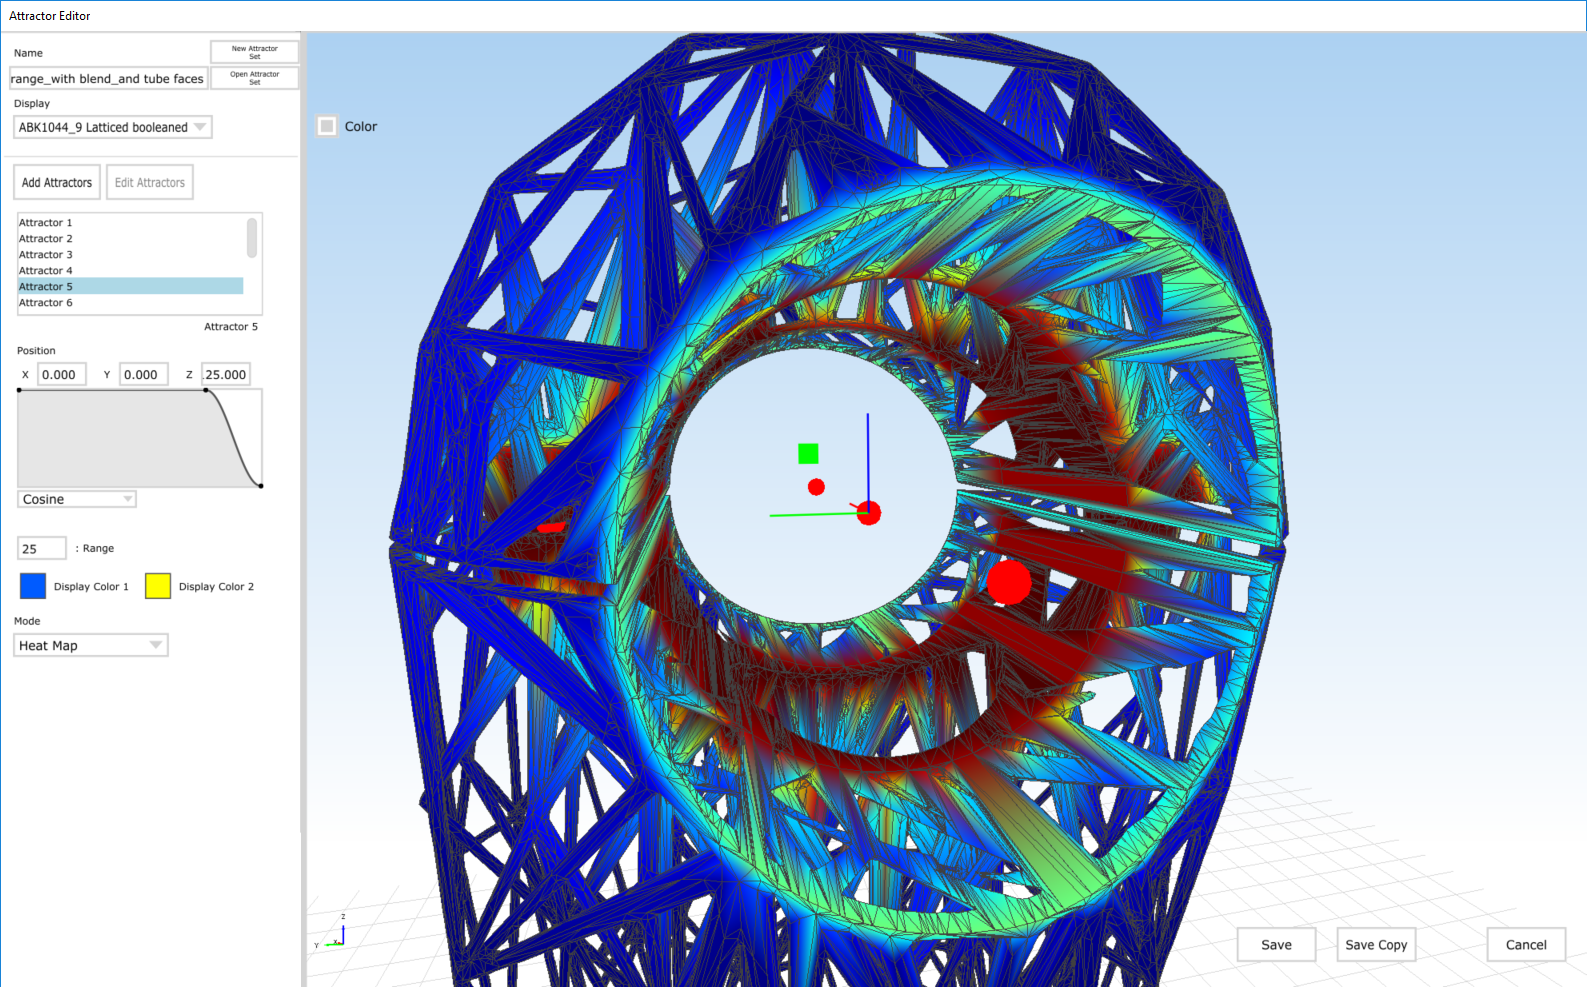
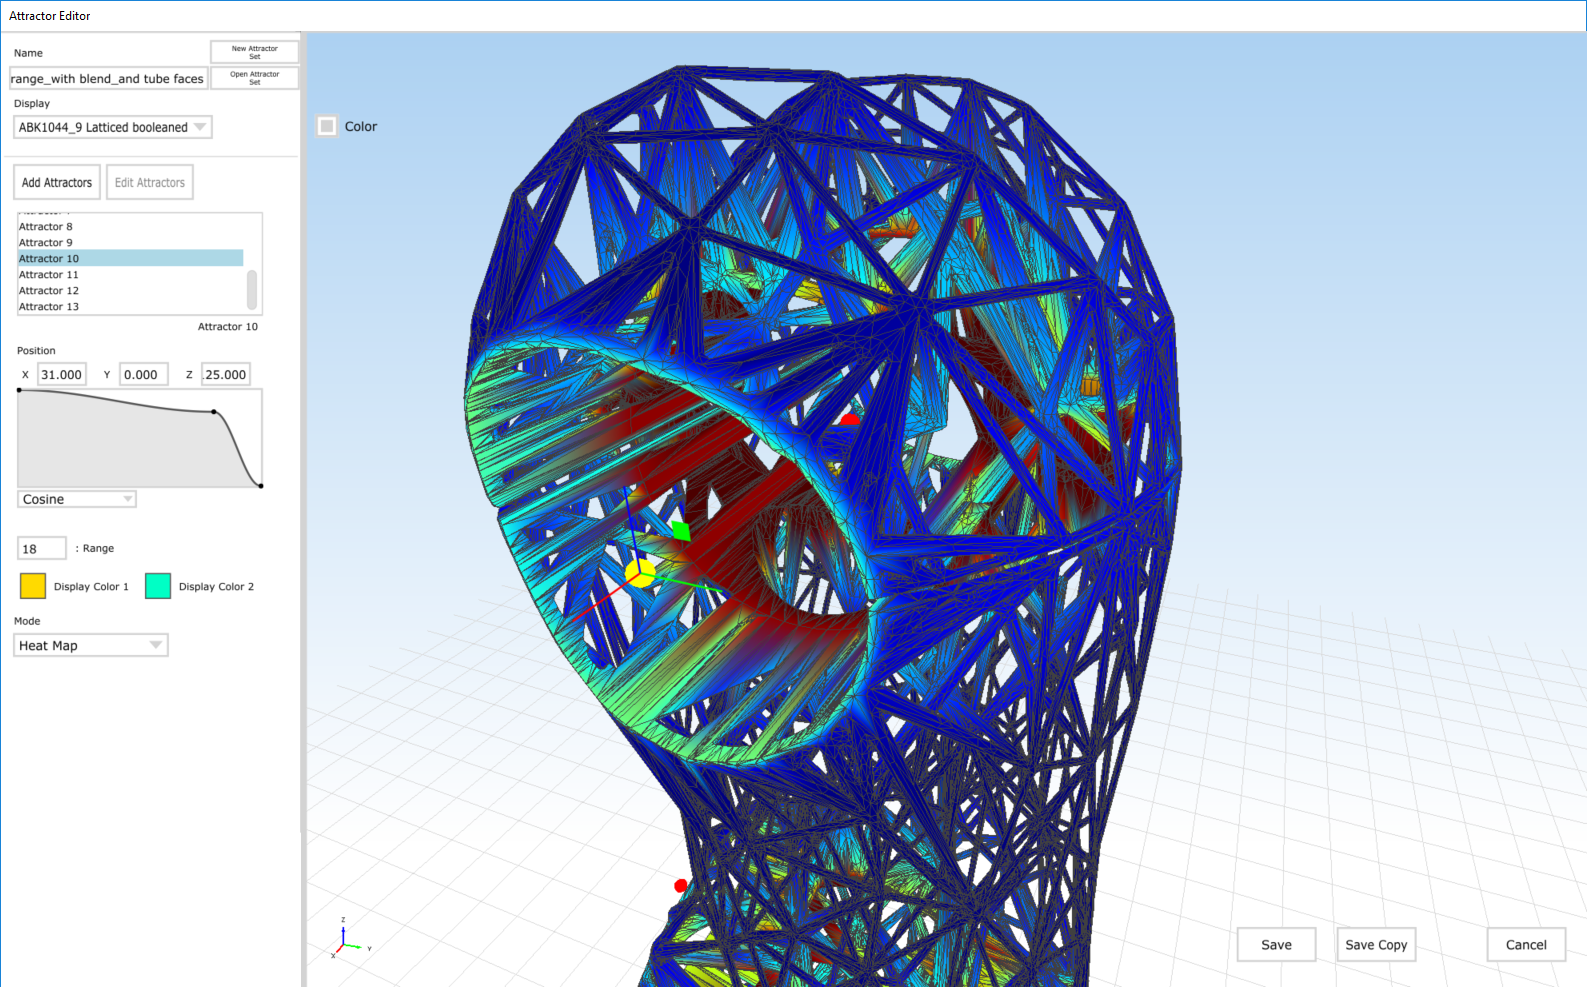
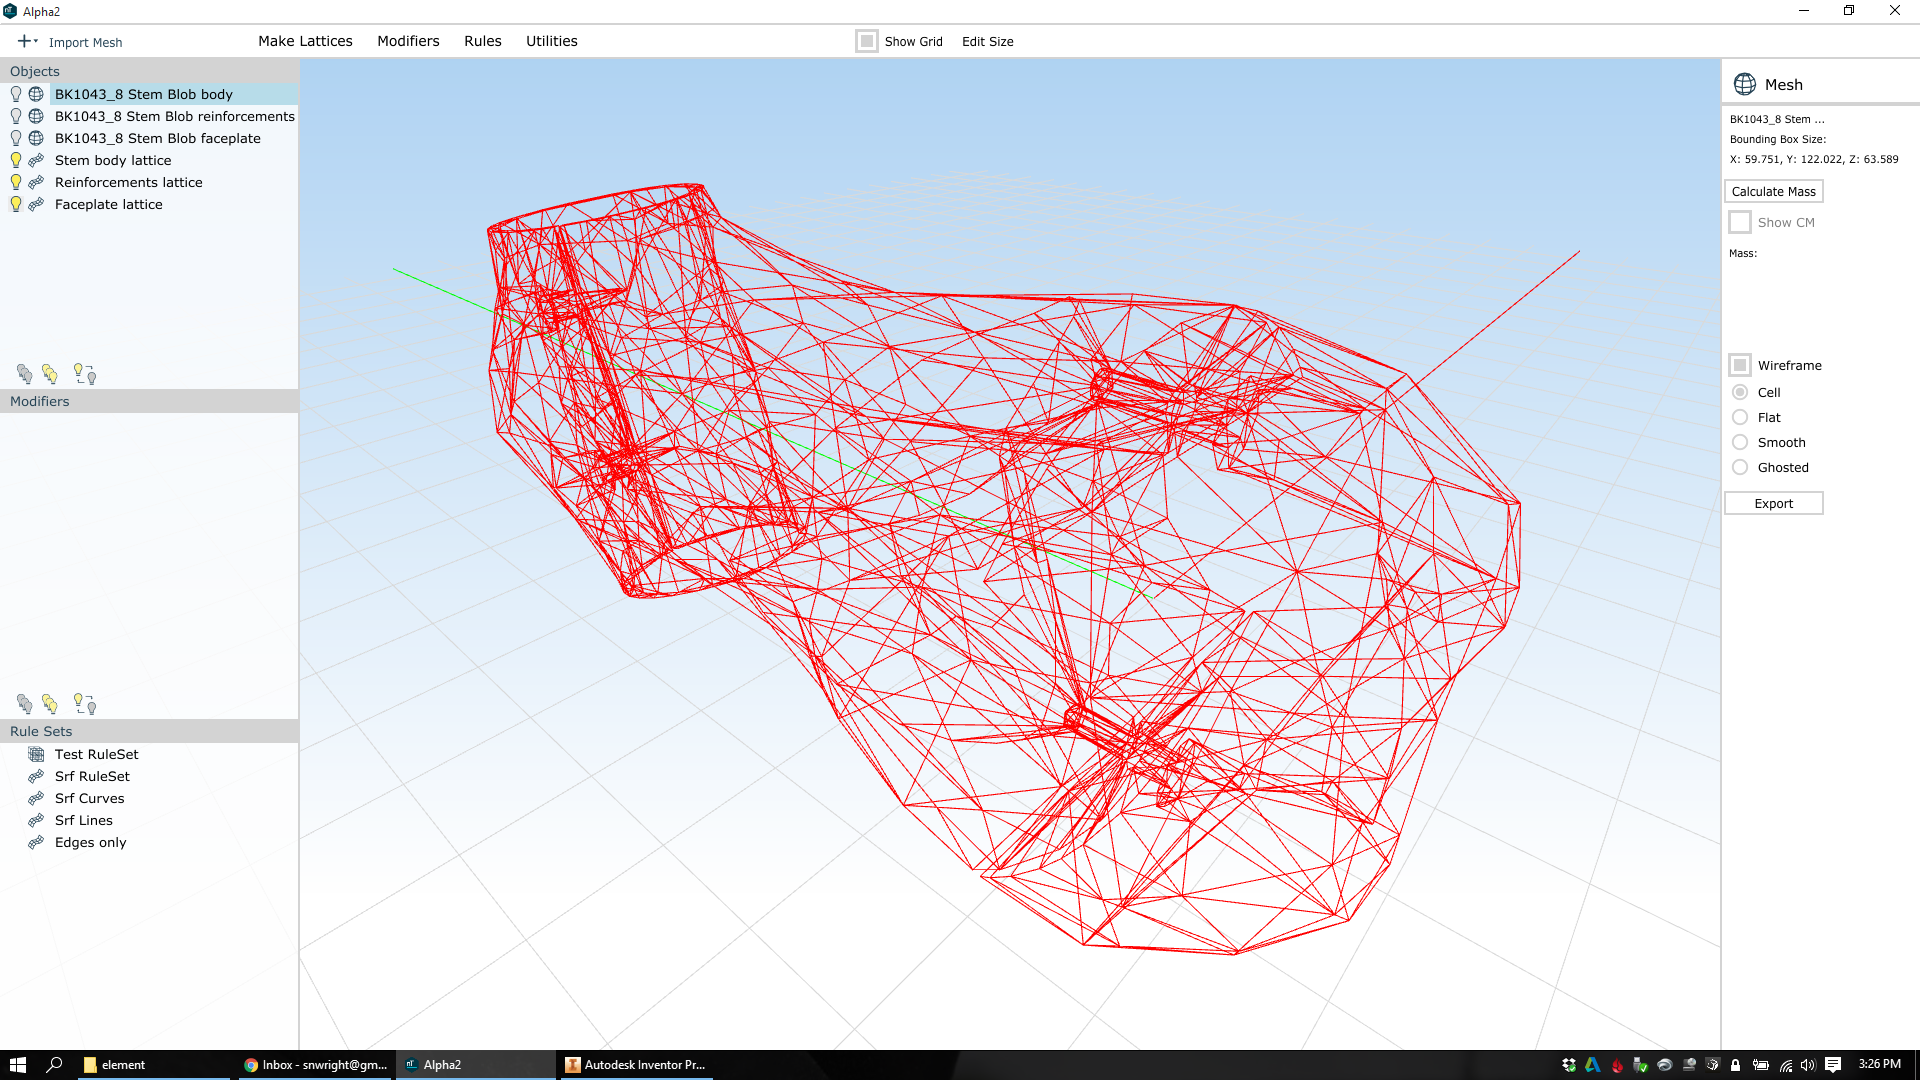
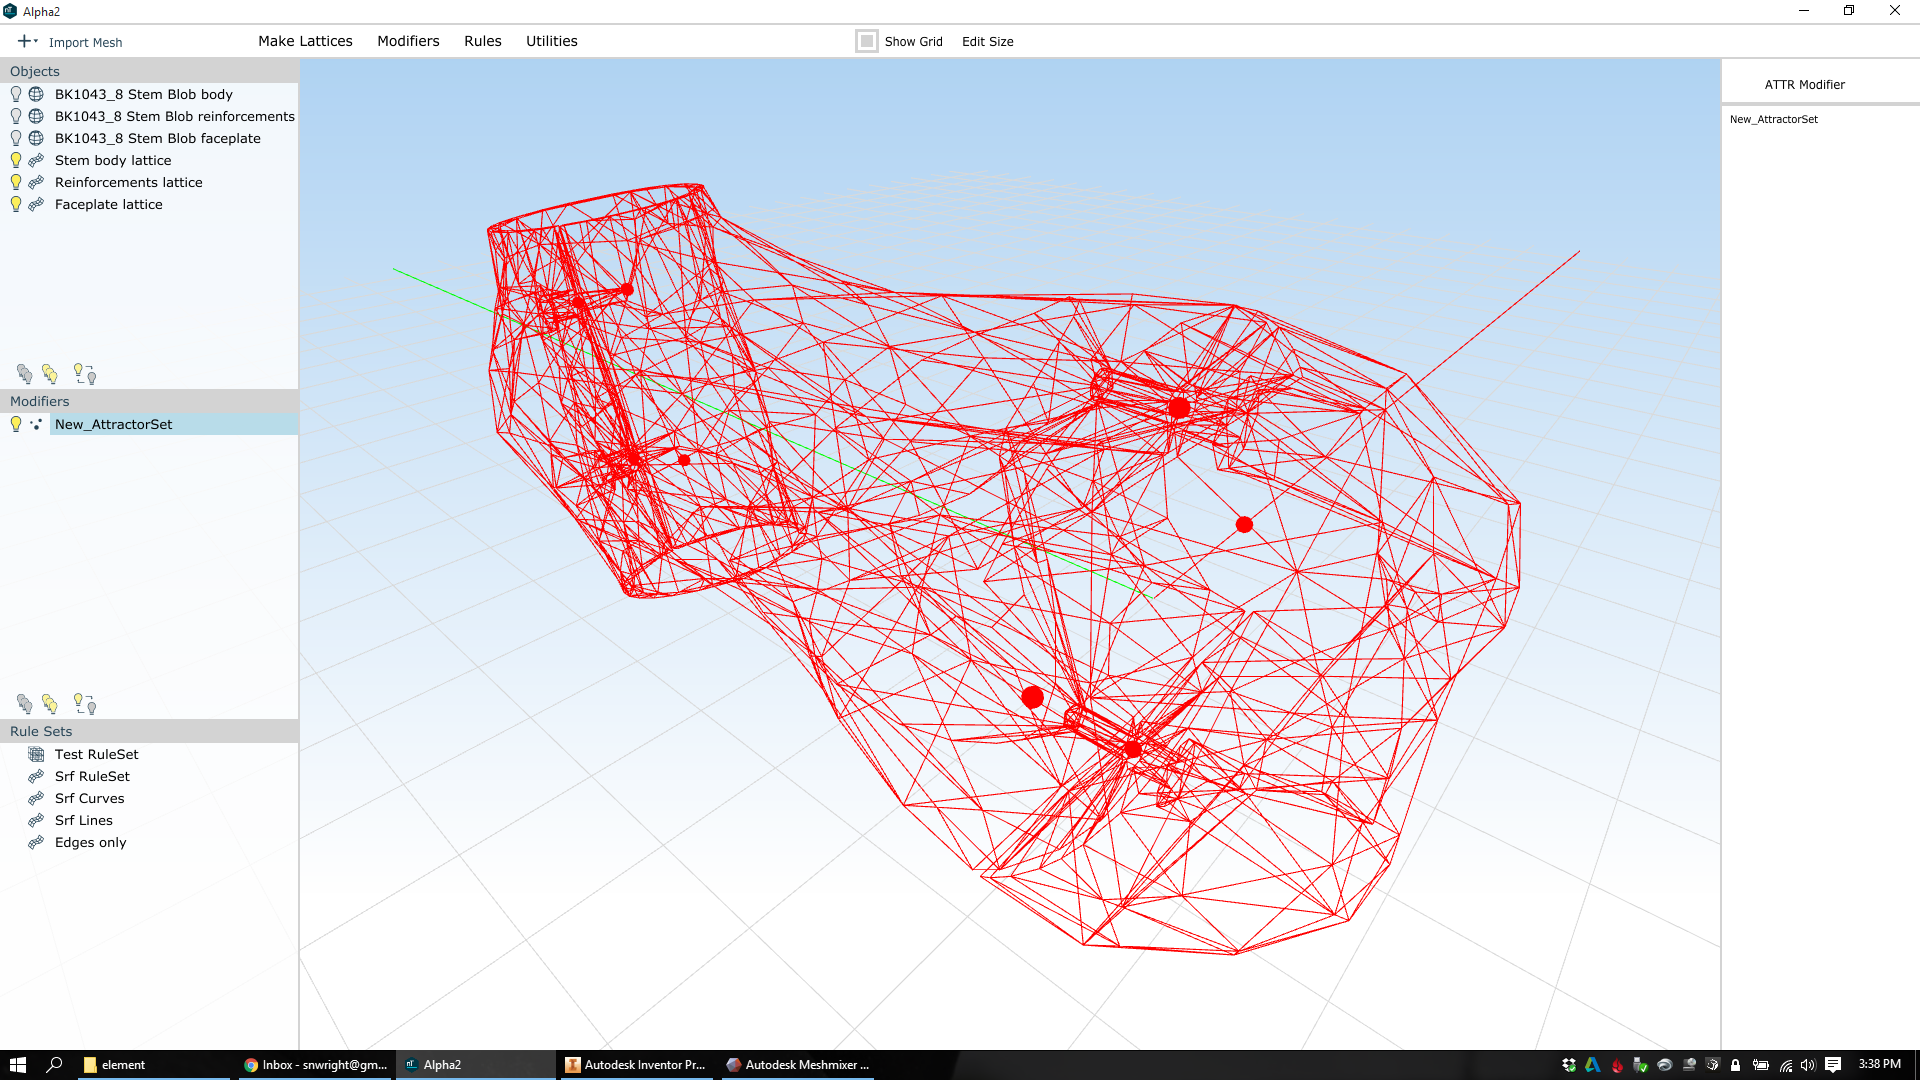
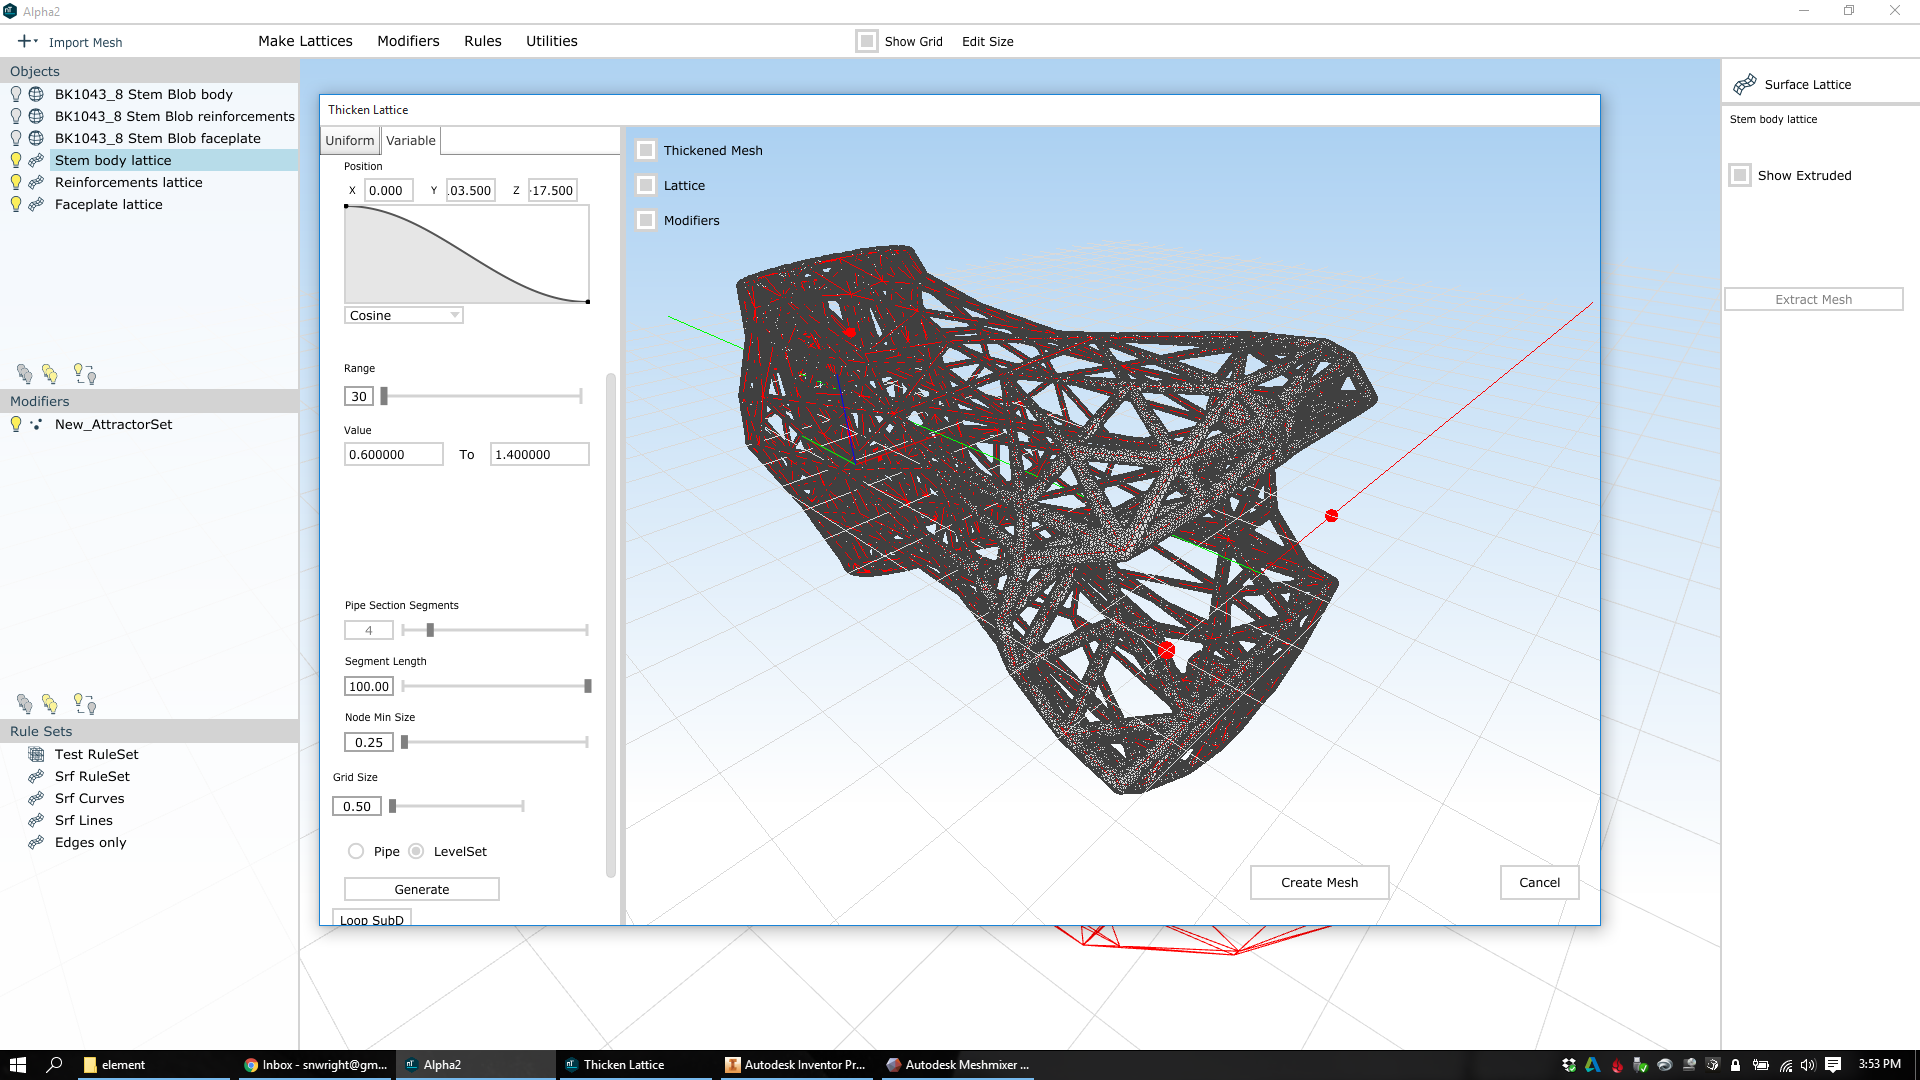
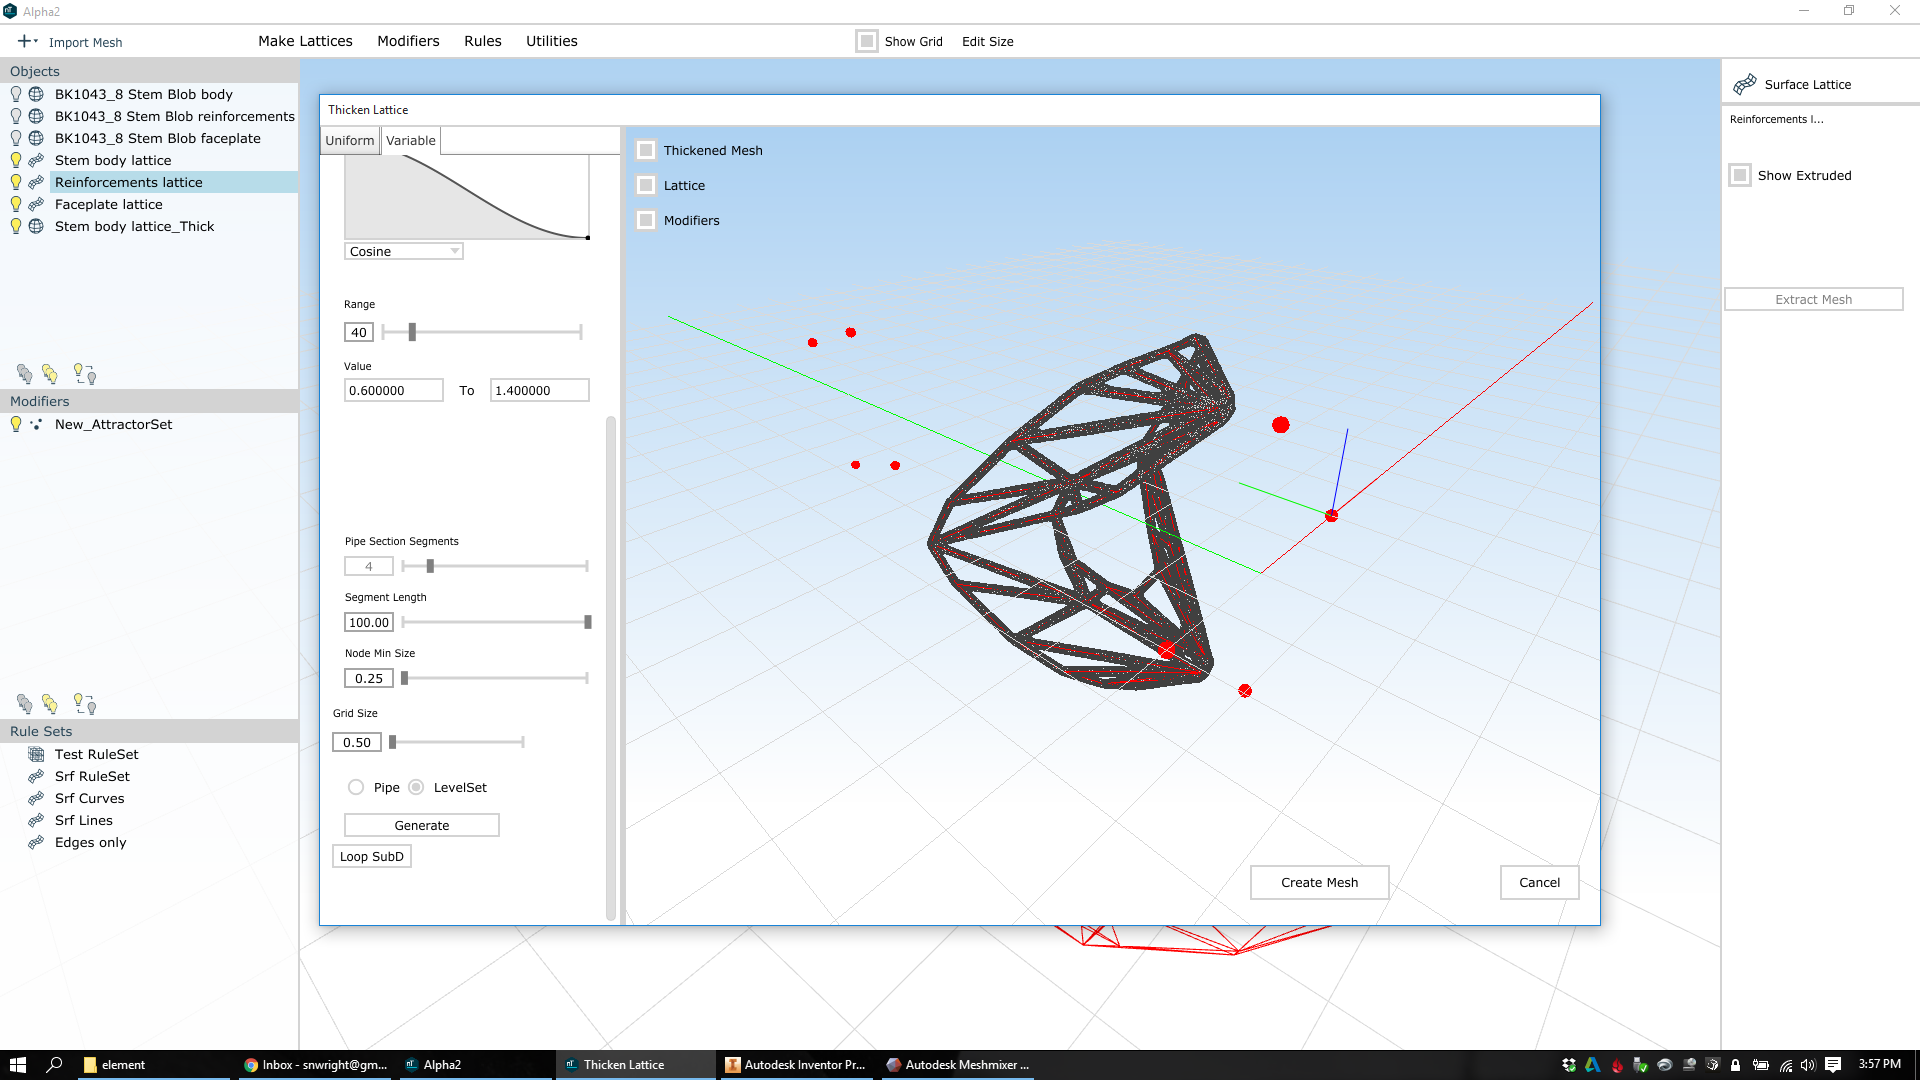
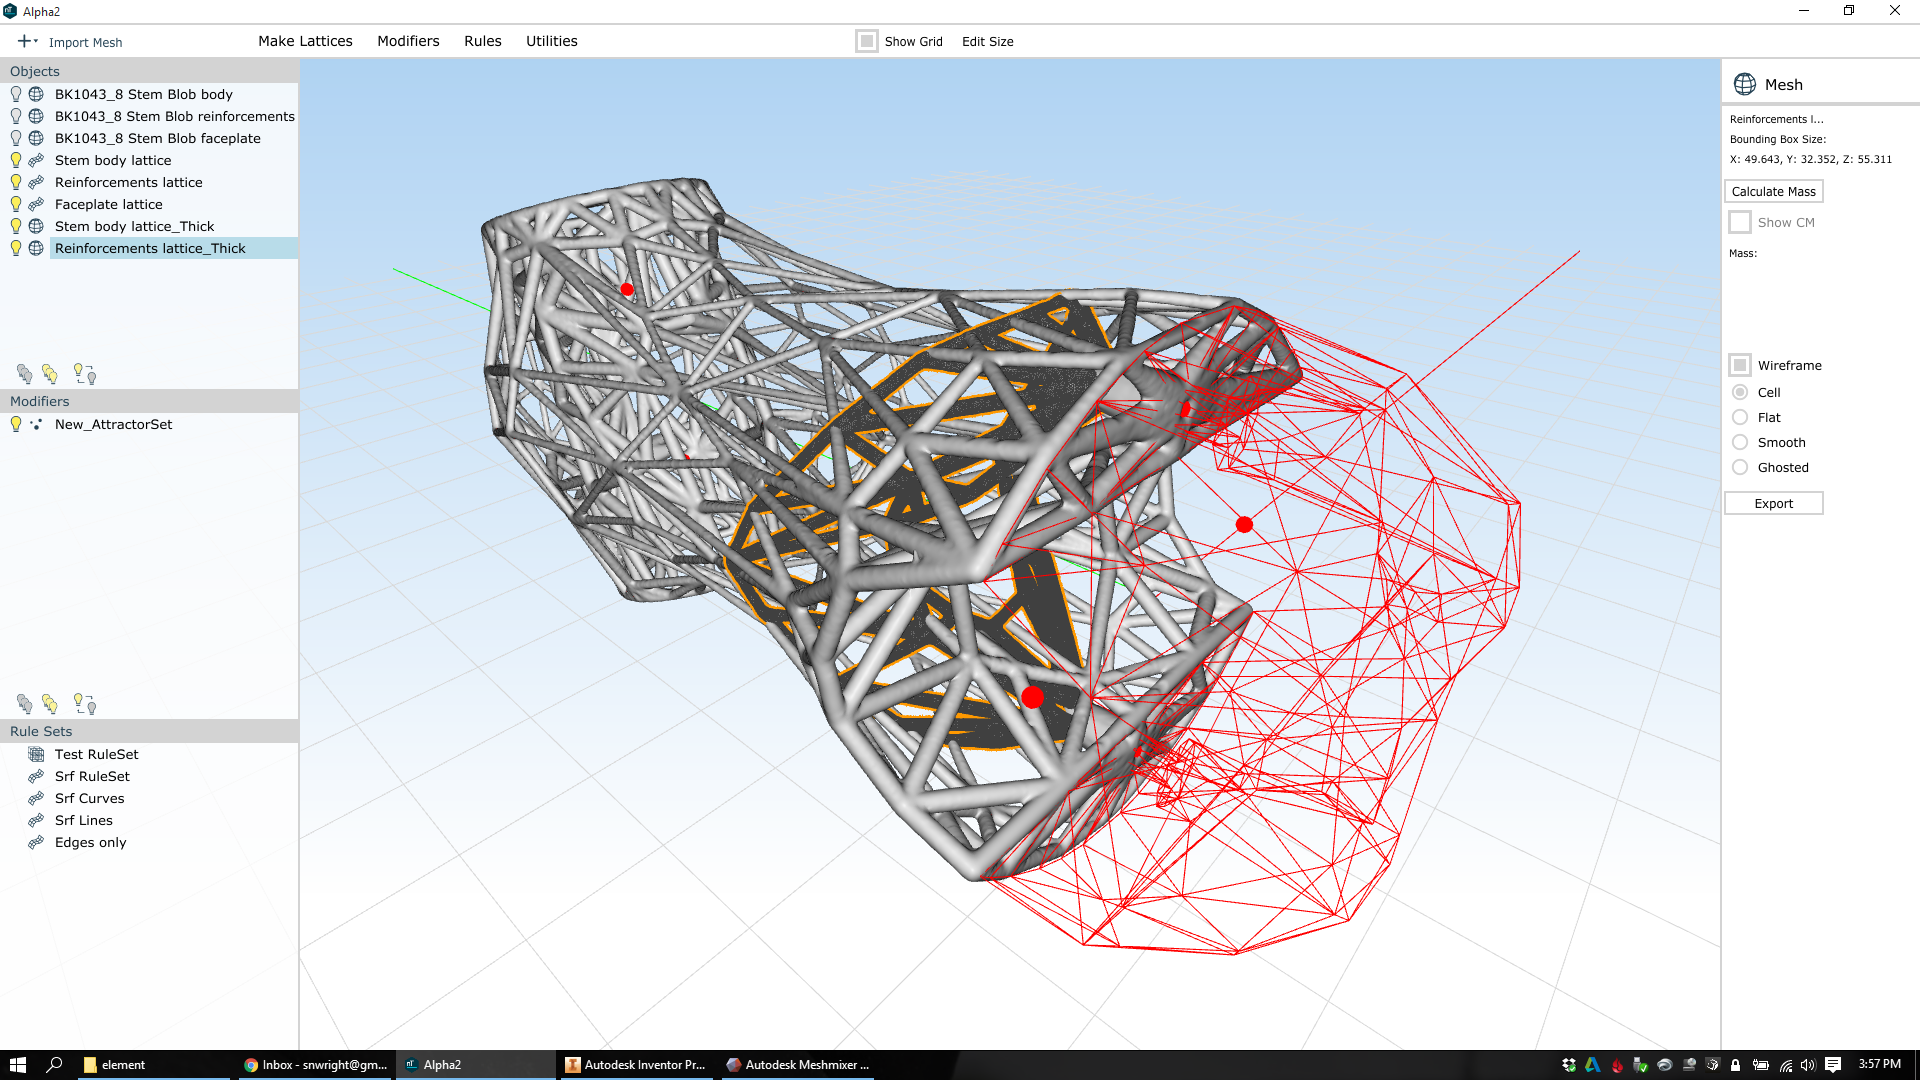
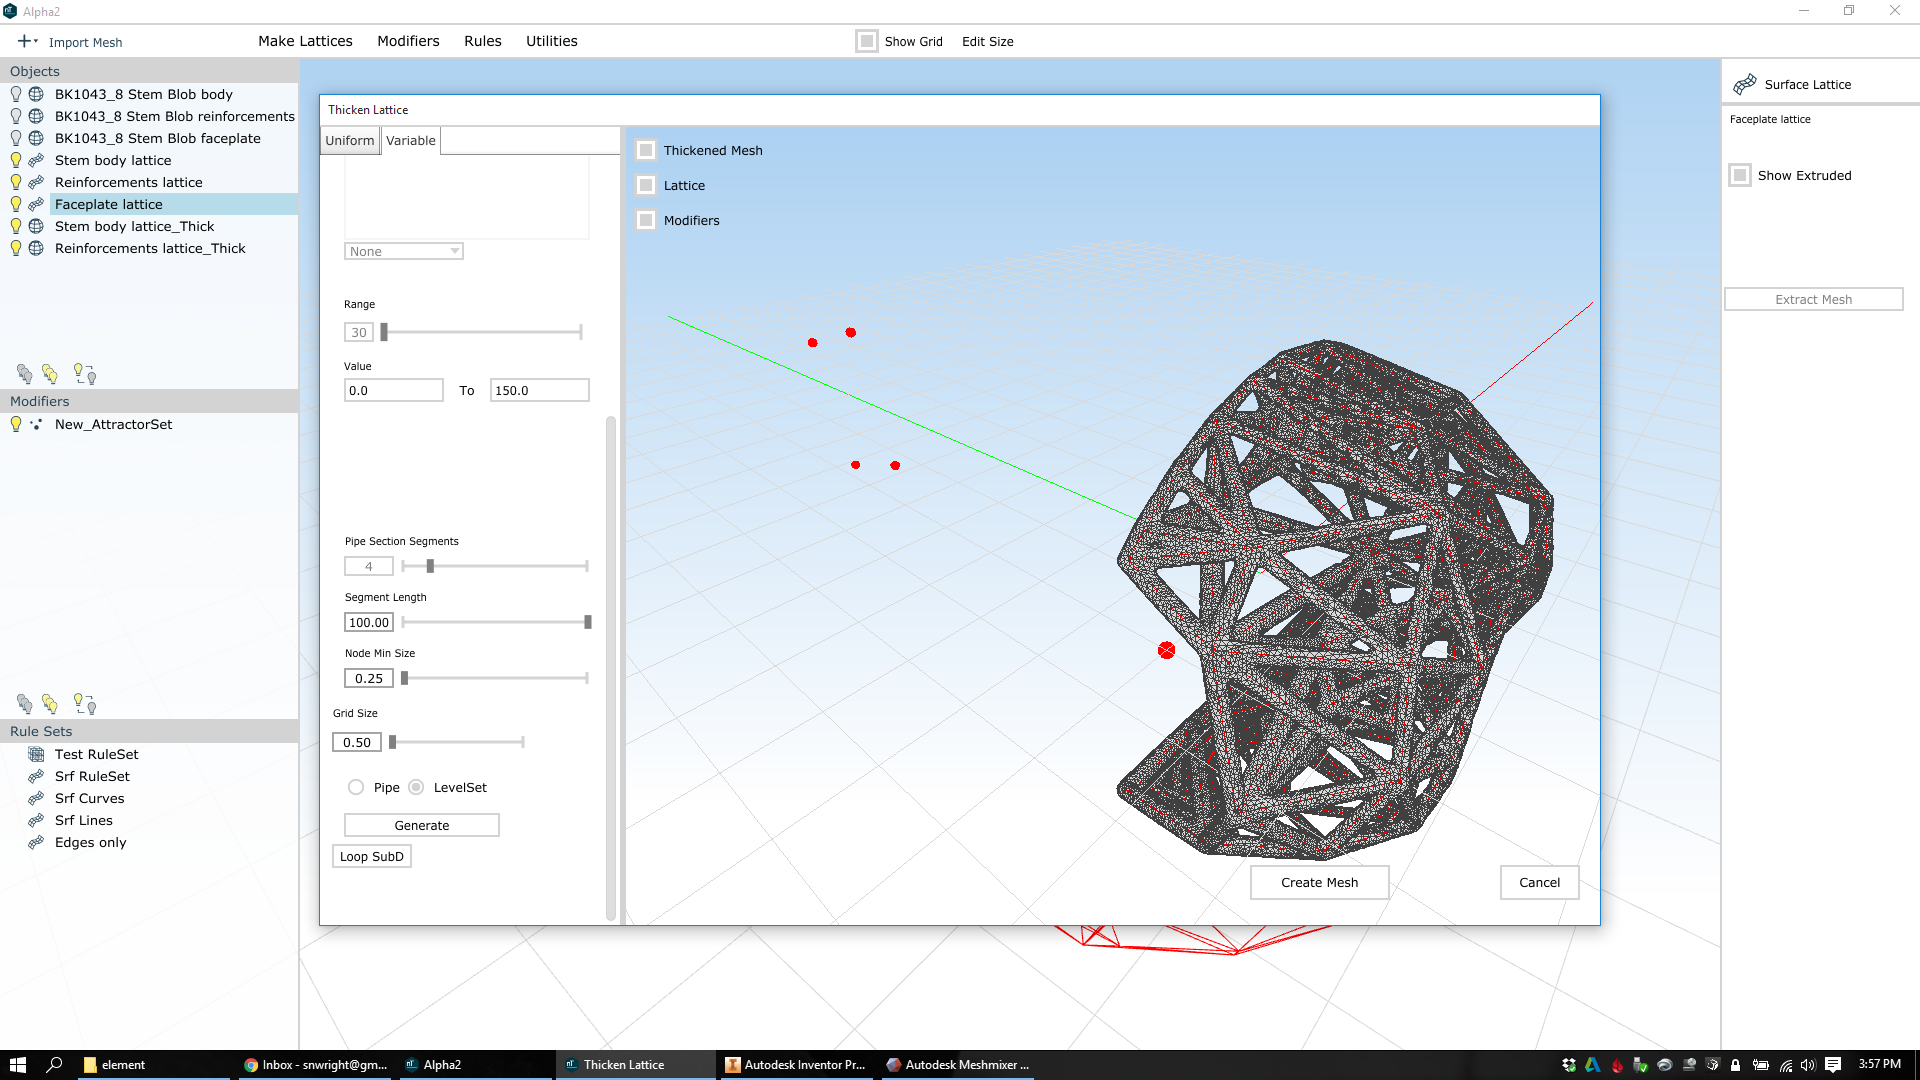
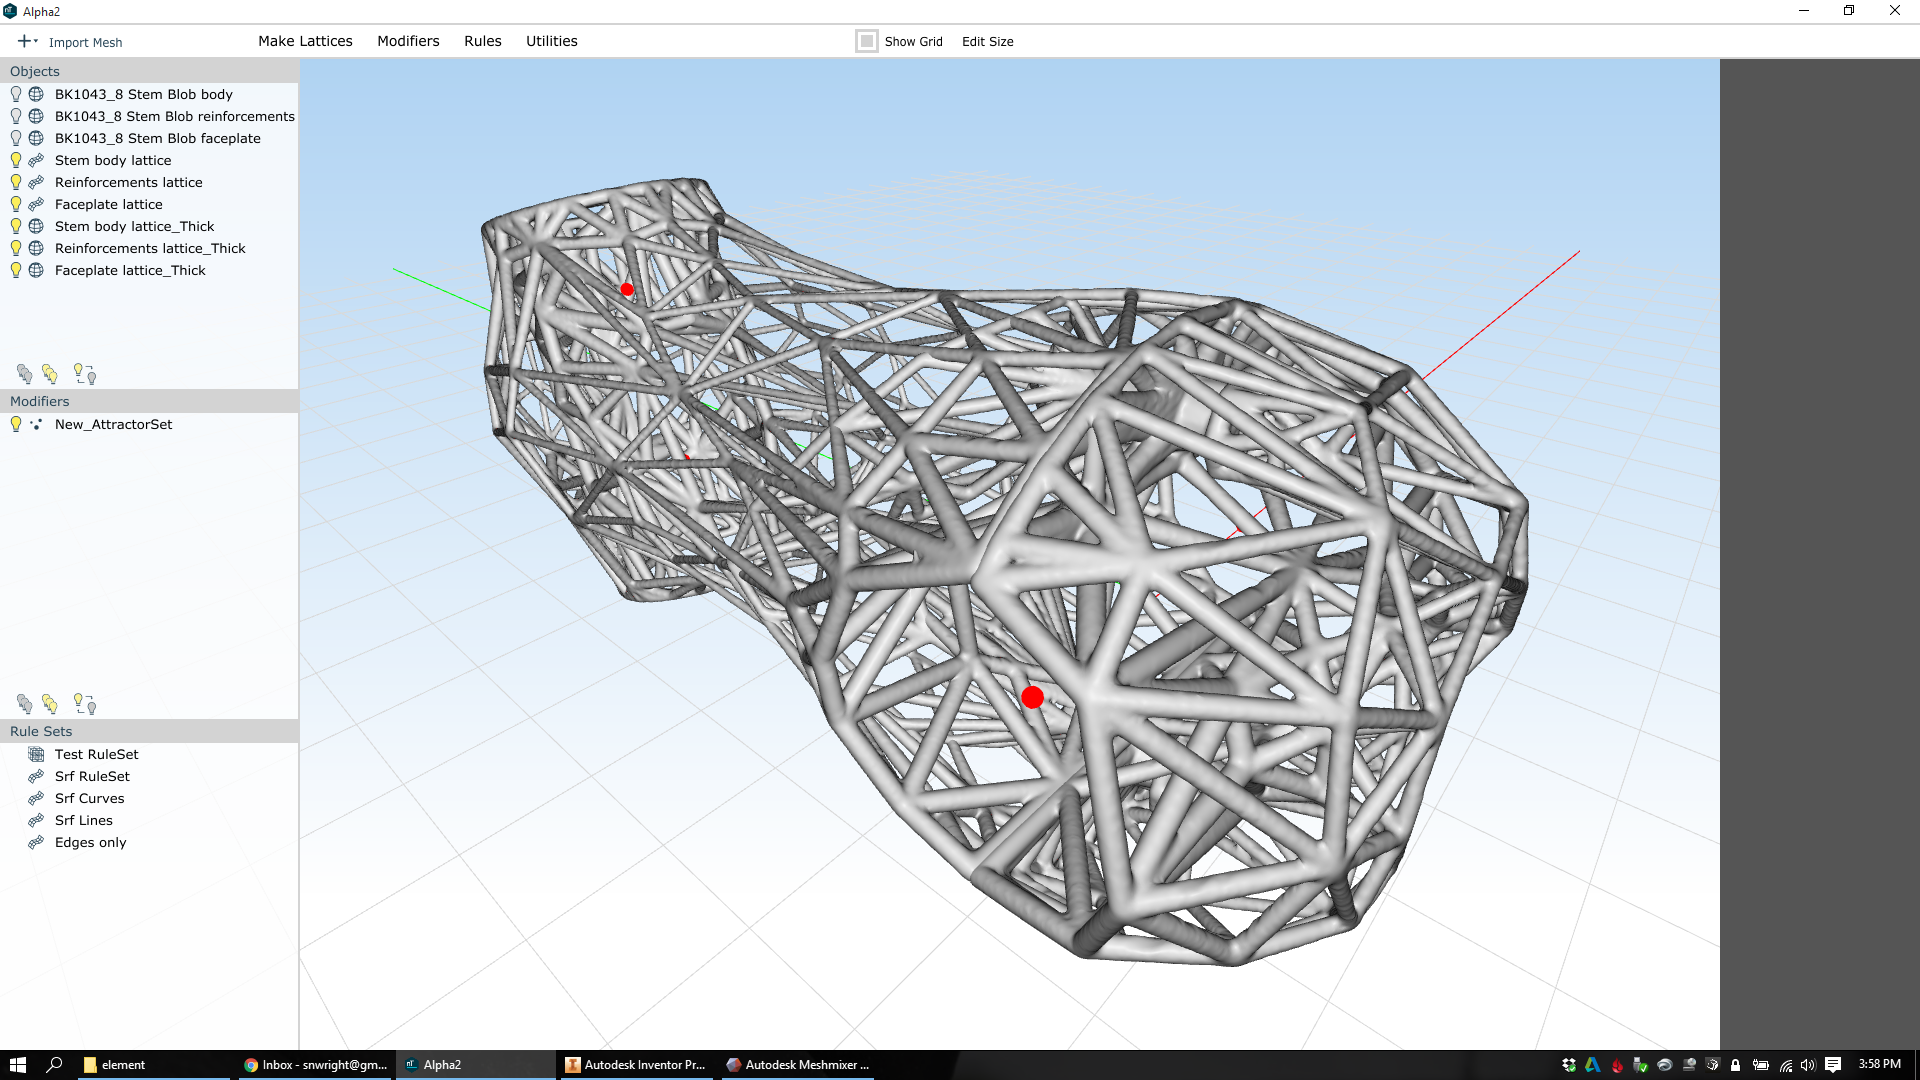
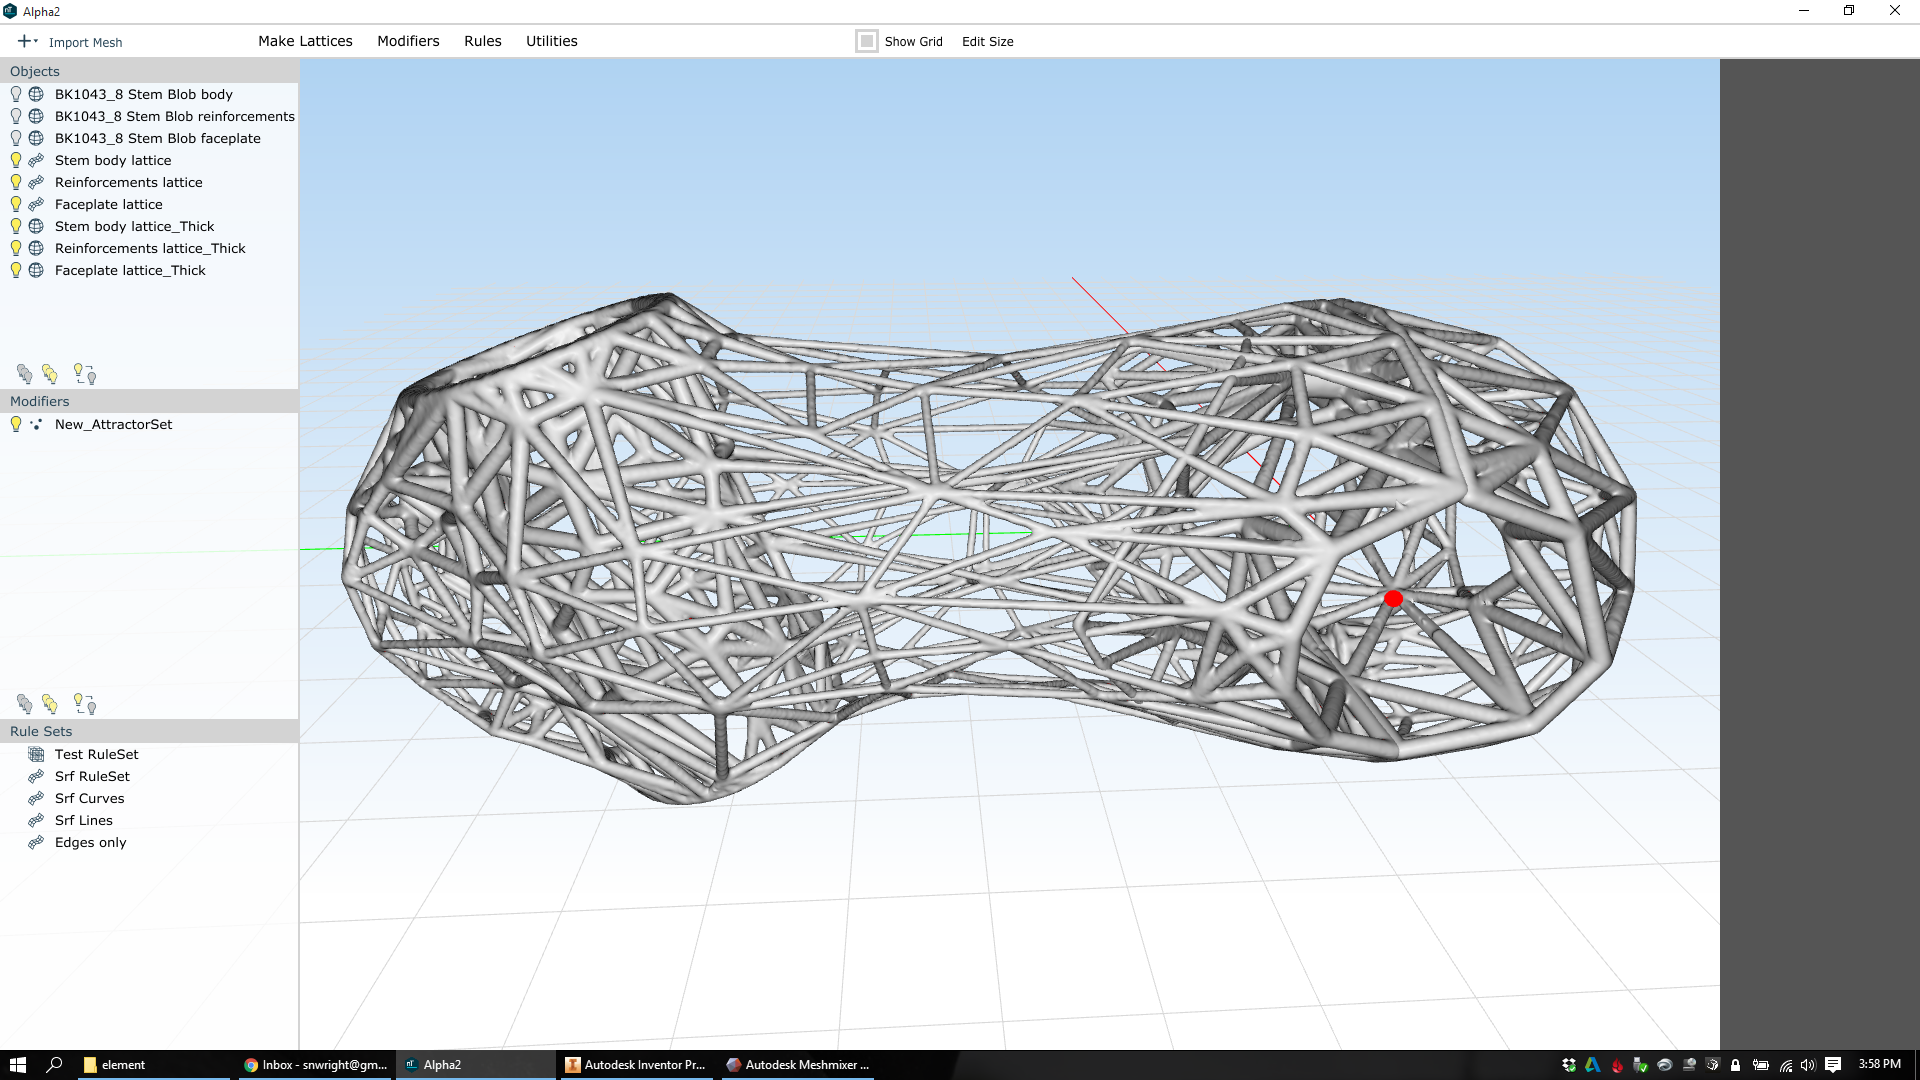
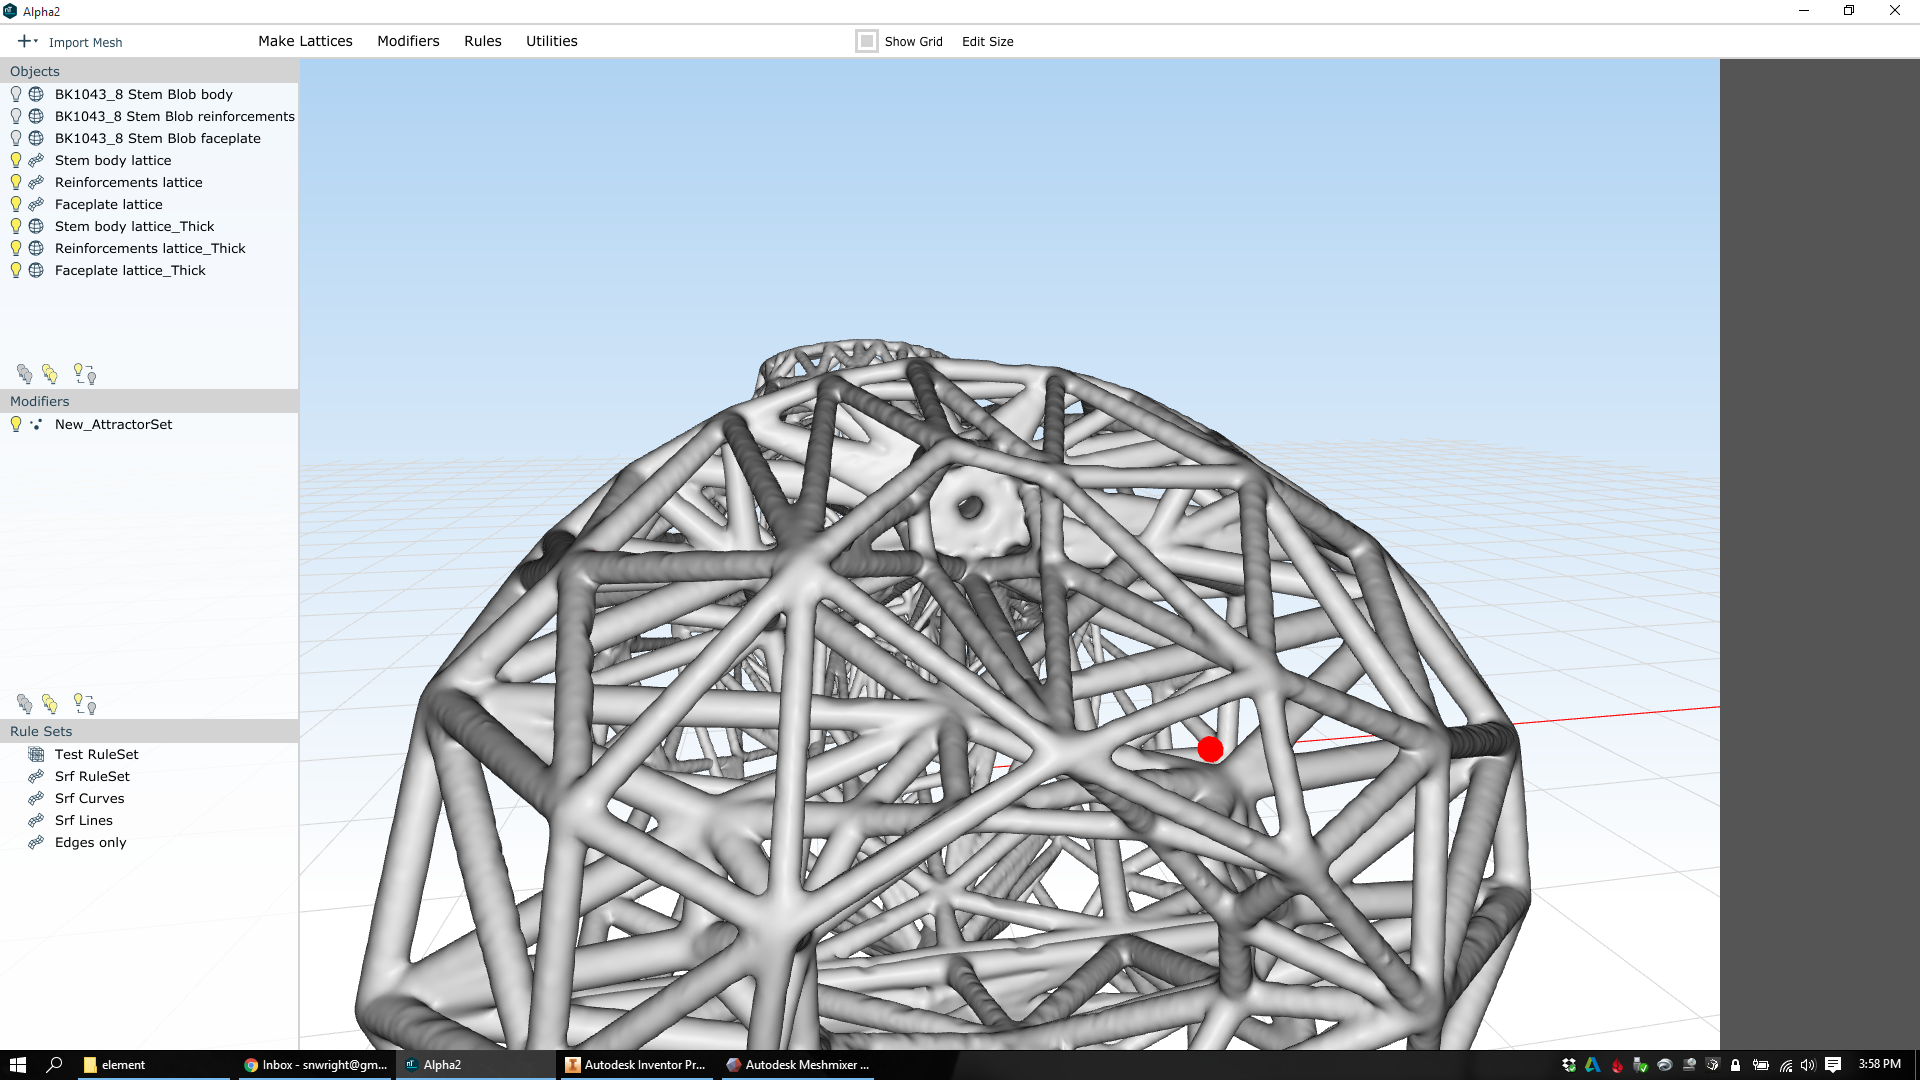
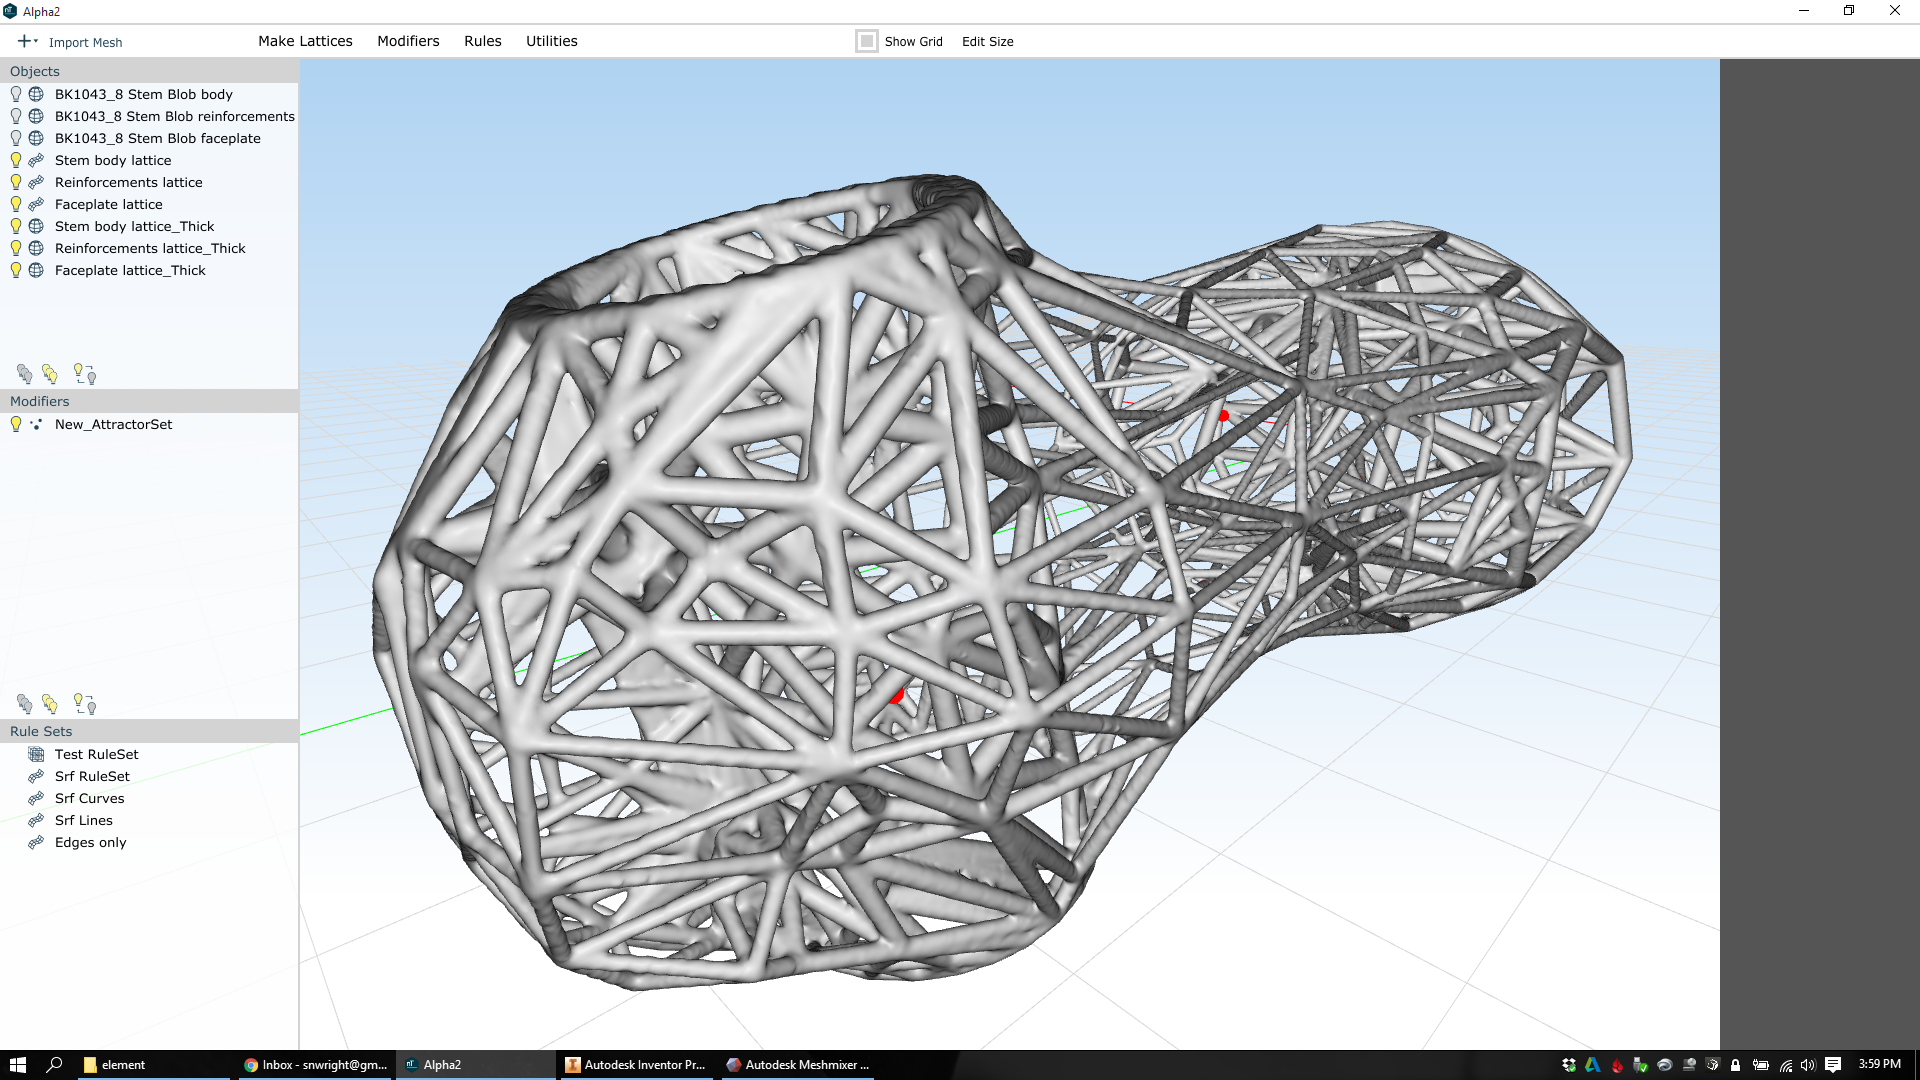
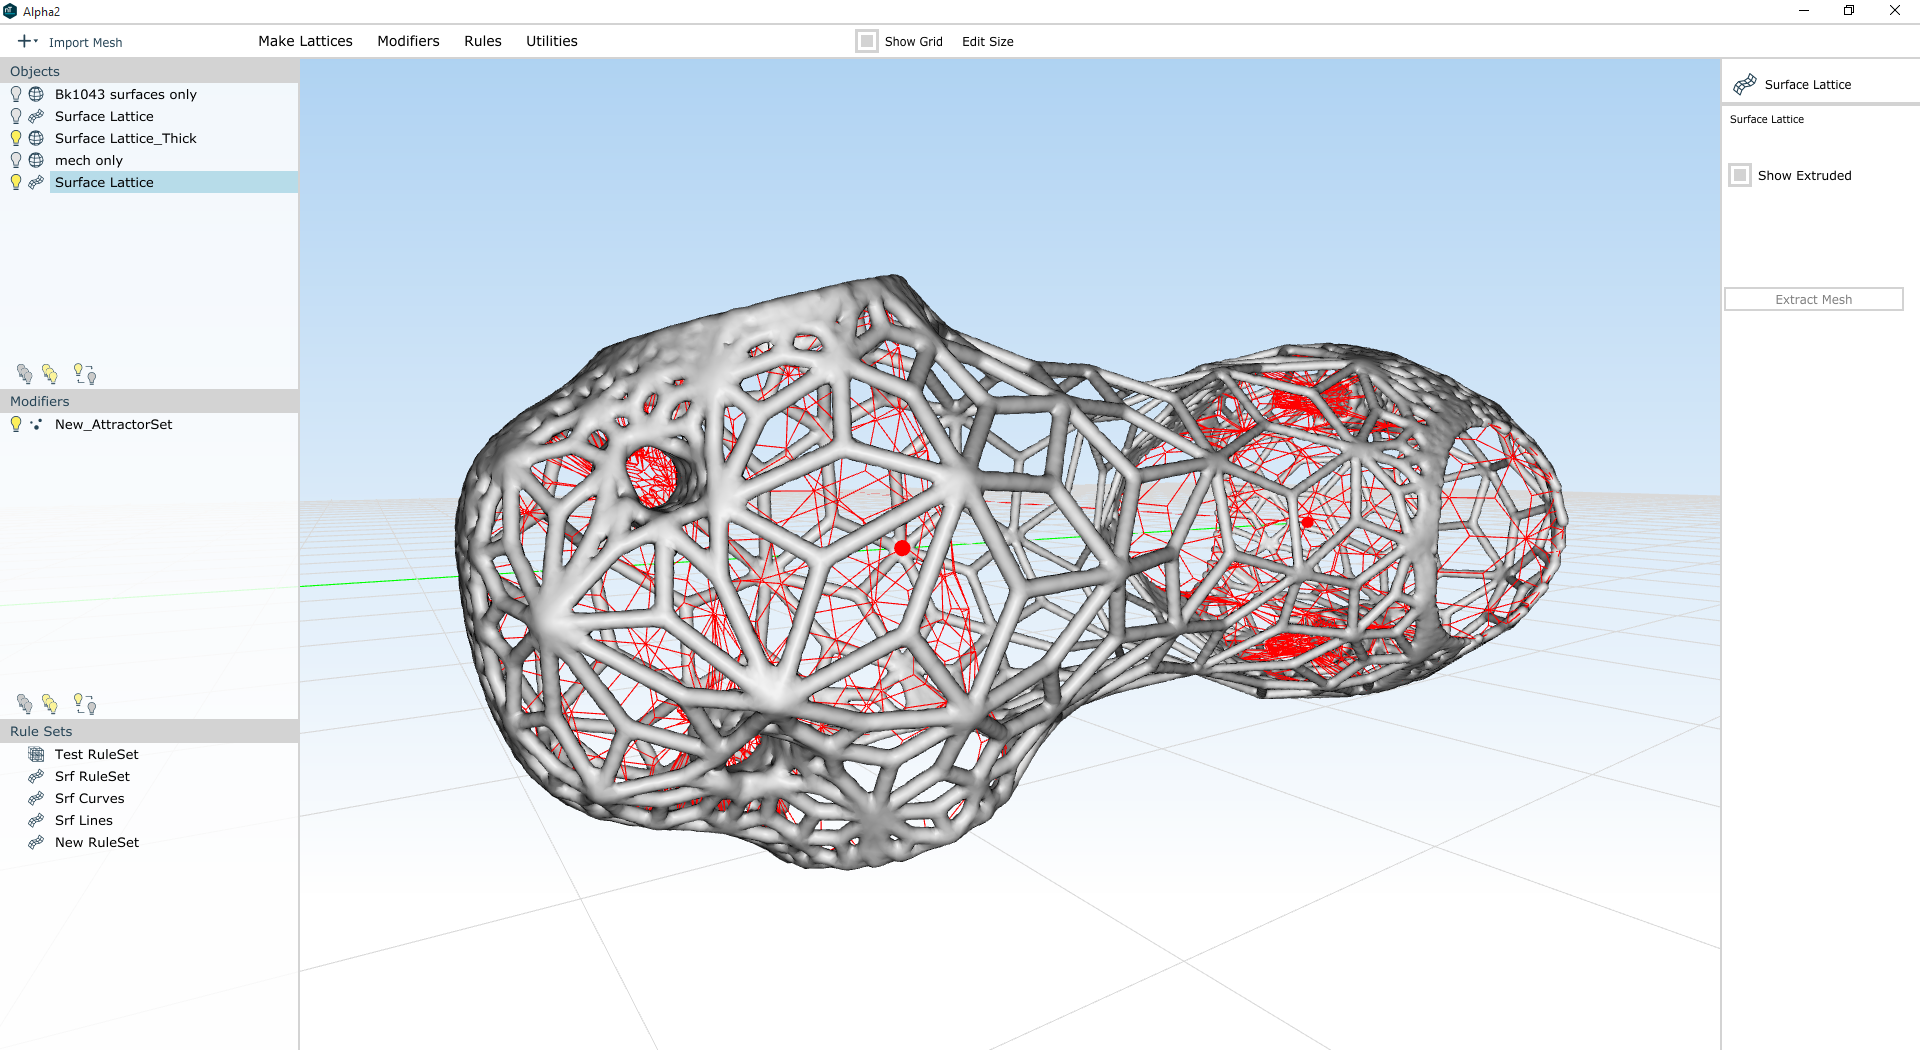
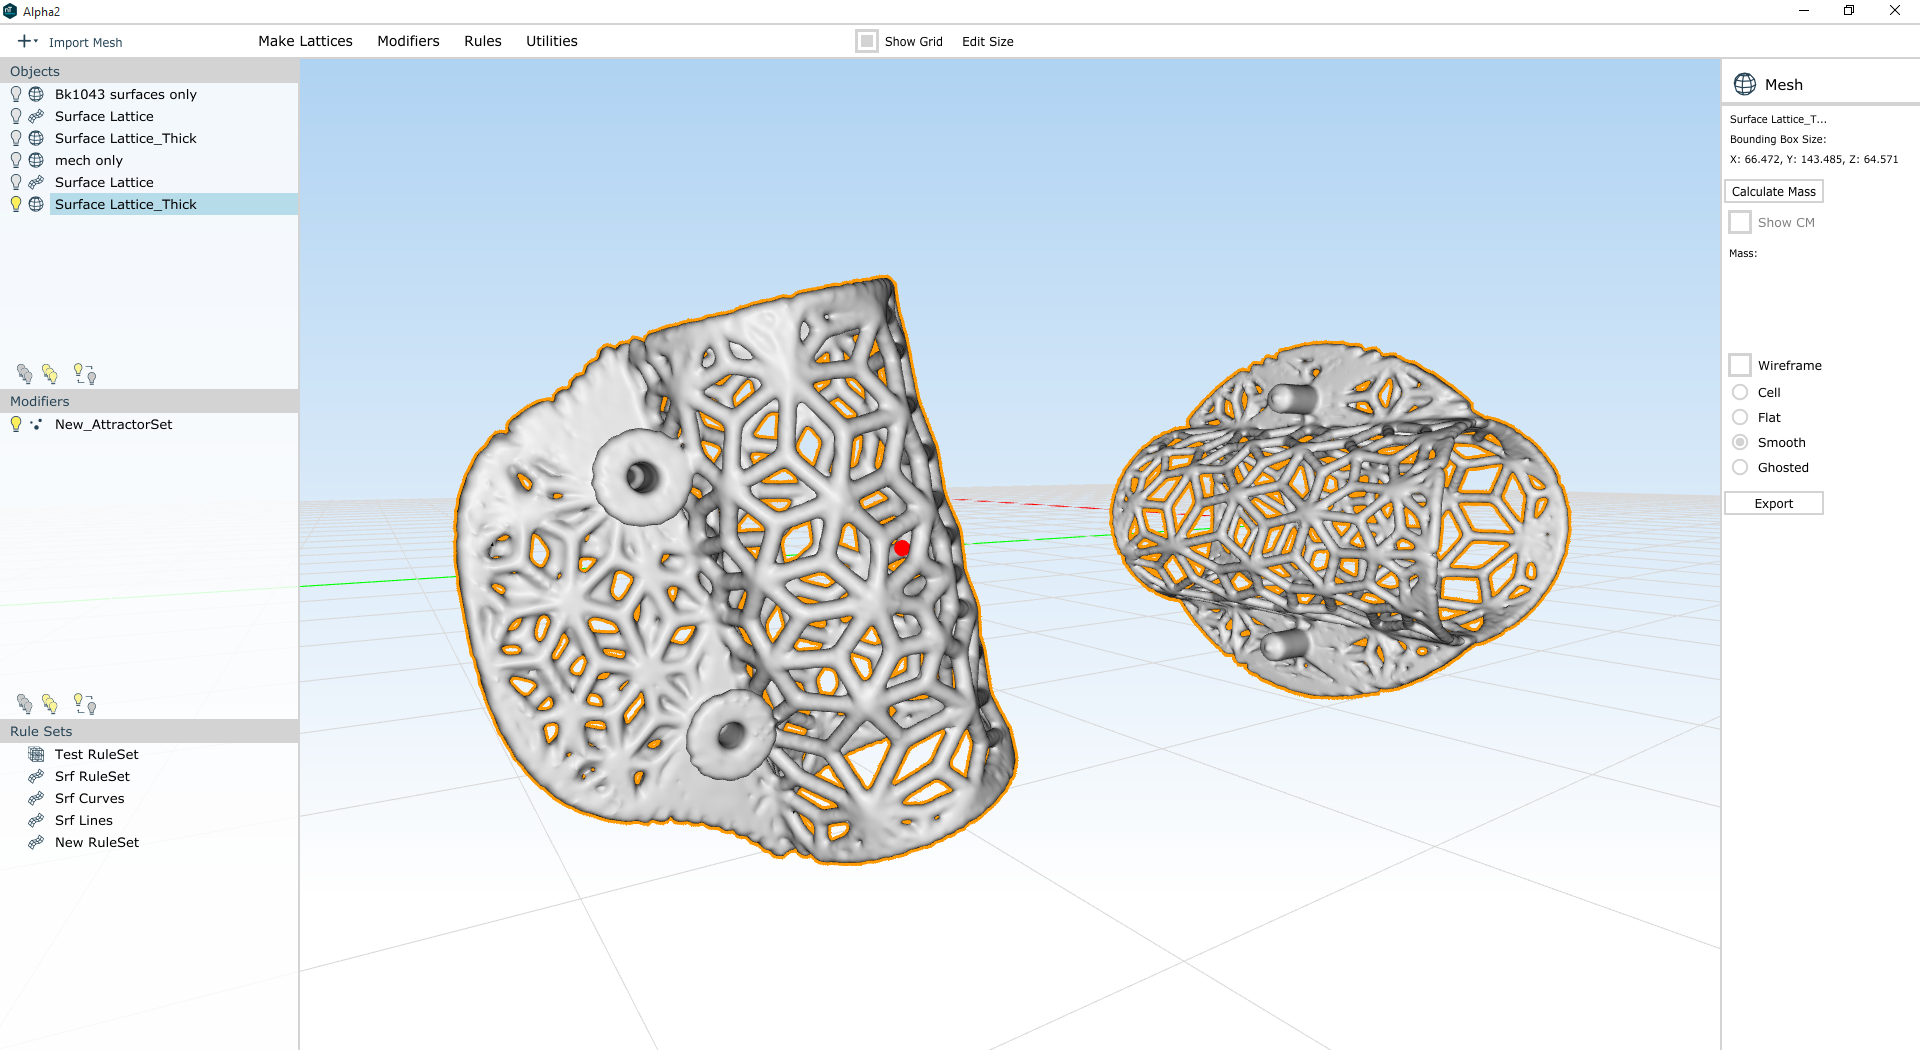
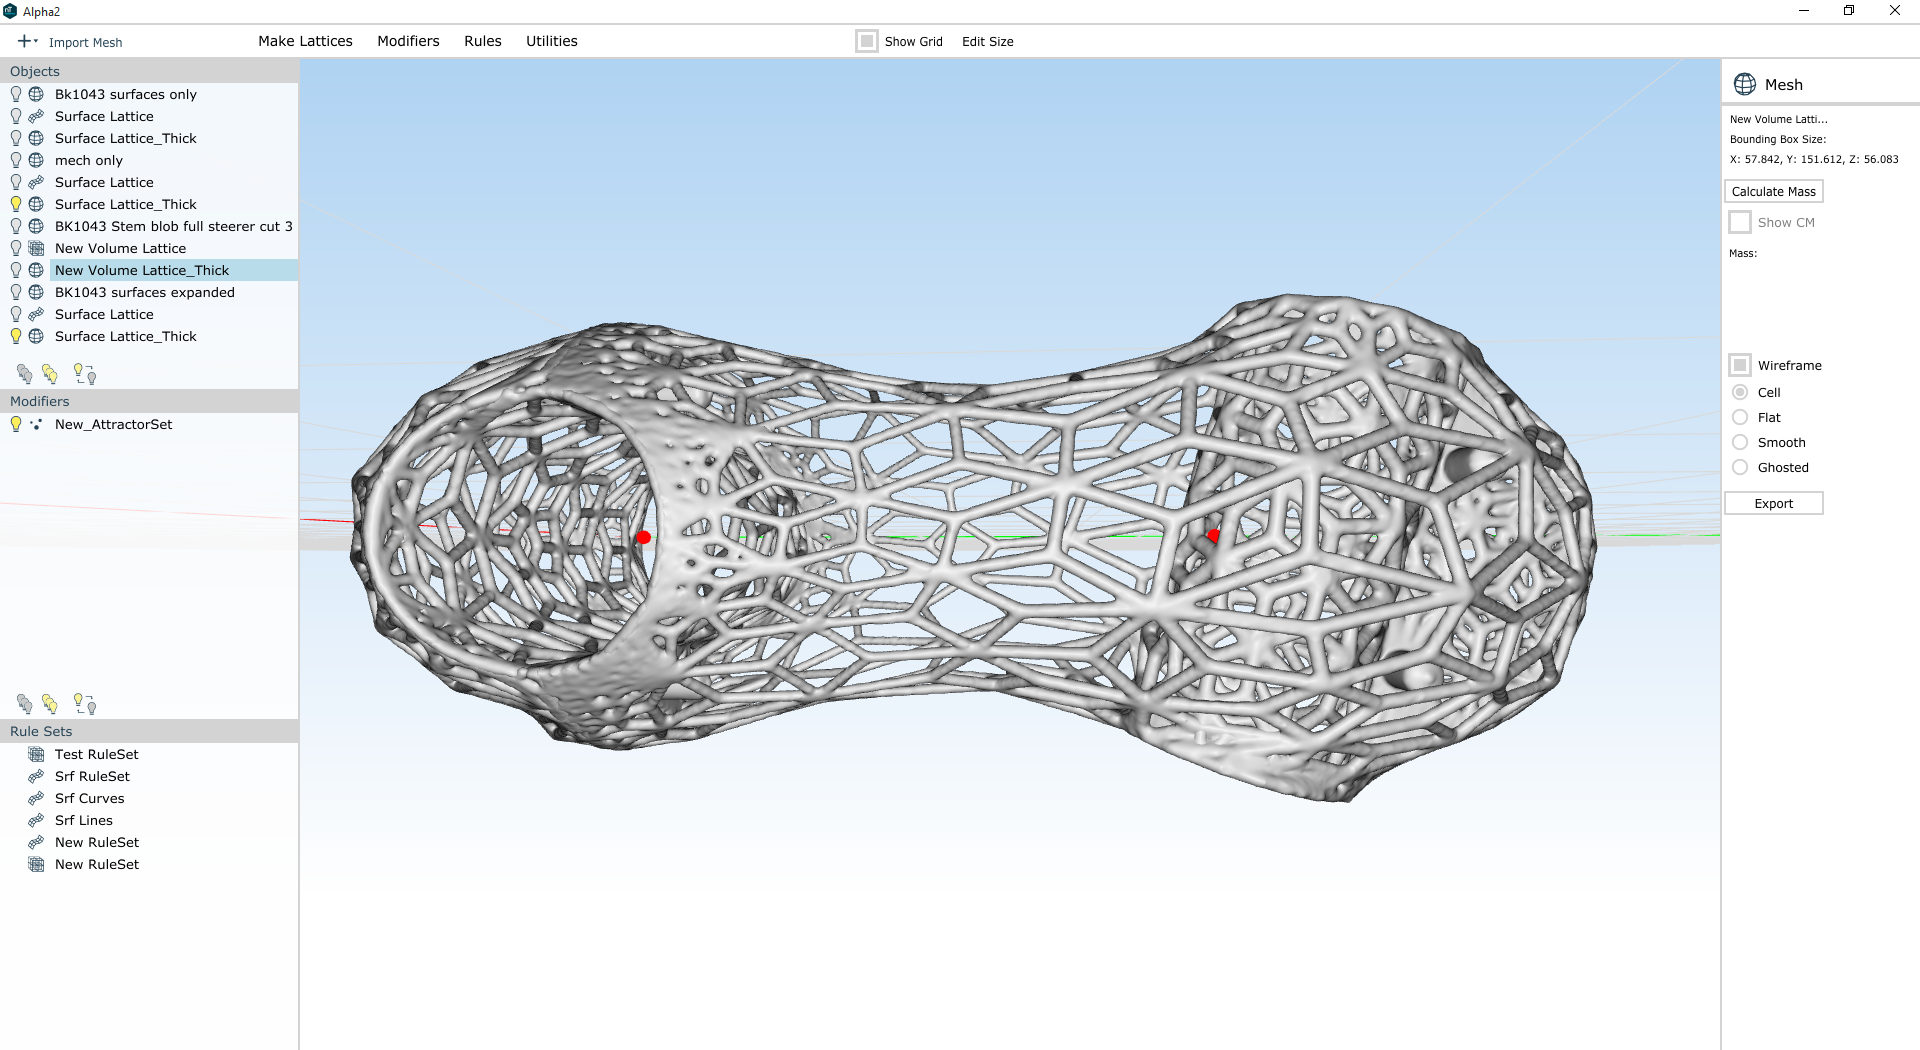
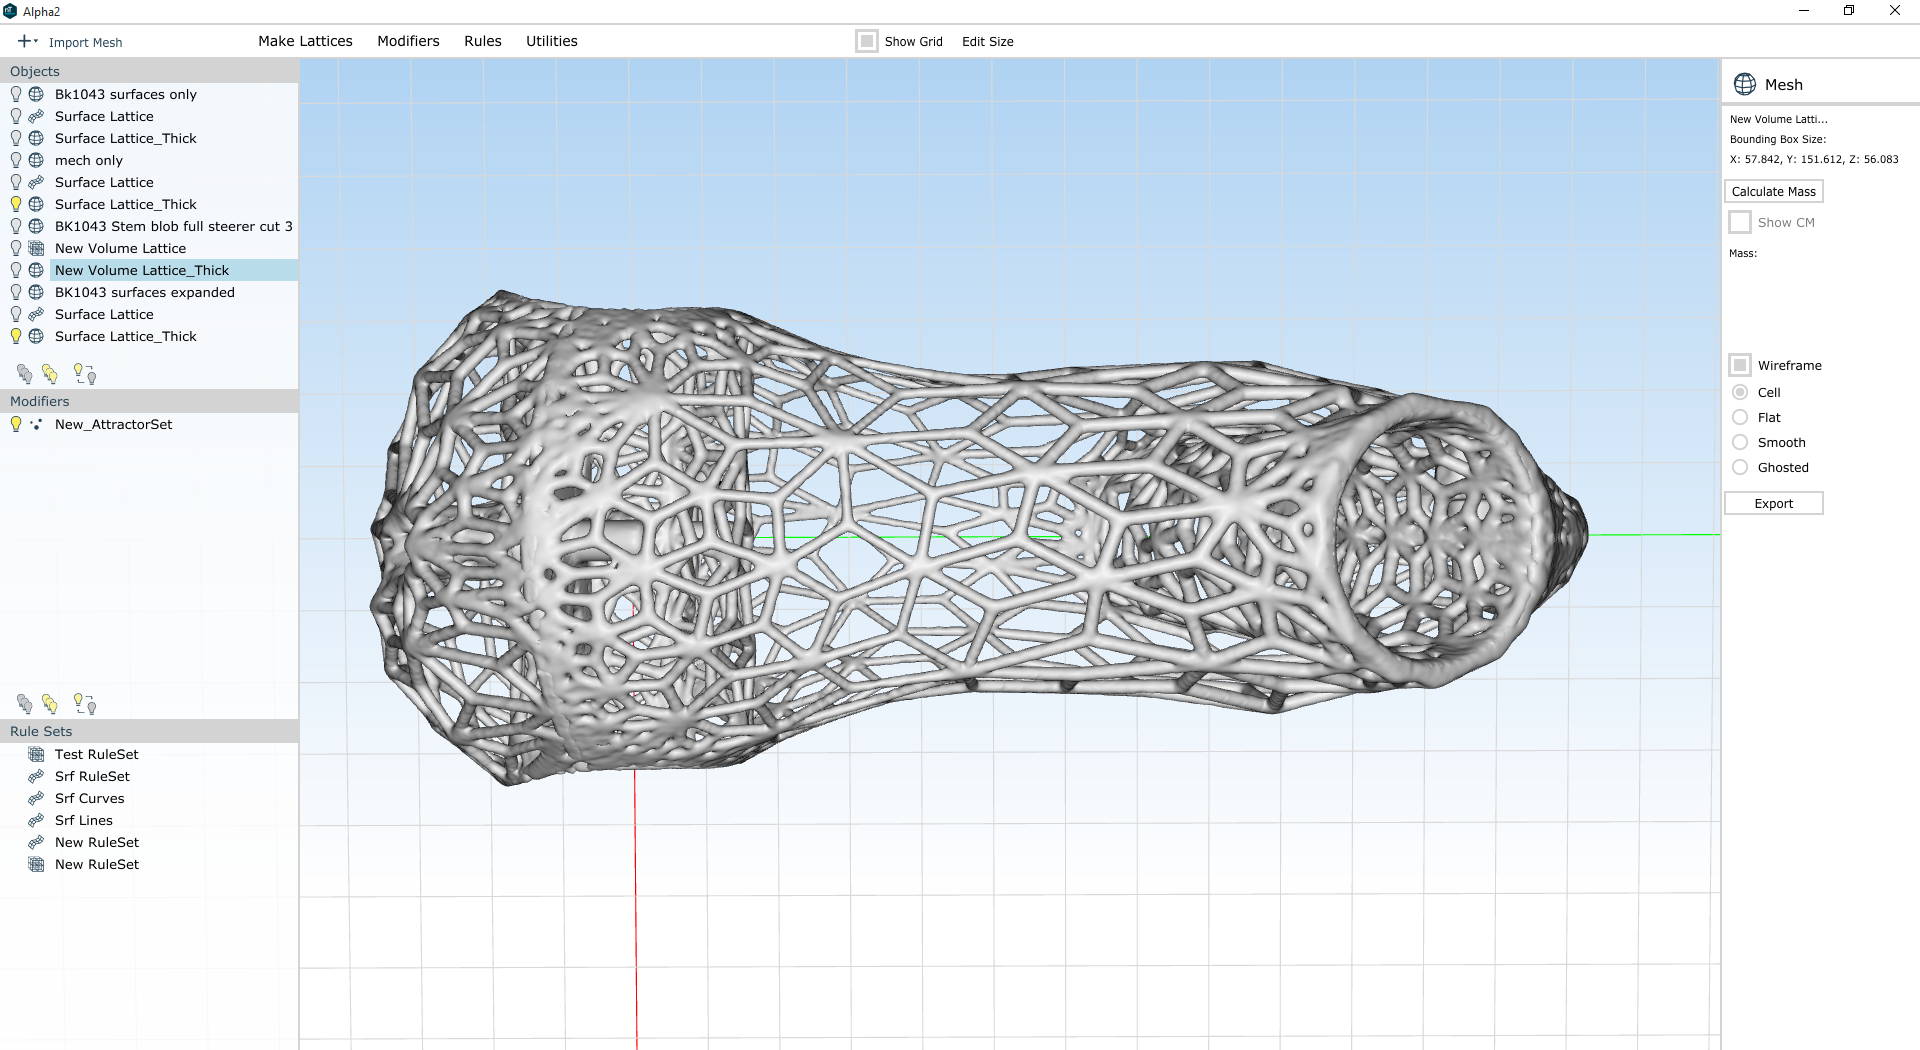
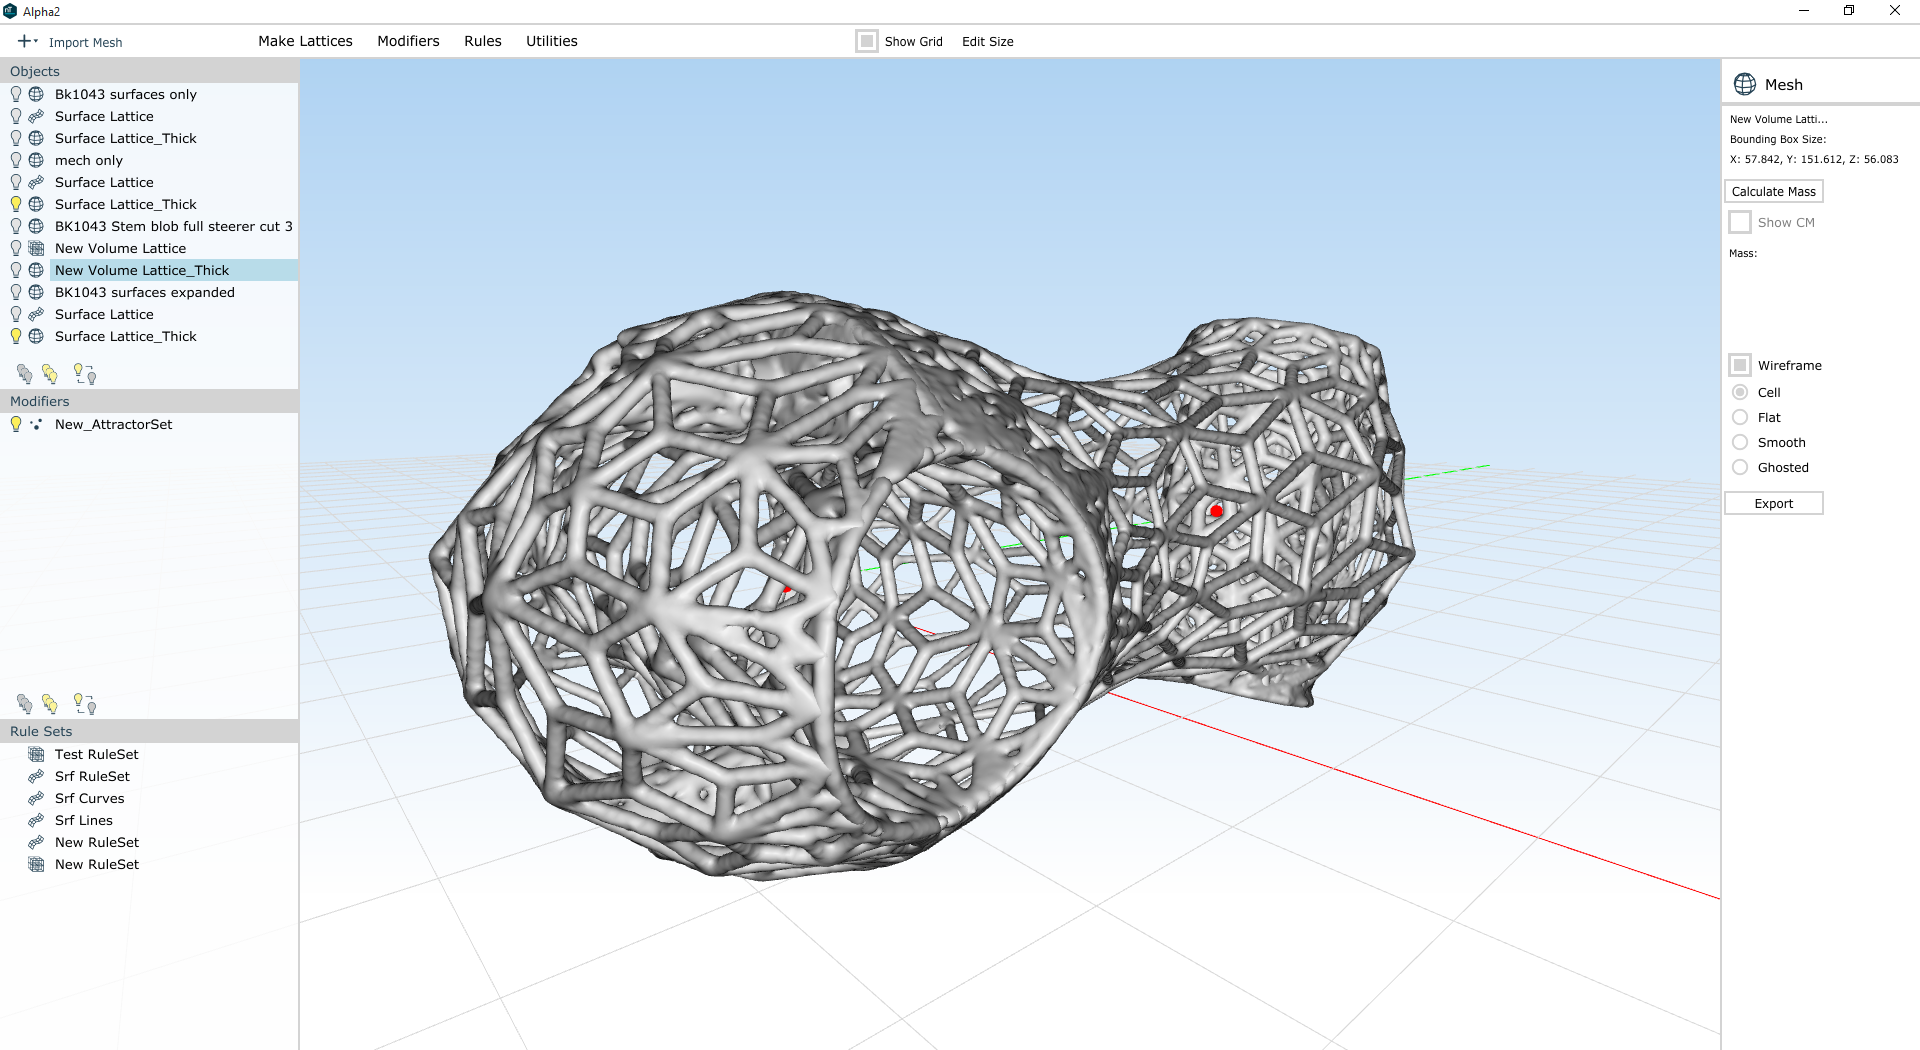
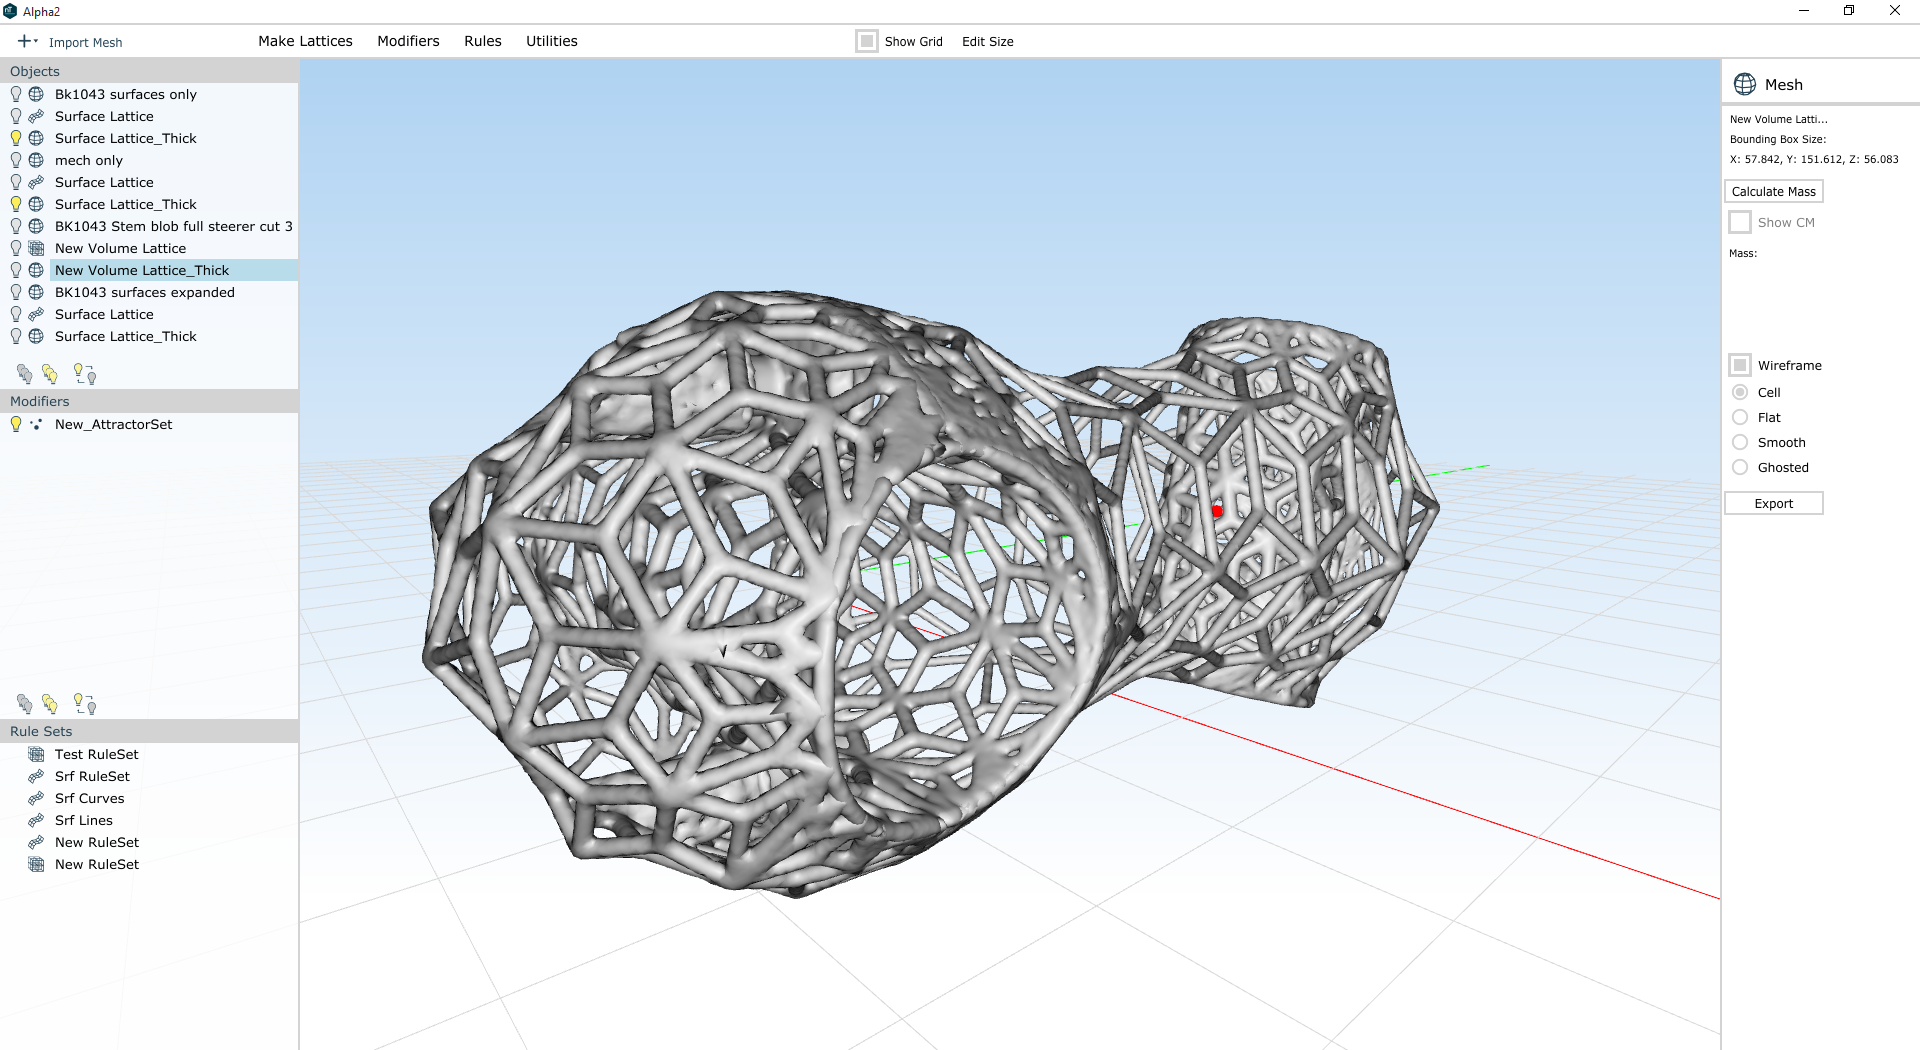
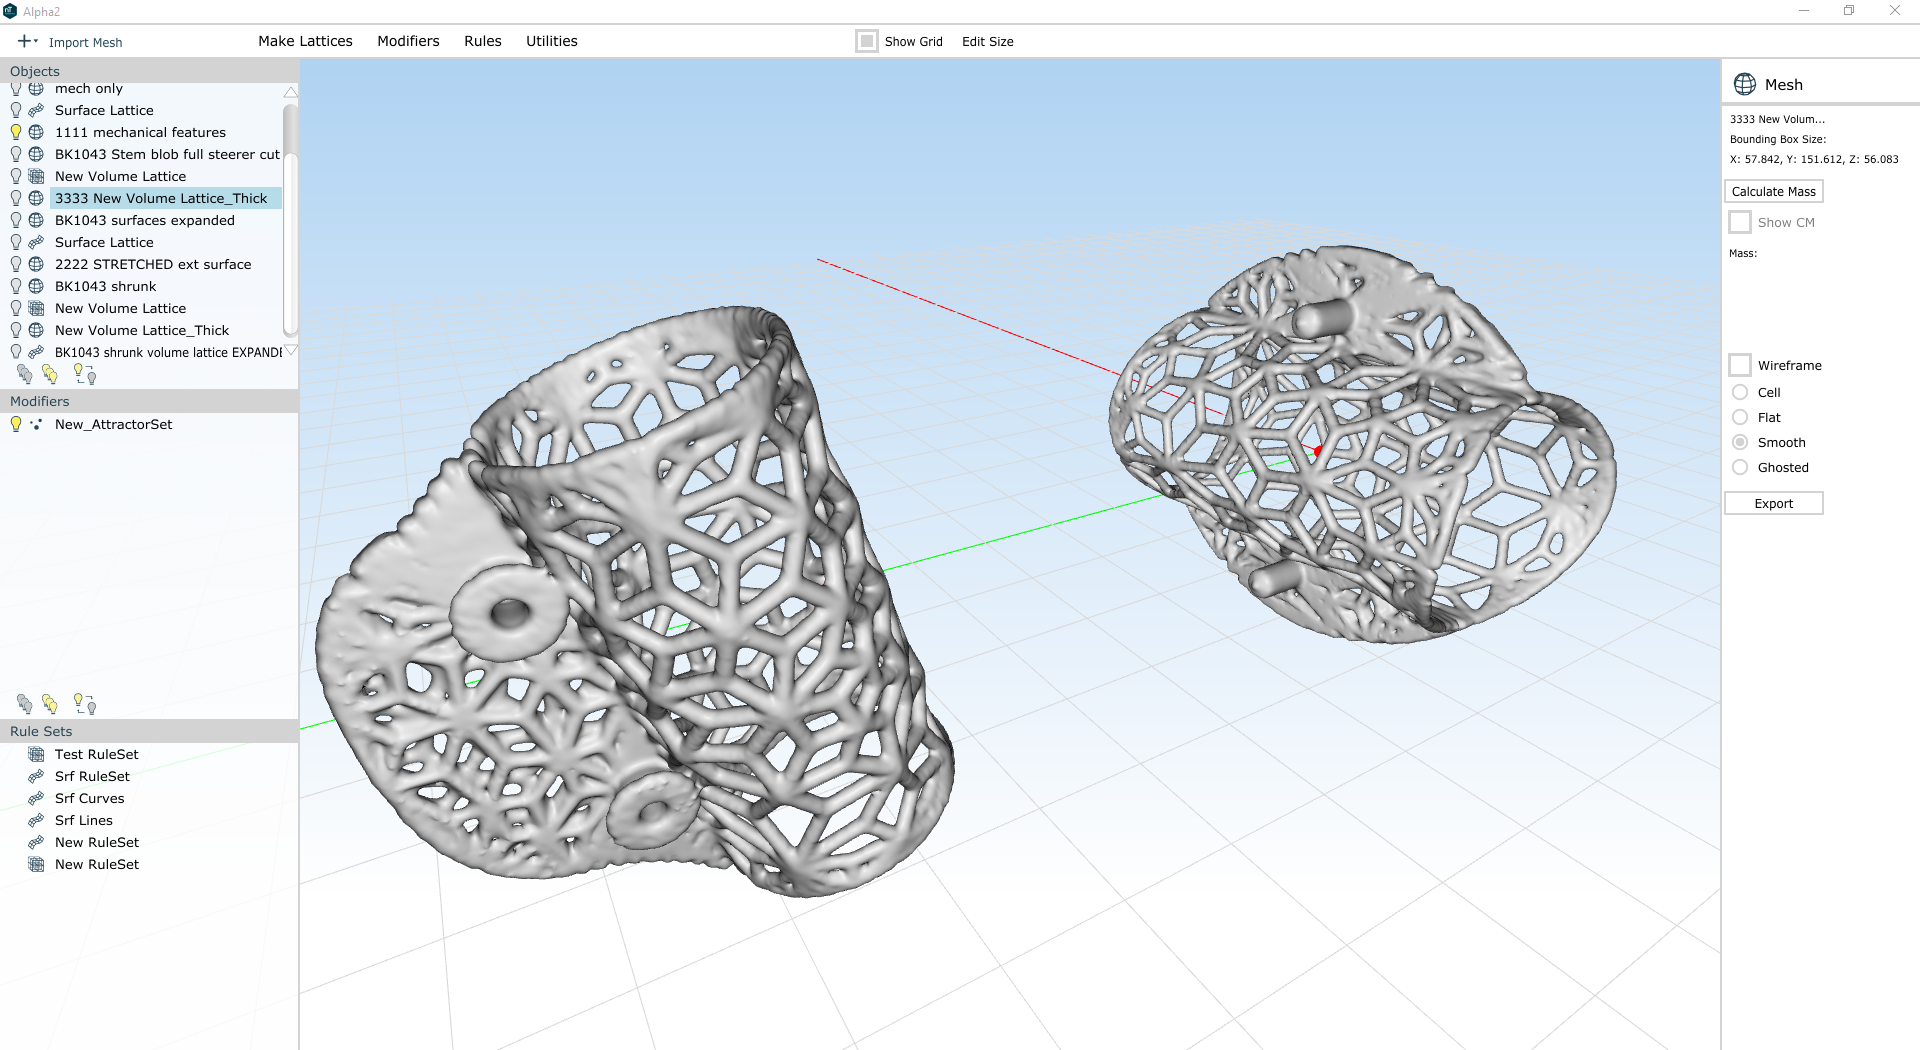
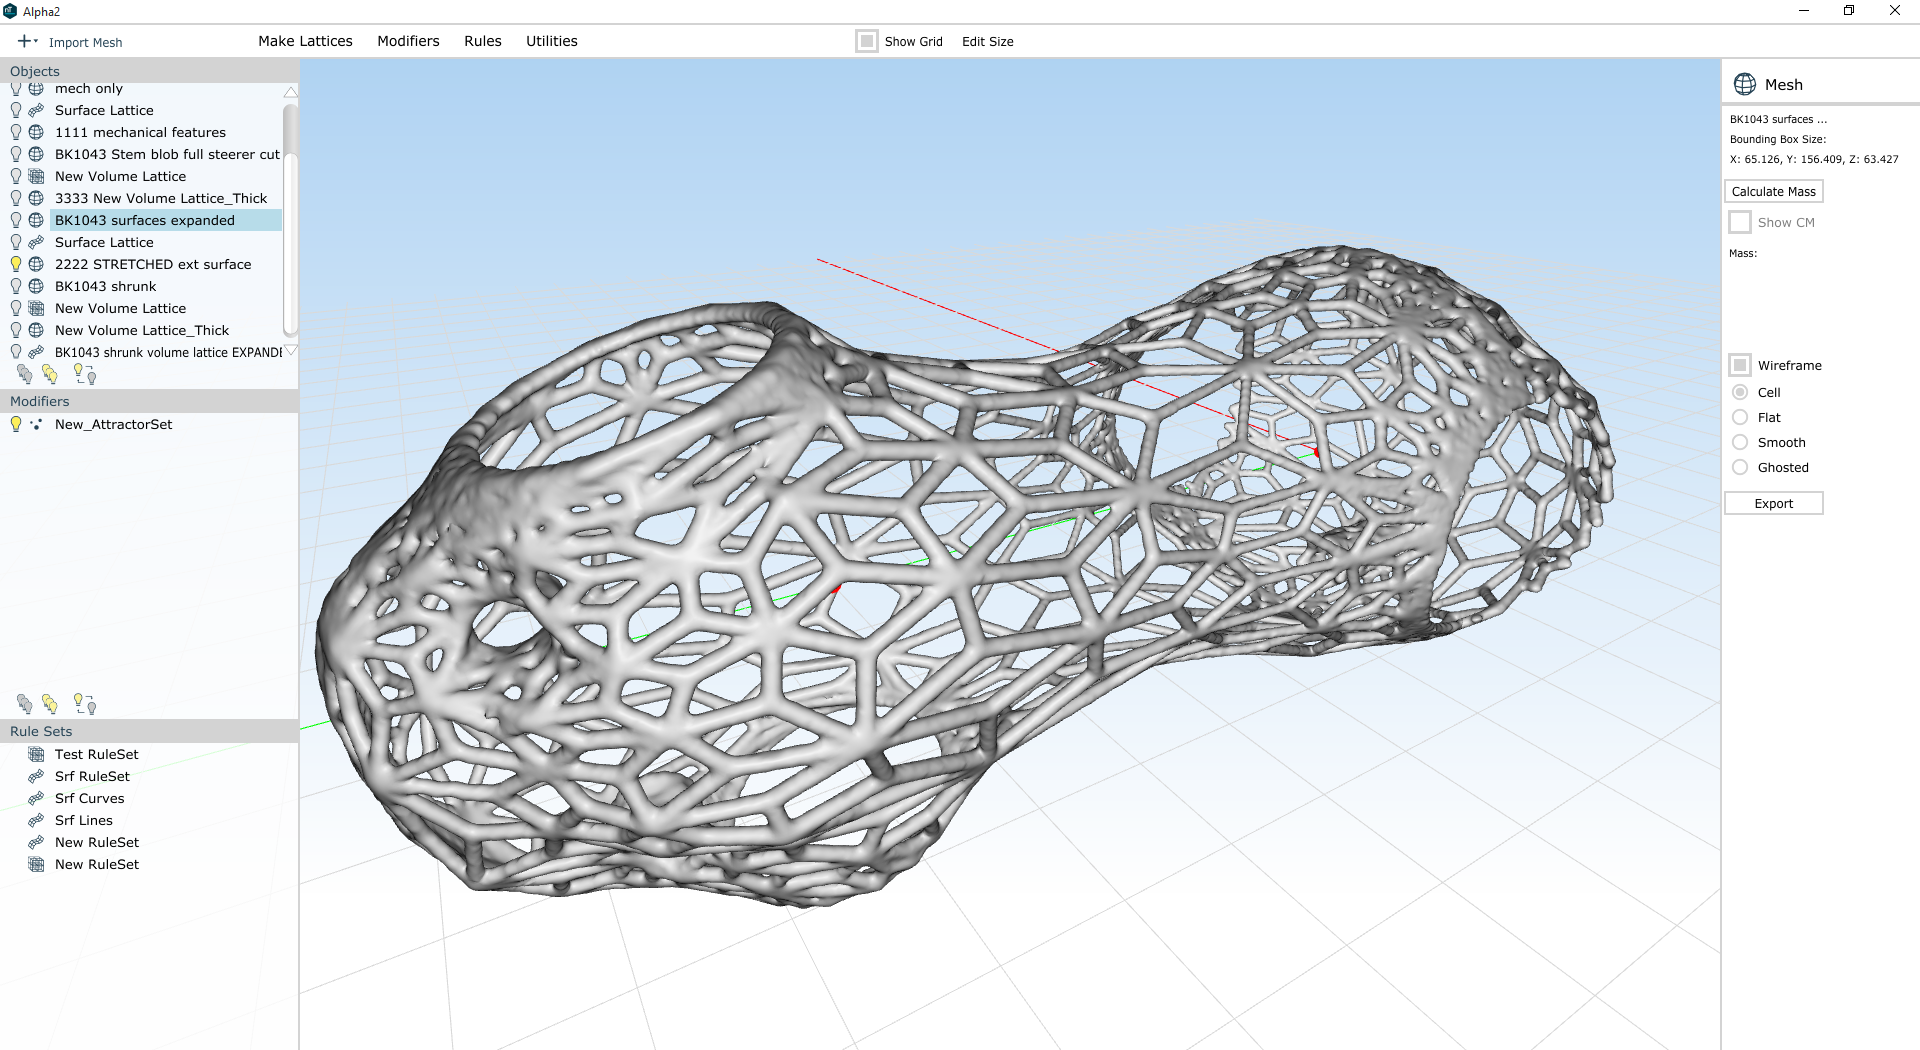
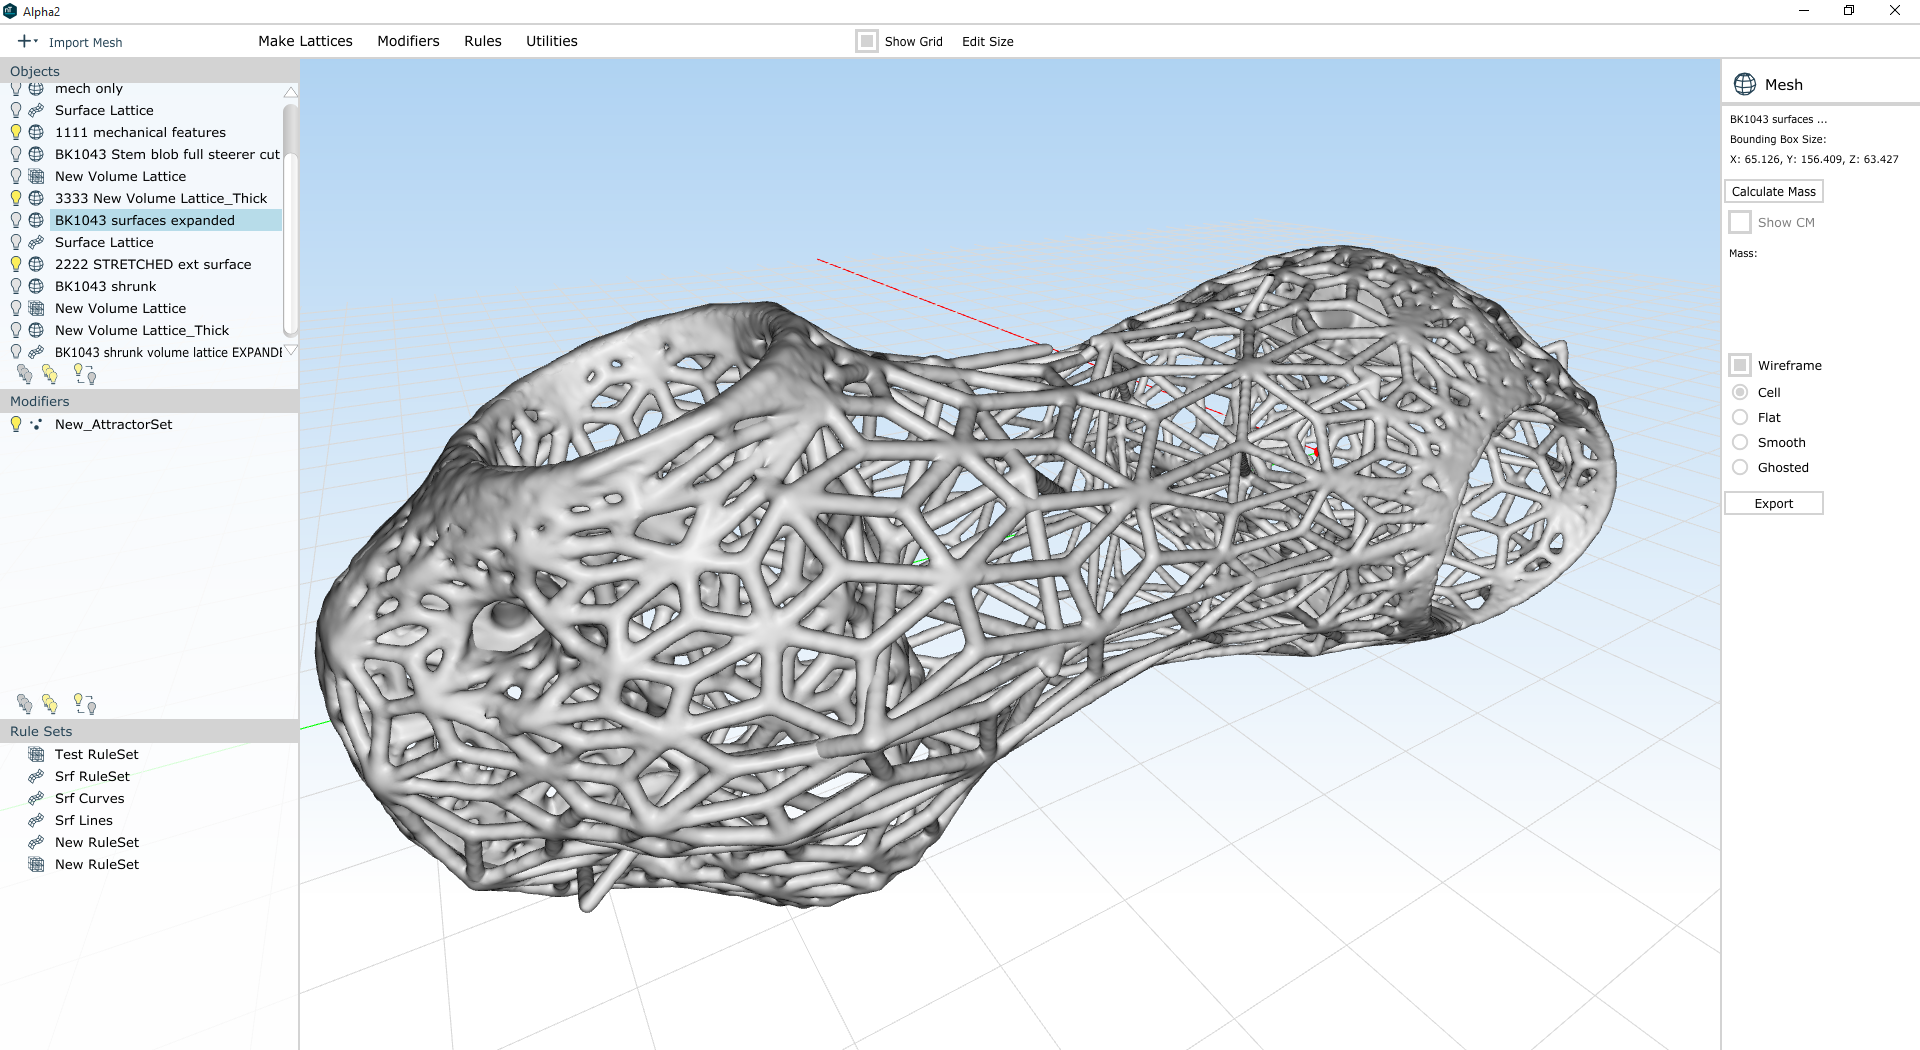
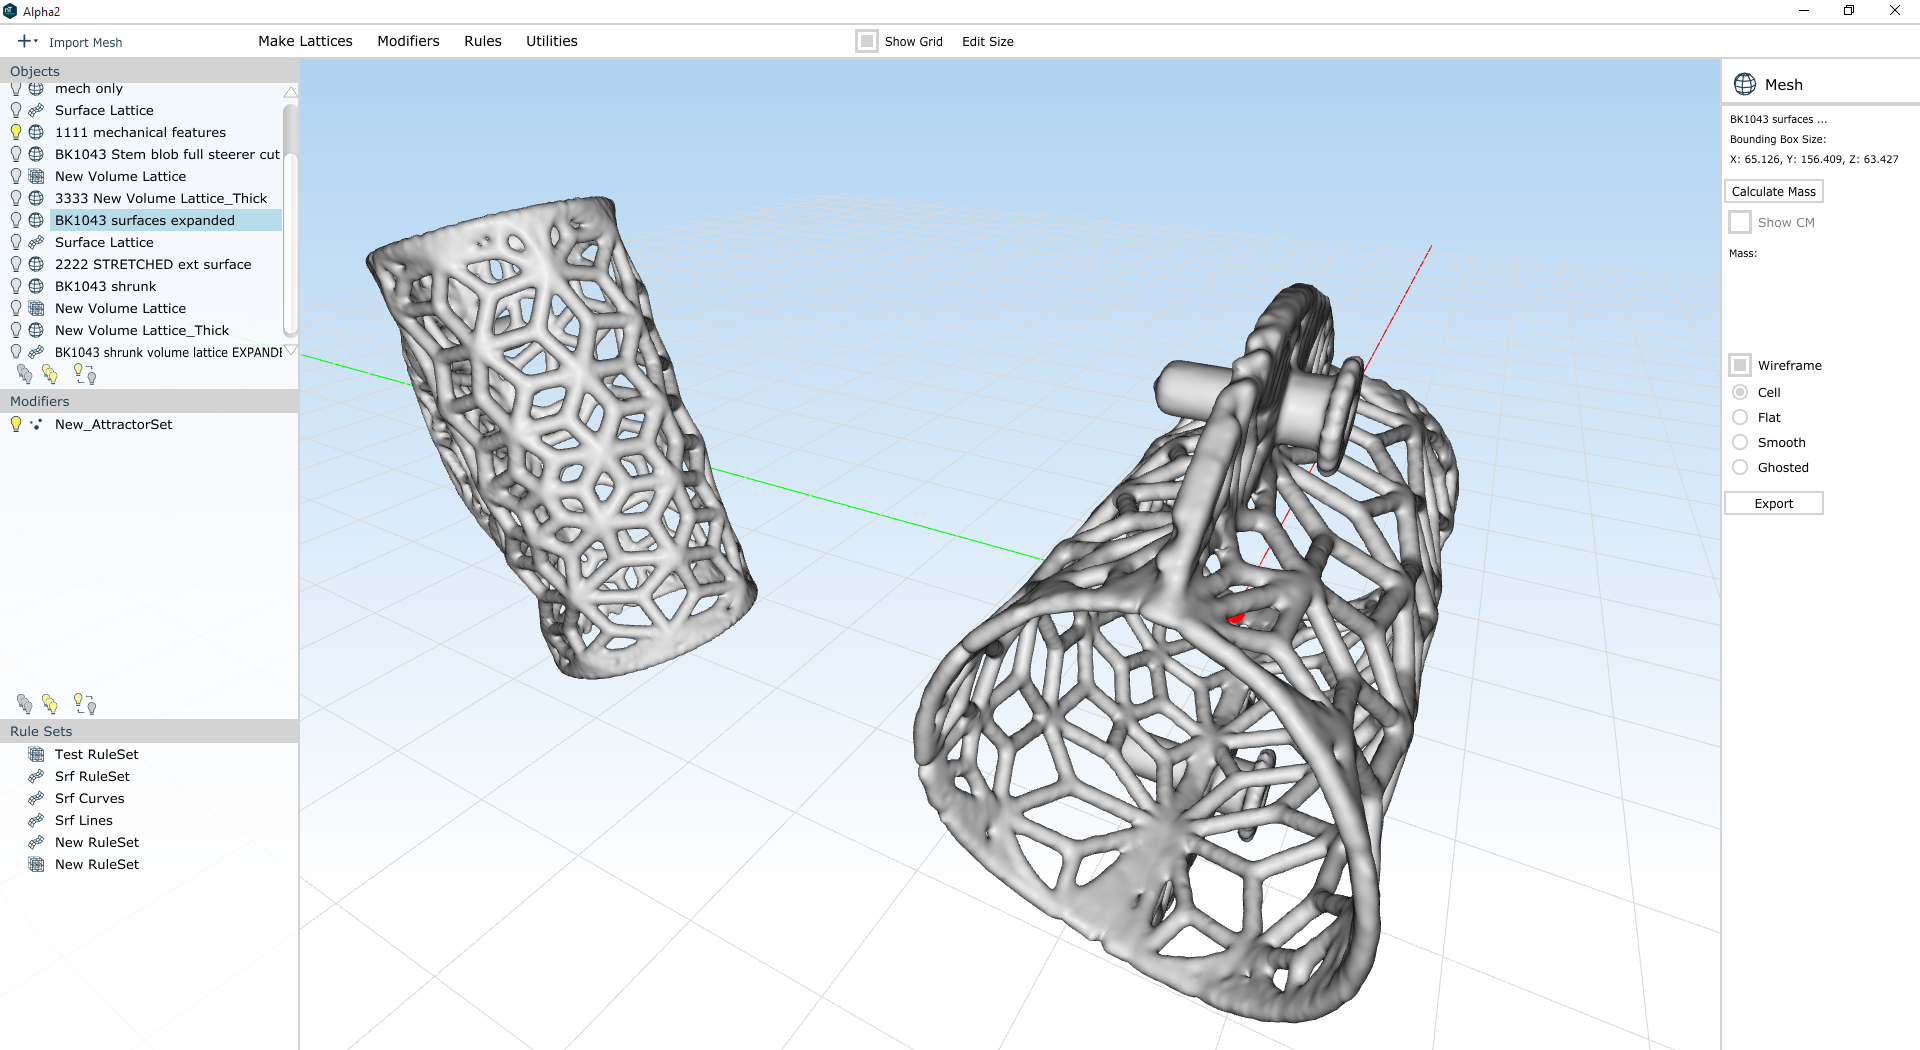
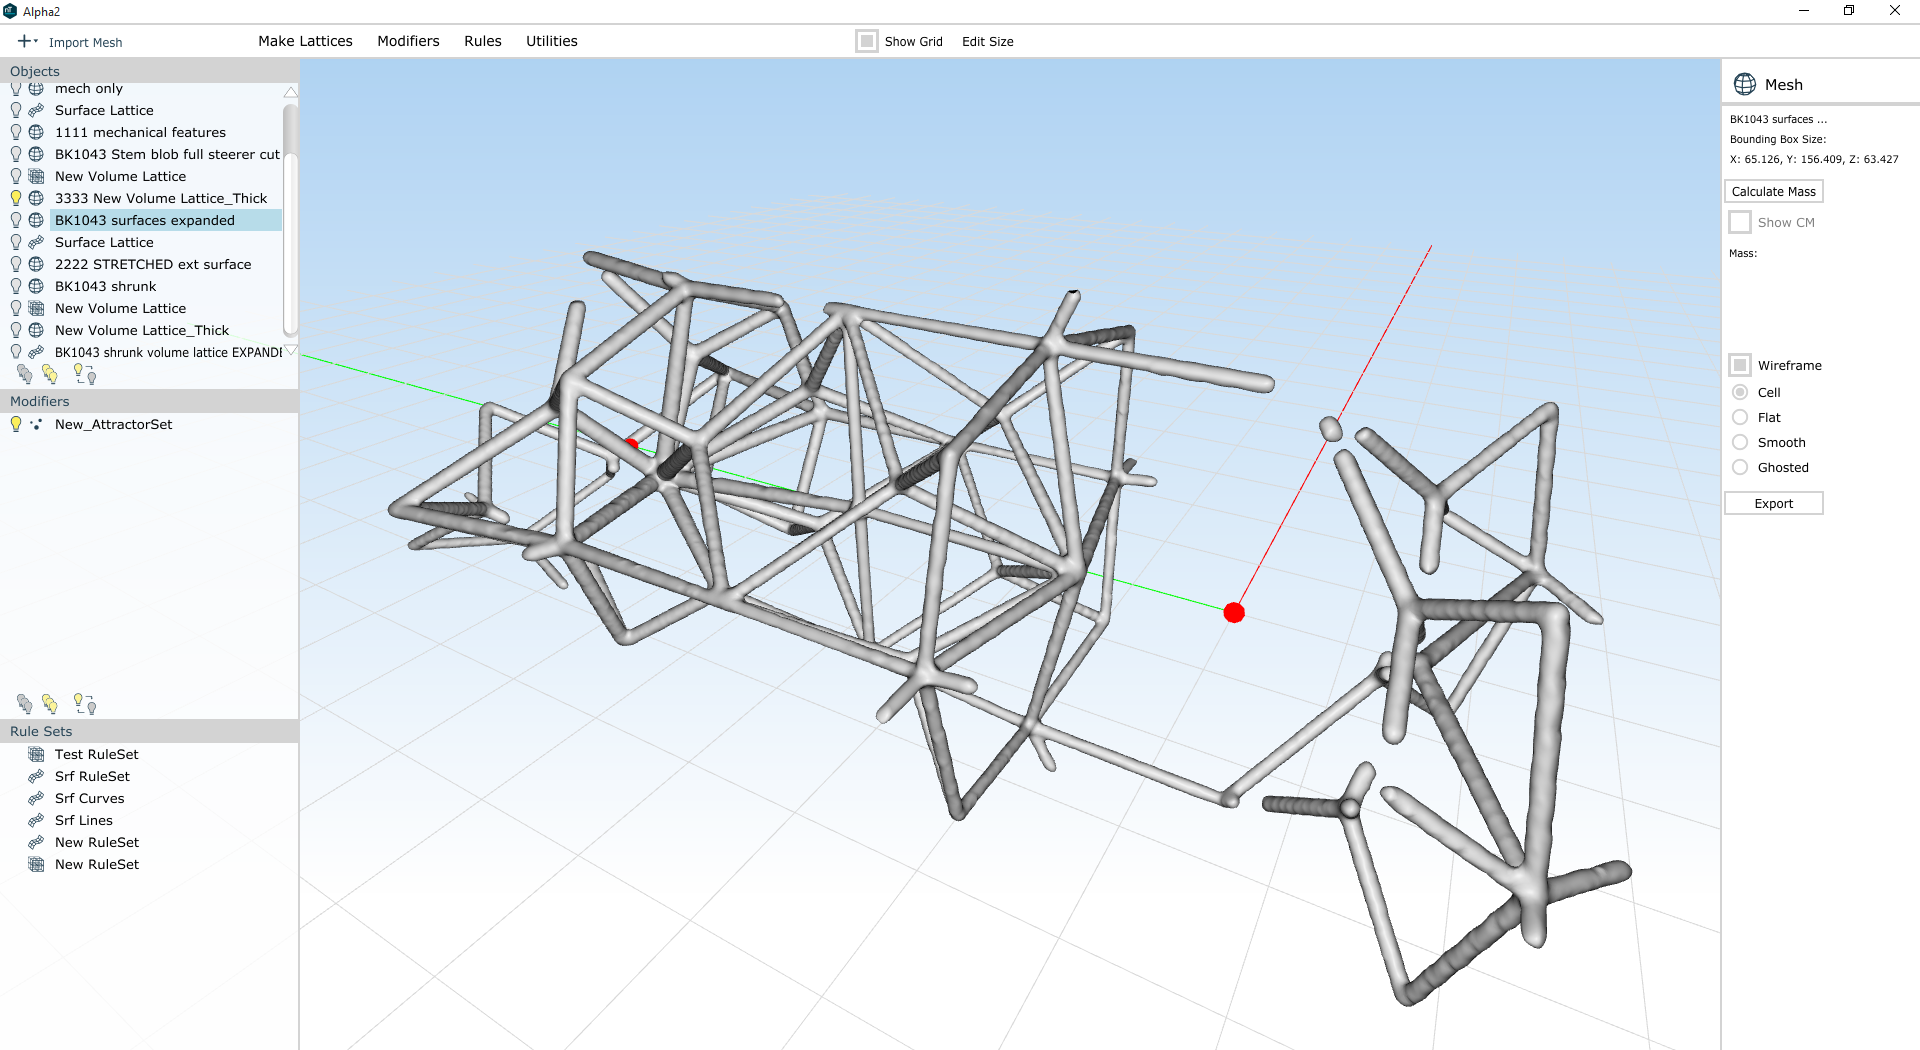
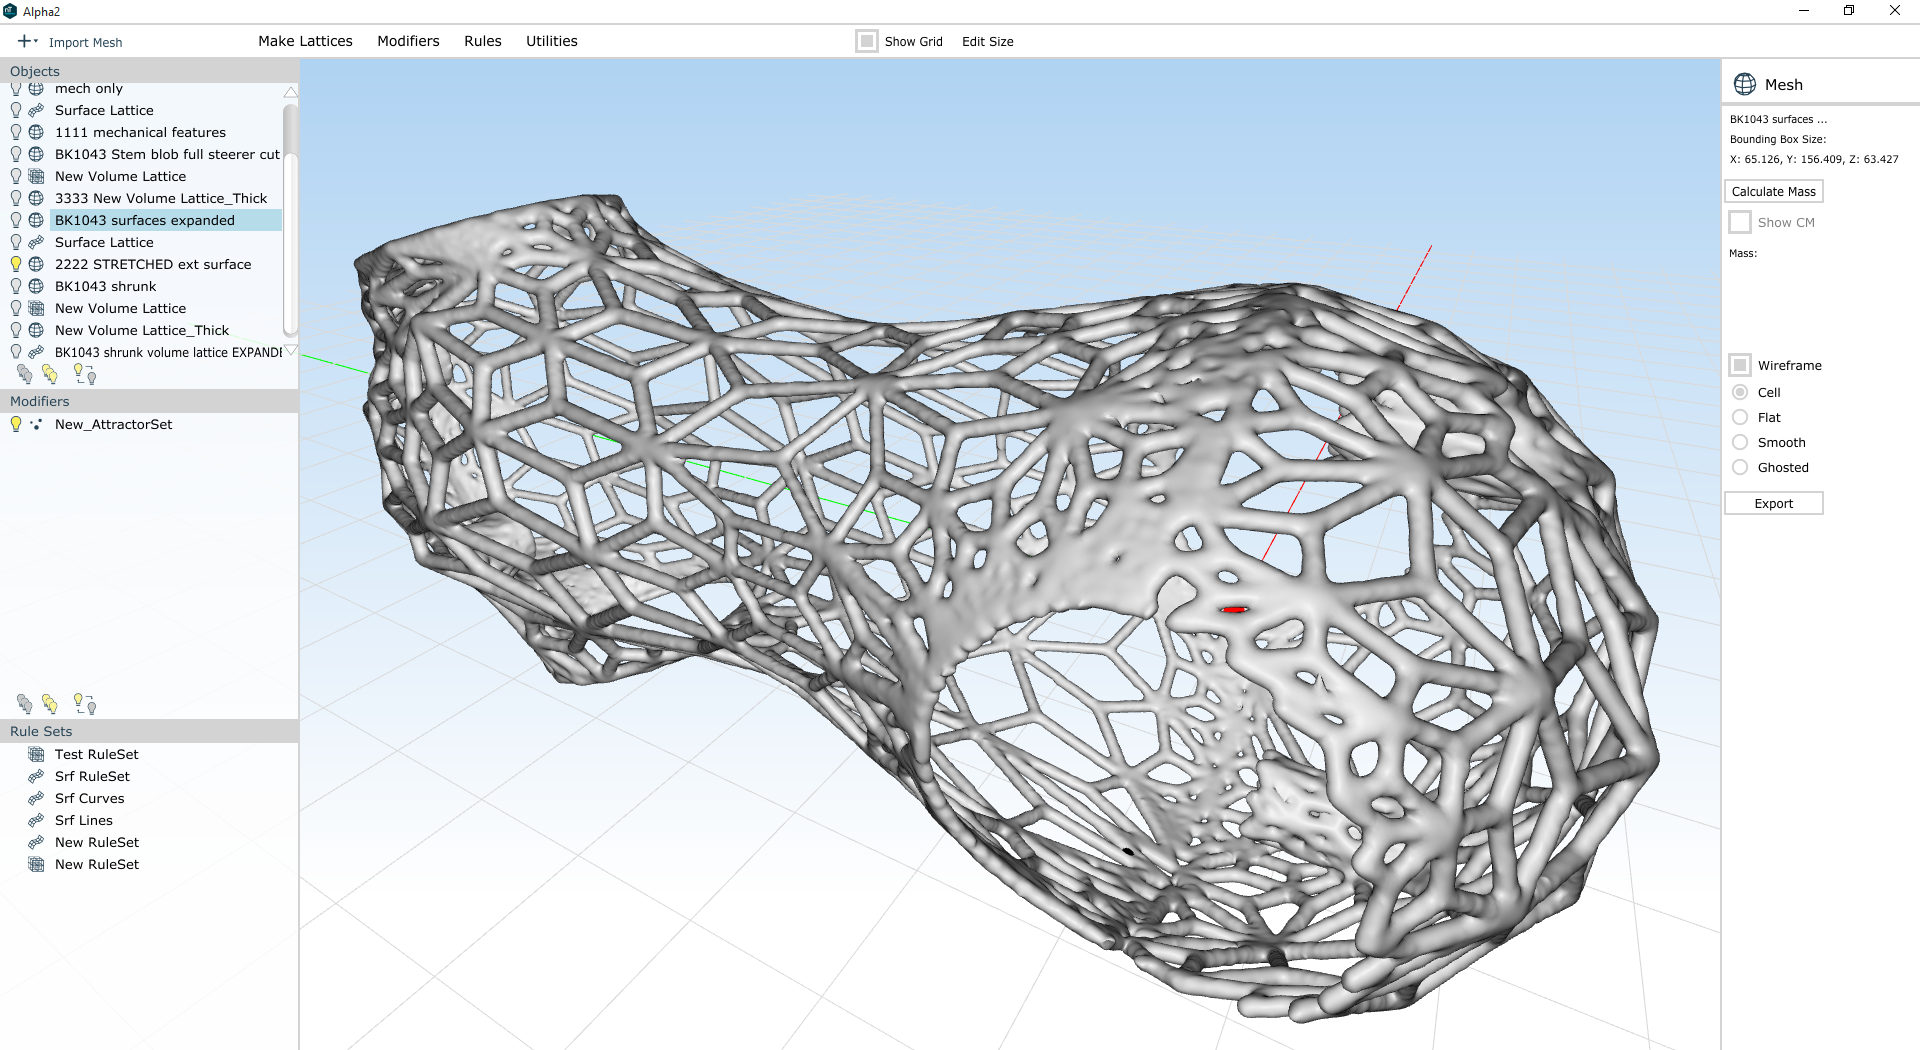
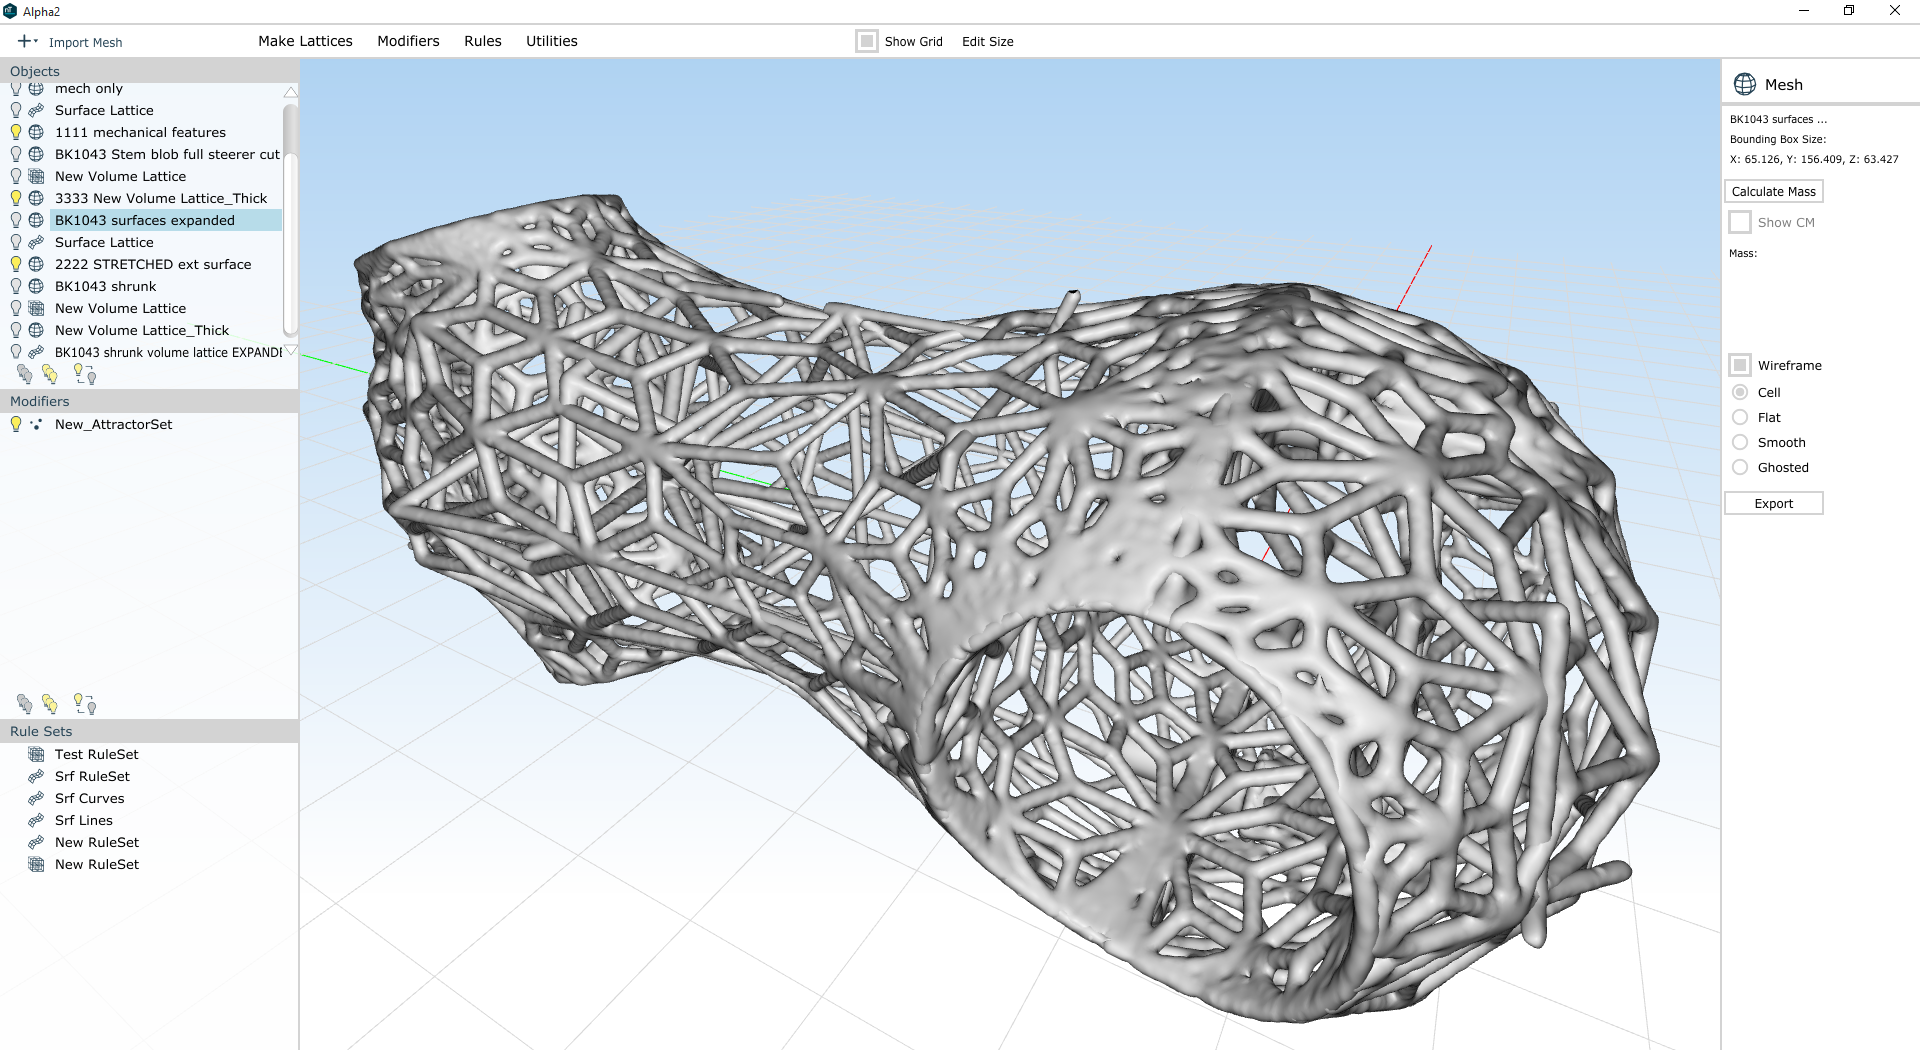
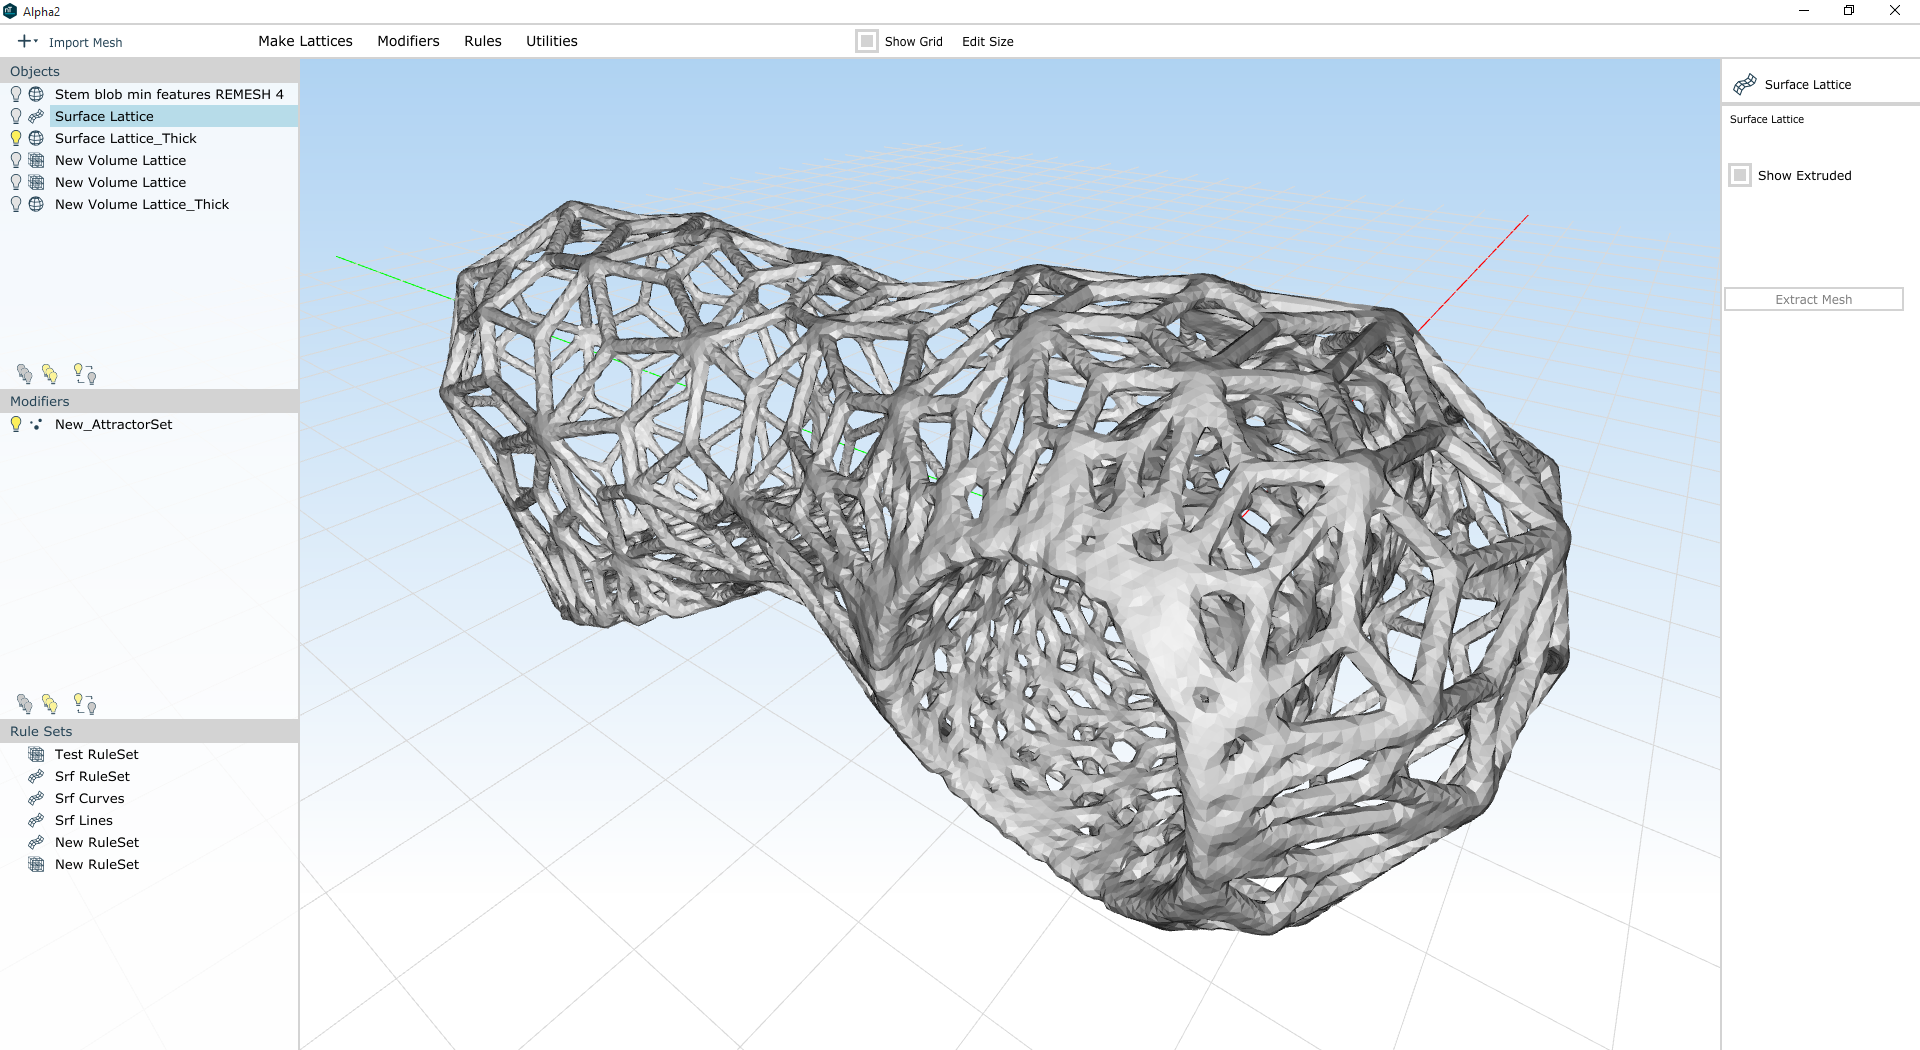
Second, we need to expand the number of variables we're optimizing for. Ultimately I believe this means iteratively focusing on one or two variables at a time, as the curse of dimensionality will make high dimensional optimization impractical for the foreseeable future. It's because of this that I'm bullish on parametric lattice optimization (and nTopology), which optimizes strength and weight on lattice structures that are (given input from the engineer) inherently manufacturable and structurally efficient.

Third, we need a new paradigm for documentation. This is for a few reasons. To start, the kinds of freeform & lattice structures that additive manufacturing can produce don't lend themselves to traditional three view 2D drawings. But in addition, there's a growing desire [citation needed] within engineering organizations to unify the design and documentation processes in some way - to make the model itself into a repository for its own design documentation.

These are big, difficult problems. But they're incredibly important to the advancement of functionally driven design, and to the integration of additive manufacturing's advantages (which are significant) into high value industries. And with some dedicated work by people across advanced design and manufacturing, I hope to see substantive progress soon :)


Thanks to Steve Taub and MH McQuiston for helping to crystalize some of the ideas in this post.

After publishing this post, I got into two interesting twitter conversations about it - one with Ryan Schmidt, and the other with Kevin Quigley. Both of them know a lot about these subjects; I recommend checking the threads out.

Remeshing wishlist

Added on by Spencer Wright.

So: I need to reduce overhangs on my lattice stem design. As you can see here in MeshMixer, there are a lot of them (highlighted in red/blue):

(Incidentally: If you know of a really easy way to measure the surface area of unsupported faces in an STL/OBJ, let me know! Right now I'm doing some crazy stuff in Blender (thanks, Alex) but I'd love a one-step process if there is one.)

Now as you'll recall, I'm generating these beams (and varying their thicknesses) in nTopology Element, but the method I'm using starts by looking at all the edges in an STL/OBJ that I create in MeshMixer. When I go to generate the lattice (in Element), a beam is created on every triangle edge of the mesh (which I created in MeshMixer). So if I want to control the orientation of the beams in the lattice, I really need to start with that input STL/OBJ.

But here's the thing: remeshing algorithms tend to prefer isotropic (equilateral) triangles, which result in a *lot* of beams that are oriented parallel to any given plane (e.g. the build plane). They also prefer nodes that have a valence close to 6 (valence refers to the number of other nodes that a given node is connected to).

This is mostly because most remeshers assume that you want to preserve features - a reasonable assumption, in general. But for the vast majority of my design (basically everywhere except the clamp faces and bolt hole features), I care *way* more about eliminating overhanging faces than I do about feature preservation.

Over the next week, I'll be playing with the underlying mesh a bunch more and trying to find a way to reliably reduce overhangs in my end design. Specifically, I'm looking at remeshing methods that result in:

  • Anisotropic triangles, specifically ones whose orientation I can set as a global variable. I want my triangles to be longer than they are wide/deep.
  • Nodes with valences <6. This will essentially reduce my beam count (I think).
  • A mesh which is adaptive (as opposed to regular), so that I can preserve my mechanical features (high density mesh) and still reduce beam count elsewhere (low density mesh).

I'm also interested in using some curved beams (especially in the clamp areas), but that's prioritized below the things above.

More soon!

Lattice design workflow, part 3: Integrating full mechanical features

Added on by Spencer Wright.

Note: As before, thanks to Bradley Rothenberg (of nTopology) and Ryan Schmidt (of MeshMixer/Autodesk) for their continued help on this workflow.

As documented previously (1, 23, 4), I've been working on a multi-step workflow to create printable lattice structures for mechanical parts. In earlier posts, I described some of the techniques I used to generate the lattice itself, and at this point I'm ready to refine the mechanical features and evaluate the end result.

I've made a few changes to my remeshed surfaces since my last post, so I start this process today in MeshMixer. Here I've got three parts: The stem body itself, a surface that's designed to reinforce the threaded portions of the faceplate bolt holes (this is mostly hidden inside the stem body, but you can see its border still), and the faceplate itself. 

From this, I export three separate OBJ files and import the into nTopology Element. There, I generate simple surface lattices: each edge in the OBJ is turned into a beam in the new lattices.

Next, I create a set of attractors that I'll use to control the thickness of my lattice. The locations of these attractors were taken directly from Inventor; I know the XYZ locations of the general areas that I want to thicken, and so put the attractors right where I want them. Then I control each attractor's size and falloff curve to thicken just the areas I want. In the shots below I have every attractor on a cosine falloff; the bolt attractors are 12mm in size, and the clamp cylinder attractors are just a few mm bigger than the diameter of the cylinder.

Once I've got the attractors set up, I go through each part and thicken the lattice. The grey appearance is just where nTopology is showing me a wireframe, and the density of the mesh is really high:

You can see here that each part has some degree of variation in its beam sizes. In the bolt areas the mesh is dense and the beams are thick; in the middle of the stem body the mesh is sparse and the beams are thin.

At this point, I export each of the three lattices and bring them back into MeshMixer. Here you can see them overlaid on the original meshes:

Now, I import meshes that correspond with the mechanical features I want to preserve in the part. I've taken these directly from Inventor: I created an assembly file containing the original IPT and then created a new IPT that refers directly to the mechanical features. I export that as an STL, bring it into MeshMixer, and then select it and flip all of its normals so that it's inside out. Here you can see those boolean parts - first as red bodies in Inventor, then as meshes in MeshMixer, then as inside-out meshes:

Now I select the three lattice objects, combine them into one, and run the inspector tool and fix all of the mesh problems. Then I run "Make Solid" on the whole object. I run this in "Accurate" mode and turn the "Solid Accuracy" and "Mesh Density" settings *way* up in order to keep the whole thing smooth:

Now I've got a single lattice object that's fully solid and ready to have its mechanical features taken back out. Pretty rad. I combine the lattice and the mechanical features into one object and run "Make Solid" again, again at high density and accuracy:

I select the result, run the Inspector tool, and fix any errors. Then I look around the lattice and evaluate it. Inevitably there are a bunch of areas that are cut off, thin, or chunky - places where the lattice was thin once the mechanical features were removed, and the meshing operation rounded over the resulting isthmus. Unfortunately, that's not something that I can go back and fix; I need to move individual nodes back in my original lattice in MeshMixer. But at least I know that now, and going back through the workflow actually isn't as painful as it sounds. And anyway, the part that I have now is actually pretty good:

I should note here that I got a *lot* of help on the Boolean operations from Ryan Schmidt. Ryan also recorded a full video showing how to reintroduce the mechanical features even if you didn't have the ability to create them in Inventor. Although I went a slightly different route, there's a lot here that's super useful - and it shows the really powerful features that are built into MeshMixer:

Now that I've gone through the full process from start to finish, I see a few aspects of my design that still need some work. I also know that I still need to reduce the number of overhanging features in my design (which will probably be built on its end, with the handlebar side up). I'm also excited to test out the lattice utilities that are built into the most recent build of nTopology Element - especially in the area where the handlebar bolt reinforcements interface with the rest of the stem body. Bradley describes the process here:

I also, for what it's worth, need to do some actual FEA on my part. But by focusing on a repeatable workflow for even designing parts like this - and keeping a mind towards some basic manufacturability constraints - I've got something here that shows some promise. More soon :)

More workflow details

Added on by Spencer Wright.

The other day I got a nice email from Xavier Alexandre, which included a few good questions about my update from last week. His questions are here, along with my answers:

XA: It isn't entirely clear for me what guides your remeshing from a mechanical/strength optimization point of view. I get that you are trying to optimize for stiffness so you're trying to maximize the stem virtual hull volume. But this global shape is set at the beginning of your workflow in Inventor. Then you're trying to have an higher lattice density around the mechanical features but how did you set on edges length or thickness. Is it based on gut feeling? If so, do you feel that there will still be a lot of room for weight/mechanical properties optimization?

Yeah - you could definitely call my process "emergent." I know that my minimum practical beam size is going to be something greater than .6mm (the exact number is unclear and will require testing). I know that I want to minimize overhanging features, and that it'll probably be appealing (from a cost perspective) to build the main stem body on its end, so that I can pack more of them into a build plate. I also know that the clamp areas will need some significant surface area in order to not, for instance, damage a carbon fiber part that they might be clamped to. I also know that the threaded bolt holes (which will be M4, but which Inventor exports as 3.2mm diameter smooth holes) will need a minimum wall thickness of about 1mm, and will really want more than that. And I know that the heads of the bolts will similarly need a bearing surface of about 1mm, and that both the bearing surface and the threaded hole will need to be reinforced back to the rest of the structure in order to distribute the clamping load on the part.

In short: Yeah, it's mostly gut at the moment. But to be honest the biggest constraint right now is manufacturability; I need the lattice to be oriented so that it won't require support structures *everywhere*, and am focusing mostly on that at the moment. Once I've got that (and basic mass distribution in areas that I *know* will need it, e.g. bolt holes) mostly solved, then I'll move on to FEA. nTopology Element has an FEA solver built in, and you can feed the results back into the design so that overstressed areas get reinforced. I'm definitely excited to get there, but for now I'm focusing on making something that a job shop will be willing to make in the first place :)

XA: I didn't get the part with the interior Oct-Tet volume lattice at all. Is it gonna be merged with the exterior lattice? A lot of these beams will be surprisingly useful once the whole part is put together Huh?

Exactly - the volume lattice (which is an oct-tet topology - see this paper for a better description than I could ever give you) will be booleaned with the surface lattices to create one structure. If you look at that volume lattice on its own,  you'll notice that there are some stray beams that don't appear to be doing anything - they stick out into the middle of nowhere, and don't appear to be taking any load. But when you merge the volume with the surfaces, the situation changes, and those beams might be more useful than you would have thought.

As it happens, I've been focusing more and more on surface lattices in the past few days, as they're a bit easier to control explicitly - and the changes that I make are easier to immediately grasp the effects of. The "generate multiple individual lattices and then merge them at the end" workflow really isn't optimal for this reason: it takes way too long to understand what the finished structure will work like.

XA: You won't have skins in your design. I guess that for the stem to fit handlebars and steerer tubes you'll need the contacting beams to match the tubes curvature. Did you plan to design the beam shape for this or is it something you'll let for post processing. If so, do you plan to make those beams sturdier to account for grinding?

I'd *love* to bend the beams around the clamp area, actually. Right now I don't have a convenient way of doing that, but I'm looking into it. Either way I'll boolean out the clamp regions before printing, so I shouldn't need to grind away much. 


As you might expect, my thoughts on this workflow are changing as I use it more. It's a rather finicky process, and I'm eager to industrialize it a bit - and improve the areas that are most difficult to reproduce.

More soon!

The beginning of a workflow

Added on by Spencer Wright.

Note: Special thanks to Bradley Rothenberg (of nTopology) and Ryan Schmidt (of MeshMixer/Autodesk) for their continued help on this workflow. Also, both of them make awesome (and very weird ;) software that you should check out.


A scenario: You've got a part that you want to manufacture with metal powder bed fusion. You've got a few mechanical features that you know you need (to mate up with other parts in an assembly) and a general sense of the design space that's available for the part you're designing. You know the mechanical properties you need (via an ISO test that the part needs to pass) and you've got a target mass (which is basically "less than the competition"), and a target cost (which is basically "similar to the competition, taking into account a ~35% margin for me").

I've spent a lot of the past week going back and forth between Inventor, MeshMixer, and nTopology Element, trying to make a 3D lattice structures that are both mechanically effective and easy to manufacture. My workflow has been decidedly emergent, and it's also been counterintuitive at times; I've often found myself working backwards (away from my final design intent) in order to create the conditions where I can make progress down the line. My end goal is to design a bike stem that's sub 125g and which has minimal post-processing costs and requires minimal support structures (I'll deal with the actual dollar cost later, as it'll depend on a bunch of factors that aren't under my direct control).

I've got 27.7 cubic centimeters of titanium to play with. Where do I put it?

I began in Inventor. Setting up a design space is, counterintuitively, kind of a hard thing to do. Very few parts that I've designed have hard and fast design space boundaries; most of them could always be a little bigger, or a little smaller, and the rest of the assembly would stretch or squish to accommodate it. Nevertheless, I need to start somewhere, so I created a T-spline form that was close to what I thought I'd want:

I export it as an STL at low resolution (where we're going, resolution doesn't matter :) and bring it into MeshMixer:

From here, things start to get complicated. The way I see it, this part essentially has three components: 

  1. The mechanical features. This includes the two clamp cylinders (one, the handlebar clamp, is 31.8mm in diameter and split; the other, the steer tube, is 28.6mm and slit along the back side) and the four bolt holes (all M5, and all with one counterbored part and one threaded part) that do the clamping.
  2. The design space's exterior surface. In general, the stiffness of the part will be determined by how much volume it takes up, and I should generally make the part as stiff as possible. Therefore the exterior surface of the part is going to be made up of a big non-Euclidian 2D lattice.
  3. The volume of space between the mechanical features and the exterior surface. I'll want some bracing here to tie the whole part together and transfer loads from the mechanical parts over to the exterior lattice.

For this design, I'm using lattice structures throughout the part. I won't design any skins (I'm generally anti-skin, unless you've got fluid separation requirements in your design), instead opting to let the lattices vary in density from zero (in the middle of the part) to 100% (in areas like the threaded and counterbored bolt holes). 

Because the different surface regions of the part (the mechanical features and the exterior surface) will have different mechanical requirements, I begin by duplicating my lattice in MeshMixer and isolating each of them in its own object:

I then go through each region and remesh it in MeshMixer. A few notes here:

  • I generally begin by remeshing the entire object at a medium-high resolution, just to get rid of the dense lattices that Inventor creates at edges and small fillets. 
  • I then choose the area that I want to be at the highest resolution (which is almost always lower than the one I chose in the first step) and remesh it. On the part's exterior, that was the bolt counterbores.
  • Then I work my way down to the lowest resolution areas. On the part's exterior, I targeted edges in the 15mm range, but I play around with the remesh settings a *lot* until I get something I like.
  • Then I'll go back and find areas that are still a bit high-res and remesh them again until they look good. There's a bit of back and forth here, and I haven't really figured out a one-size-fits-all workflow yet.

I DON'T worry about geometric accuracy much during this process; I assume that I'll need to clean up the geometry at the end (after I've generated the full lattice structure - more on this in a future post) anyway.

Then I export the lattices as OBJs, bring them into nTopology Element, and see what they look like:

At this point, I decided that I really wanted to stretch the entire exterior lattice out so that more of the beams would be horizontal. The part will probably be built on its end, so these will be easier to build as a result. So I go back into MeshMixer, transform the part down (it happens to be the Z axis here) by 50%, and remesh the outer skin. Then I transform it back up to 100%, stretching everything out.

As you can see in the last few shots, the lattice has been stretched significantly. I've also remeshed a few of the higher resolution areas individually, evening them out a bit. Back in nTopology Element, you can see the difference between the old lattice (the last shot below) and the new one:

Meanwhile, I've used nTopology element to create (and warp) an Oct-Tet volume lattice for the interior of the part. This may look odd (and to be sure it needs some work) but a lot of these beams will be surprisingly useful once the whole part is put together. The red stuff here is a zero-thickness representation of the mechanical features' lattice structures; the white/yellow structure is the volume lattice:

When you put the whole thing together, it starts looking pretty good:

Now, there's still a lot wrong with this. There are a *lot* of overhanging faces. The threaded bolt holes aren't very well connected to the outer mesh, and there's probably too much material on all of the flat faces (where the slits/slots are). I'm also over my mass target - my total is 34.1 cubic centimeters, and my target was 27.7.

But there's a lot right with the design, too. My beams are about the right size throughout, and I've been able to (more or less) distribute my mass where it will matter most. And while the aesthetics of the part aren't exactly what I'd like them to be, they're not far off either. 

So, a few things I need to work on:

  • First, I need to make overhanging faces easier to eliminate. Some part of this *needs* to be happen when I remesh a surface (assuming I'm using the surface topology to determine the lattice topology). Ditto with volumes - I need to be able to stretch the lattice out so that it isn't horizontals all over the place.
  • I also need to be more careful about directing my volume lattice where it'll be more effective. It's possible I should break it up into a few regions - some near the mechanical features, and one in the middle of the part - but I'm concerned that if I do that, I'll never get the two to tie together. Either way I need a denser volume lattice at the bolt holes, and I need to be able to tie the volume lattice beams up to the other regions of the part.
  • I should probably play with modifying my mechanical features back in Inventor to make them more conducive to lattices. This might involve warping the clamp cylinders somewhat to reduce overhanging faces... or drilling the threaded holes through the part so that they connect to the exterior surfaces... or puncturing the flat faces so that they aren't as massive as they are in the current design.

Clearly, there's a lot to do here still. But I'm beginning to get the hang of this workflow, and hoping to have some printable (and extremely lightweight) designs to make soon :)

Quick & closer

Added on by Spencer Wright.

From the end of the day yesterday:

This is still not manufacturable, and is still missing all the mechanical features too. But it's getting there! By combining a skin lattice (which my part definitely needs in at least some regions, for instance the clamp faces) and a minimal, bonelike volume lattice, I hope to be able to create something that's significantly lighter than a comparable tube-to-tube (e.g. welded) structure.

The next step, I think, is to reintroduce the mechanical features (at least some of them) into the model *before* I remesh the surfaces. I would really want the mesh density to be created relative to the kinds and intensities of the forces that the part is going to be under: for instance, all of the bolts and clamp faces will want higher density meshes around them, etc. At the moment my best bet is to do that manually, by selecting areas I want to be at higher densities and just remeshing them to suit my intuition. 

More soon :)

Remeshing

Added on by Spencer Wright.

I get the feeling I'll be doing a *lot* of this in the coming month:

Here I've taken an STL from Inventor and brought it into MeshMixer, where I'm remeshing the outside skin. I'm doing this so that I can then create a surface (as opposed to a volume) lattice in nTopology Element. If I tried to create the mesh directly from Inventor's STL, it would be much to fine and have a bunch of artifacts from the way that Inventor processes T-Spline surfaces (Inventor breaks the surface up into panels, and then subdivides each one individually - you can see the panel boundaries in the beginning of the gif), and would also be *way* too fine to be used as a scaffold for a surface lattice. By remeshing at a lower resolution - and playing with MeshMixer's remeshing settings a bit - I can get to a topology that's way better.

The design that I'm pointing towards here still isn't manufacturable - and is missing a bunch of mechanical features that the end part will need too - but it's starting to come together a lot better:

Special thanks to Ryan Schmidt (of Autodesk/Meshmixer) and Bradley Rothenberg (of nTopology) for pointing me in this direction - and for helping me out with the even cooler stuff I hope to do in the next week :)