When I visited MicroTek Finishing, a Cincinnati based precision finishing company, in late 2014, I was intent on printing my seatmast topper with laser powder bed fusion. DMLS's install base is relatively large, making it easy to source vendors and compare pricing. And while their surface finish and dimensional accuracy can leave something to be desired, DMLS parts can be put into service with minimal post processing.
But as I was saying goodbye to Tim Bell (my host at MicroTek) that afternoon, he planted a seed. I should try building my parts in EBM, he said - and see if MicroTek's MMP process could bring the rough parts up to a useable state.
That same day, I asked Dustin and Dave (both of whom I worked with on my seatmast topper) what they thought of the idea. Dave had extensive experience on an Arcam A2, and thought it was definitely worth trying out. Relative to DMLS, EBM is a quick process (for more details on Arcam and EBM, see the Gongkai AM user guide), and a big portion of the cost structure of metal AM parts is the amount of time they take to print. Furthermore, parts can often be stacked many layers high on EBM machines, allowing the fixed costs of running a build to be distributed over a larger number of parts. And while EBM parts do tend to be rough (and have larger minimum feature sizes than DMLS), they also tend to warp and distort less - making the manufacturing plan a bit simpler in that respect.
Shortly after that trip, I reached out to Addaero Manufacturing. I visited them soon after, and then asked if they'd be interested in exploring an EBM->MMP process chain. They were, and provided three identical parts to experiment on.
The part in question is the head of a seatpost assembly for high end road bikes. The part itself is small - about 70mm tall and with a 35mm square footprint. As built, it's just 32g of titanium 6/4. Add in a piece of carbon fiber tubing (88g for a 300mm length) and some rail clamp hardware (50g), and the entire seatpost assembly should be in the 175g range - on par with the lightest seatposts on the market today.
As a product manager who's ultimately optimizing for commercial viability, I had three questions going into this process:
- How do the costs of the different manufacturing process chains compare?
- How do the resulting parts compare functionally, i.e. in destructive testing?
- Functionality being equal, how do the aesthetics (and hence desirability) of the parts compare?
I'll write more about the second point later; in this post, my primary aim is to introduce MMP and compare the different process chains from a financial and operational standpoint.
Basics of surface texture
As confirmed by a 1990 NIST report titled Surface Finish Metrology Tutorial, "there is a bewildering variety of techniques for measuring surface finish." Moreover, most measurement methods focus only on the primary texture - the roughness itself - and incorporate some method of controlling for waviness and form. From the same report:
The measured profile is a combination of the primary and secondary texture. These distinctions are useful but they are arbitrary in nature and hence, vary with manufacturing process. It has been shown, but not conclusively proven that the functional effects of form error, waviness and roughness are different. Therefore, it has become an accepted practice to exclude waviness before roughness is numerically assessed.
Surface finish is usually measured using the stylus technique:
The most common technique for measuring surface profile makes use of a sharp diamond stylus. The stylus is drawn over an irregular surface at a constant speed to obtain the variation in surface height with horizontal displacement.

The most common surface texture metric is Ra. (For a good, quick, technical description of the varieties of surface texture metrics, see this PDF from Accretech.) Ra measures the average deviation of the profile from the mean line (the related Rq also measures deviation from the mean line, but using a root mean square method), and is used across a variety of industries and manufacturing methods. But it's incapable of describing a number of important aspects of a part. For instance, it's critical (for both aestetic and functional reasons) that my parts have Rsk (skewness) values close to zero - meaning that their surfaces are free from flaws like pits and warts. In other words, I'd take a consistent, brushed surface over one that's highly polished but has a few deep cuts/pits.
I should note, of course, that surface finish is a result of the total manufacturing process chain. If the near net shape part (straight out of the EBM machine) is rough and pitted, then it'll be difficult to ever make it acceptable - and the methods required to do so will vary widely.
MicroTek and MMP
MicroTek is just one in an international network of companies that perform MMP, which grew out of a Swiss company called BESTinCLASS Industries. The MMP process is closely guarded; neither MicroTek nor BiC disclose enough about the process to really understand how it works. From MicroTek's website:
MMP Technology is a mechanical-physical-catalyst surface treatment applied to items placed inside a processing tank. MMP technology is truly different from traditional polishing processes because of the way it interacts with the surface being treated.
MMP Technology uses a mechanical cutting process at a very small scale (not an acid attack or any other process that could alter the part's metallurgical properties), meaning it can distinguish between micro-roughness and small features. The process actually maps the surface as a collection of frequencies of roughness, removing first the highest frequencies, then removing progressively lower frequencies.
Unlike other polishing processes, MMP Technology can stop at any point along the way, so now for the first time it is possible to selectively remove only the ranges of roughness that you don't want on the surface, giving you the option of leaving behind lower frequencies of roughness that could be beneficial to the function of the part.
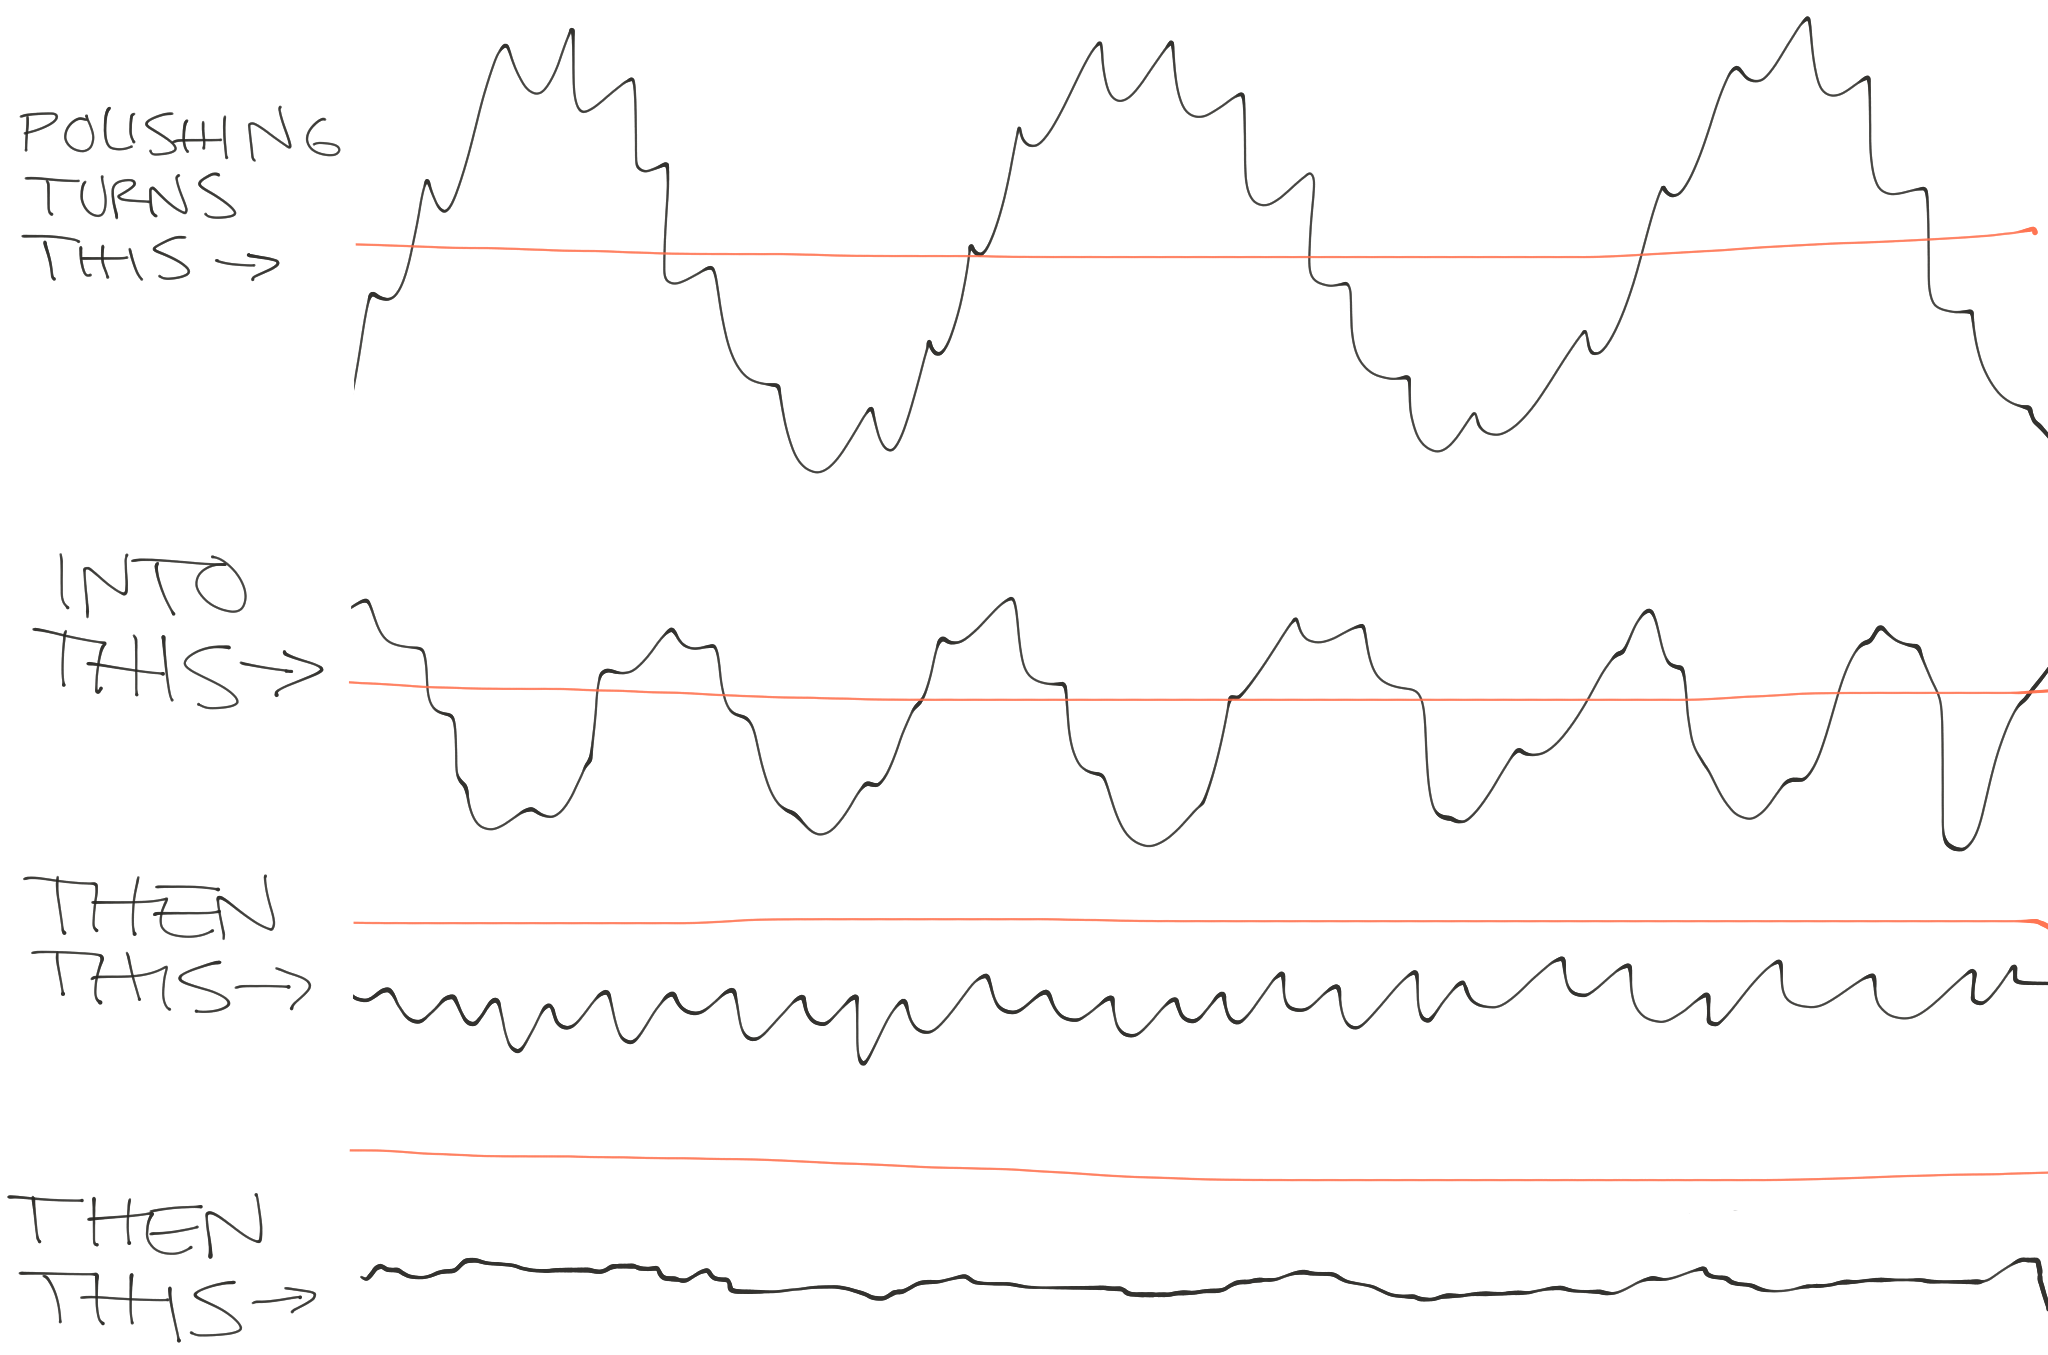

To hear Tim and JT Stone tell it, MicroTek essentially does a Fourier transform on the topography of the part. They analyze the surface finish as the combination of many low and high frequency functions, and begin the MMP process by characterizing those different functions and identifying which ones to remove. Then, by selecting "an appropriate regimen of MMP Technology from the several hundred treatments available," they selectively remove the undesirable aspects of the surface finish - while still preserving the underlying form of the part.
This is worth highlighting: traditionally, polishing is a process whereby a part is eaten away by abrasive media. With each successive step, progressively smaller scratches are made in the part's surface. You're constantly cutting down the peaks of the part, and as a result the form gets smaller and smaller over time. With MMP, you have the flexibility to remove fine frequencies while keeping longer ones - maintaining the original intended shape.
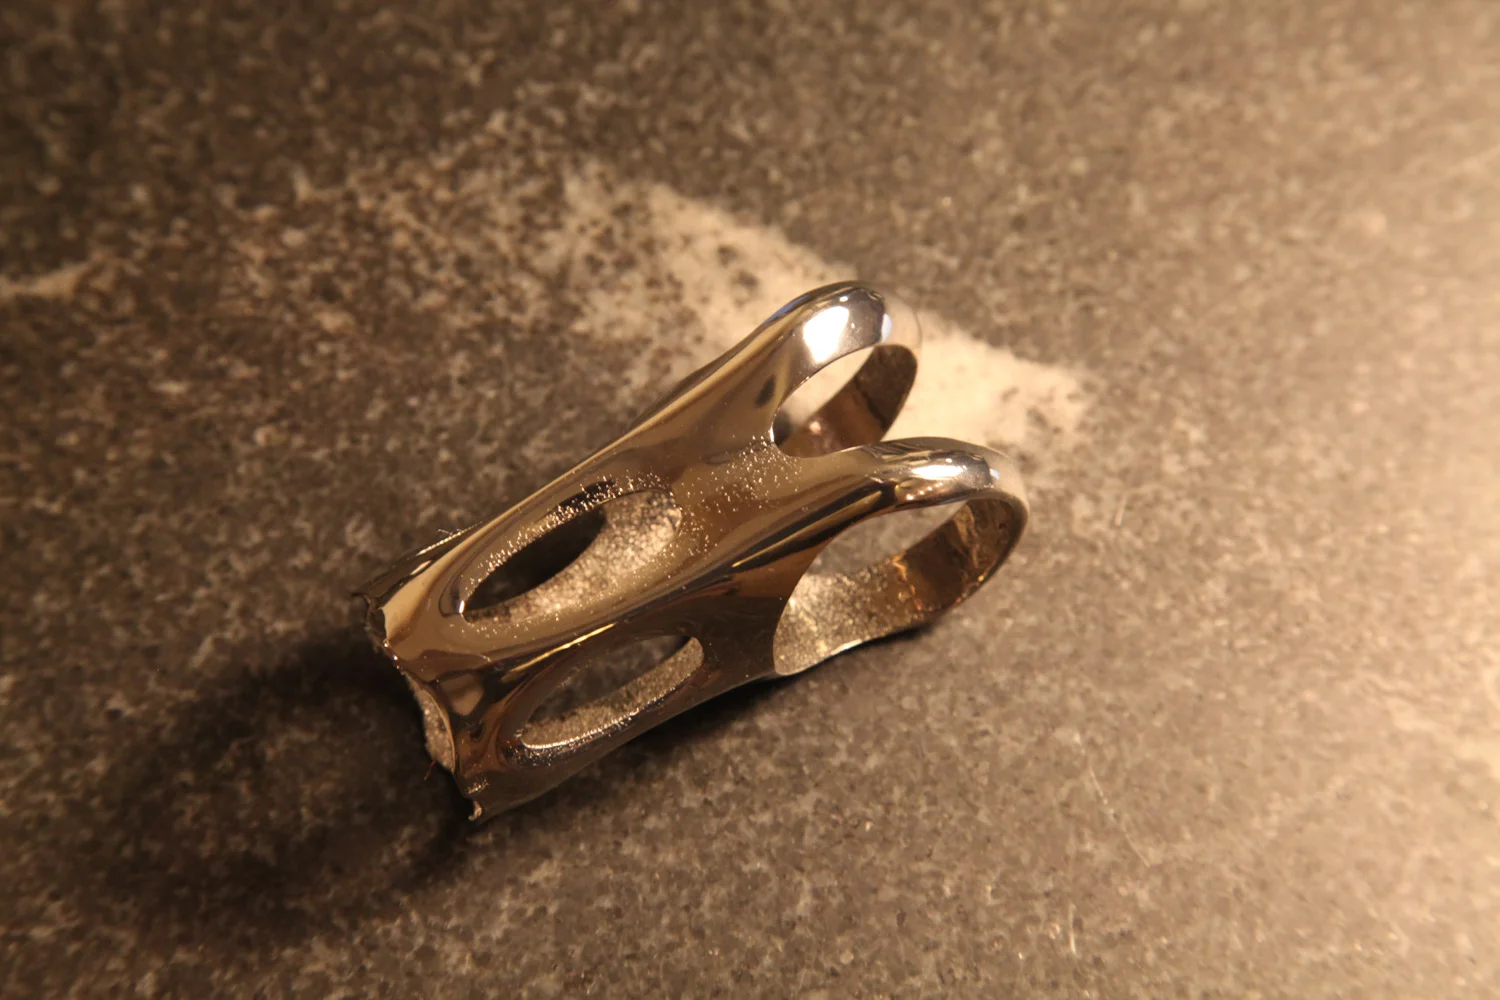
The parts
Addaero printed three identical parts for me. I sent two to MicroTek. They processed one for fatigue resistance, and the other they "made BLING."


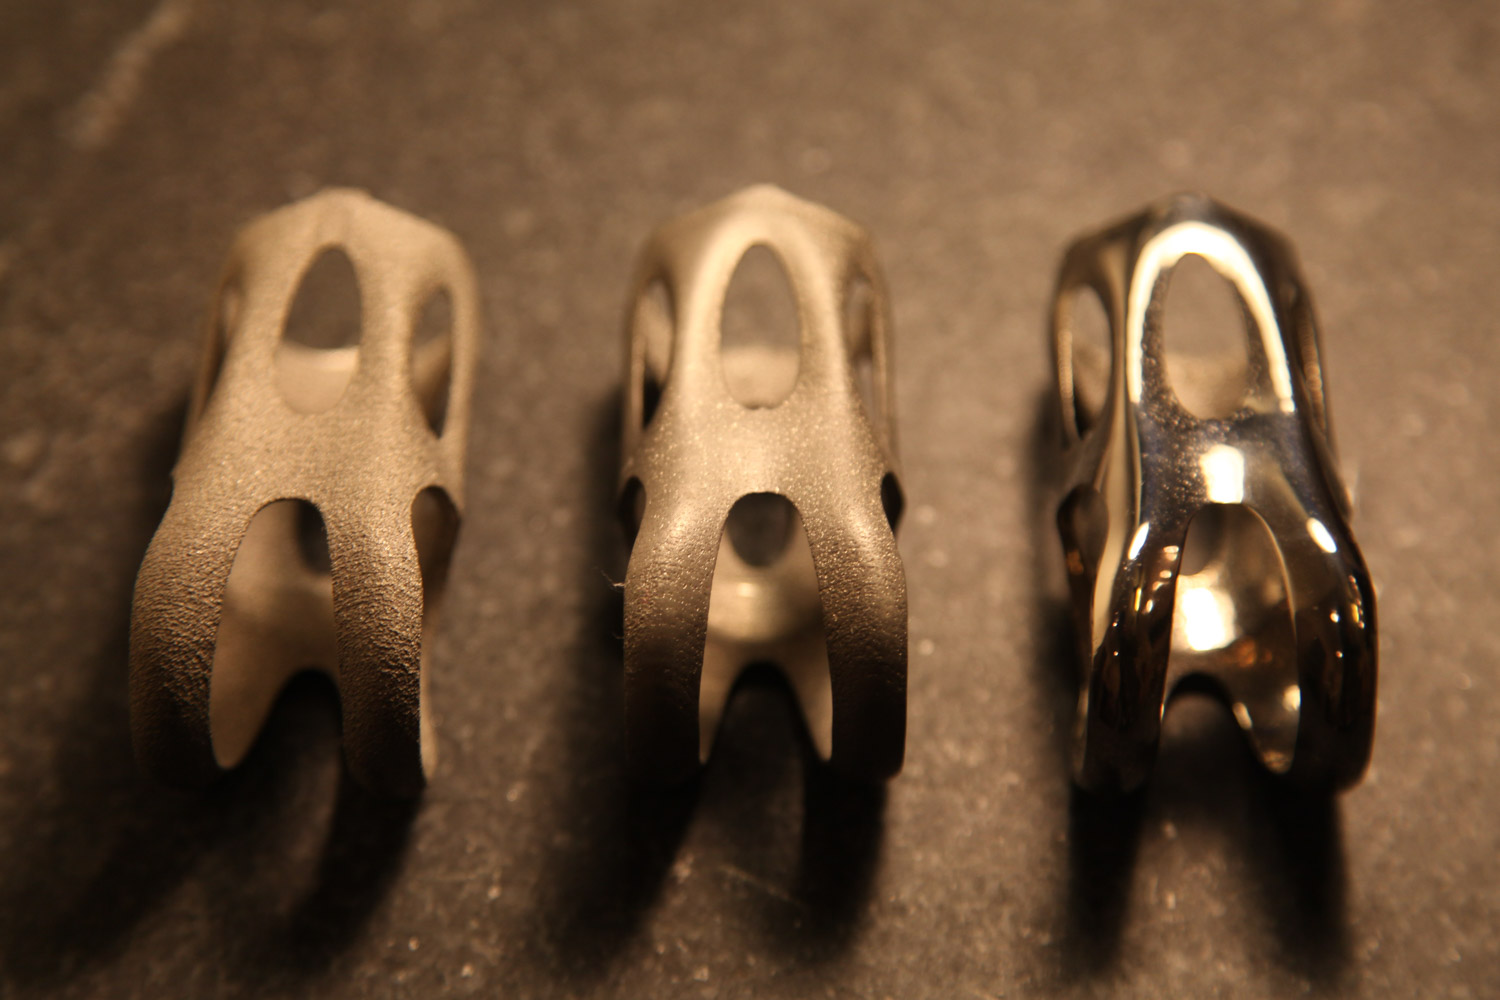


(Note that you can click on the photos above to see a larger version.)
MicroTek sent detailed inspection reports with the parts, and the picture they paint is fascinating. MMP reduced both Ra and Rq drastically, and Rt dropped significantly as well. Rsk is a bit of a different story, however: in one of the measurement locations ("Side of leg"), it dropped well into the negative range. You'll recall that the absolute value of skewness is really the issue here; a negative number (indicating pitting) is just as bad as a positive (indicating warts/spikes) one.
I've put the raw data in a Google Sheet, here; the full inspection reports are here and here. The charts below show most of the relevant information, broken down by the area of the part being tested. A helpful description of the part's areas ("V-neck face," etc) is here.
Ra - Roughness average
Rq - Roughness, root mean square
Rsk - Roughness skewness
Rt - Roughness total
MicroTek also sent a series of photos taken with a Hirox digital microscope at a variety of magnifications:
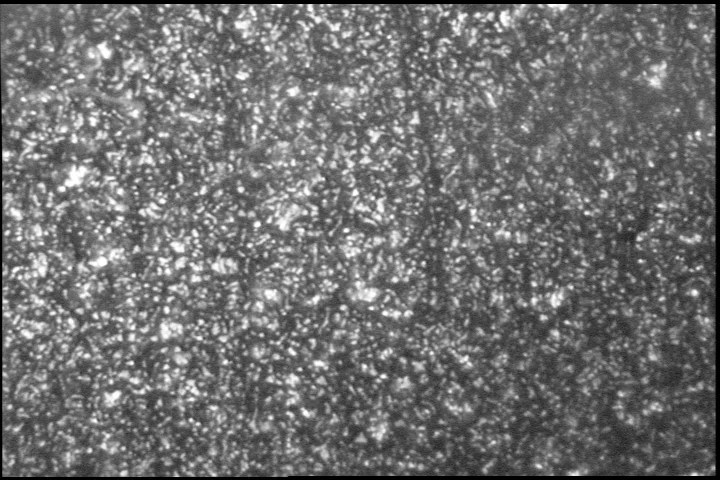


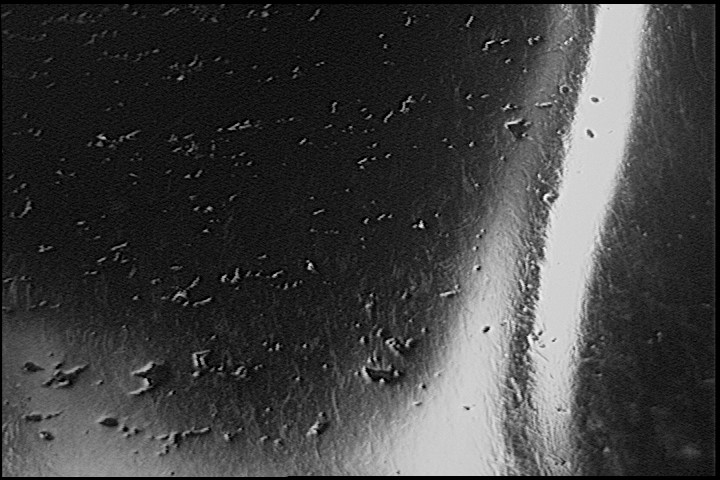


If it's not clear from all of the photos and charts above, the improvement on the parts due to MMP is really remarkable. The as-printed part is really rough - on average, it's about as rough (Ra/Rq) as 120 grit sandpaper (see this for a good analysis of sandpaper surface texture). MicroTek was able to eliminate the vast majority of the total and arithmetic mean roughness; both parts they processed feel very much like finished products.
The pitting, however, is a problem. To be clear, it's not a result of the MMP process; all they did was expose flaws that were already in the part. Many of these could probably be eliminated on future batches. First, printing the parts on a newer Arcam system (like the Q20) might improve the as-printed texture significantly. And second, MicroTek can investigate more complex treatments that allow for the offending frequencies to be eliminated more thoroughly. I'll be exploring these (and other) options in the coming months.
Assembly
Before putting the seatposts together, a little bit of prep was necessary. The inner diameter of both the seatpost and saddle clamp cylinders were slightly undersized, and there were warts (remnants of support structures) left on the undersides of the shoulder straps. I had intentionally left these untouched when I sent the parts to MicroTek, as I wanted to see how little post processing I could get away with. The MMP process took them down slightly, but not nearly enough to put the parts into service.
Fixing that was pretty straightforward - just a few minutes each with a file. In future iterations, I'm hoping that by making some light design modifications - and by dialing in the EBM build parameters - will minimize this work. If not, then I'll probably add CNC machining into my process chain (after printing and before finishing).
With the inner diameters trued up, the parts could be dry fitted to the carbon fiber tubing I'm using as a seatpost:
I'll be gluing the assemblies together with 3M DP420 this week, and then I'll send them out for testing. These parts will be put to the same ISO standard that my seatmast topper passed last summer, and I'm particularly curious to know whether the different levels of post processing has any effect on their strength. In high fatigue cycle applications (this paper defines "high fatigue cycle" as N>100,000, which is exactly what my parts will be tested to), improvements in surface finish (lower Ra) have been shown to increase fatigue life. If some form of surface finishing (MMP or otherwise) means that I can print a lighter AND stronger part, that'll definitely help justify the expense.
Cost
With my current design and a batch size of 275 (a full batch in an Arcam Q20) my as printed cost will be under $100. MMP will cost an additional $40-75 (depending on finish level), though those numbers were based on smaller quantities. I'd hope that the rollup cost to me is under $150.
In addition to these parts, a full seatpost requires about $25 worth of carbon fiber, a few dollars worth of glue, and (I suspect) under ten minutes of assembly time. They'll also require saddle rail hardware, which I'm budgeting an additional $25 for, and some packaging - under $10. All told, my cost of goods sold would be about $215.
That's a fancy seatpost, but it's not completely unreasonable. My goal, at the moment, is to get that price down to $150.
More updates soon :)