Manufacturing guy-at-large.

Filtering by Tag: noheadset

Most recent revision: Dummy Headset

Added on by Spencer Wright.

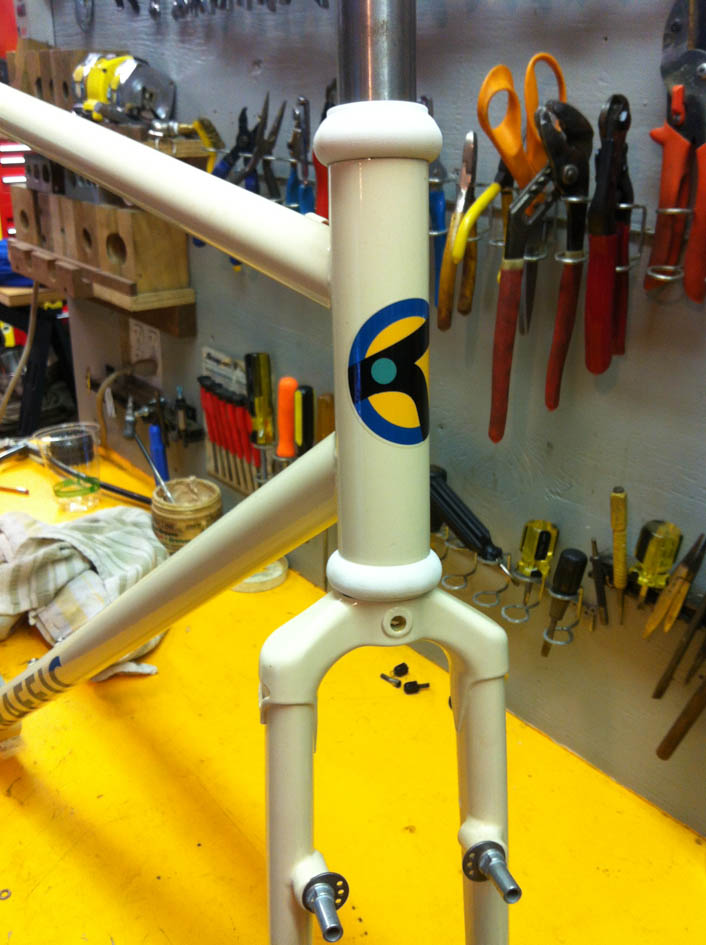
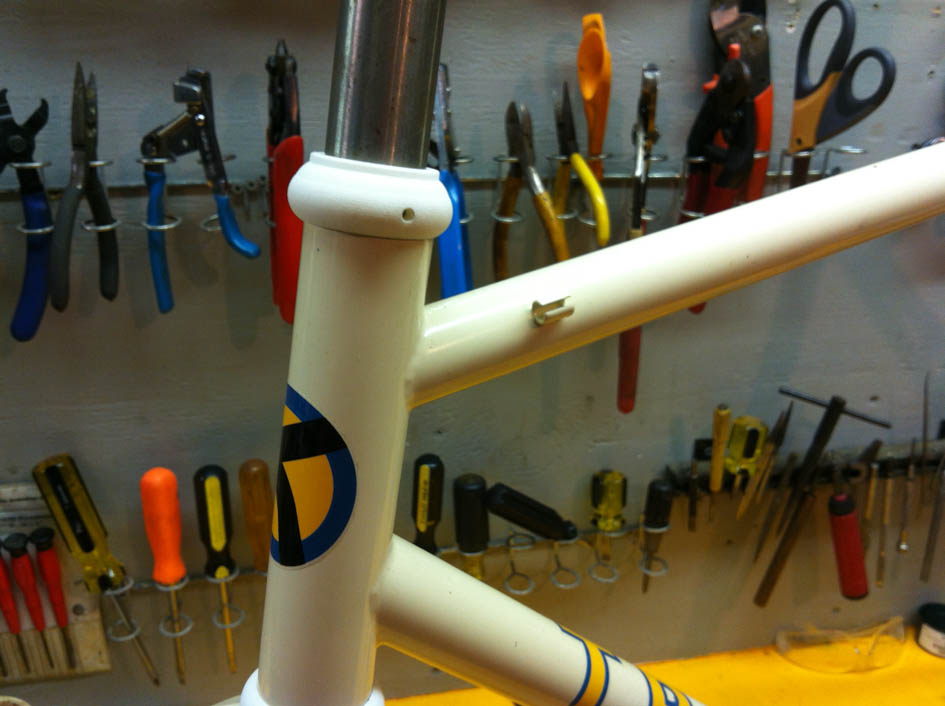
I realized that I never posted photos of the most recent revision of my dummy headset. Here it is:

The major difference is that I removed a bit more material from the inner diameter of the part. The result is that it's lighter and less expensive to produce, while still holding a fork steerer gently & securely. 

The updated version is on Shapeways - please check it out and send any feedback my way!

PS - it's also available in black :) With more colors to come!

NoHeadSet on Shapeways

Added on by Spencer Wright.

After a couple of revisions, my 3D printed dummy headset is on Shapeways!

It still probably needs a few refinements, but I'm hoping to get a little feedback on it before I make them. I did try it out in my shop recently (NYCVelo also has a prototype), and I can confirm that it looks great and works damn well.

The headset is two parts. The top half has two 3.3mm holes "drilled" in it; they need to be tapped M4 in order to make the assembly really work well. I would recommend using brass tipped set screws for aluminum or steel steerers, and nylon tipped set screws for carbon fiber. You can also experiment with thumb screws or plain old socket cap screws if you like.

This may seem like an obscure part, but for anyone who has spent any time handling bike frames & forks, it'll come in *really* handy. If that sounds like you, grab one on Shapeways and let me know how it works!

Update: Dummy Headset

Added on by Spencer Wright.

Short update on my Dummy Headset project!

First, I took v1 (the non-lightened version) and installed it on a frame I lad lying around. In order to do so, I had to tap threads into the holes that were SLA printed right into the parts, which I did by hand. Shapeways and the other 3D printing houses just won't do secondary operations (this is dumb and will in time change), but it only took a few minutes to do. For mockup purposes I used some cup point set screws that I had in my shop (the final version will have soft tipped set screws). The end result was pretty slick - my frameset now has the fork semi-permanently attached, and the whole thing is totally secure. 

Of note: Here's a photo of the original dummy headset that I turned on my late circa 2010. I used little thumb screws on it, which were kind of convenient, but the overall look is too blocky for my eyes. 

My old aluminum dummy headset, made on manual machine tools.

After mocking the whole thing up and seeing that it functioned as intended, I went ahead and ordered v2 of the parts, which are internally relieved to reduce build mass. They came a week or two ago, and I'm happy to say that I think they'll work just fine. The internal ribs probably aren't totally necessary, but they're kind of a cool feature and would be *impossible* to be made via conventional methods. I may end up removing most of them, but for this version I'm happy to have included them.

I also grabbed a few soft tipped set screws from McMaster, and am looking forward to seeing how they work. The nylon tipped one would be for carbon fiber steerers, which are pretty delicate and don't want a metal screw digging into them. The brass tipped screws would be for steel and aluminum steerers, which are much more durable.  

I haven't had time to tap the holes in this version or install them on a frameset yet, but I have no reason to think they'll work anything other than perfectly. At that point I need to determine whether it's worth trying to get them injection molded or CNC machined in bulk. These SLA versions cost me about $20 for the set. If I had to guess, I'd say that they'd run $5-10/set for CNC machined and $2-3/set injection molded (in quantities of 100s, plus $2-3K in tooling and setup).  

Modeling for SLA

Added on by Spencer Wright.

I spent a little while today optimizing my dummy headset for 3D printing. In subtractive manufacturing, cost can often be estimated by calculating the difference between the mass of the raw material and the mass of the finished object. The more material you need to remove, the more fabrication time and resources you'll consume producing the part, and hence the more expensive (generally) it will be.  

The cost structure of 3D printing is totally different. With additive techniques, cost is a largely a function of the mass of the finished object (envelope size also has an effect in production settings, but it's less critical). The cost of a part comes down to how long it takes to make, and production time is limited by the amount of material the machine can spit out in a period of time. 

As I noted the other day, my dummy headset is a bit more expensive than I'd like it to be. On the upside, though, I can remove material in a bunch of places! I took the revolved part in Inventor and made a series of revolved cuts on the ID of the part. I left some ribs along the ID to keep the perimeter somewhat intact, and left the areas right around the set screw holes thick. 

Shown before I mirrored the cuts onto the top side of the part. 

I was able to shave a *lot* of mass off the parts - more than 45% on the lower part - which means significant cost savings. 

Shapeways' volume/price breakdown.

I still need to make sure I'm on the right track on clearances in a few locations,  but cutting the extra material out should make these parts much more feasible. Keep in mind, my total development cost at this point is probably 2.5 hours of labor and $40 in parts. Were I trying to get this product to market quickly (and who knows, I may try doing so) I could be live in both Shapeways' - and my own - webstore within two weeks.

Even though I've just been playing with it for a half hour, it's pretty cool seeing my model live on the site.

Another 3D Printed thing: Dummy Chris King Headset

Added on by Spencer Wright.

I can't justify the cost on this, but with some small modifications I could print a lot of them before I hit the price of the molds I'd need to injection mold them. 

Okay, the color's a little off. I'm working on it ;)

Most framebuilders, and a lot of bike shops, will have a frameset (that's frame and fork, for the uninitiated) around the shop for some time before the headset is ready to be installed. Optimally, they're able to be kept together and protected - both from things around the shop and from each other - and the natural solution is to temporarily install the fork in the head tube. For a variety of reasons, though, you don't always want to install a headset just yet, and in those cases it's useful to have a dummy that approximates the size and shape of the headset that you're eventually going to use.

When I was building bikes, I made a batch of dummy headsets out of aluminum on my lathe. It was a fun project, but it took a while and the finished thing didn't look at all like the headsets (usually Chris King) that I was installing on the bikes when they were done. Moreover, a lot of small time builders either don't have access to a lathe or don't have the time/energy/gumption to build dummy headsets themselves.  

So I spent an hour or two and modeled this one. It's a damn close copy to a King 1-1/8" NoThreadSet, but SLA printed. I included two holes in the top "cup" that I'll tap out and install set screws in. When the dummy is installed on the frameset, the set screws can be tightened down to keep the whole thing together. Because the dummy is plastic, it won't mar the frame, and because it's dimensionally accurate, it could be used to mock up the steering column for use in rack building, component setup, etc.

I need to make a few small changes to reduce printing mass, but in the meantime the design files for these parts are all in a GitHub repo. If I can find a way to get the cost down a bit, I'm hoping to put them up for sale for other folks to use; drop me a line if you're interested.