So, this is happening:

Lots more coming in the next few months, including plenty of engineering & manufacturing reports. Stay tuned! And sign up for The Public Radio's newsletter to stay in the loop :)
So, this is happening:
Lots more coming in the next few months, including plenty of engineering & manufacturing reports. Stay tuned! And sign up for The Public Radio's newsletter to stay in the loop :)
A brief calm between many storms:
I've spent a lot of time here over the past few months. Much of my work at nTopology happens here; probably half of The Prepared's management and composition; a *lot* of reengineering & planning for The Public Radio. Plus the odd proverbial cat video, etc.
I'm very lucky to have such a great work space; I'm looking forward to the next few (hectic) months.
As I've said here before, The Prepared was never meant to be a media operation. And yet, when I think of its place in my life and in (apparently) the lives of its readers, it's just that - and I can't help but want it to be more.
So I'm happy, then, to announce The Prepared's first experiment into audio. Appropriately enough, the first episode of The Prepared (the podcast) is a conversation between myself and Zach Dunham, the better half of The Public Radio - which, as it happens, is *about* to relaunch on Kickstarter.
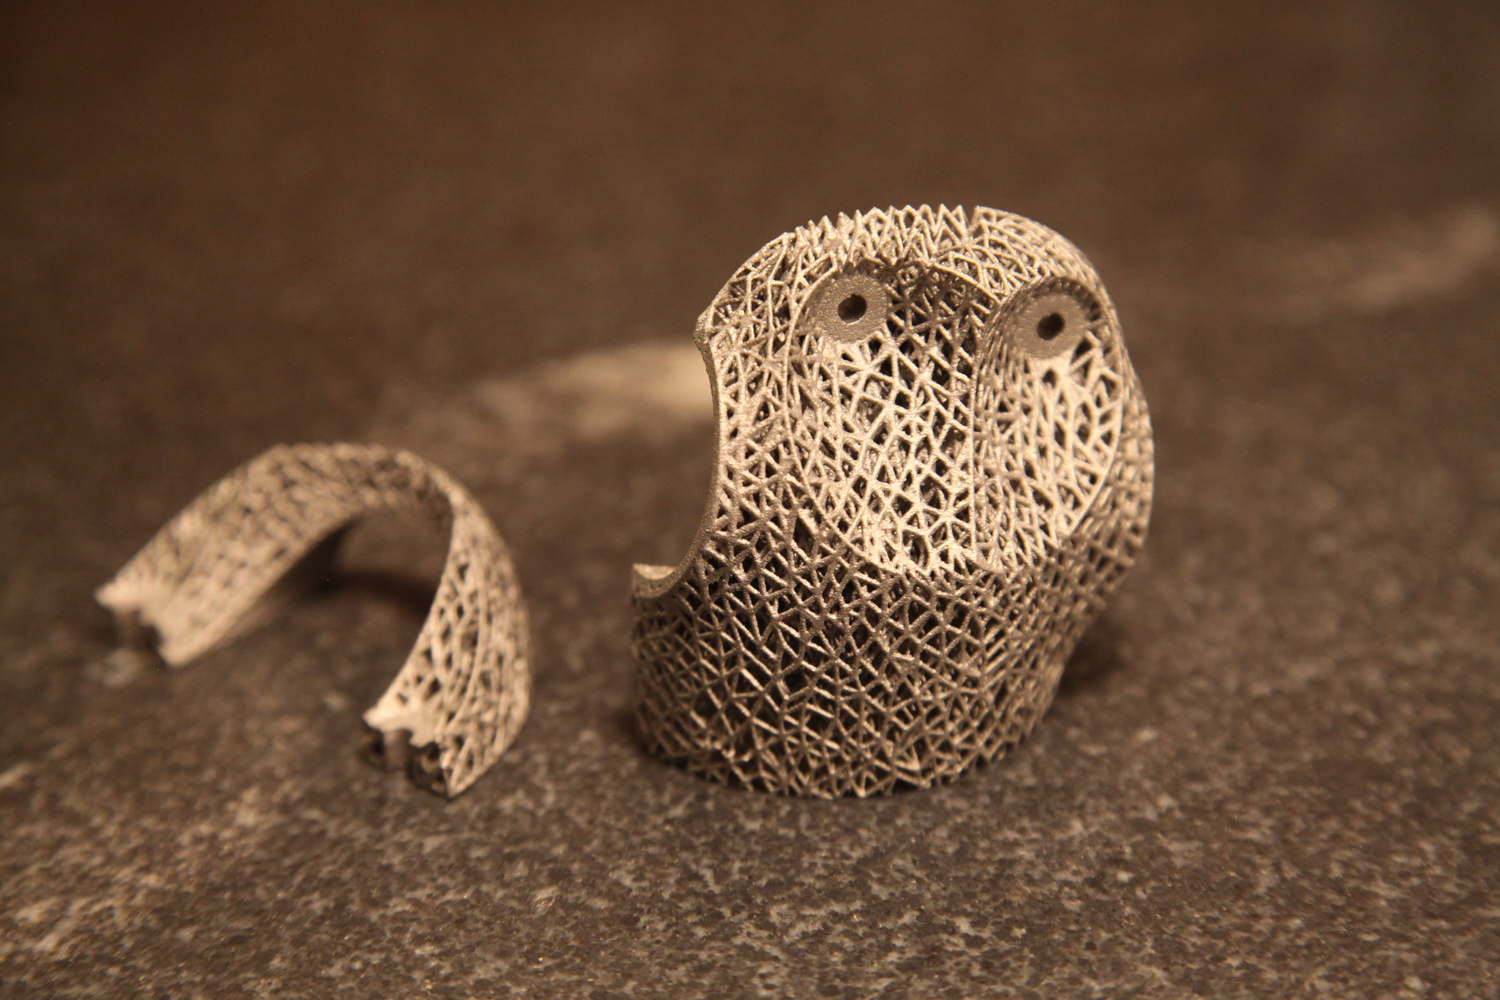
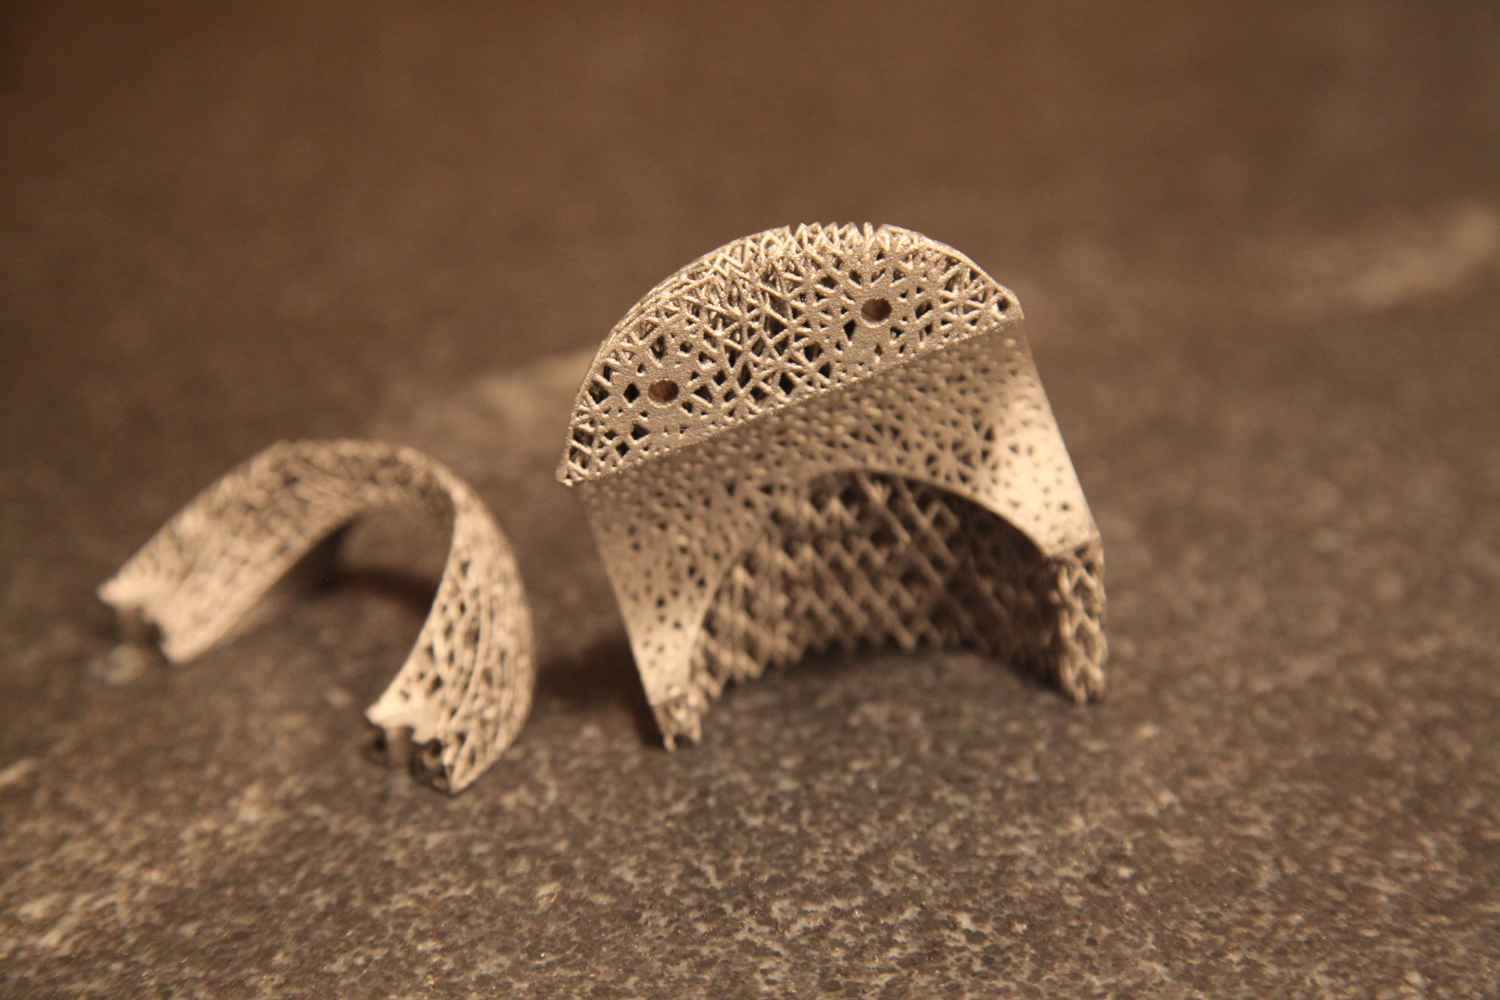
Almost a year ago, I posted a rendering of my printed bike stem on my blog here. Now:
These parts were printed by my friends at Playground Global on their 3D Systems DMP320 in titanium 6/4. Like the titanium parts I've had printed (and written about extensively) in the past, these are done via laser metal powder bed fusion - the generic name that often gets referred to as "DMLS". These parts were, of course, designed in nTopology Element Pro; you can see more of my design process here.
As loyal readers will know, I've put a lot of time into using Abaqus to predict these parts' mechanical properties; more on that in the near future. For the time being, the goal with this print was to test the manufacturing process - and use any lessons here to guide future design iterations. As you'd imagine, there's a *lot* that goes into printing a part that has ~45,000 beams; establishing manufacturing parameters was a good way to filter out nonviable design strategies.
It'll take a bit more work to characterize the as-built design fully, but at first inspection it seems to have been a total success. I was careful to keep most of the beams' orientations at a high angles, thicknesses above .45 mm, and lengths below 3 mm; the result is a structure that's almost completely self supporting.

At this point, the part has been roughly cleaned up and bead blasted to remove any surface discoloration. The next step is to tap the holes, clean up the clamp surfaces, and mock the entire assembly up.
More soon :)
See also: DMLS lattice sample prints, where I describe the part's design a bit more.
So, Zach and I have been working on an updated version of The Public Radio, and I figure we're about due for a manufacturing update. So! Here goes:
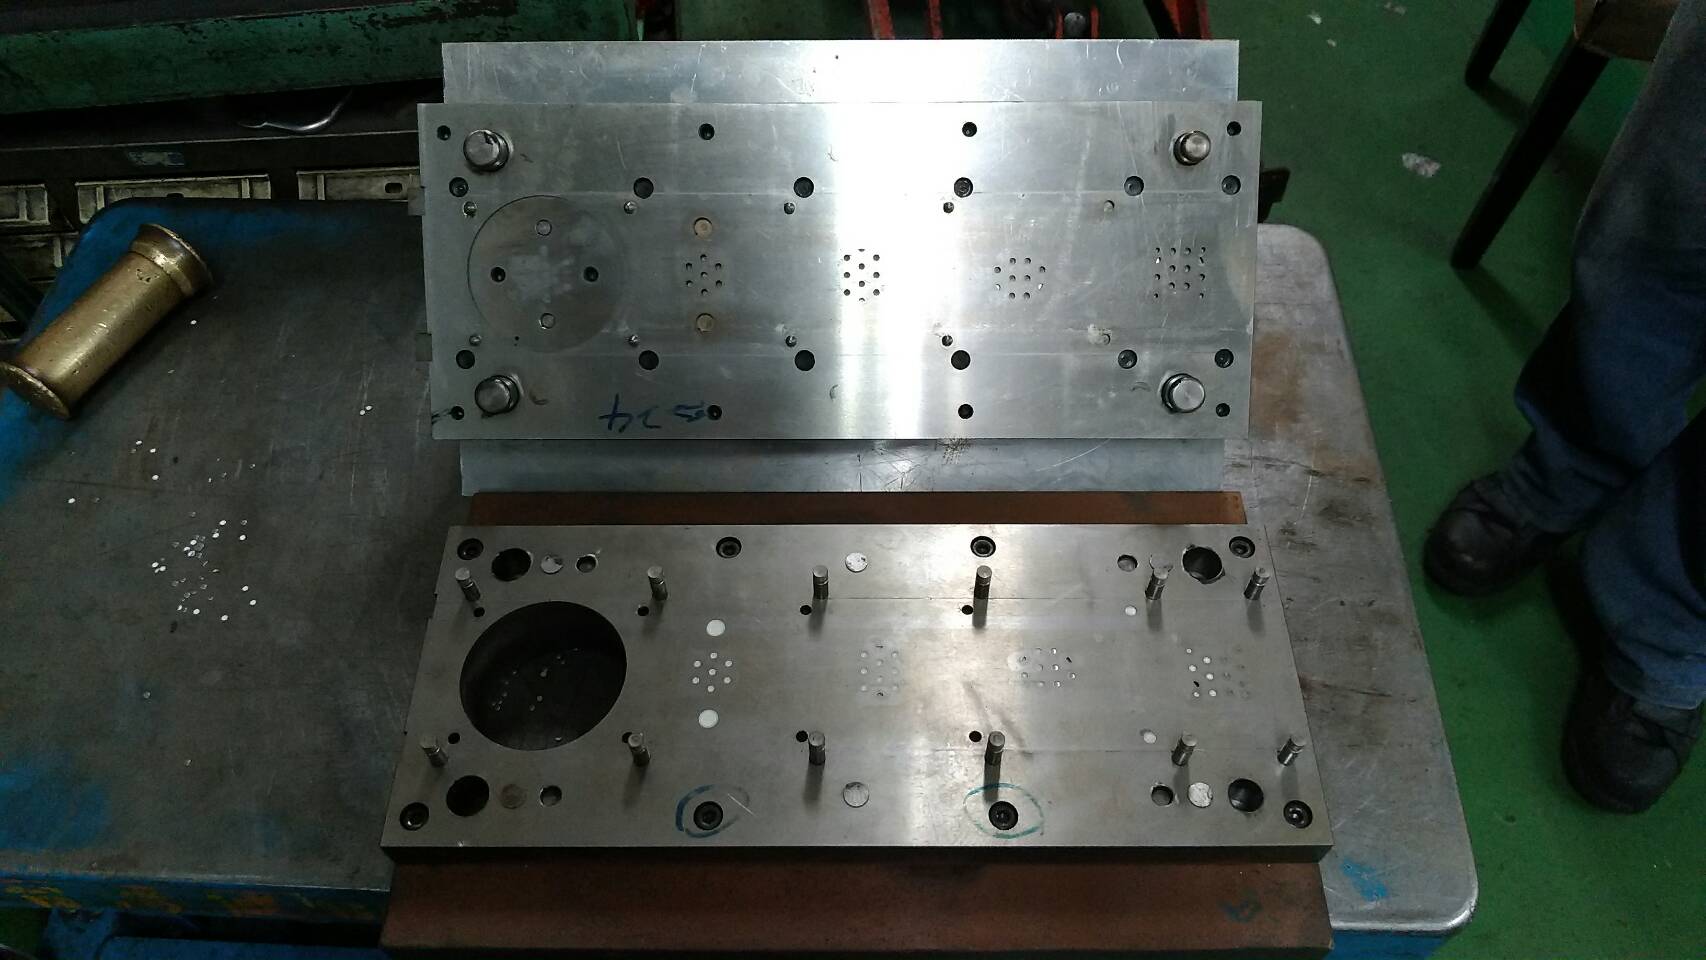
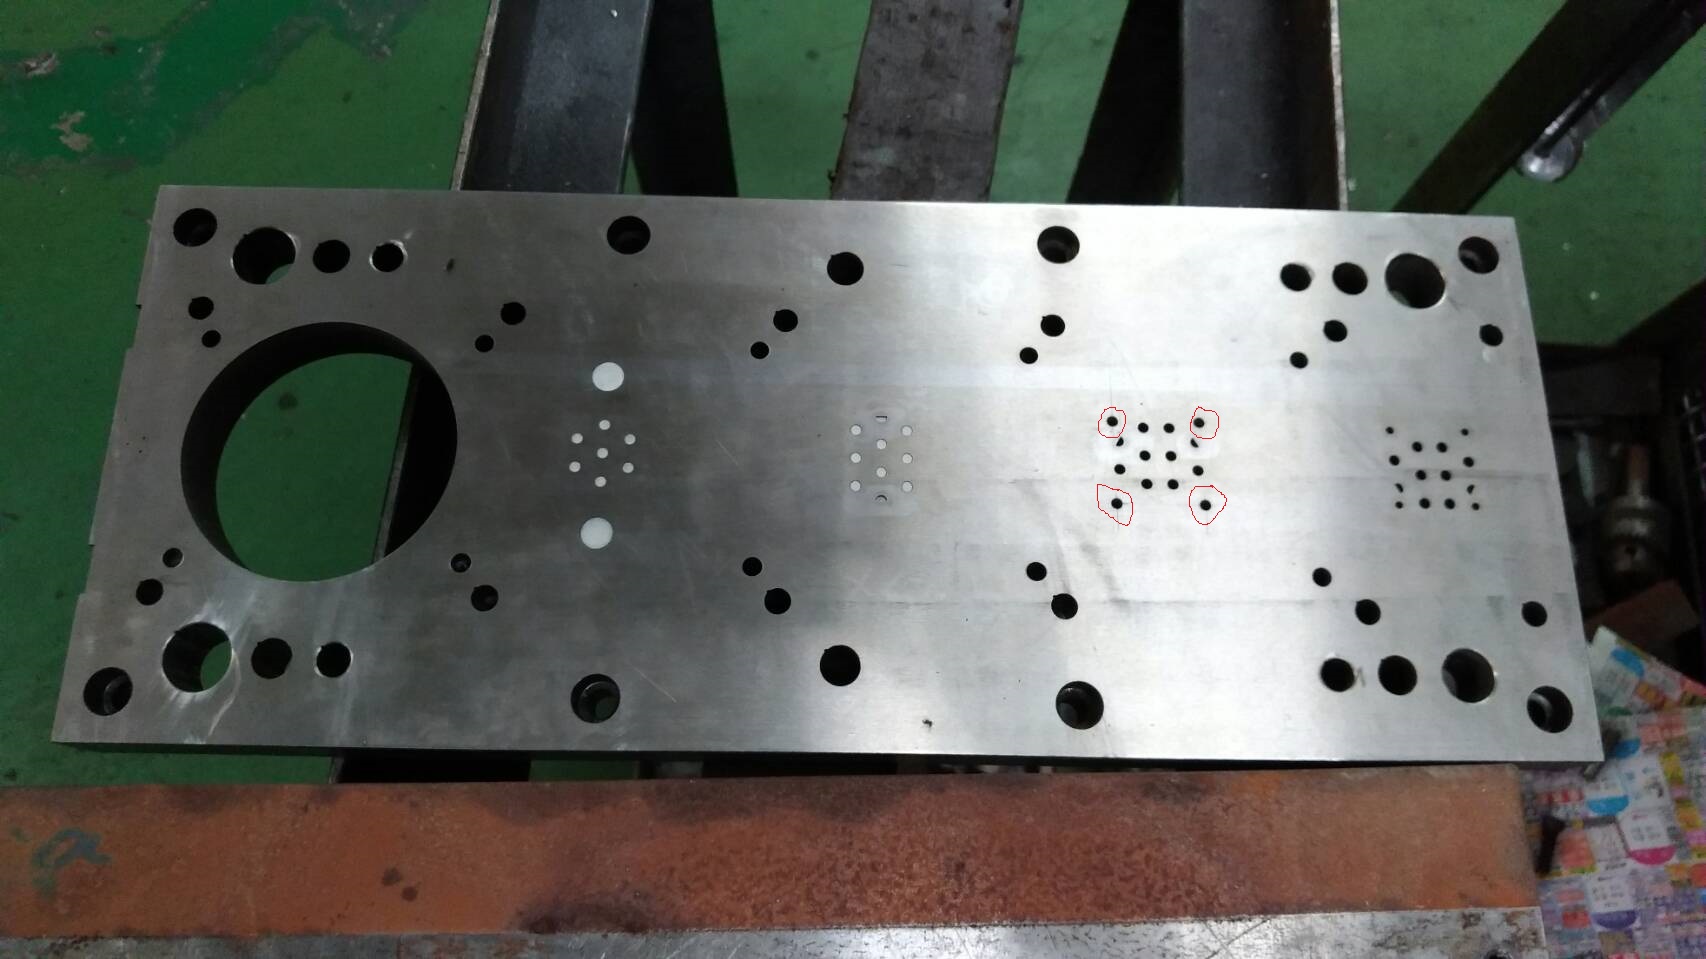
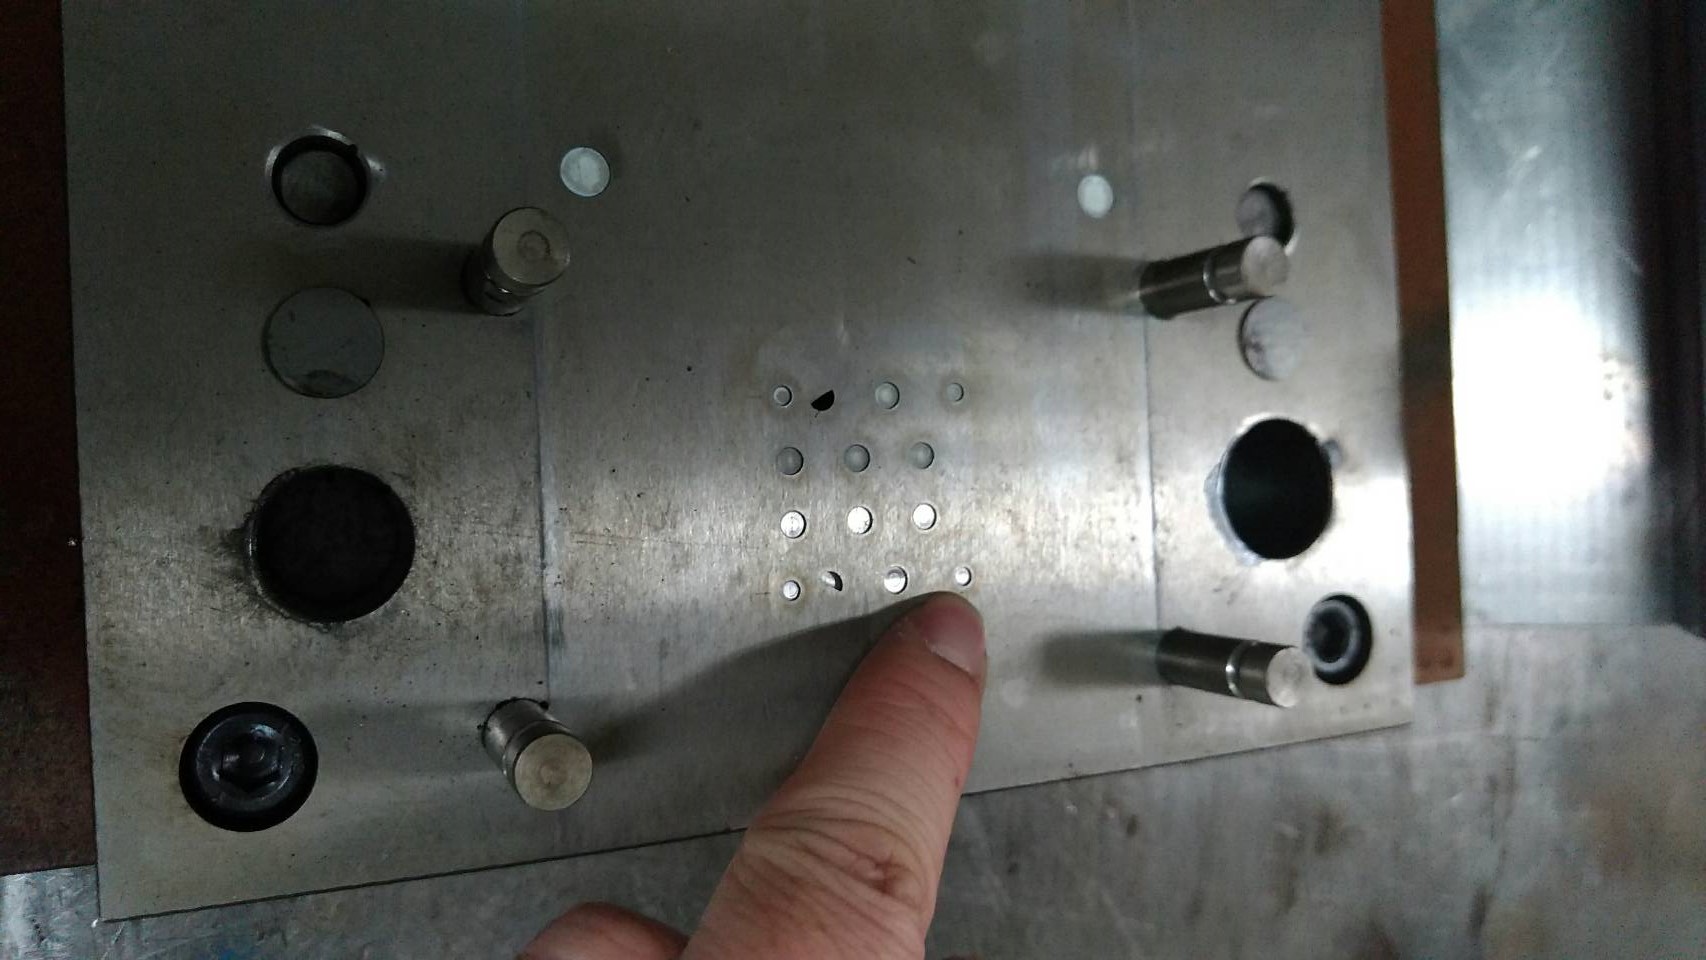
This is the same progressive stamping die I've shown here, but with some small changes. The locations and diameters of our main assembly screws have changed, and as a result the tool needed to be modified.
The cool thing about progressive stamping is that you have multiple stations - in this case five - to work with. As seen above, the stations go right to left. Initially the screw holes were punched in station one (far right), but now they're being done in station two. Making this change just requires removing four punches and then adding four new ones + corresponding holes; the old holes are simply left unused.
We've got a few other updates coming up, including visits to a few factories and a new assembly/tuning management process. Stay tuned :)
A recent episode of The Riff, a podcast I've been enjoying recently, centered around a conversation about New York City's cultural influence. In it, Andy Weissman (a lifetime New Yorker whose perspectives I've grown to enjoy on Twitter) proposes the following:
My theory is that right now New York is at a peak and is on the downside of its political, economic, cultural, and social import.
This makes me concerned both as a New Yorker and as someone who likes when old things maintain their relevance. Interested people should check out the full conversation; both David Tisch and Pam Wasserstein makes some good points about New York's cultural diversity, and the whole episode is both challenging and fun. I also have a (possibly hopeful) feeling that Andy is just trying to stir up shit & get other people excited about doing great work in NYC, but that's beside the point. The question, to me, is this:
Assuming Andy's theory is correct, what do we as New Yorkers do about it?
My thoughts:
In a nutshell: NYC needs to work on meaningful stuff, maintain an approachable image, and figure out how to improve its basic urban operations.
If this is something you're working on, let's talk.
Every few weeks, someone asks me what I think the future of 3D printing is - whether it's going to really change the way things are made. My response is to ask if the name "PCC" means anything to them - a question that almost always elicits a blank stare.
PCC is a manufacturer of castings and forgings, primarily for aerospace and power generation. They live mostly outside of the public eye; to most folks, casting pretty much begins and ends with old-school iron cookware, and few stop to consider how improvements in casting techniques might have changed the cost and availability of electricity and air travel over the past half century.
And yet they have had a big impact. PCC sells about $10B worth of products every year, supplying critical propulsion and airframe components to companies like Boeing and Airbus. Many of these parts allow airplanes to reduce weight and improve engine efficiency, helping along significant improvements in fuel economy per seat. And so, in 2016, Precision Castparts Corp was acquired by Berkshire Hathaway for $37.2B. It's the largest amount that Warren Buffett has ever spent on an acquisition.
I bring this up to say: The tech press may maintain their interest in 3D printing, or they may not. It's possible that, in a few years, I'll walk into a retail shop and have made-to-fit parts printed for me on demand. It's possible that manufacturing will become distributed; that supply chains will spin up and down at a moment's notice; that computers will engineer products from start to finish.
But there are many other, less sexy ways to change the world around us. And we'd all be well off if some 3D printing method achieved one of those instead.
This week, I participated in ASME's Technology Advisory Panel on Additive Manufacturing. This is the third standards body that I've gotten involved with in the past year or so (I also sit on ASTM F42, and represent nTopology at the 3MF Consortium), and I wanted to post a few thoughts about standards development for anyone who's curious about them or interested in being involved in similar work.
From a conversation on engineering between Arup's Dan Hill and Tristam Carfrae:
In response to fears that this kind of 'algorithmic architecture' will marginalise engineers and architects, Carfrae states that this kind of approach is only really "optimising the last 10% of a problem." The software has to be described and tuned with a particular strategy or problem in mind, and that comes from the designer, not the software.
The point here is one that I've argued many times in the past: Today's optimization approaches (and any in the adjacent possible future) do not, in fact, put computers in the driver's seat of engineering or design. Instead, they use computers to automate rote tasks that an engineer is interested in exploring.
I believe this distinction is critical, as it affects both the direction of CAD companies' efforts and the enthusiasm of a new generation of engineers. It's my desire to see the CAD industry prioritize efforts that'll have big, positive impacts on the world, and it's my goal to keep smart, driven people from becoming disillusioned with engineering. As a result, I'd encourage marketers, journalists and onlookers to seriously consider what they believe about optimization, and to be wary of anyone who tries to sell them an AI enabled Brooklyn Bridge.
For more background on optimization and the future of CAD software, see Displaced in space or time, The problem with 3D design optimization today, Computer aided design, and Exploration and explanation.
From a recent Stratechery article on Amazon & Alexa:
You don’t make good products because you really want to, you make good products by fostering the conditions in which great products can be made.
This is something I've put a lot of thought into, starting around mid 2012. At the time I was leading development of a highly complex electromechanical system (robot doors), a process which was itself embedded into pretty much the most complicated residential construction project you can imagine. The engineering tasks we faced were formidable, and the schedule was extremely tight - but in many ways the cultural aspects of the job had an even bigger impact on what we built.
Since that experience - and urged along by my time at Undercurrent and my work studying product companies like McMaster-Carr and Amazon - I've only become more convinced of how critical it is to foster the kind of engineering, product, and project cultures that are appropriate for what you're building.
Build what's right for the team that you are; Be the right team for what you want to build.
Note: I'm considering making a small run of these desks available for sale. If you're interested, let me know!
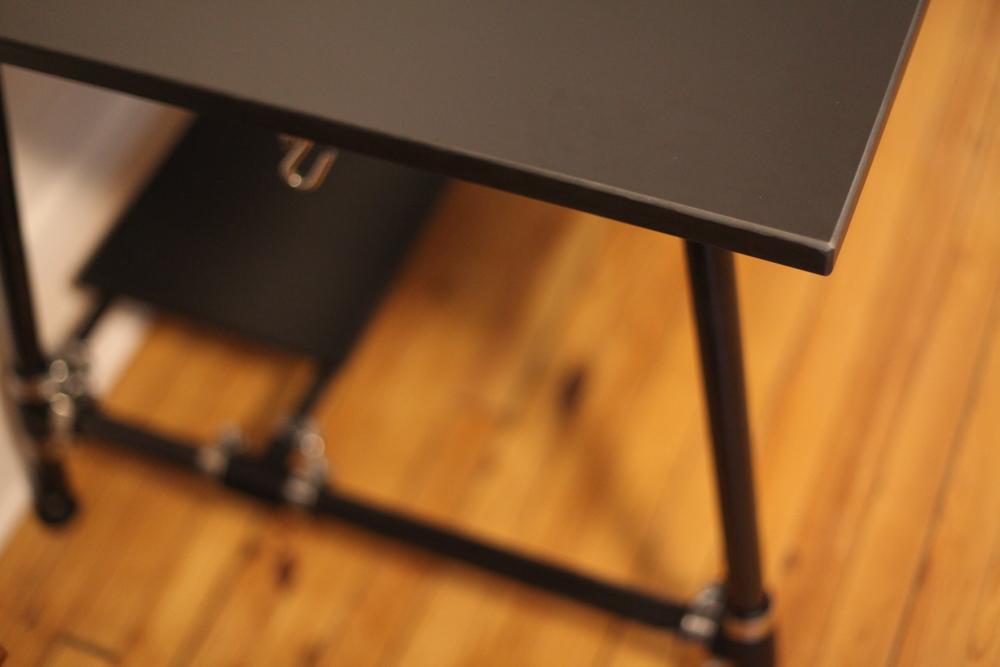
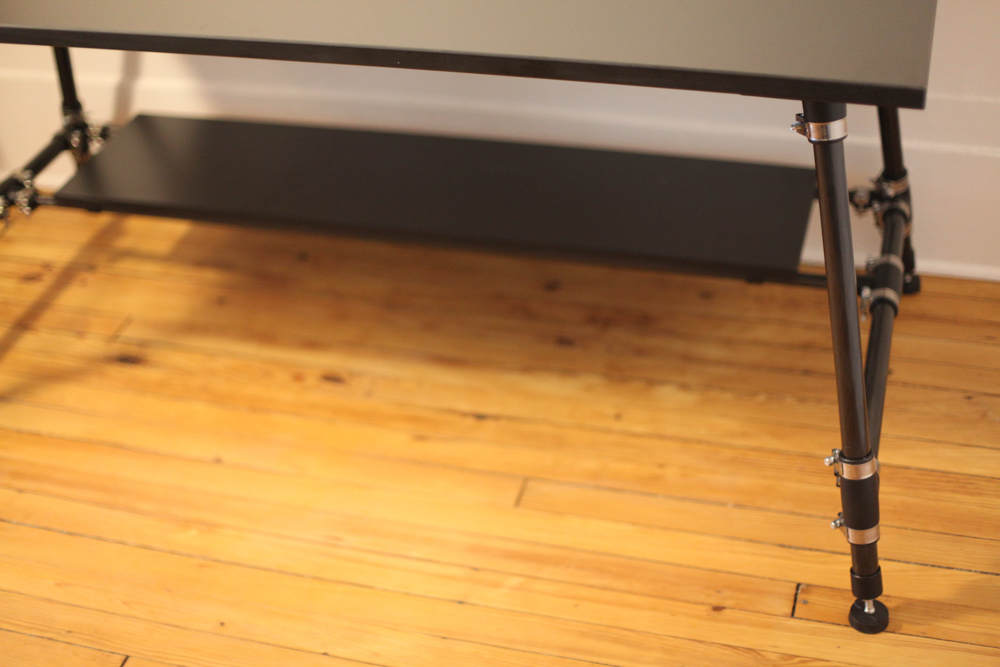
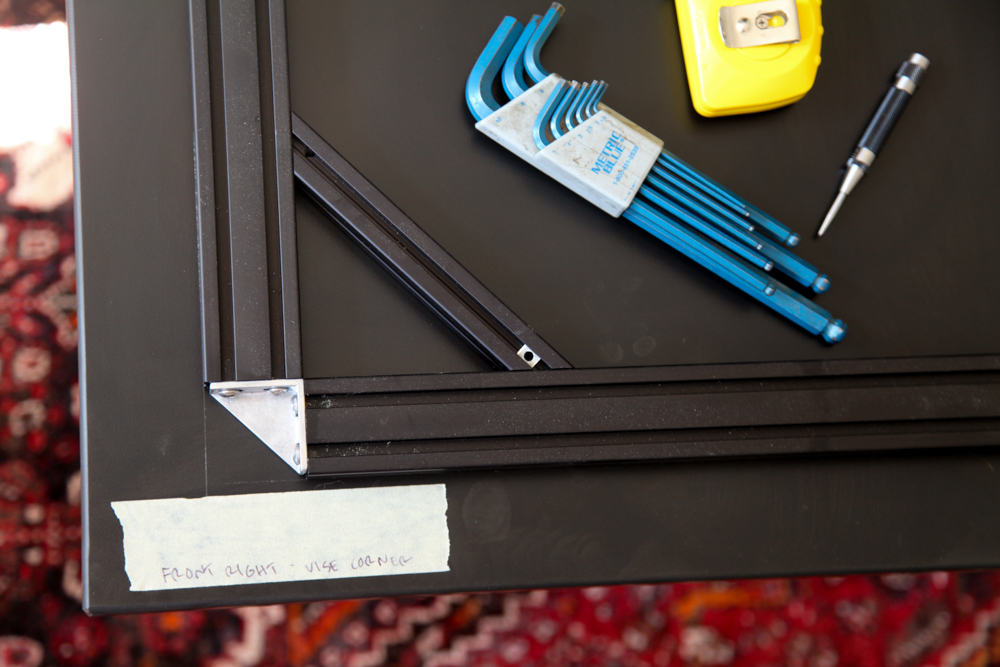
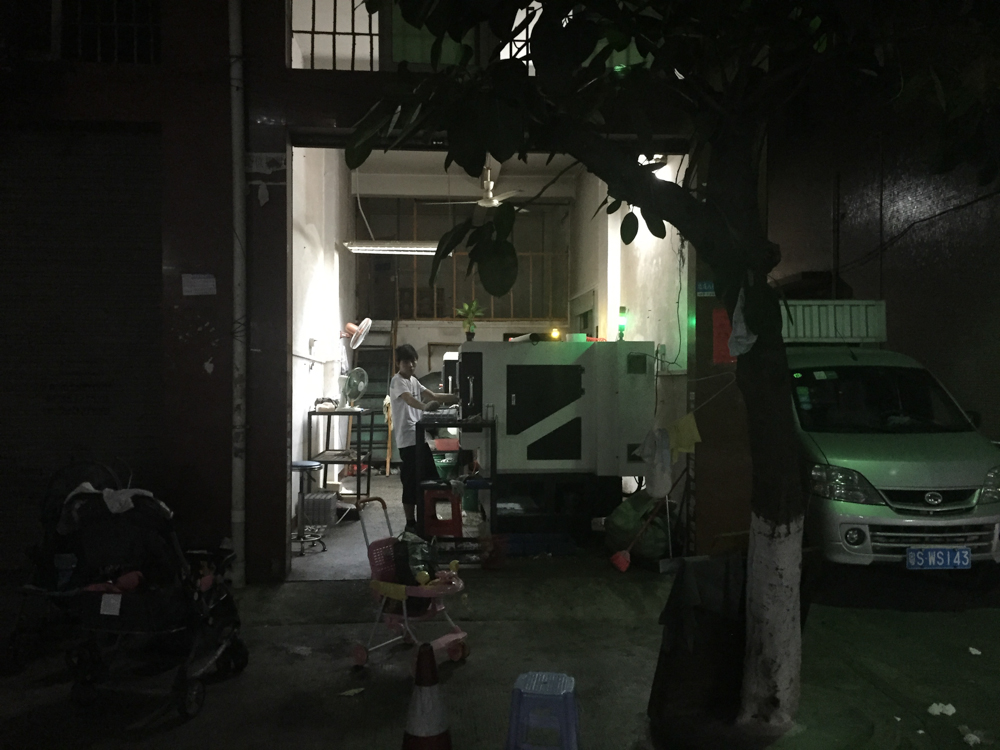
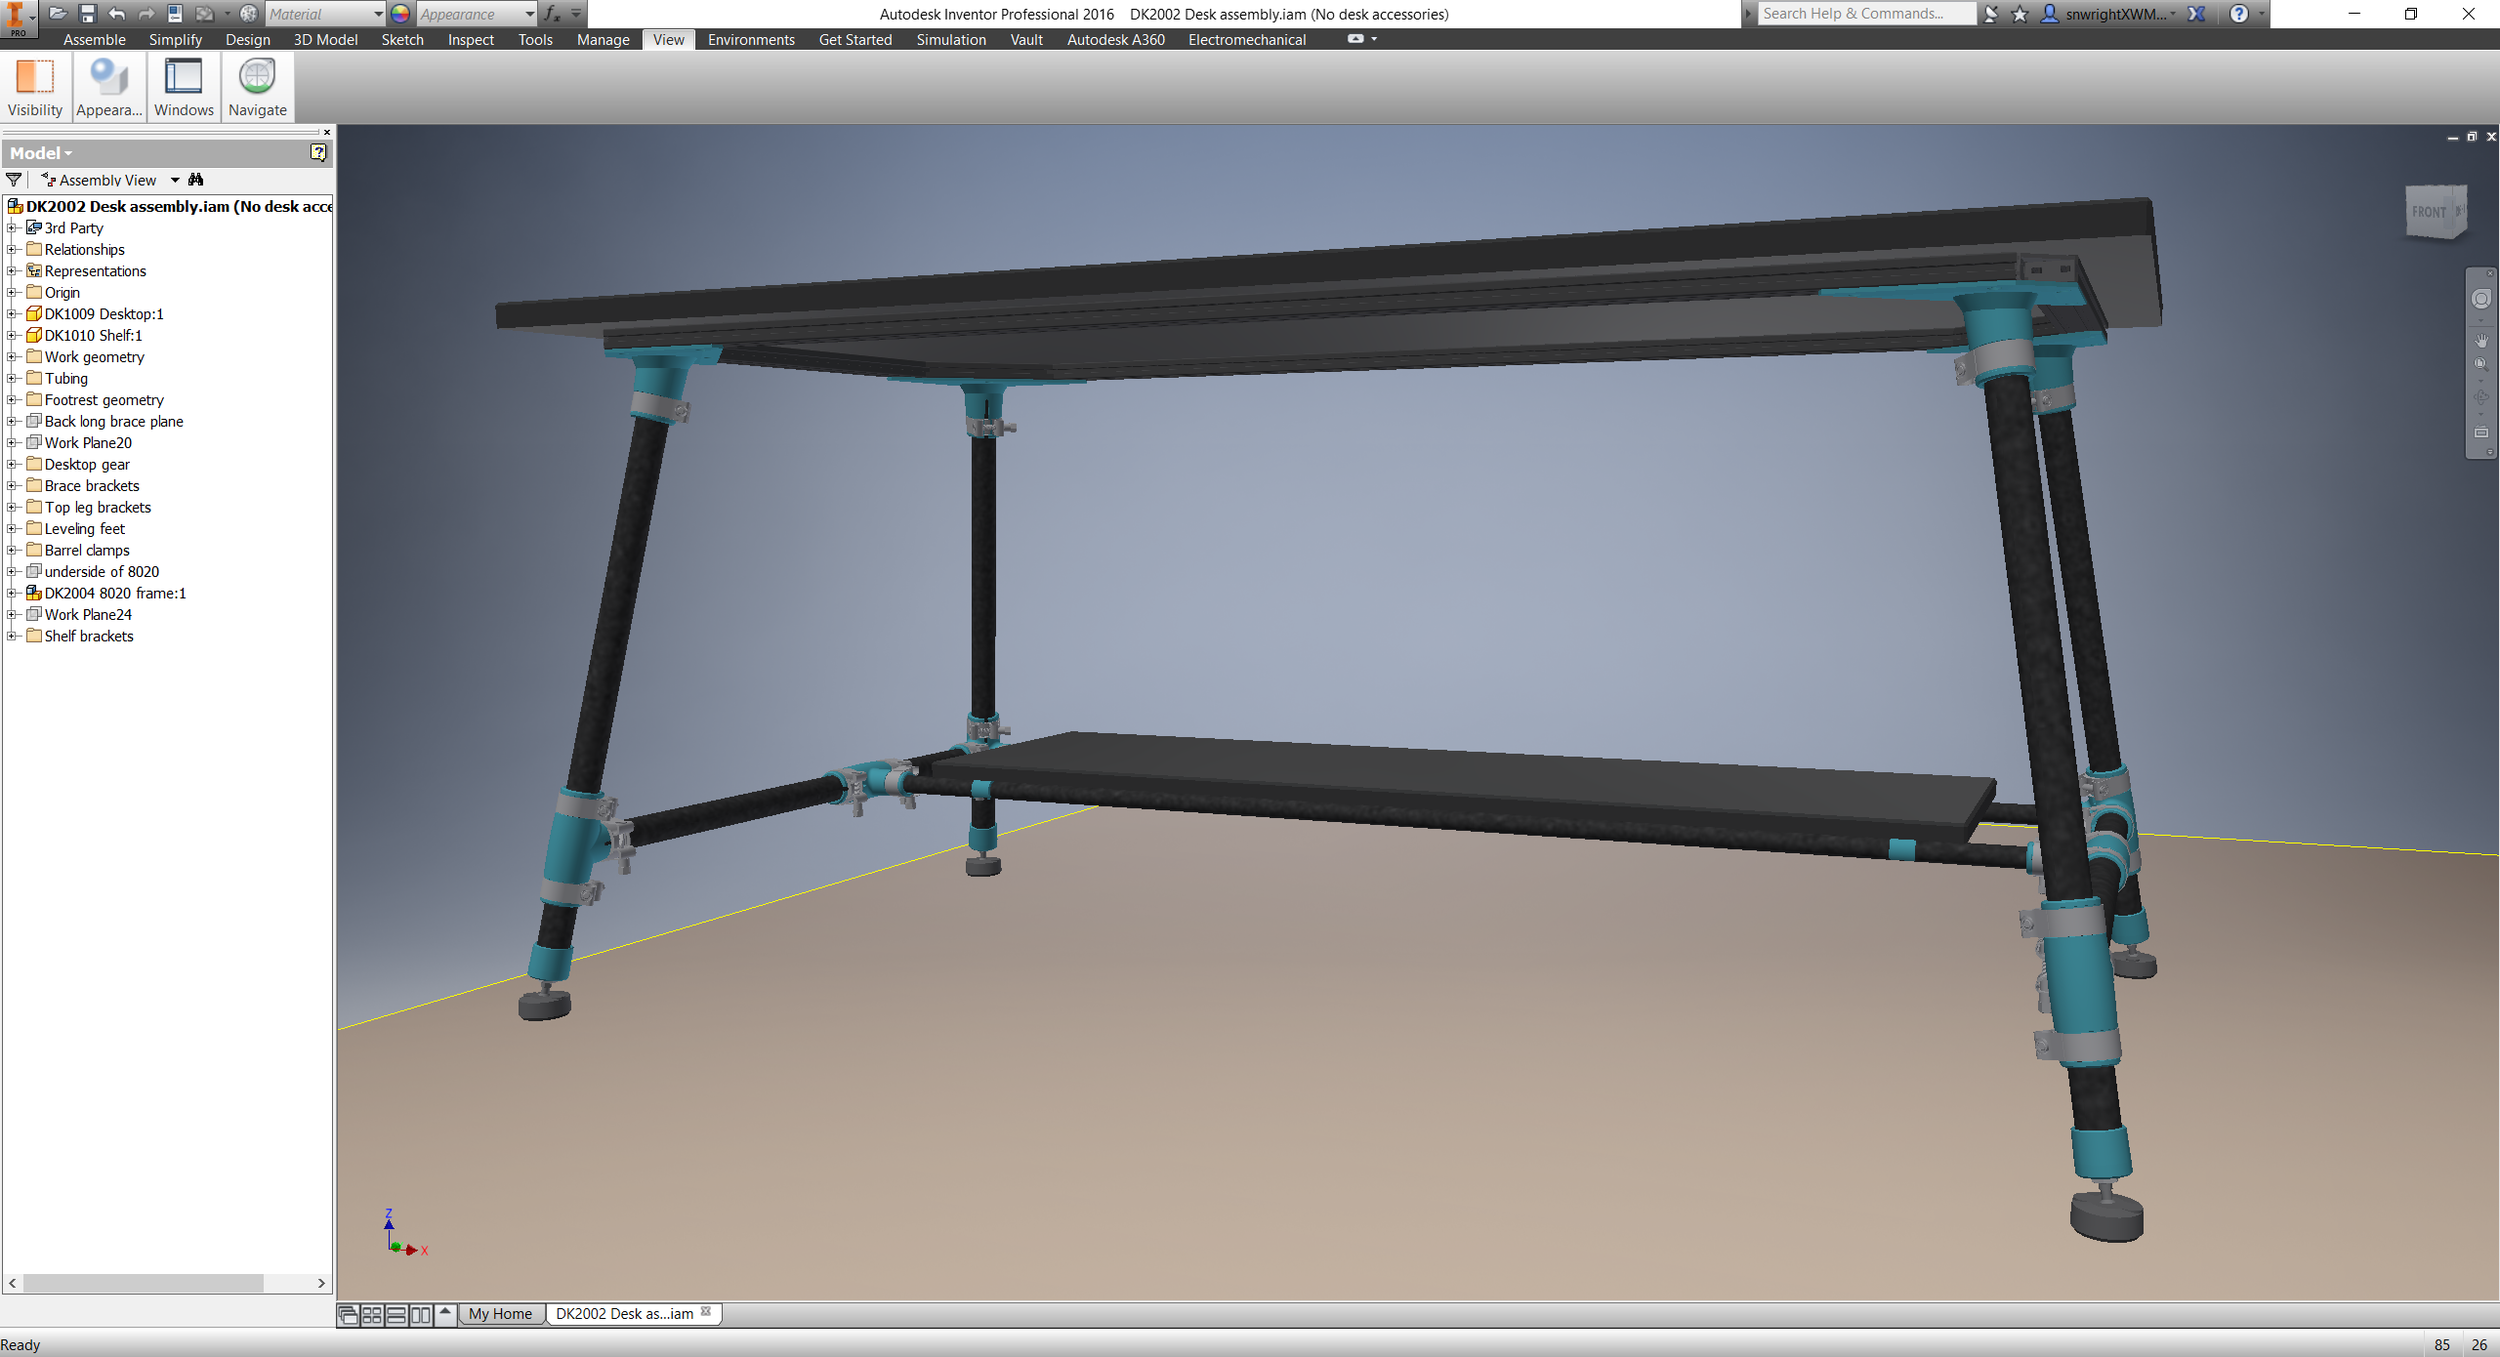
Last week I finished assembling the new desk I've been working. It's been a big upgrade to my home office, and I'm really happy with how it turned out.
To recap:
The goal was to create a functional workstation that could be assembled (and disassembled) easily. It should have a distinctive aesthetic, use durable materials, and be sturdy as all get out. Its primary use will be as a computer terminal; but as it's designed for engineering work it'll also serve as a de facto hub for parts inspection, reverse engineering, and the occasional wrenching.
Initially, I had wanted to get a slab of live edge walnut and make something classic. But after some consideration I realized that wasn't really appropriate. Wood's fantastic, but it offers zero modularity (making the desk difficult to move - bad for expanding workshops) and is rather messy to work with (bad for making changes down the line). In addition, the aesthetic of live edge desks tends towards cast iron and welded steel: beautiful materials in their own right, but not ones that are convenient for me to work on.
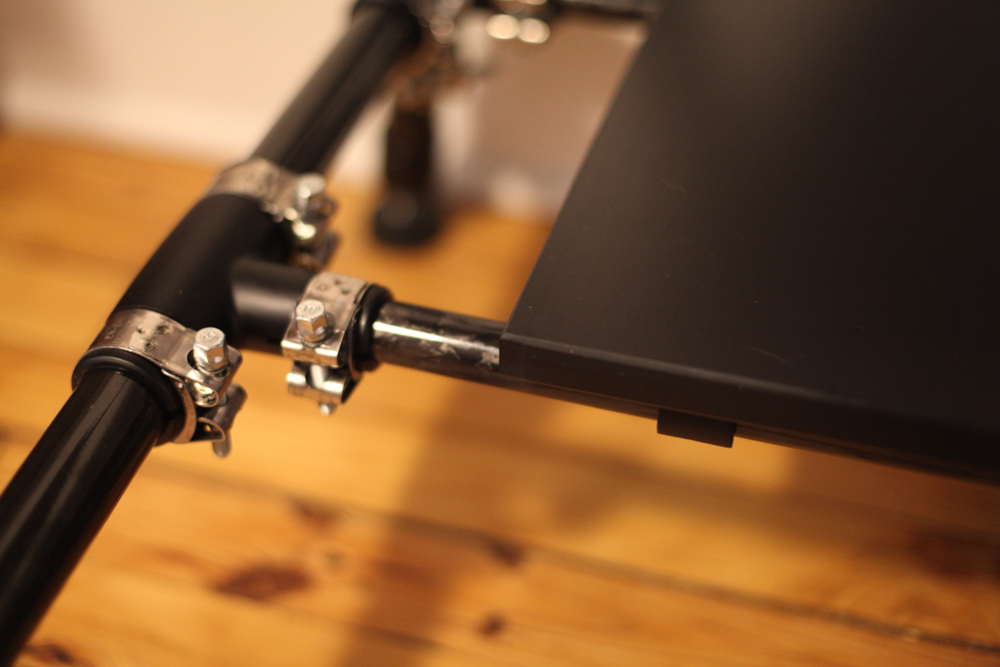
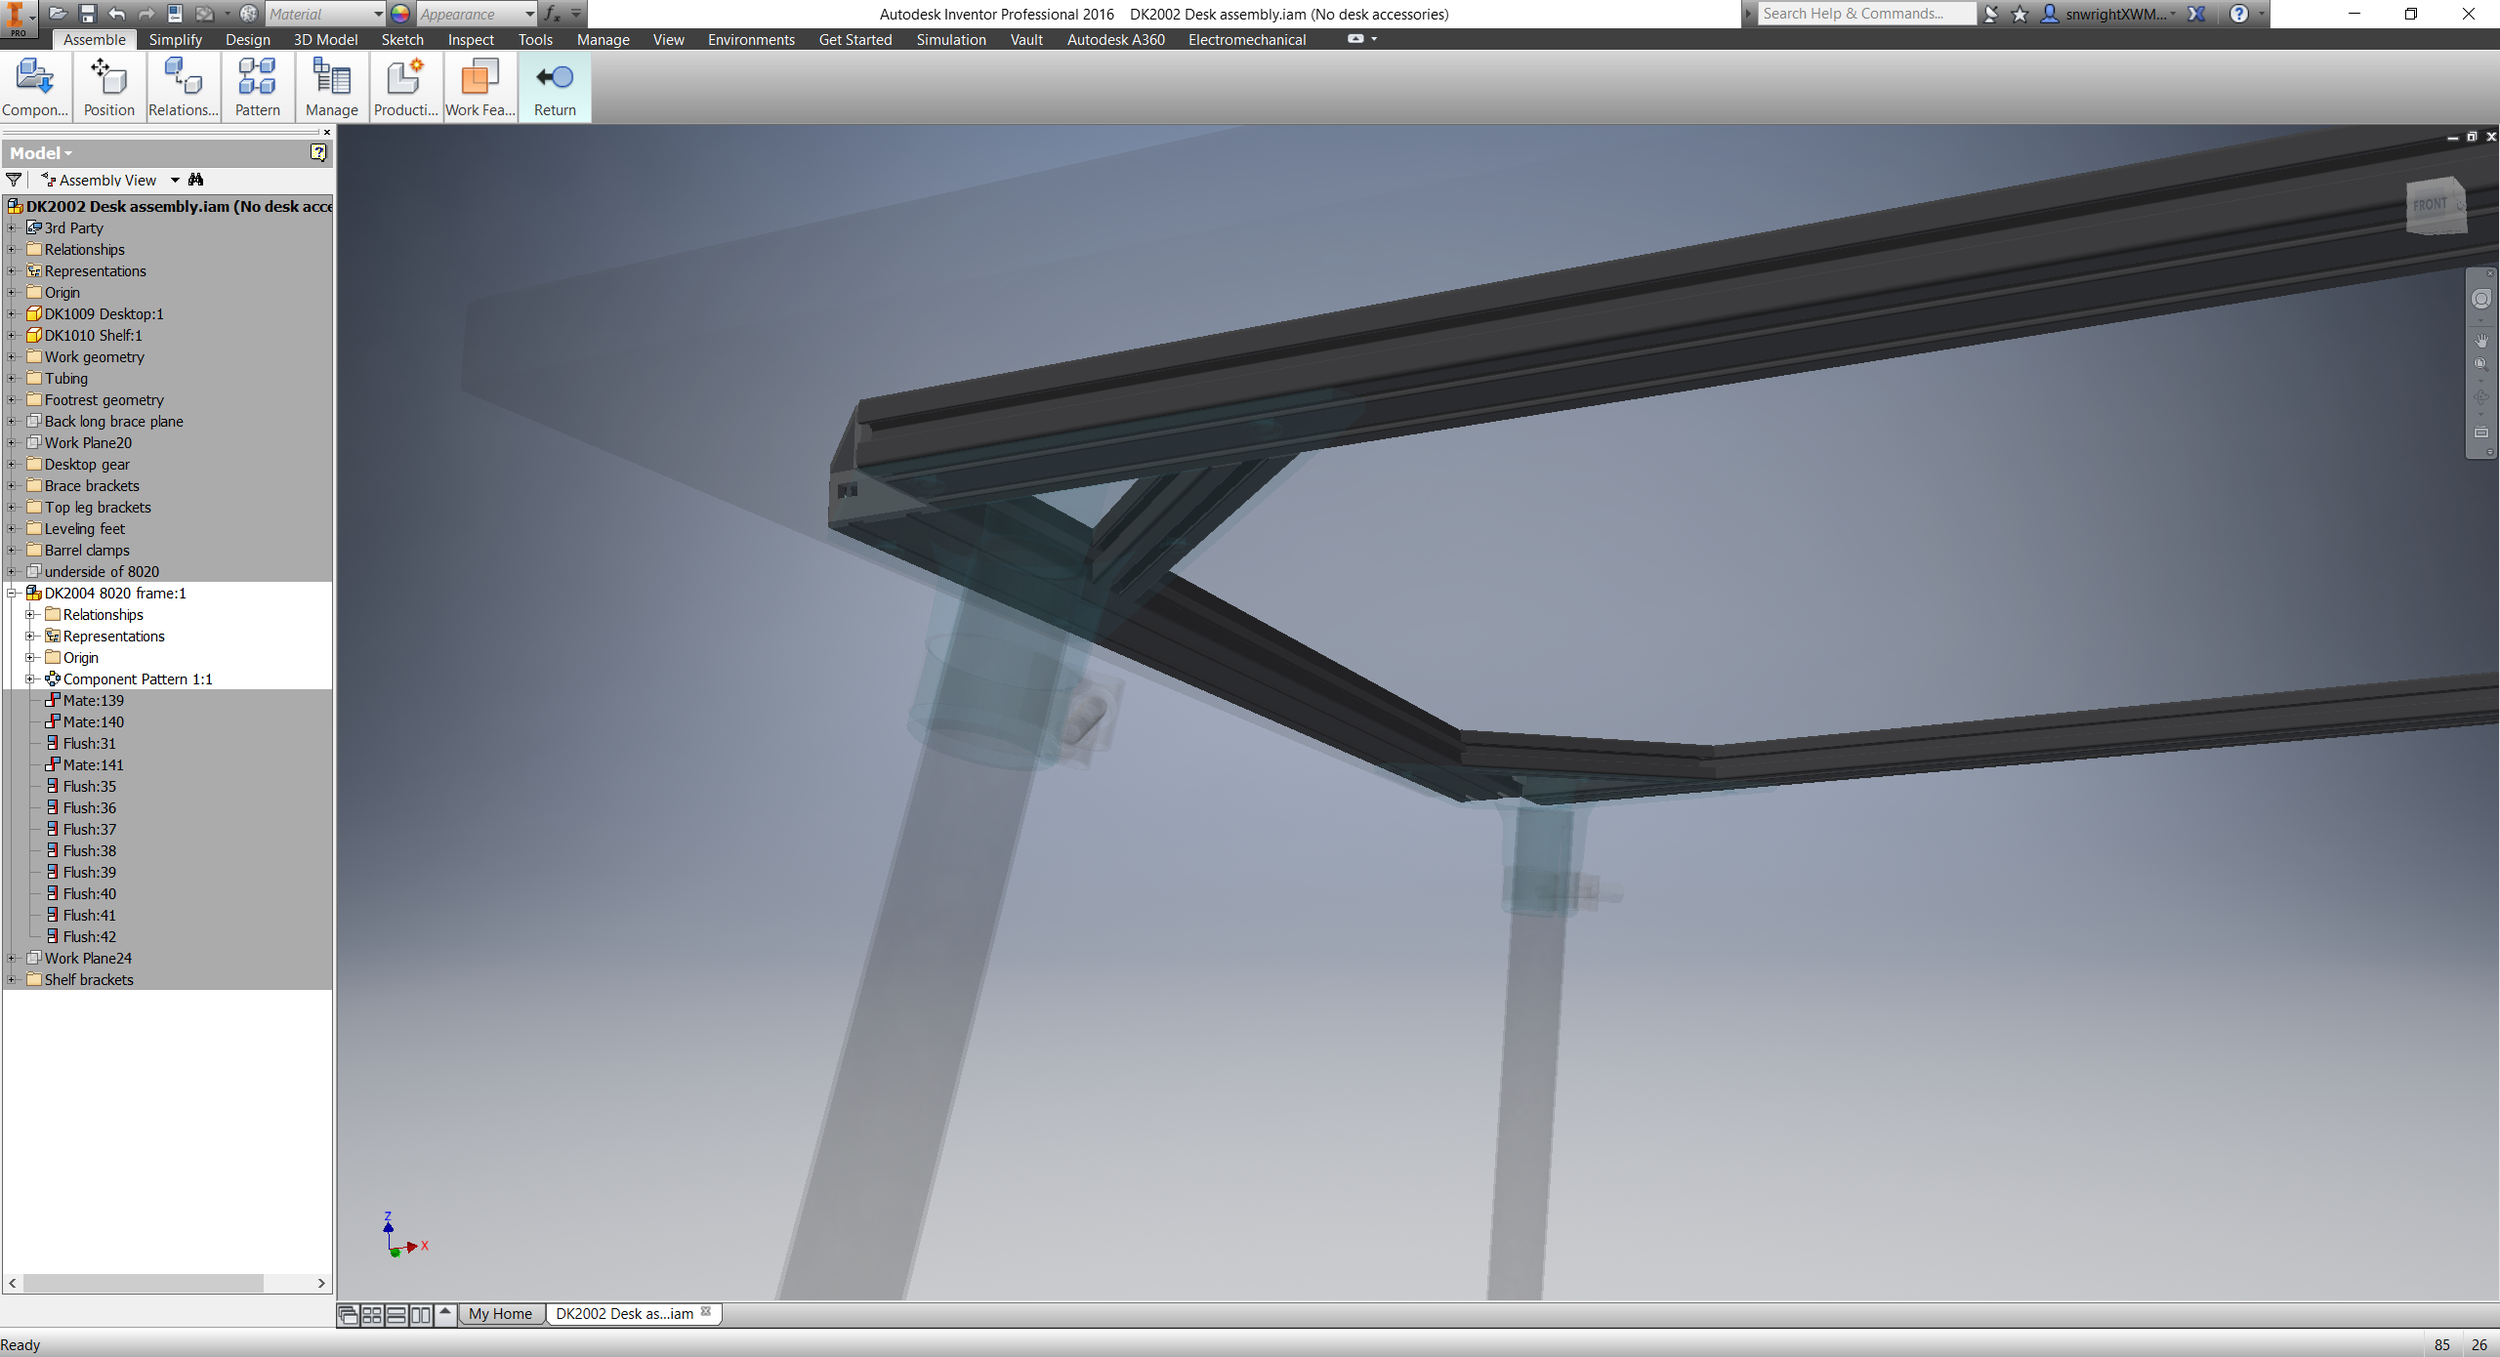
So: Carbon fiber legs. I've worked with composites since my bike days, and found that it offers some nice benefits over metalwork. Carbon tubing is light (not critical when you're using the desk, but sure is nice for shipping/moving), stiff, aesthetically distinctive, and easy to cut to length.
To finish the legs' structure, I used 3D printed resin nodes. I wanted something that had good surface finish and high tensile strength, and I wanted good elongation so that nothing would break if I *really* hammered on something on the desk. Formlabs came through on all counts; their Tough resin performed fantastically.
Next, I needed a suitable surface to work on. After researching a variety of composite surfaces, I settled on phenolic resin. It's impervious to all sorts of harsh chemicals (including coffee cup rings), is cost effective, and has a nice monolithic feel that laminates just don't. It's also easy to machine and adhere to, which came in handy when attaching the subframe.
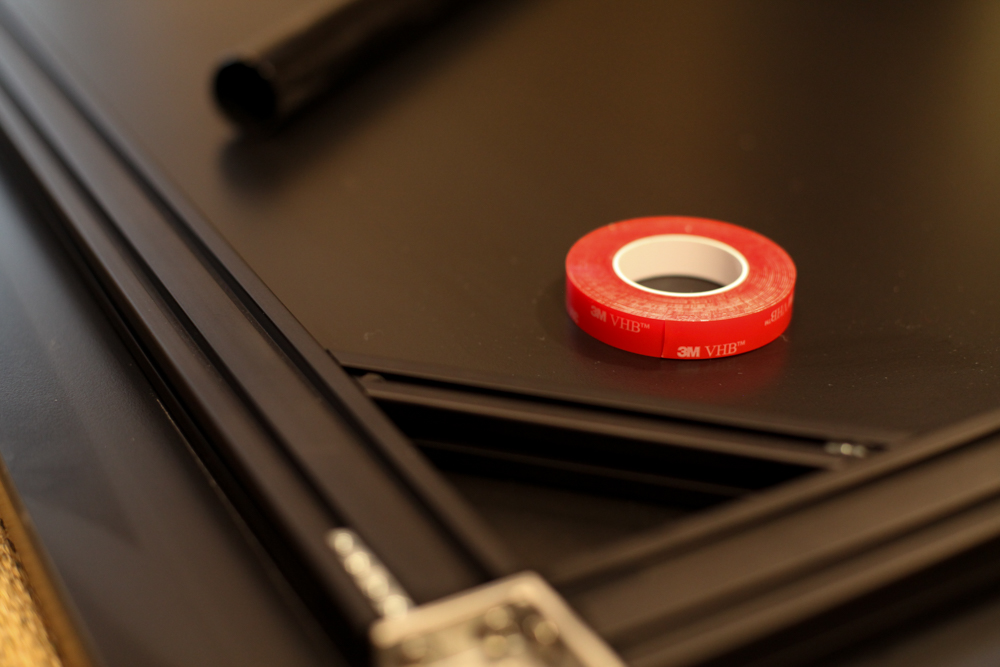
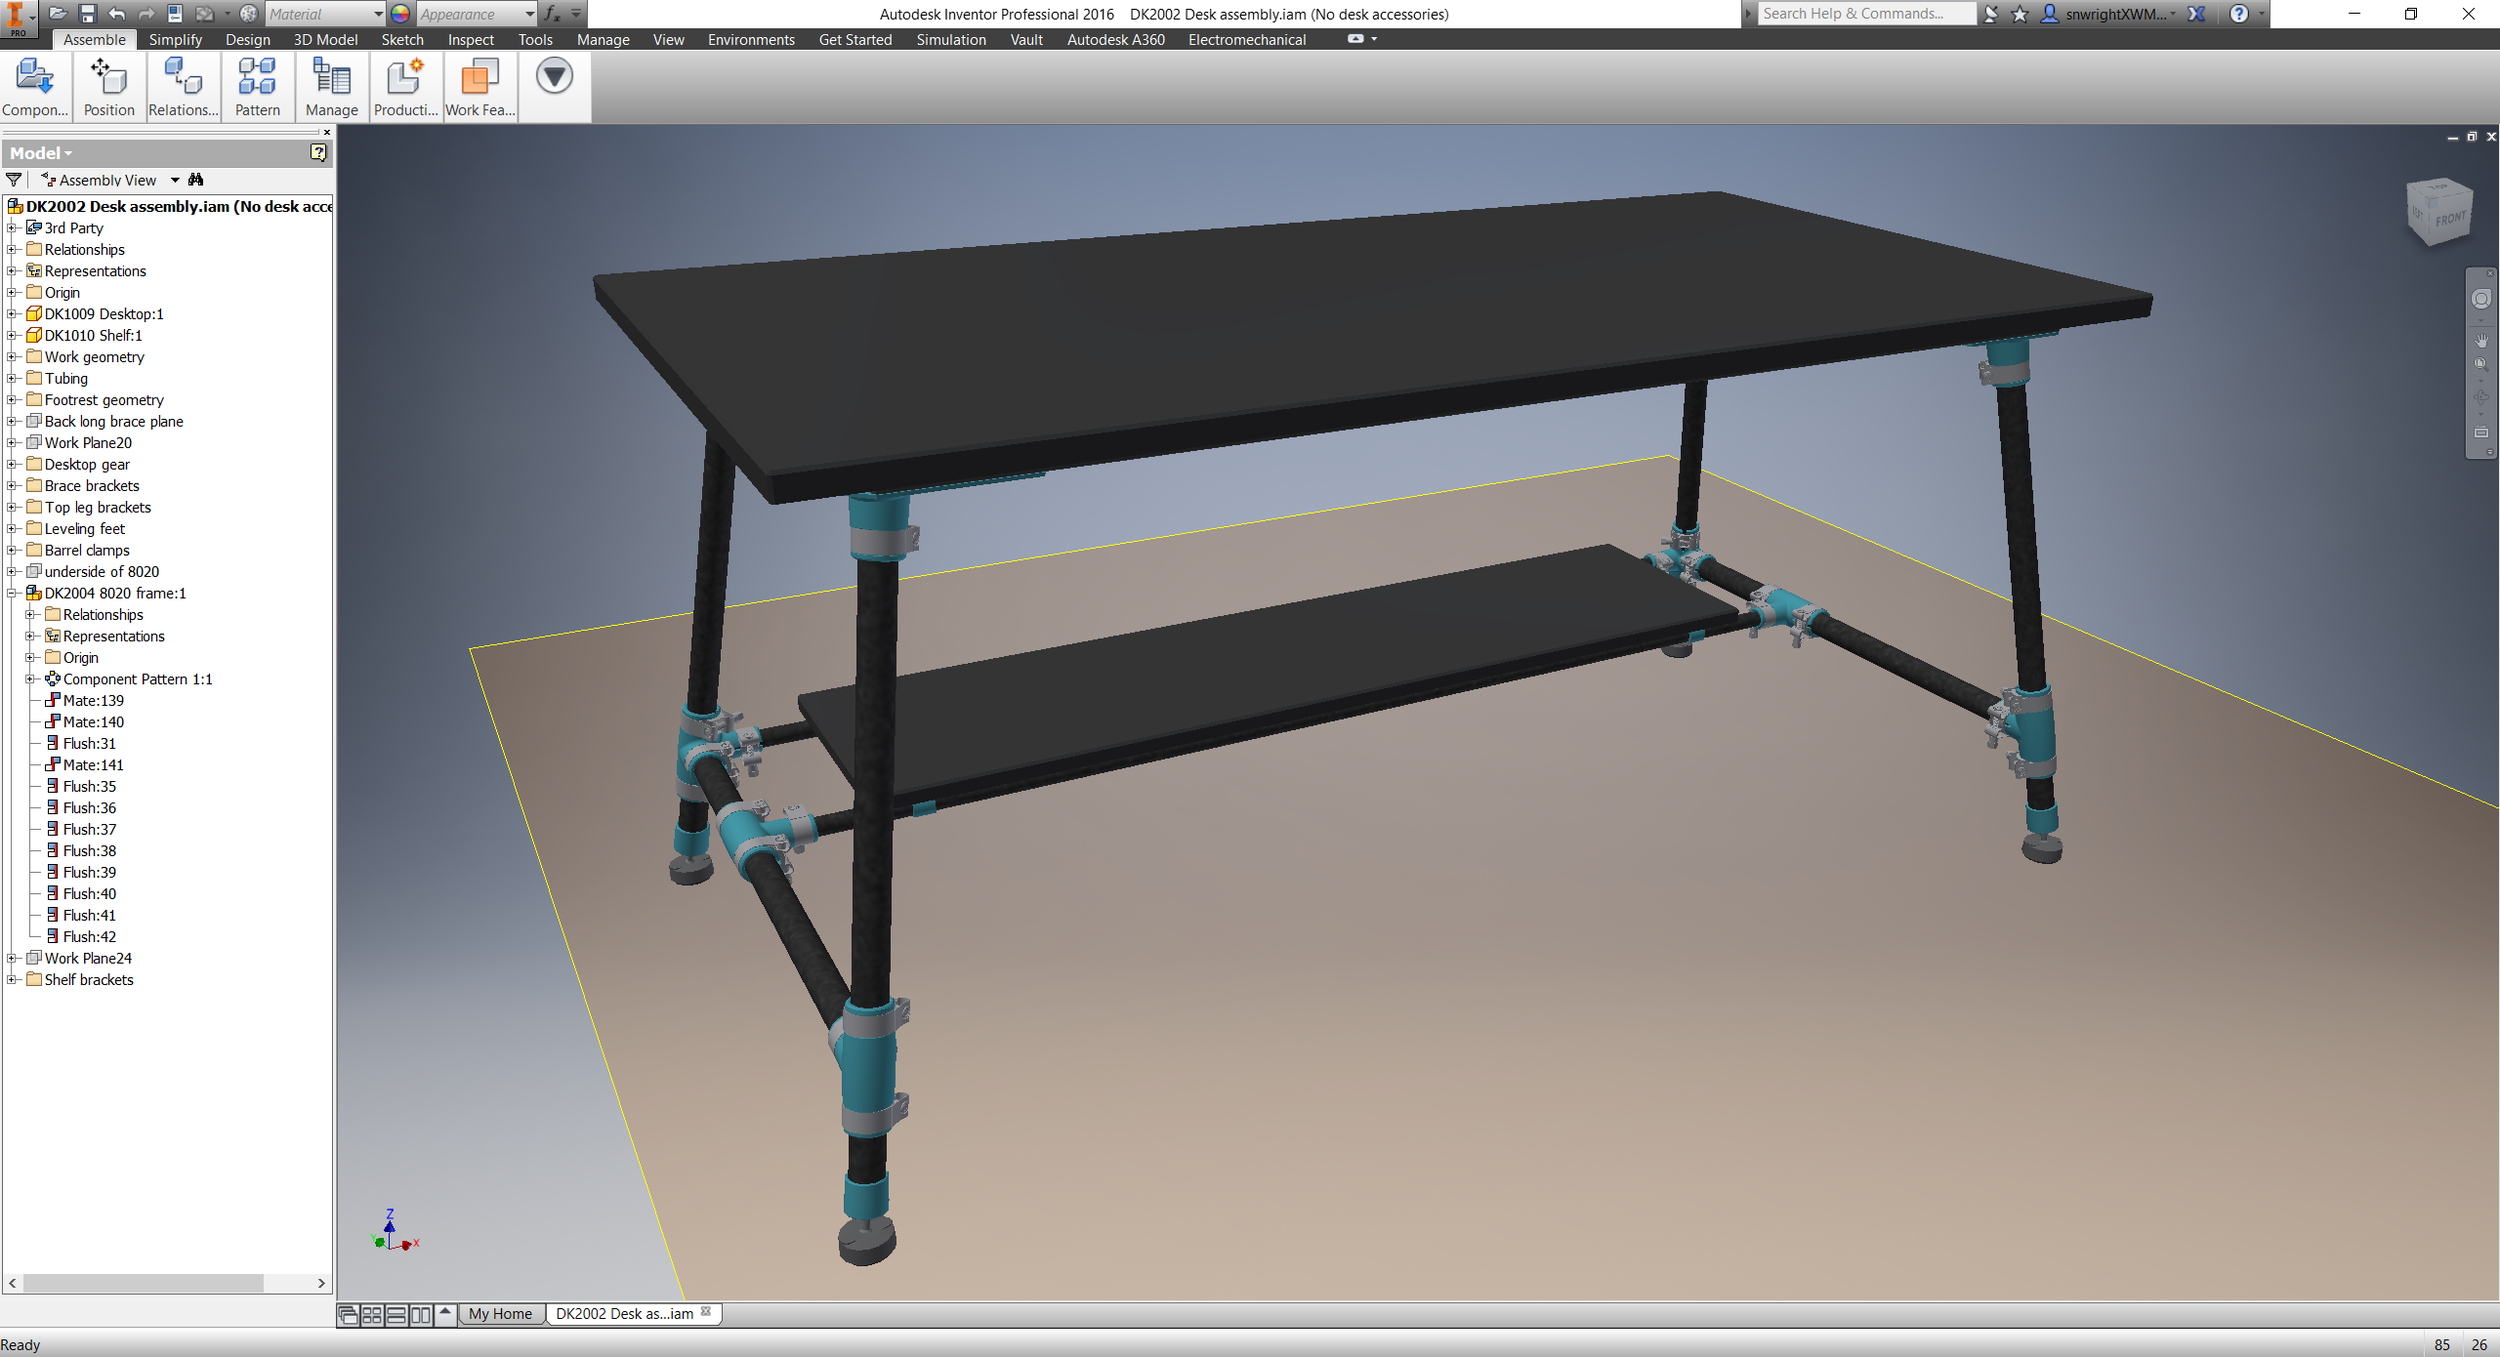
In order to reduce deflection in the work surface - and to allow for continuous attachment points under and on the sides of the desk - I designed an 80/20 aluminum extrusion subframe. Aluminum extrusions are fantastic for this kind of thing; they're light, strong, and easy to fasten to. And 80/20's selection of brackets and attachment options allow me to add accessories and even reconfigure the desk down the road. I attached the subframe with two machine screws and two strips of VHB tape.
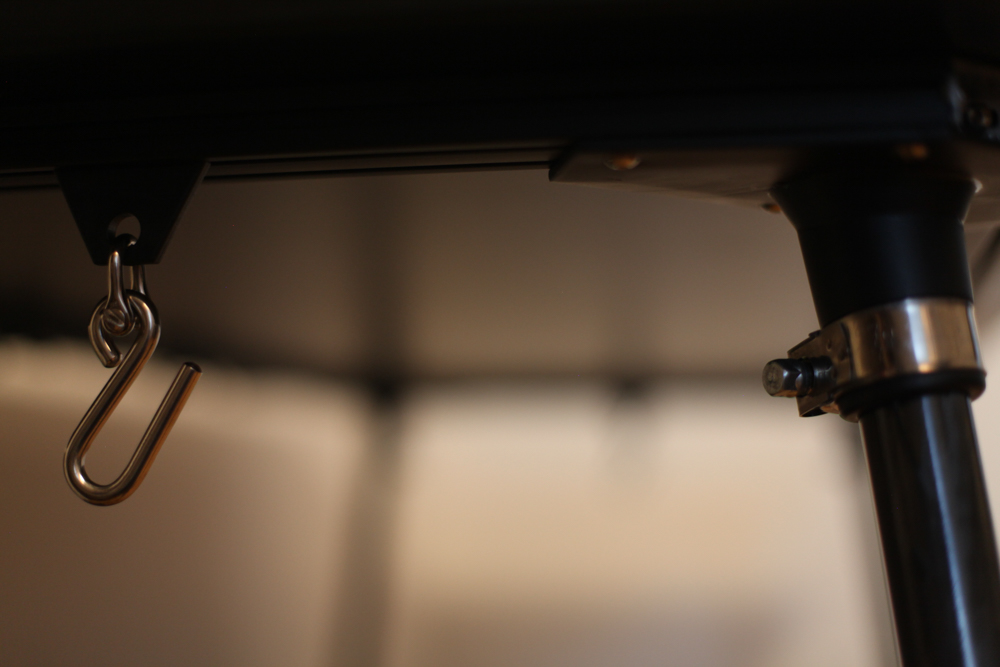
Right off the bat, I knew I wanted three accessories attached to my desk:
Since finishing the desk, I've settled into it nicely. I love the feel of the phenolic, and *really* appreciate how stable the whole setup is. I'm continuing to play with my exact layout - my home office is a bit in flux - but having this as a new centerpiece makes me feel much more grounded.
This weekend, in addition to setting up an Abaqus beam sizing optimization on my lattice bike stem, I got about 80% of the remaining work on my new desk done. Completing it (which I should get done in the next week) will be a long awaited upgrade to my home office, and I've put a lot of research and care into selecting my materials and designing a system that's functional, lightweight, aesthetically pleasing, and modular. The structure is based on unidirectionally would carbon fiber tubing - the same stuff that I use for my titanium-carbon road bike seatpost.
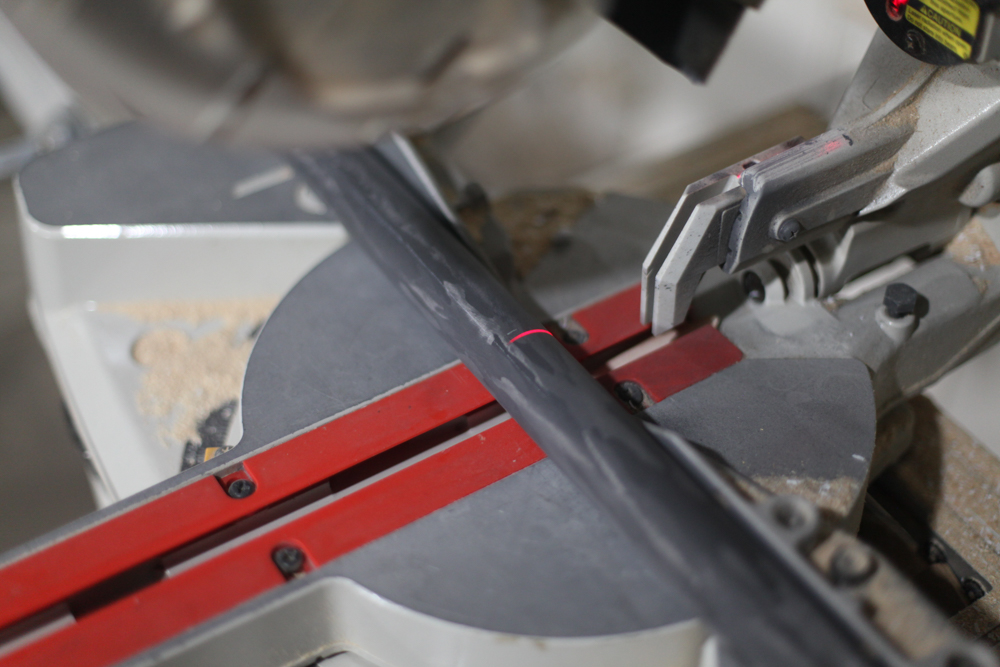
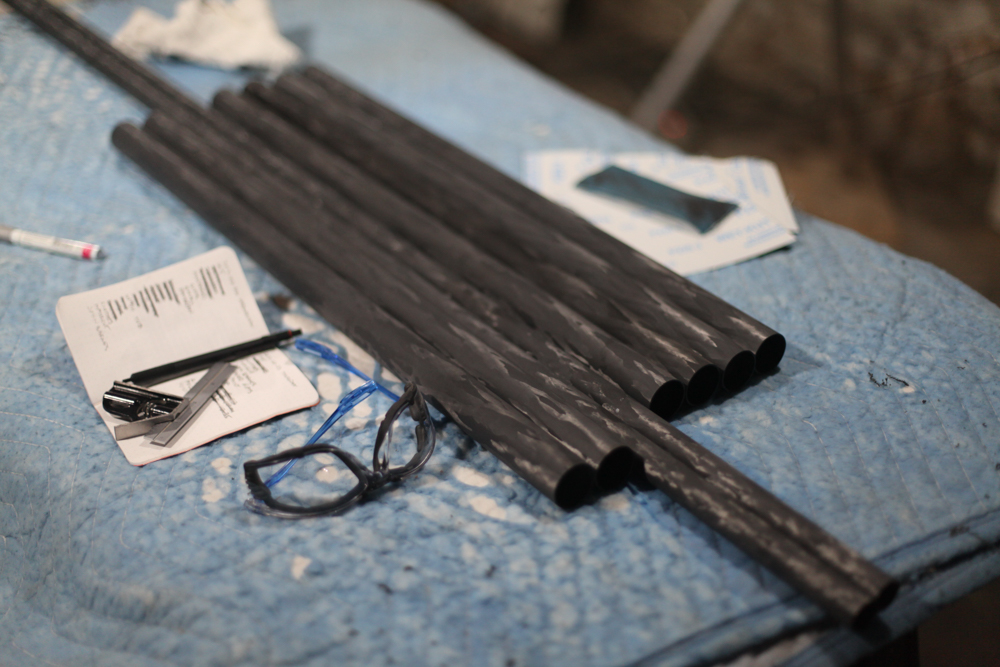

I cut the tubing to length with a 10" diamond grit blade, and use a piece of aluminum oxide wet/dry cloth to knock down any slag (stray, partially cut fibers). I then wiped the tubes down with tack cloth and used a two-part high gloss clear coat to seal and protect the tubes. The result looks great - it's hard, smooth, and allows the fiber to shimmer when it catches the light.
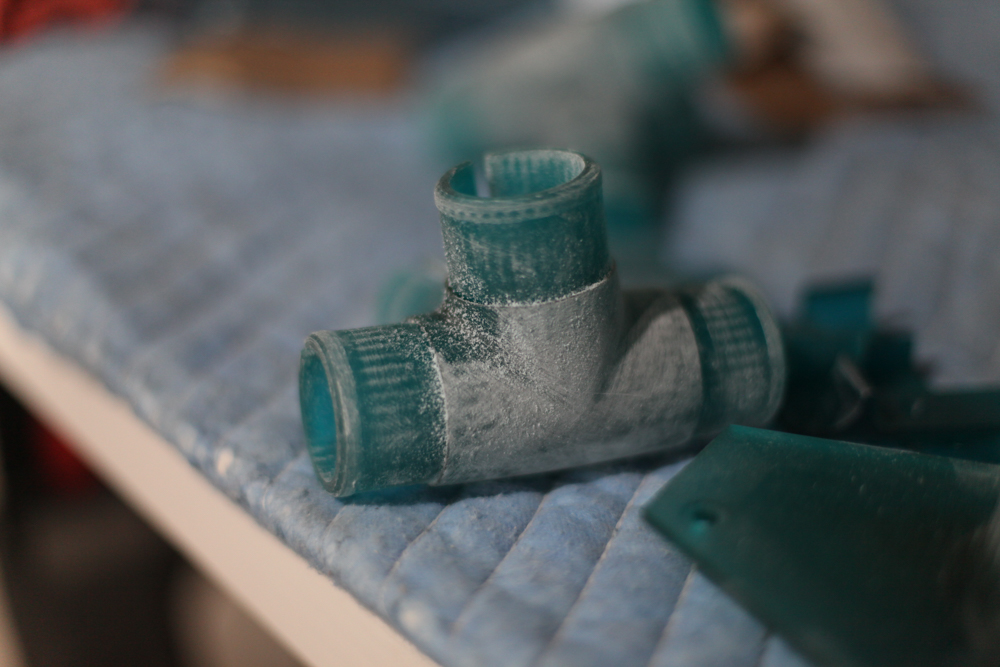
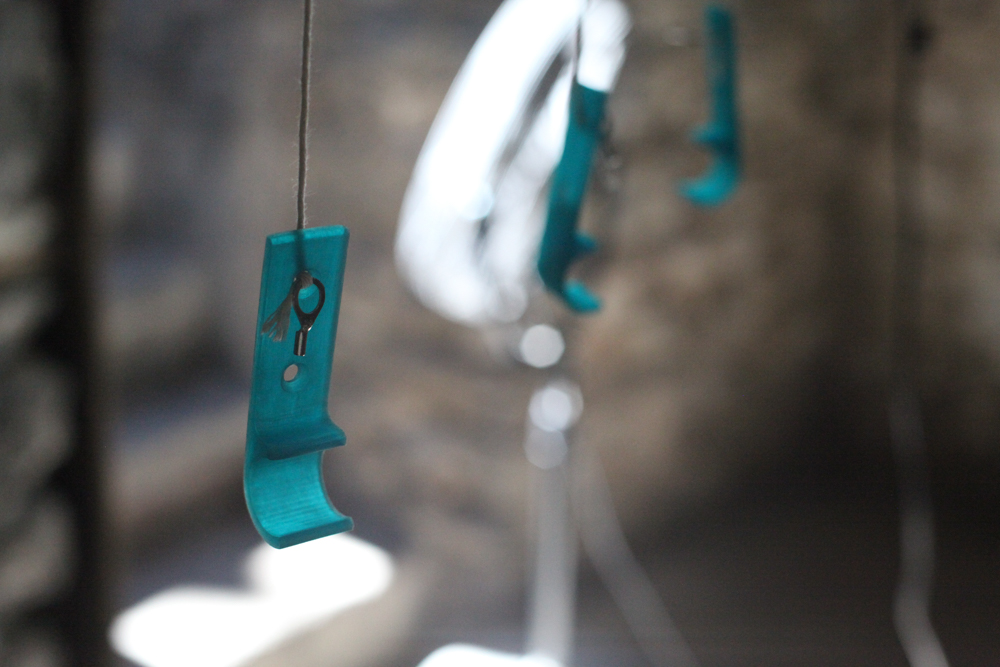
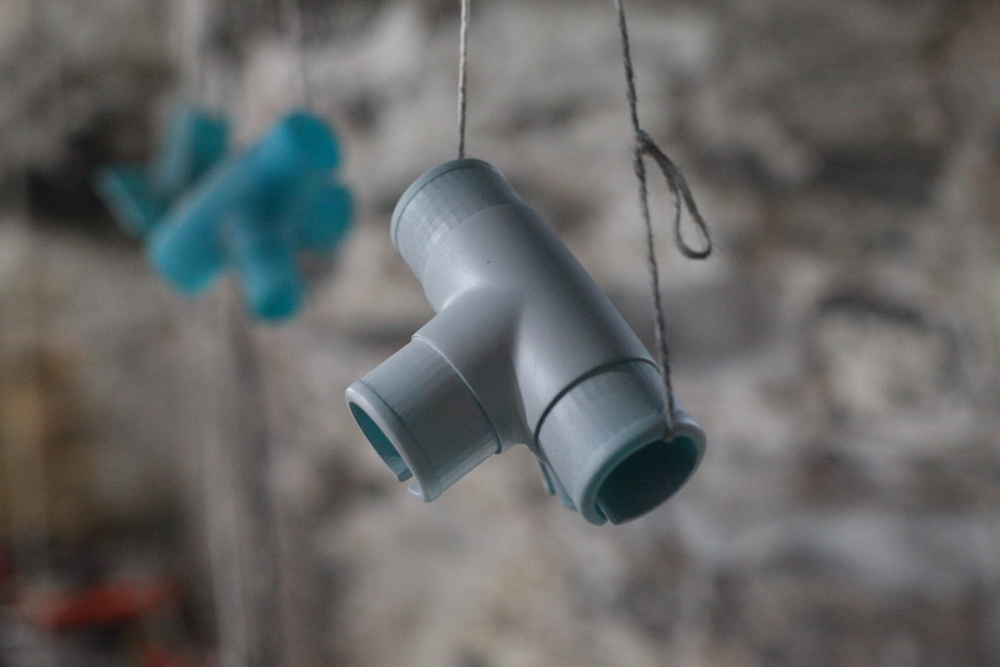

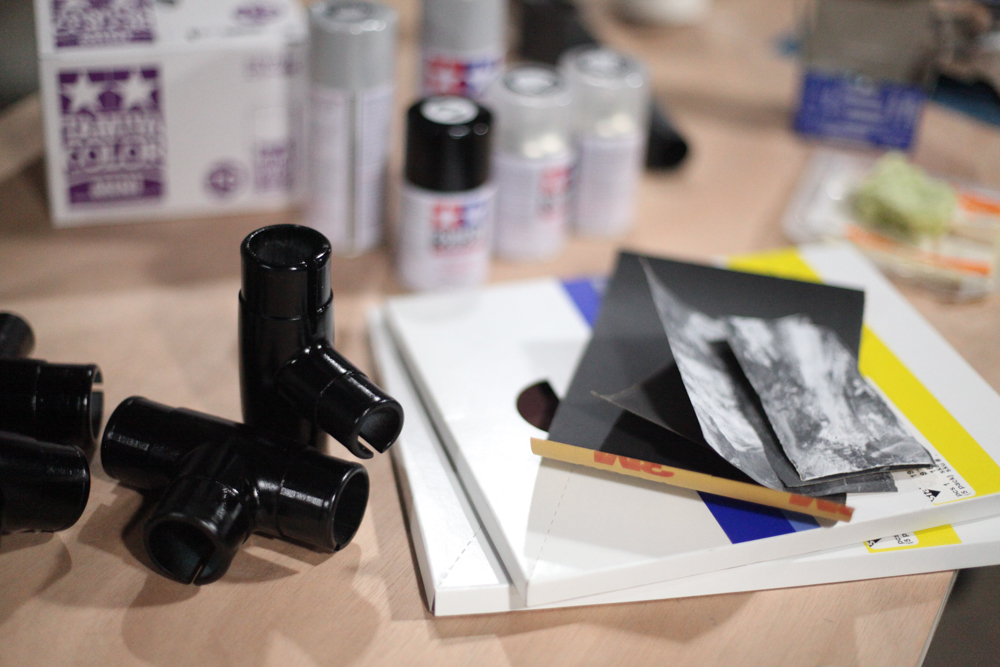
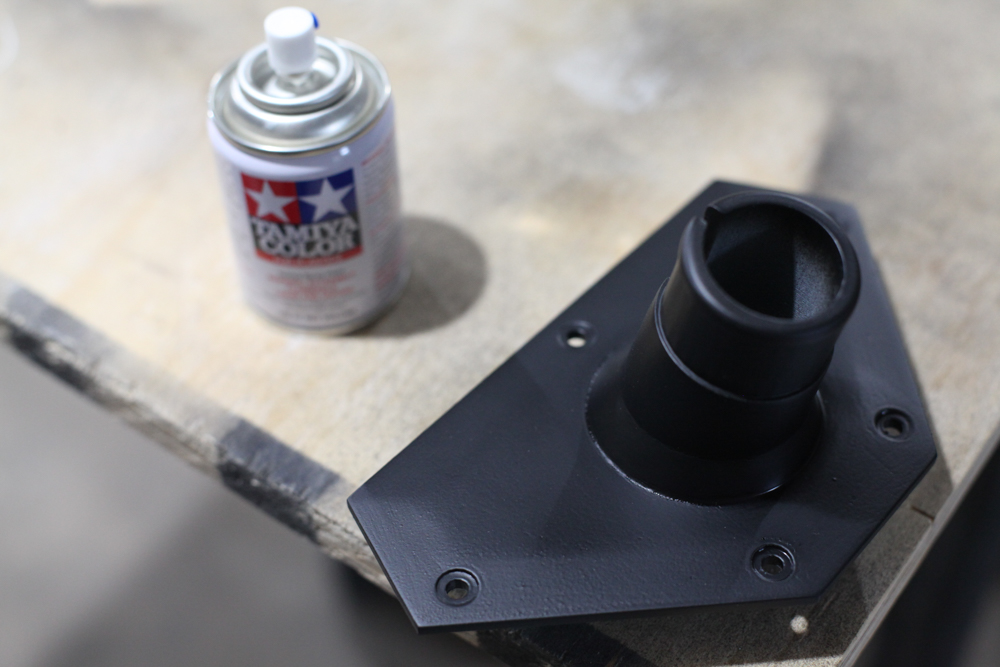

The last pieces to prep before assembly are the frame's nodes. These were printed on a Form 2 in their "Tough" resin, which most people would use for functional prototyping but which I'm planning to use indefinitely. I considered leaving the nodes in their natural blue-green (you'll note that I even changed the color on the parts in my model a few months ago), but ended up deciding to paint them black.
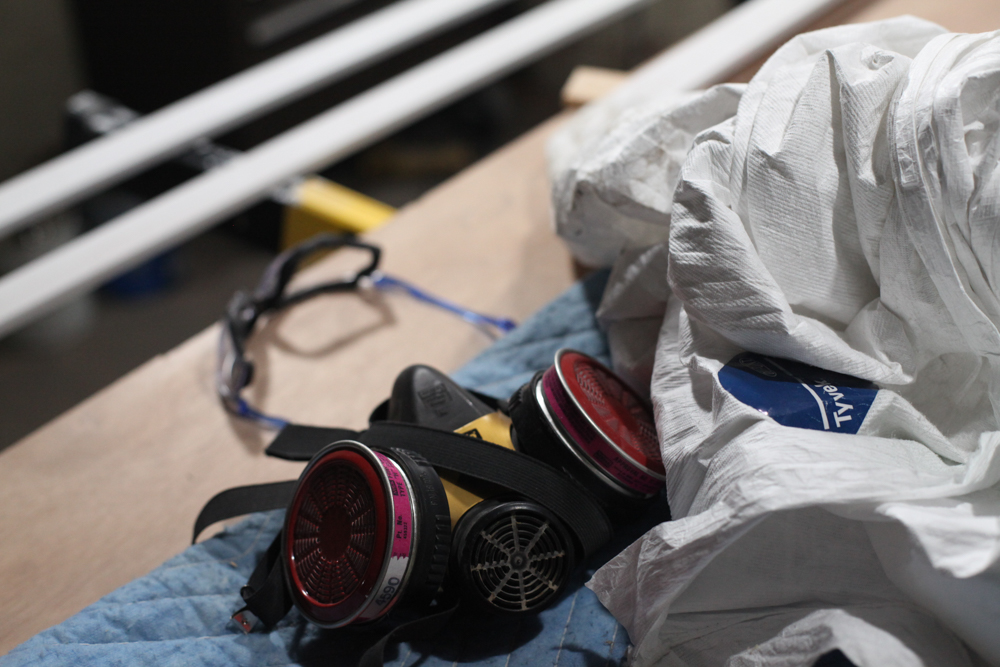
I was a bit hesitant to take on a finish paint job - I've been painting more and more recently, but my spray skills are mostly untested on small, intricate parts - but Formlabs has a good two part (one, two) guide and anyway I didn't have any other options. I used the Tamiya primer and spray paint they suggested (a note on this: Tamiya's bottles are pretty small. I ended up buying three bottles of primer and five bottles each of black topcoat and matte clear.), which goes on soft and easy - much nicer than the big rattle cans that I'm used to.
I've still got to sand, prime and paint three more of the nodes, but once that's done I'll be able to assemble the entire desk and start attaching accessories - which, because I'm particular about my workspace, will be more complicated than maybe most people's setups :)
More soon!
Some semi-random screenshots from a day's worth of lattice design in nTopology Element Pro:
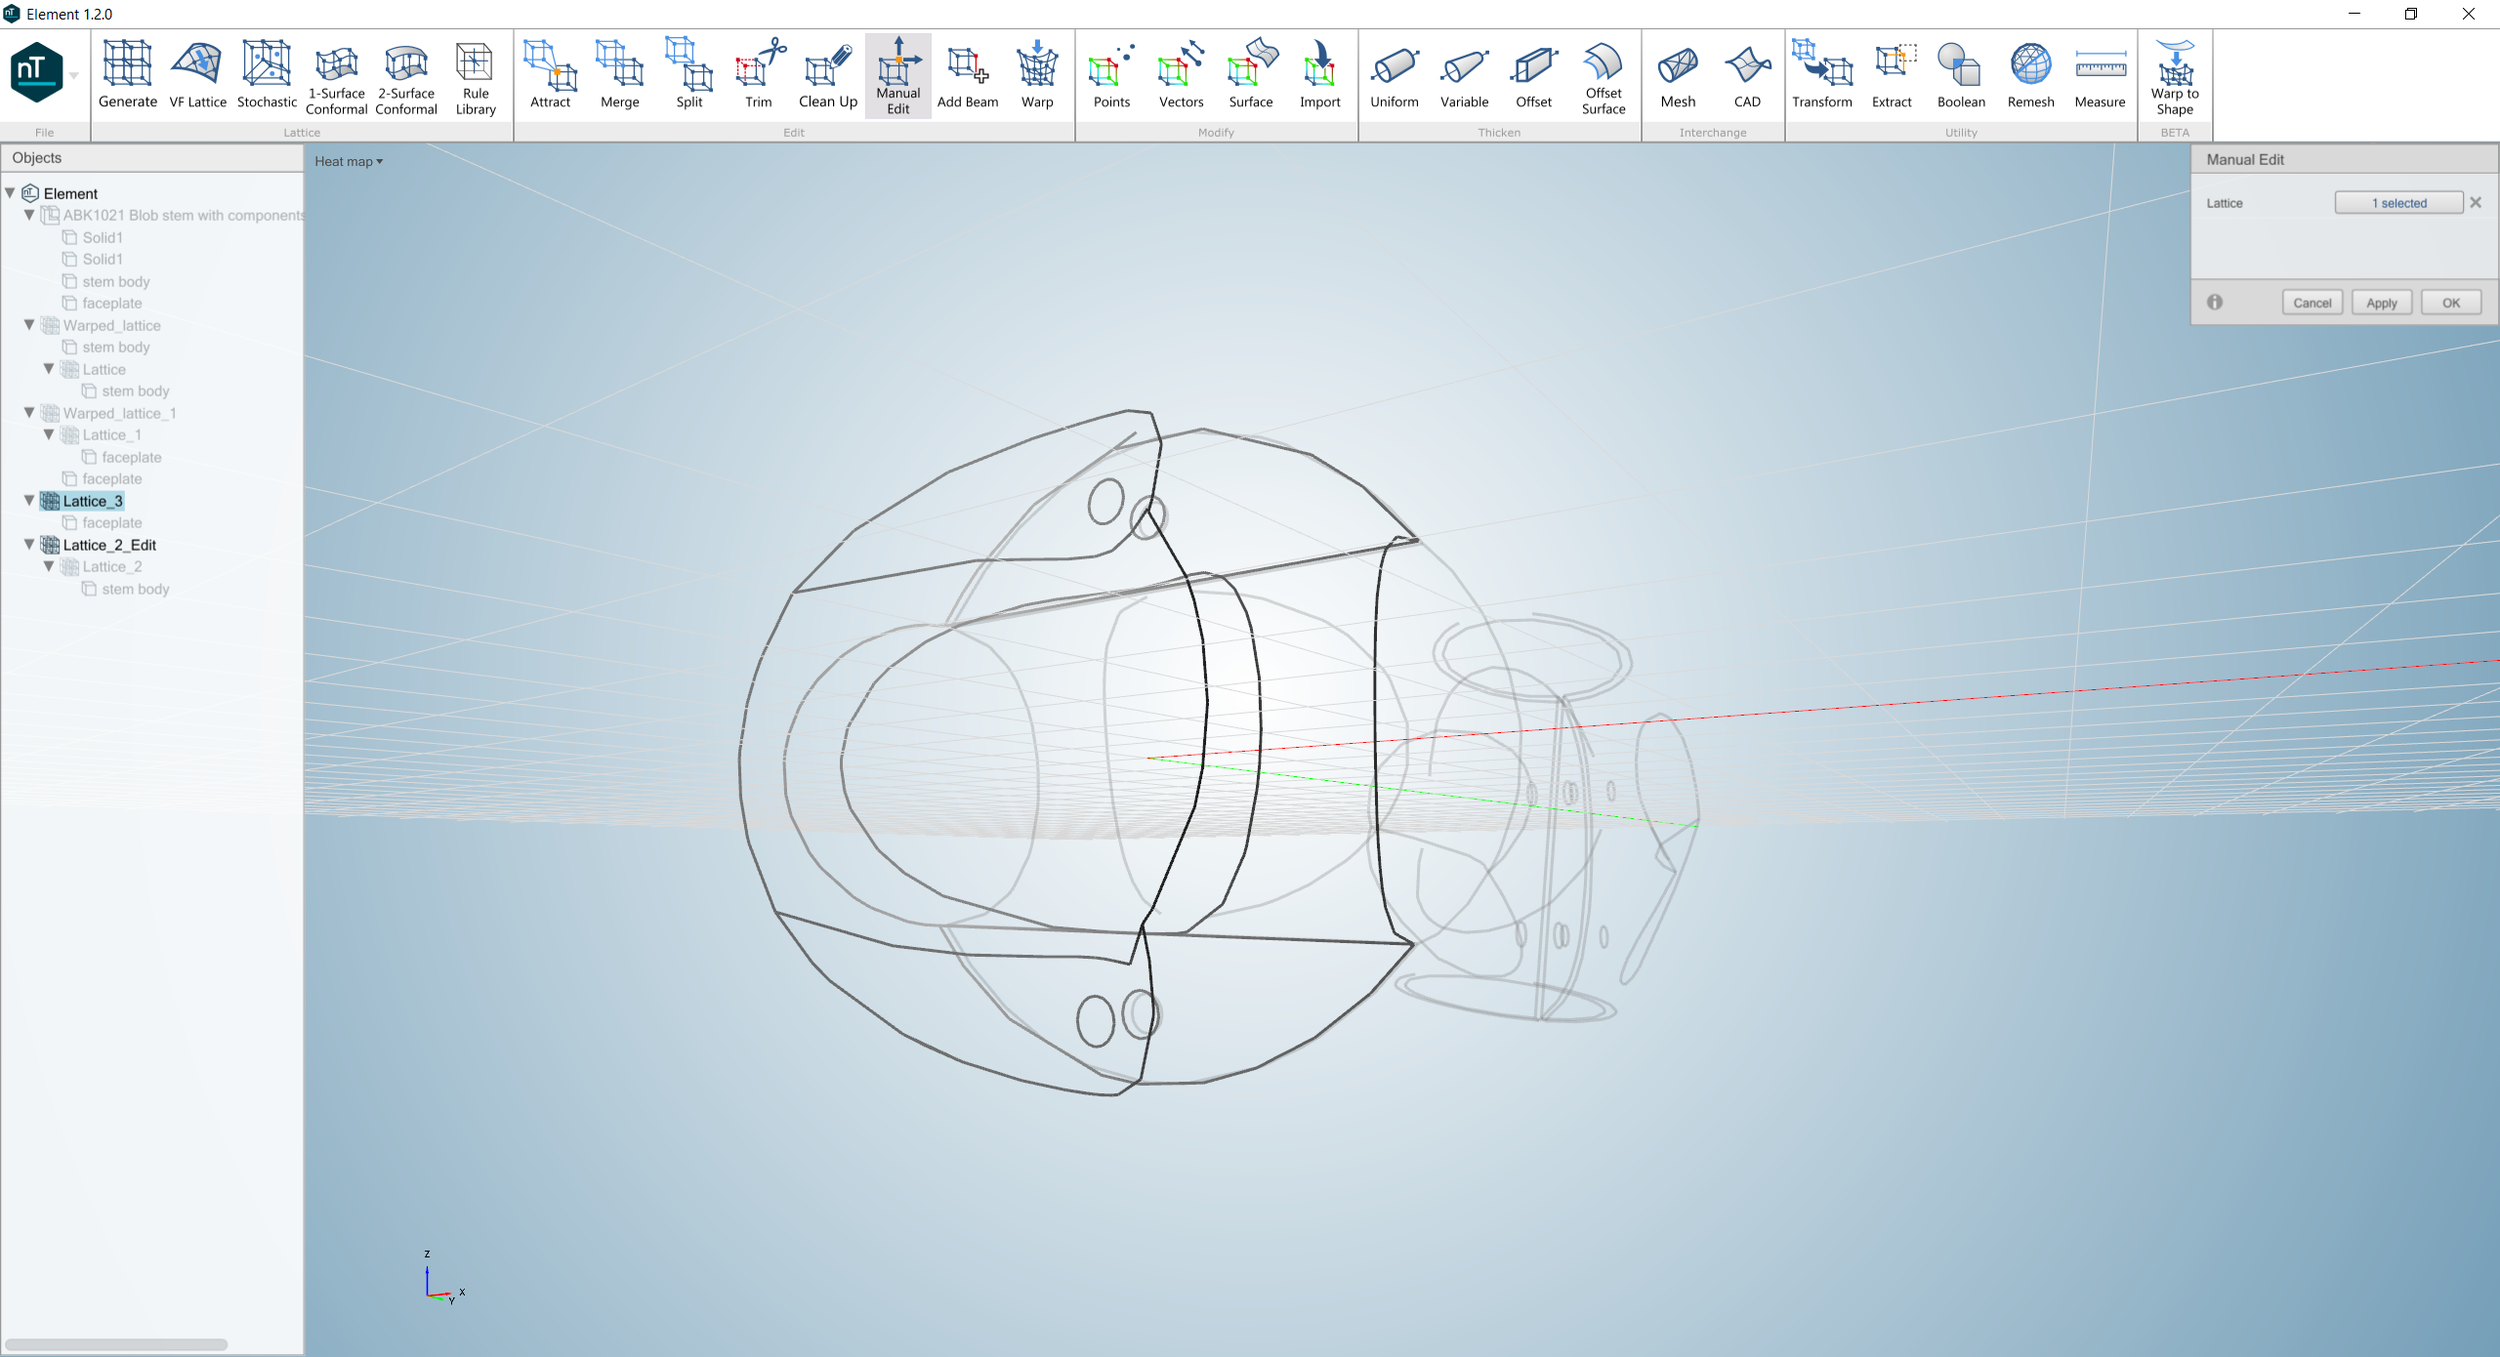
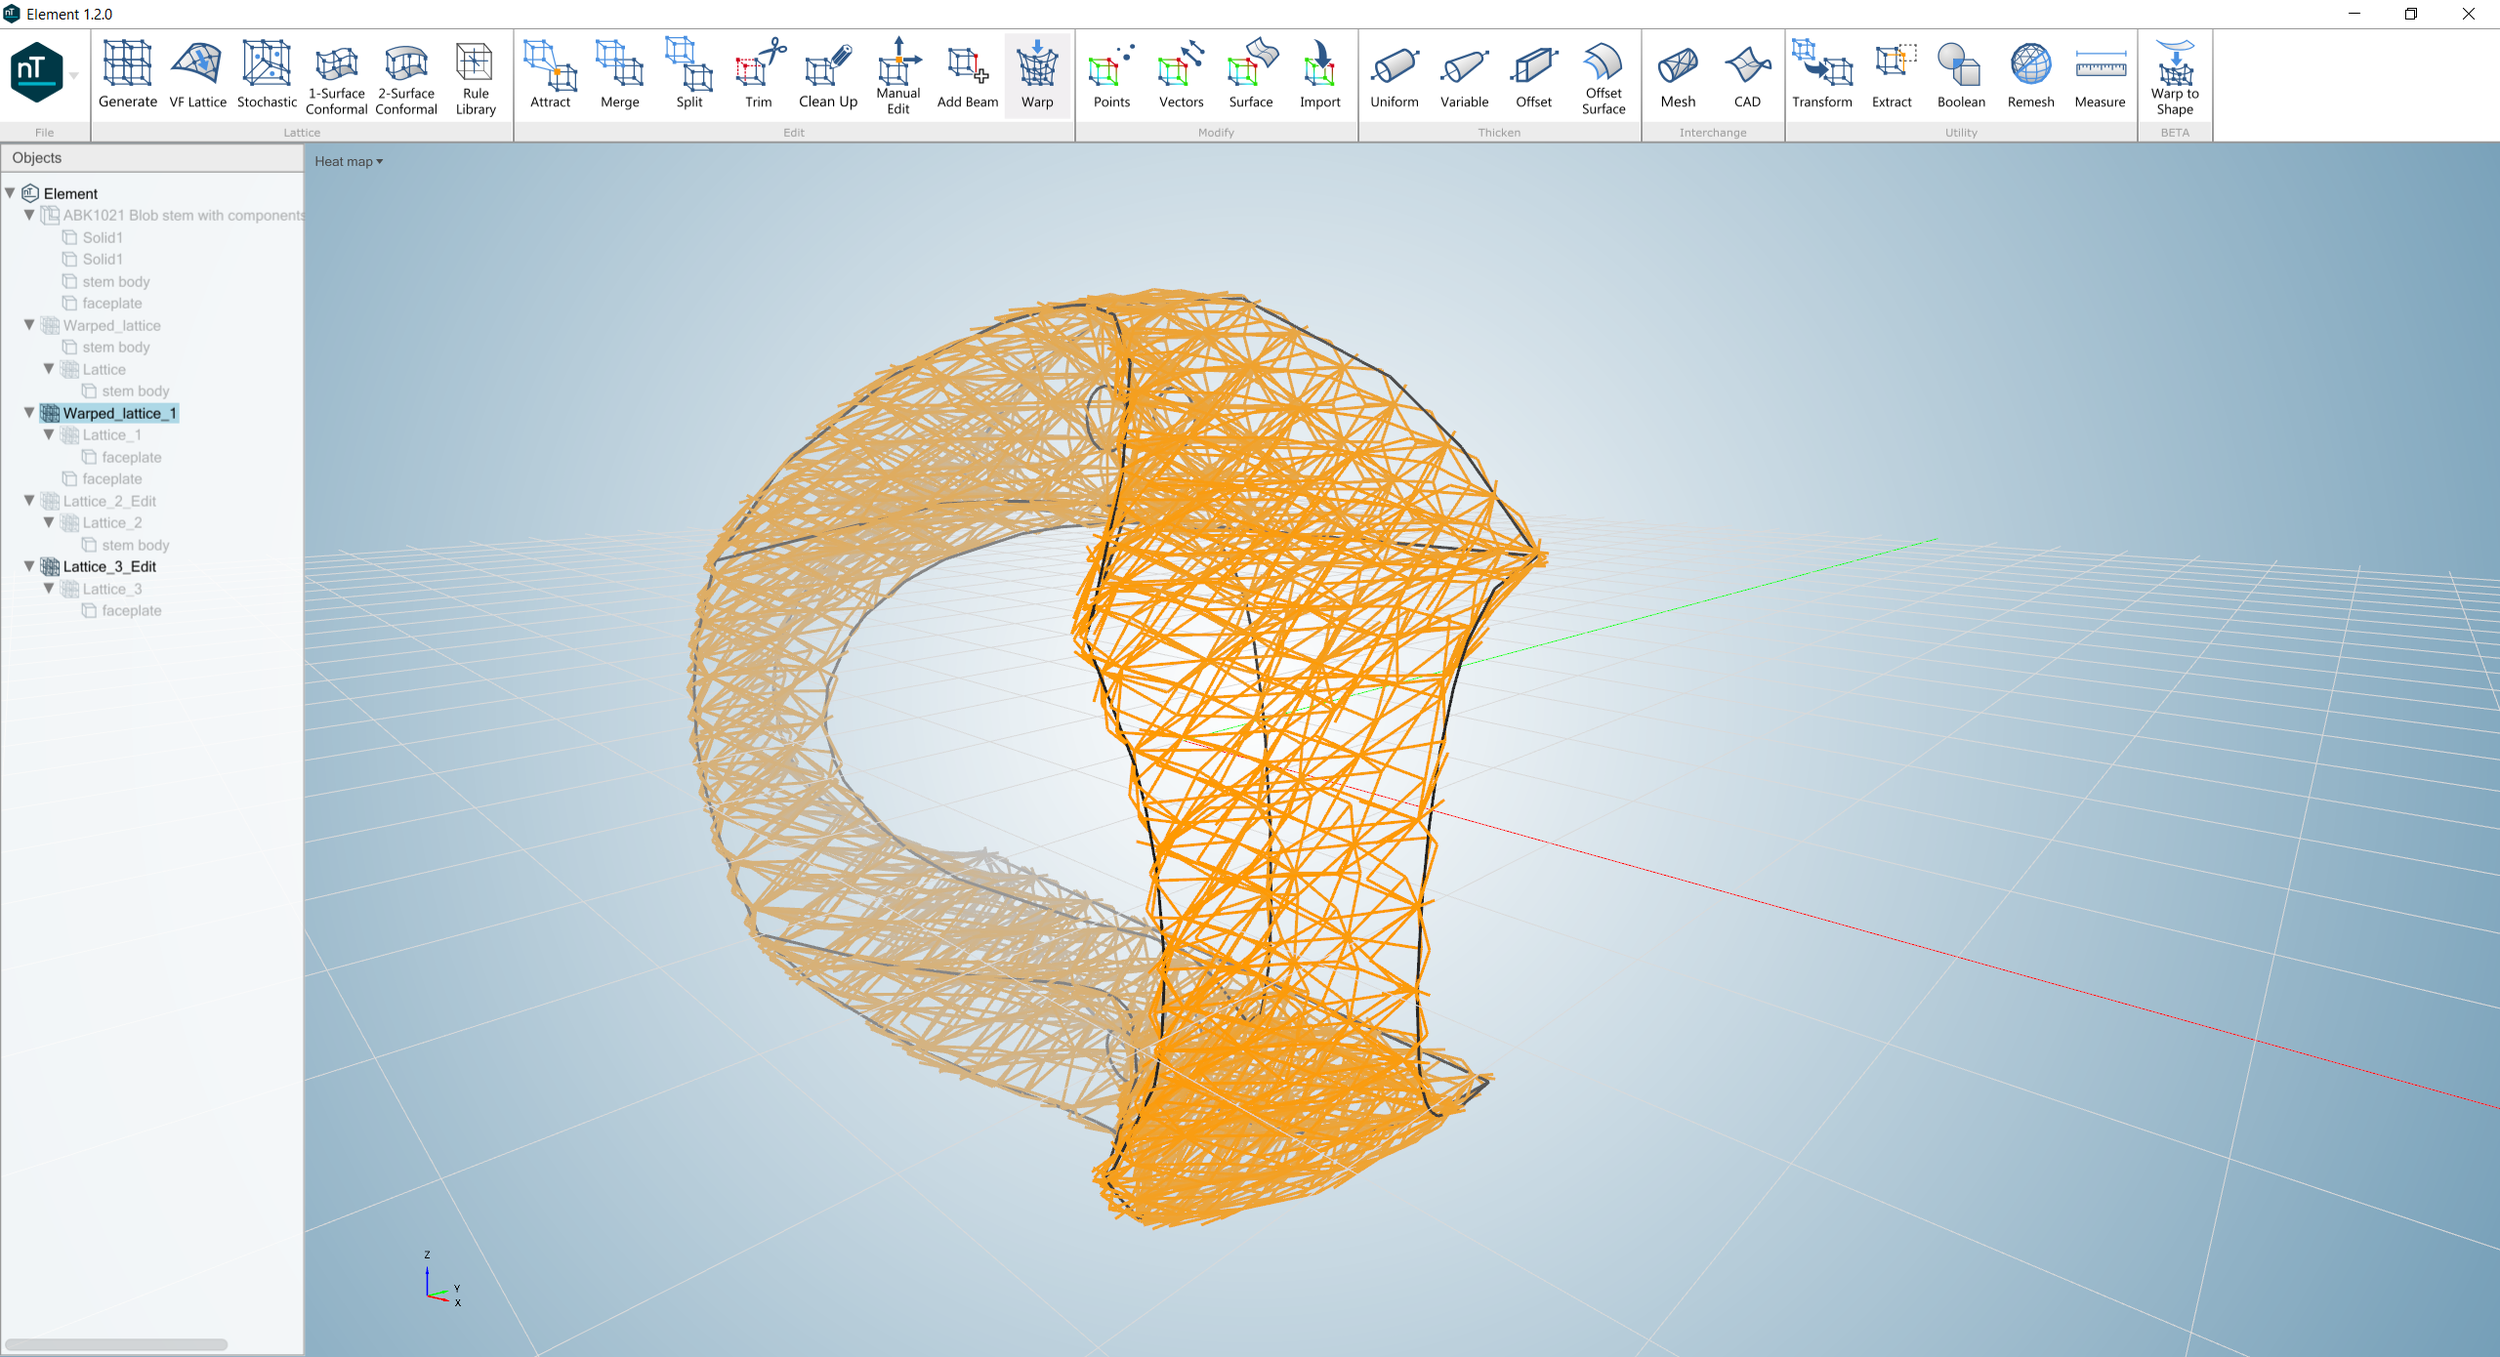
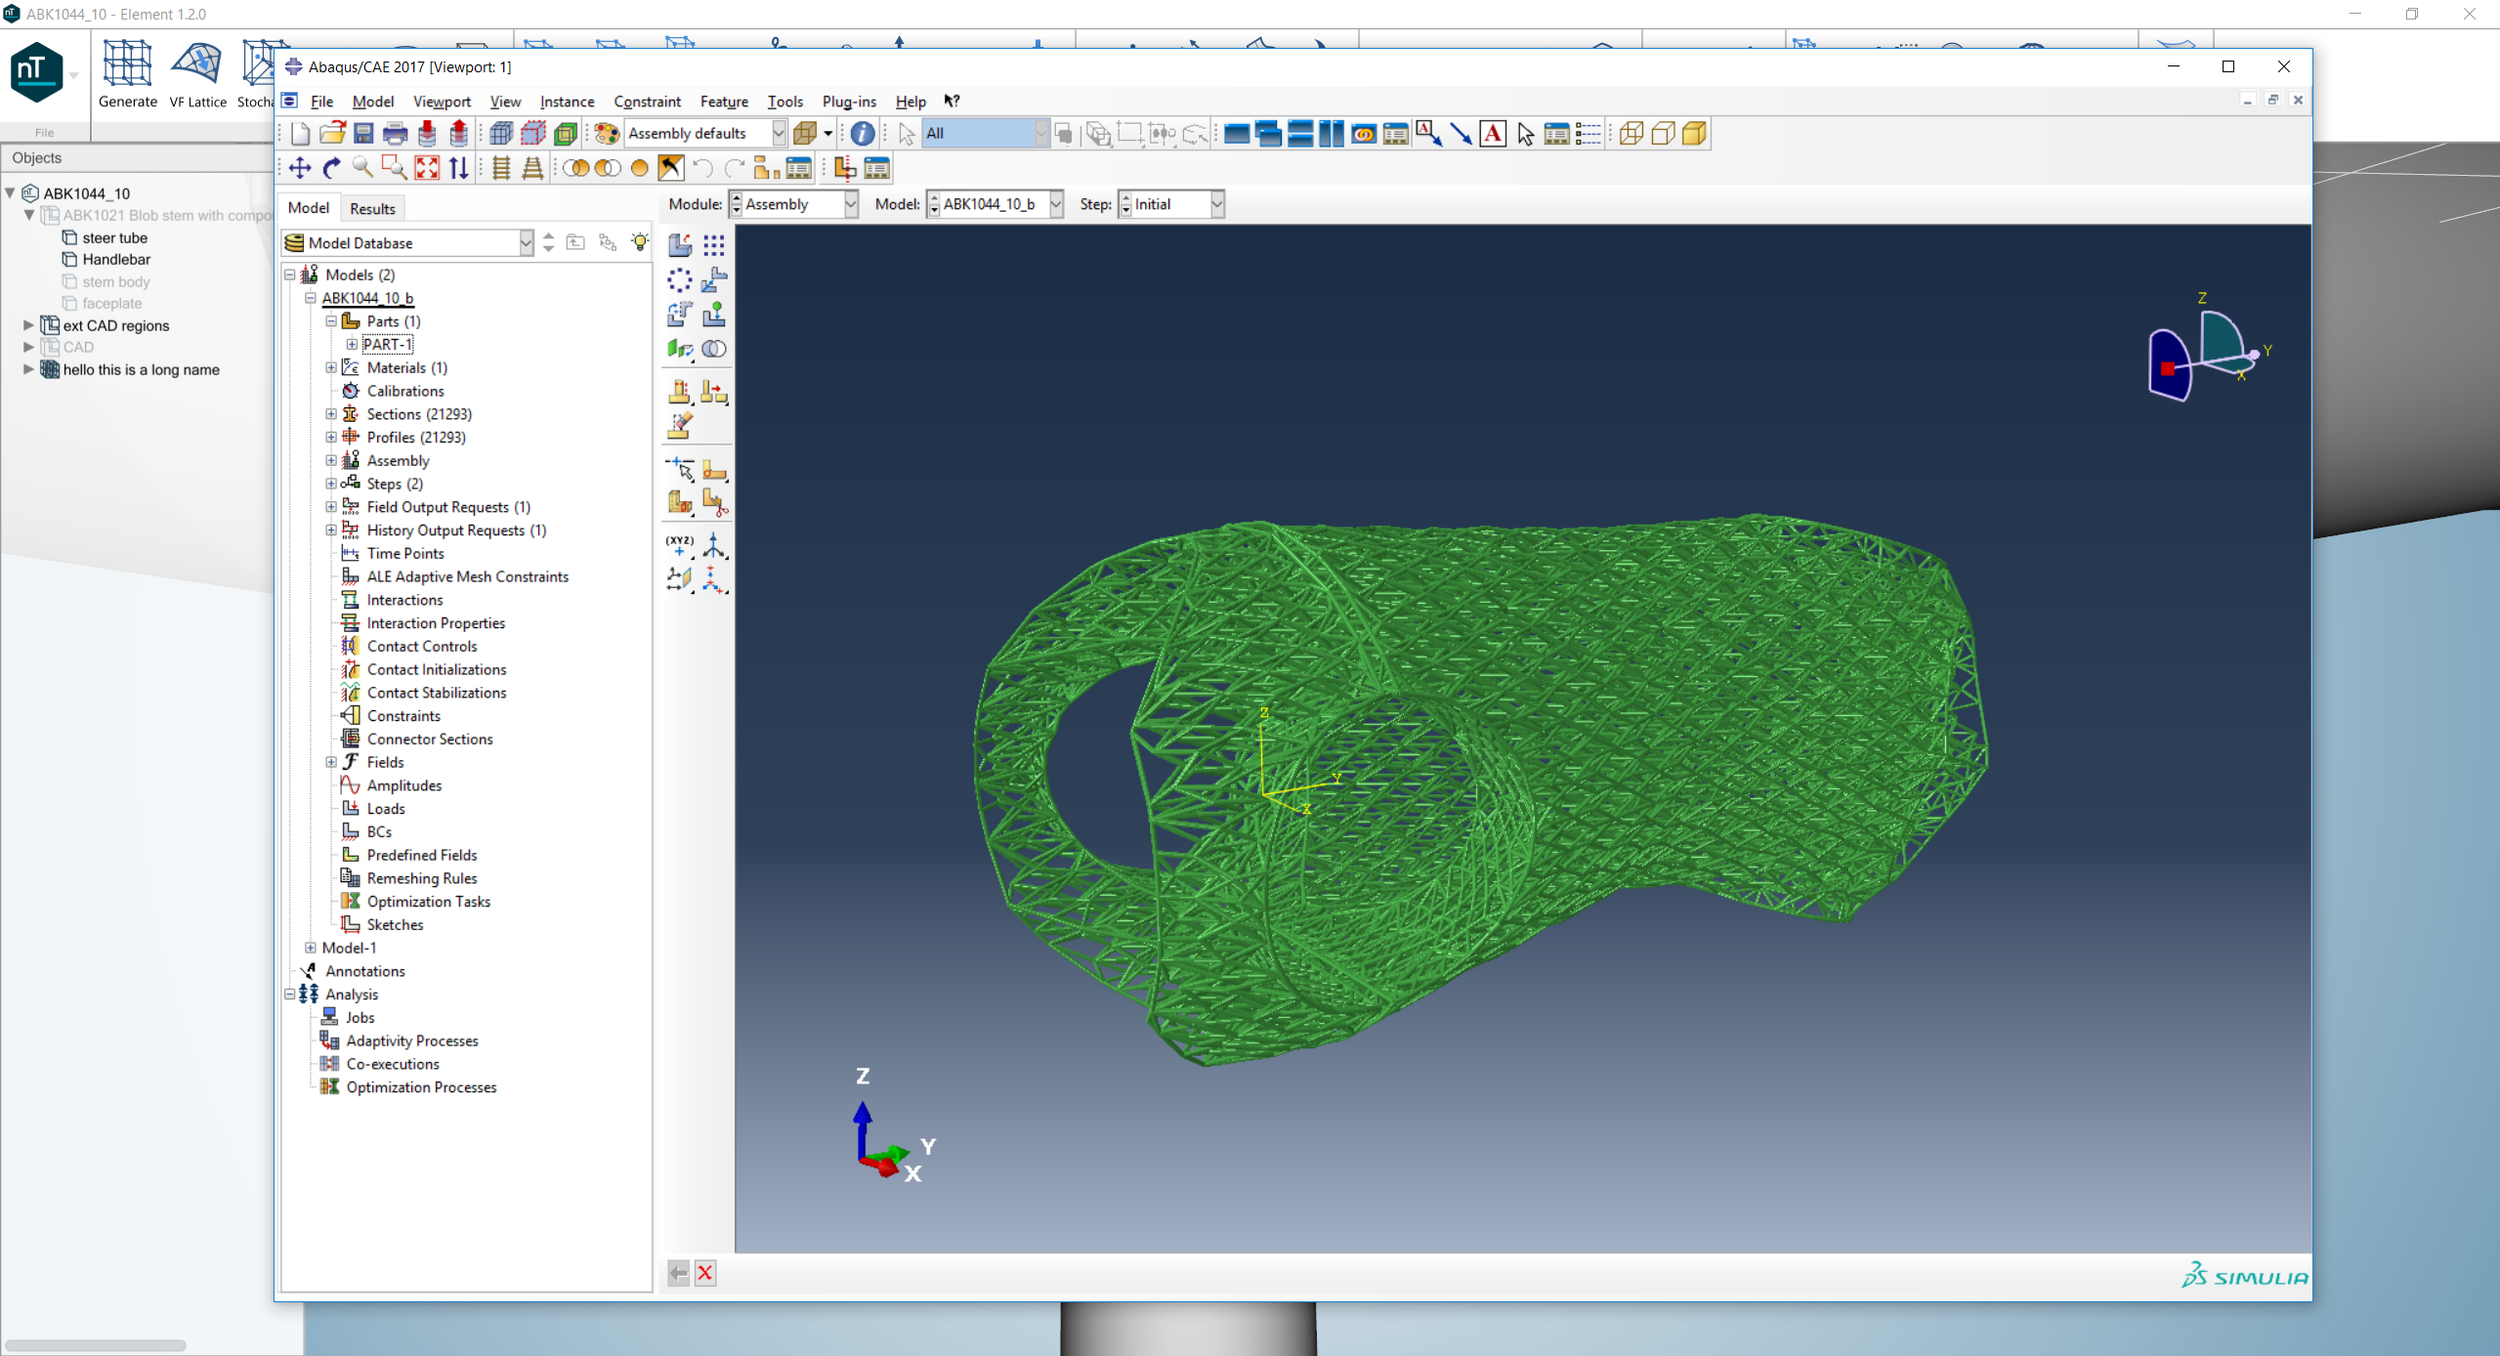
There have been a bunch of big updates to Element recently, and this workflow takes advantage of a few of them. In particular, the new Warp to Shape tool is very helpful; I also used the Extract tool and the Remesher to make some nice selective surface lattices.
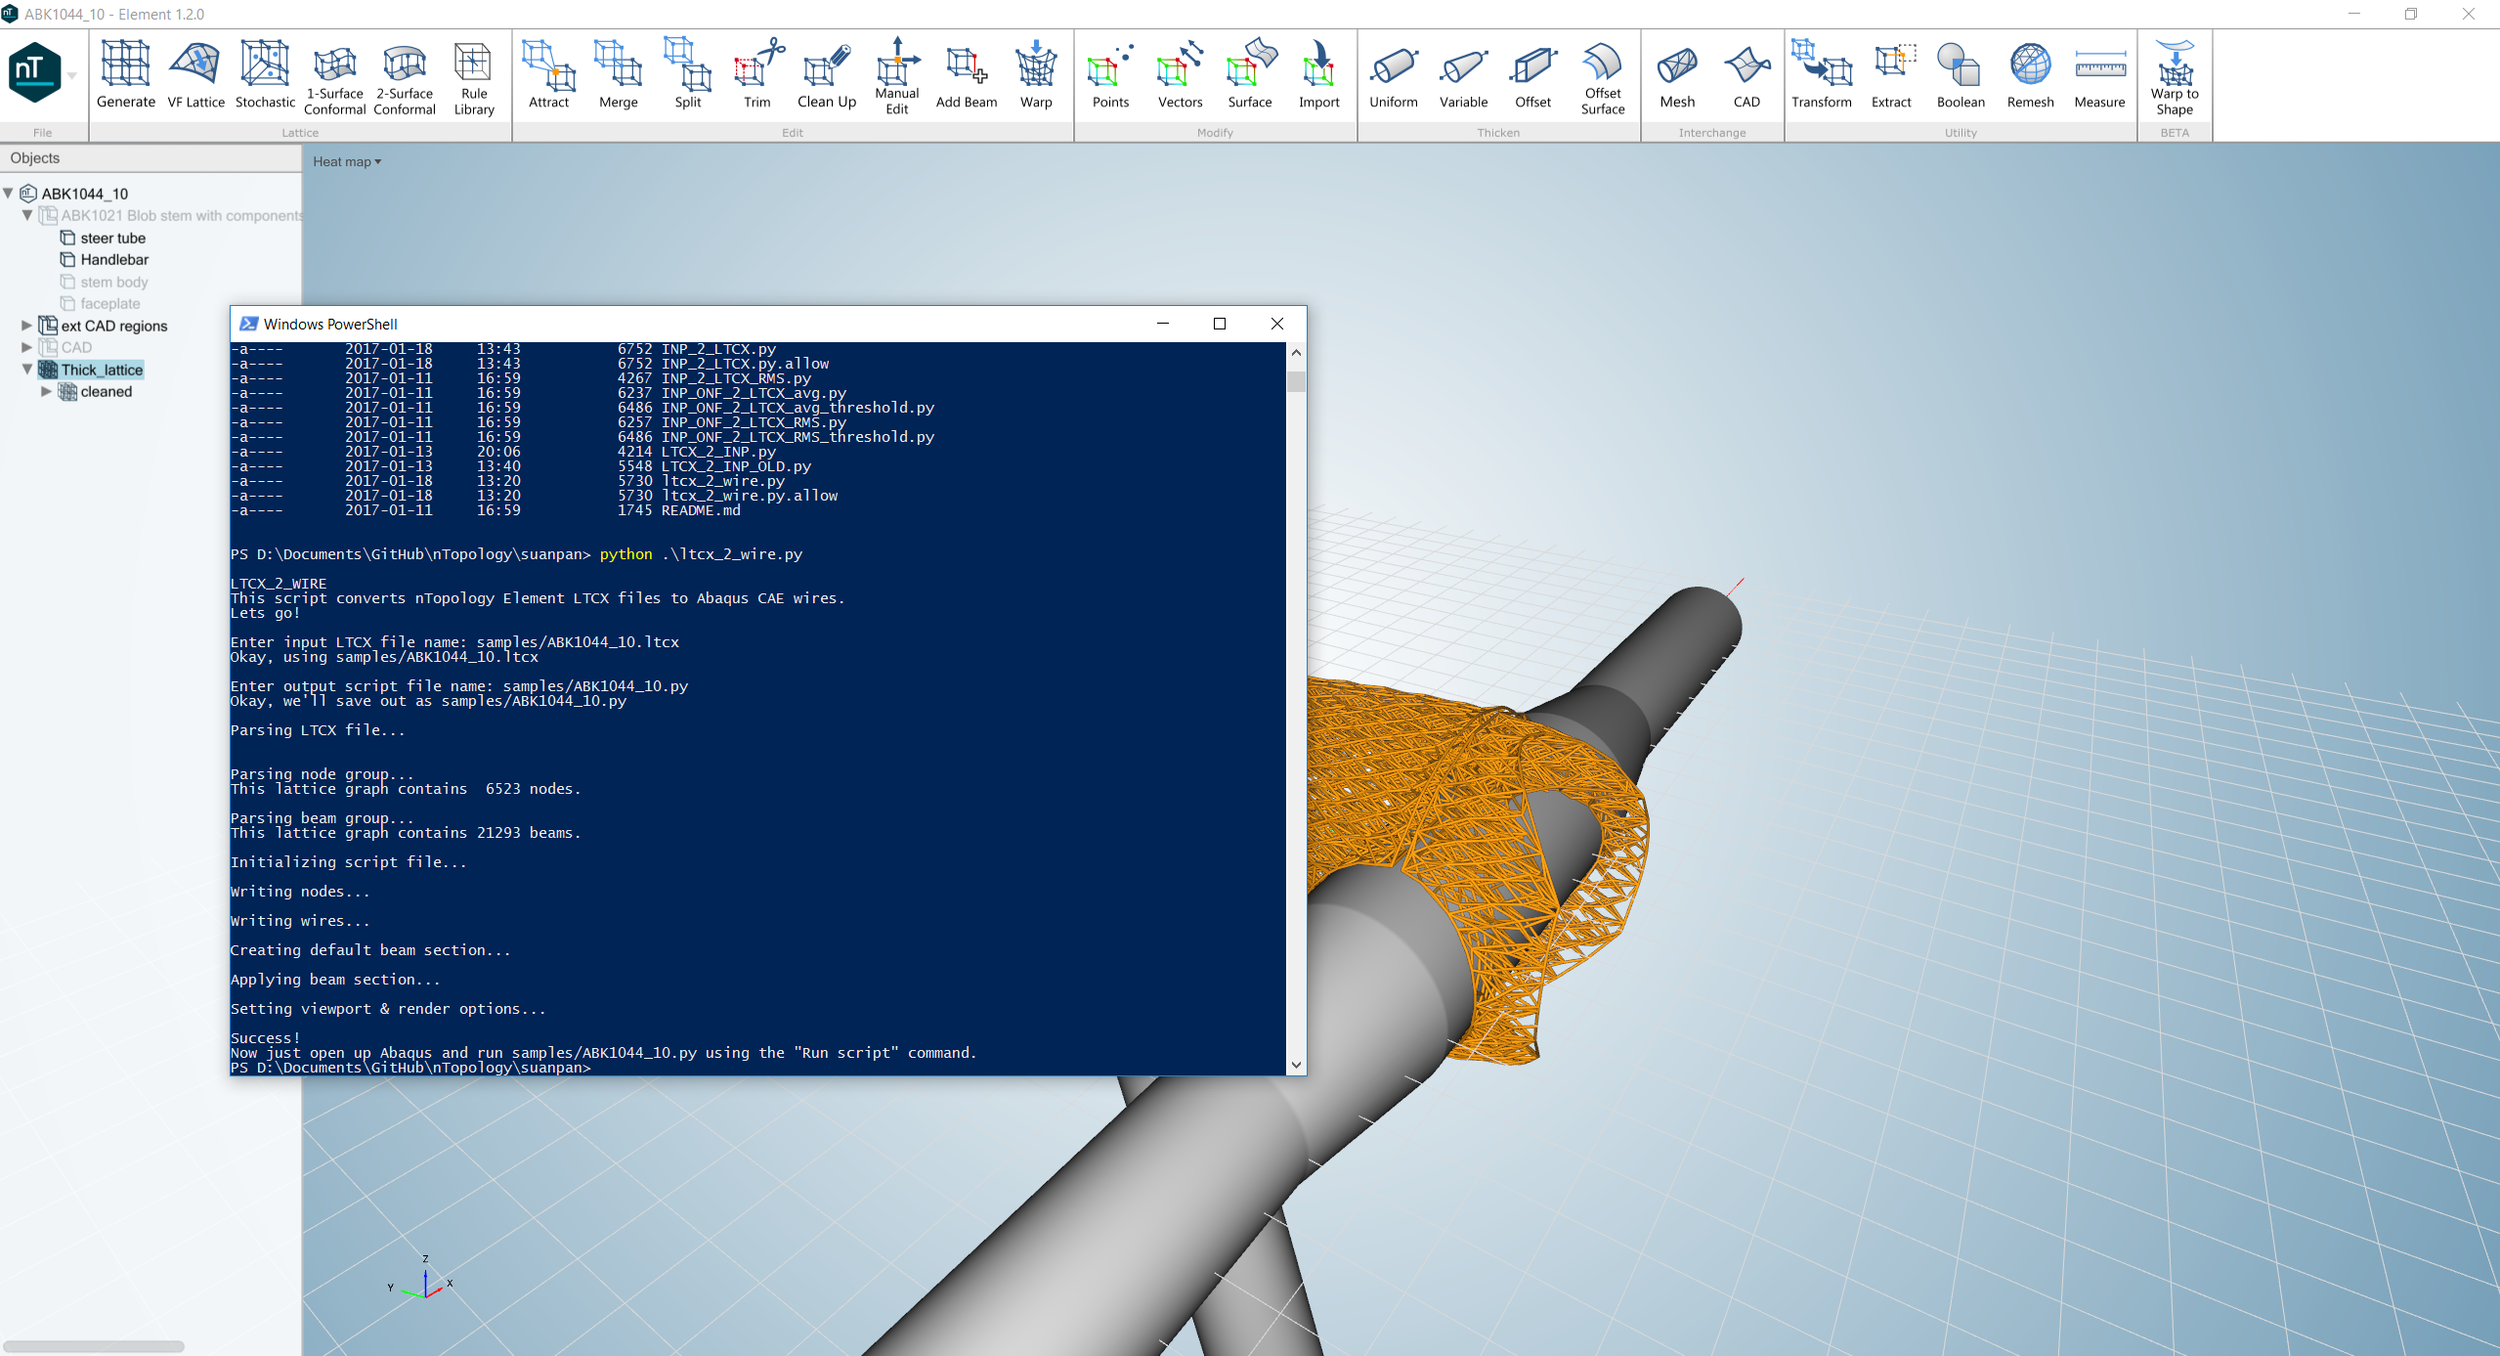
The last, and really the biggest, thing here is the conversion into Abaqus for beam analysis & sizing optimization - see the last photo above. I'll be working on & posting more about that in the next few days - stay tuned :)
The thing is, VHB tape is awesome. It's an industrial strength, double-sided foam adhesive, capable of creating *really* strong bonds between basically anything that you'd want to stick together. I've used it in a few contexts, and encourage anyone who takes hardware projects seriously to keep VHB tape in mind as an alternative to welding, bolting, or gluing parts together.
I first became aware of VHB tape when building bikes, and used it (as part of 3M's "mushroom head" tape, which is the same stuff that EZPass uses to stick sensors to your windshield) to create a modular front rack system that didn't require bungee cords. Later, when I was working on robot doors, I seriously considered using VHB tape to bond mahogany cladding to the doors' aluminum frames; we eventually decided on structural adhesives, and dealt with a slew of issues resulting from differences in thermal expansion rates.
Most recently, I'm using a small amount of VHB tape to adhere the 8020 subframe to the phenolic resin top of my desk. I chose a thin tape - 1/2" wide and .020" thick - and am using it on the short ends of the desktop as a secondary fastening method (the primary connections are two M5 bolts). I'm using it here for a few reasons, which highlight VHB's advantages:
Don't get me wrong - I keep a big selection of bolts on hand, and usually have a active tubes of cyanoacrylate, Titebond, and DP420 on hand. But my shop is much better for having VHB in stock, and my desk is much better off for having used it :)
More lessons from the past few years and beyond - these more personal than my previous post.
In between bouncing Nora around the past few weeks, I've been able to sneak in a little work on my new desk. I now have both the desktop (a 30" x 60" x 1" phenolic resin surface from JHC Lab Resin) and its subframe (a 20 mm x 40 mm extrusion frame from 8020), and have partially assembled them to each other:

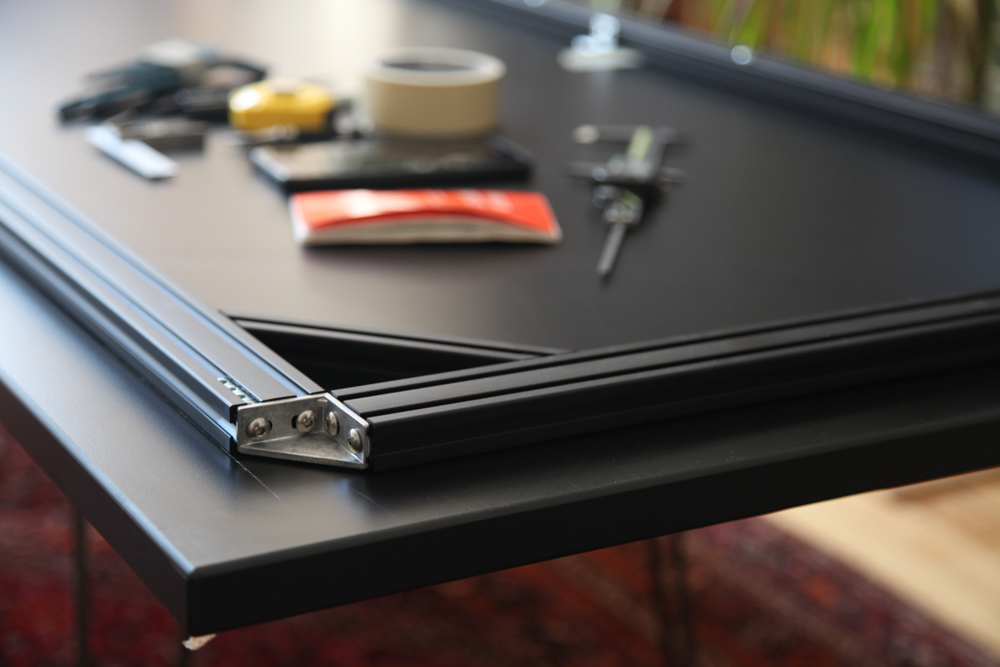


The subframe only attaches mechanically to the desktop in two places - one bolt in the middle of each of the long frame legs. I *think* I'm also going to use VHB tape between the frame and the desktop, but I'm holding off on that until I get a few more of the parts in & prepped.
I also received the shelf (which is 12" x 48" x 3/4") and all of the carbon fiber tubing. I'll be cutting the tubing to length with a diamond grit saw blade, and need to drill & tap a bunch of holes in the shelf still as well. I'm also planning on mounting my old Wilton Bullet vise to the desktop using some nut inserts, but I'll probably hold off on drilling more holes in the desktop until I get the whole thing together and use it for a few days.
I should be getting the printed parts back from Formlabs in the next week or so, and because of the way it assembles I should be able to get the desk put together really quickly once they arrive. Fun :)
I've been on paternity the past few weeks, and have spent some time reflecting. Below are some lessons - thoughts, really - that might have been useful had they occurred to me earlier. Note: The list below is decidedly incomplete; your mileage may, also, vary.
Note: This draft was started about a year and a half ago. In the name of valuing what's shipped more than what's (theoretically) perfect, I publish it now with considerably less preciousness than originally planned.
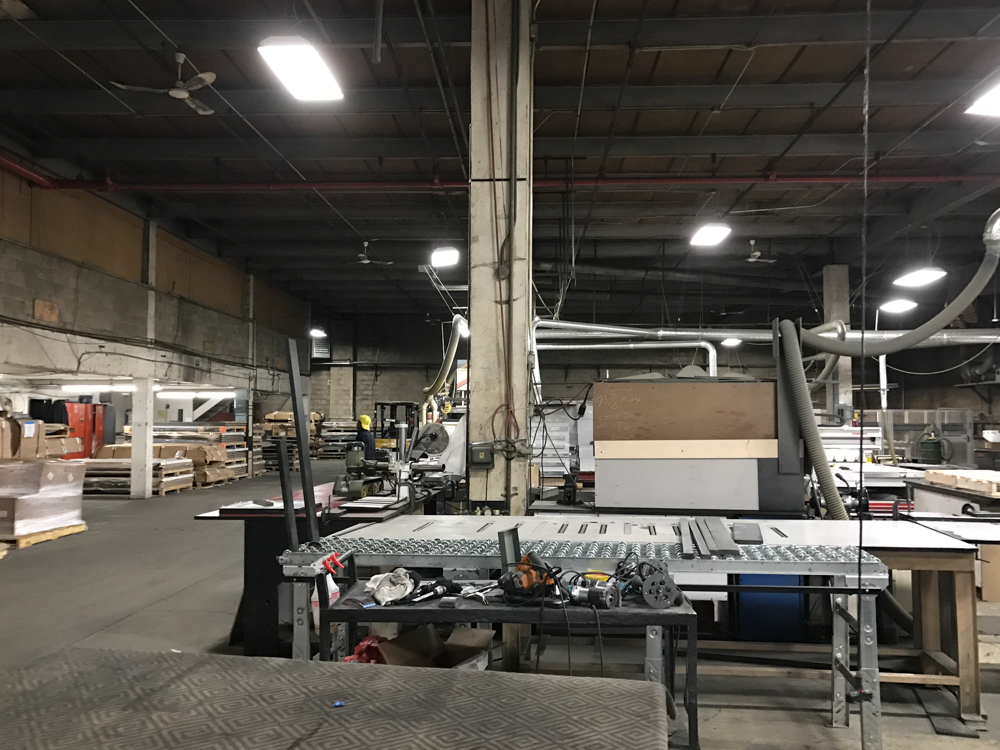
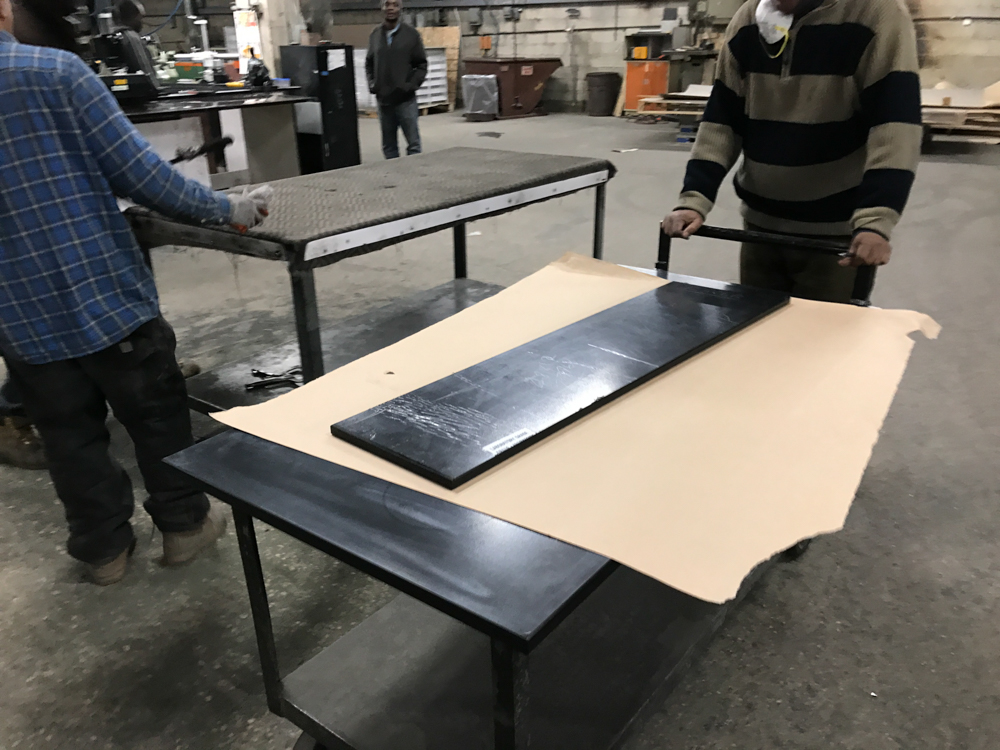
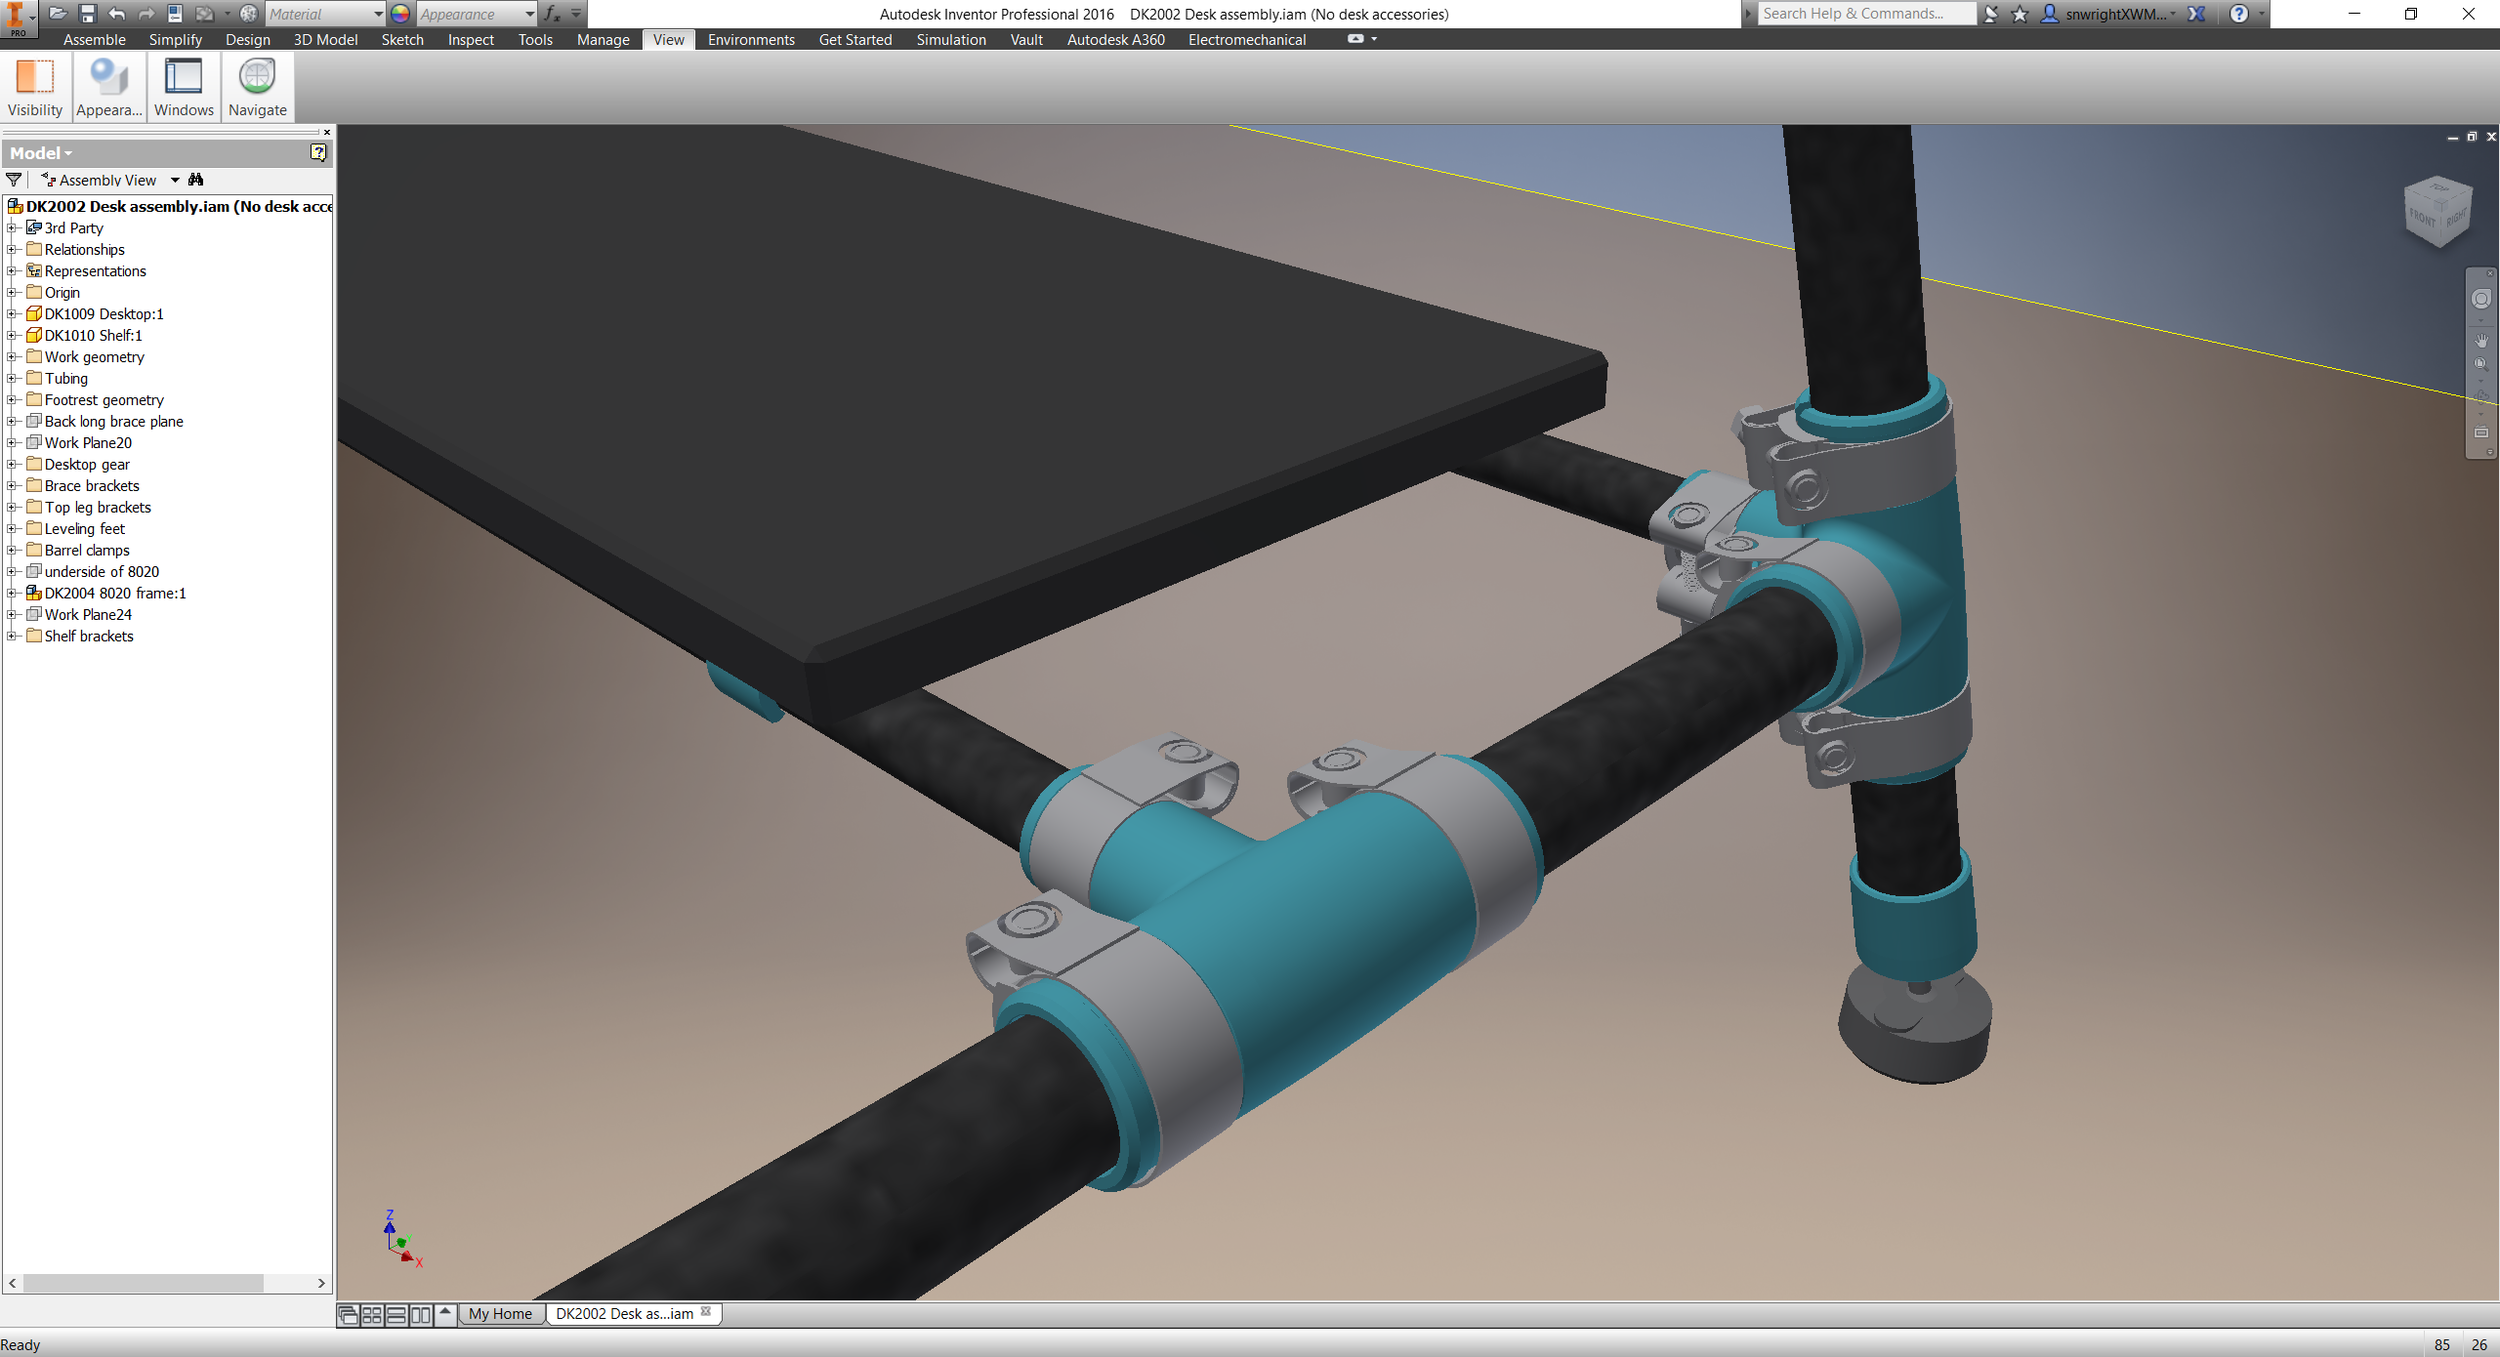
When I took these pictures - on the street in Dongguan, PRC, in the summer of 2015 - I was thinking about the emphasis that American startup culture has placed on distributed manufacturing over the past few years. According to the narrative, distributed manufacturing is being enabled by a combination of 3D printing, streamlined digital documentation standards, and web/mobile outsourcing marketplaces. Through these, we're ostensibly moving towards a paradigm that offers unparalleled improvements in efficiency, variety, and speed-to-market.
Parts of this narrative may well be true. I'm certain, however, that neither additive, nor the model-based enerpeise, nor any digital matchmaking service is a prerequisite for distributed manufacturing. Really, all you need is real estate and some demand for (in this case) overnight EDM and machined parts.
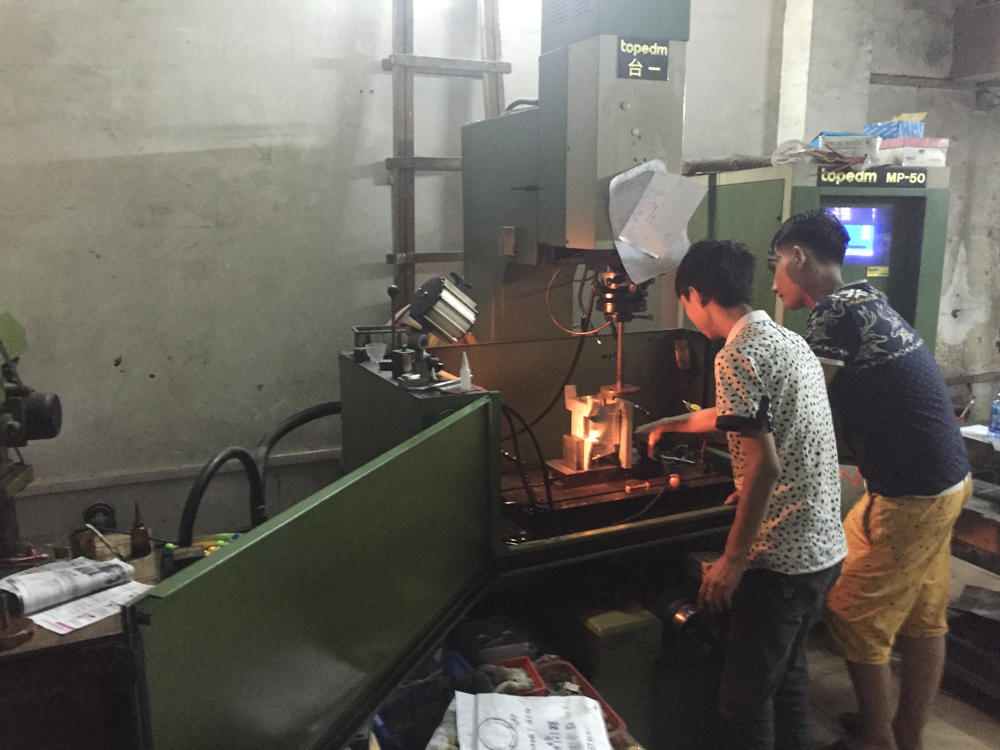
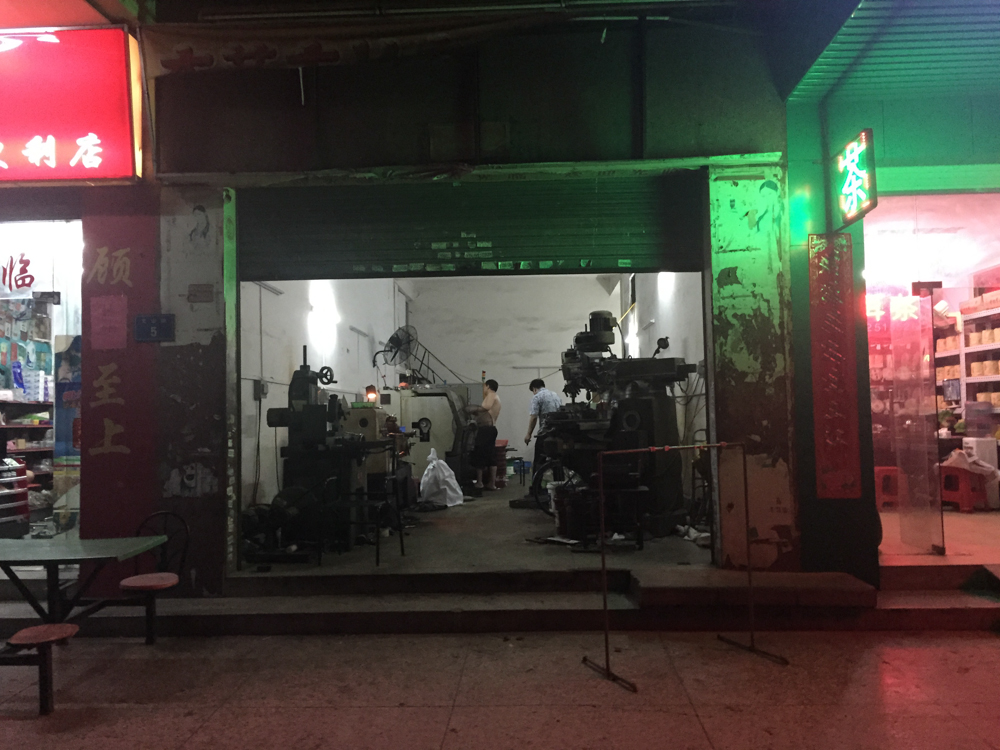
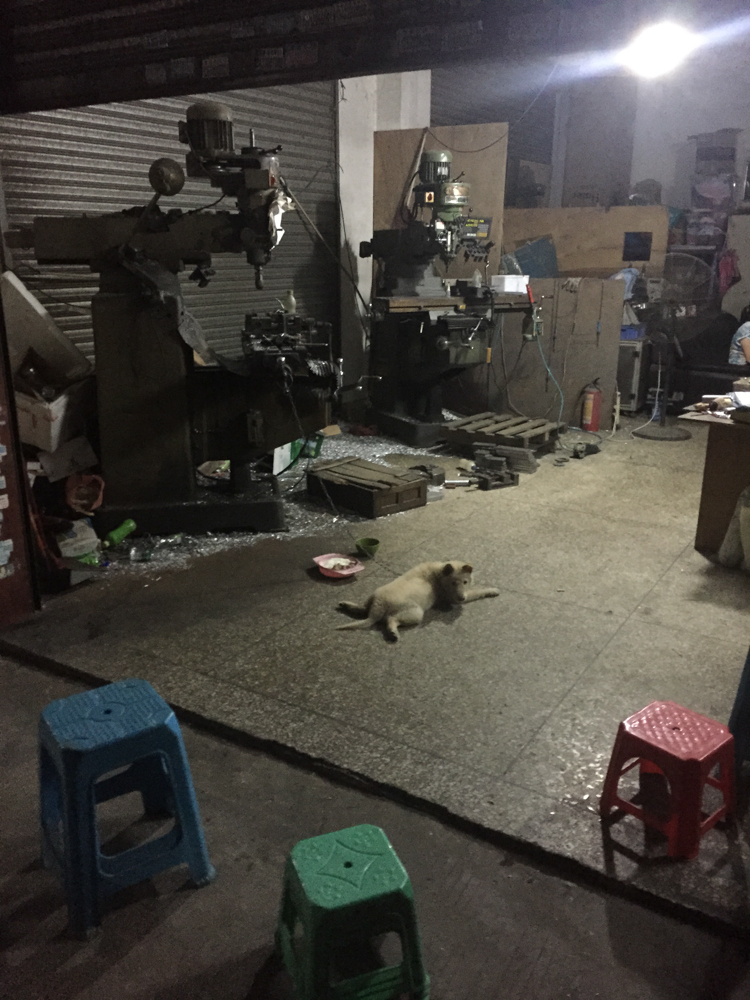
I tell you, seeing this was really breathtaking.
I was able to spend a little more time on my desk this past weekend, and got it nearly done:


A quick changelog:
Time allowing, I'll order the rest of the stock and cut-to-order parts in the next week or so. Pretty excited :)
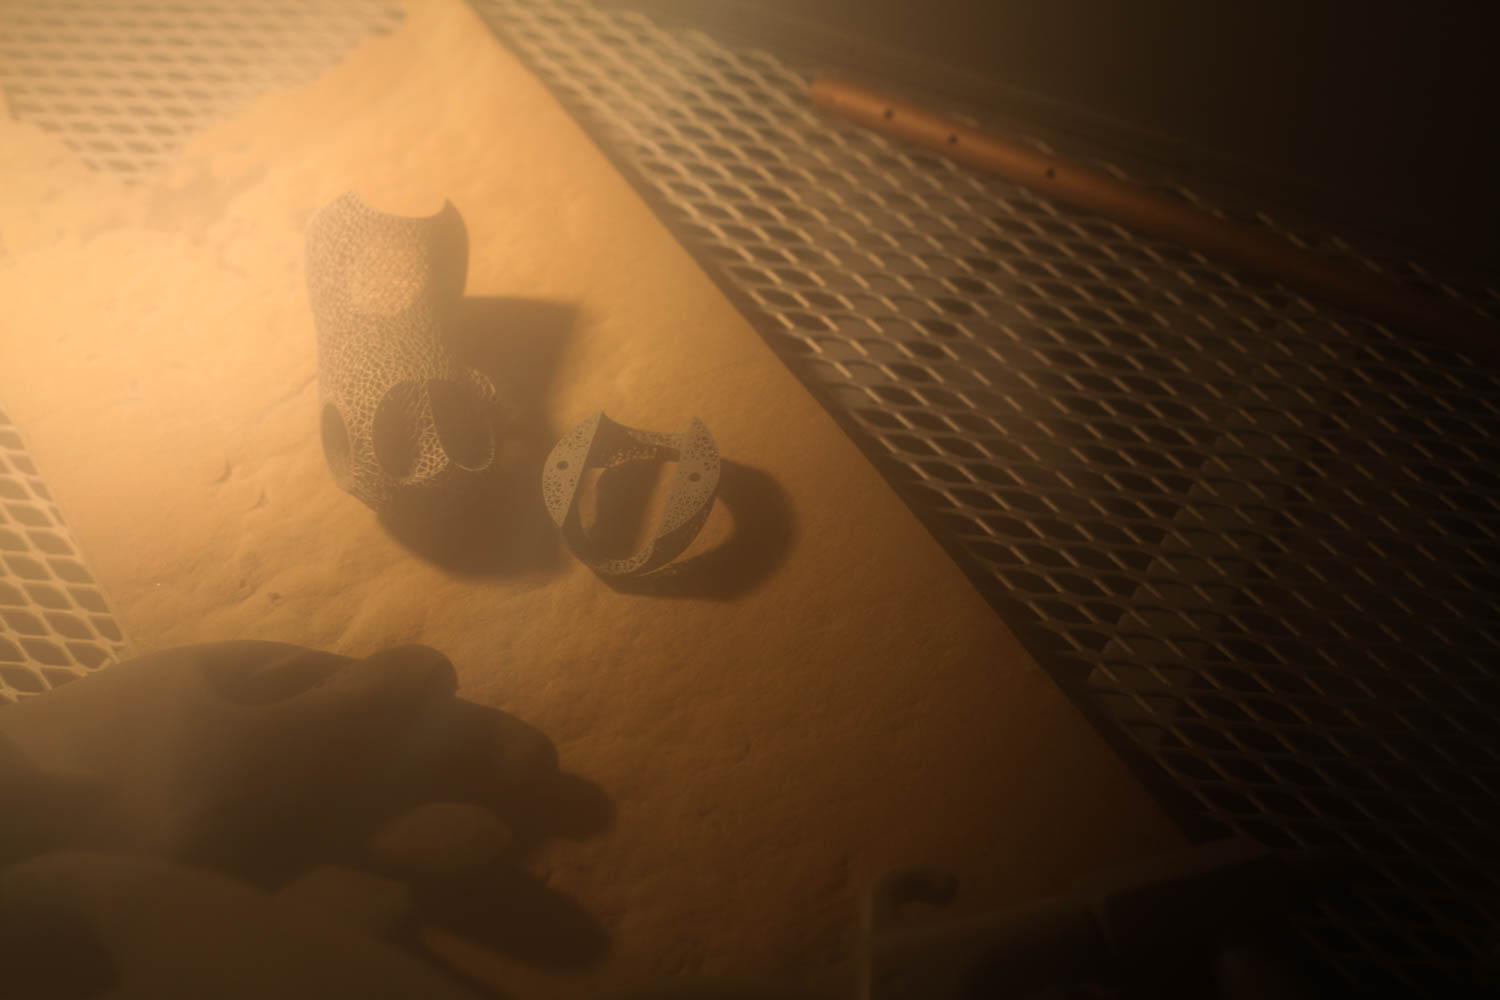
I'm *very* excited about these parts from C&A:
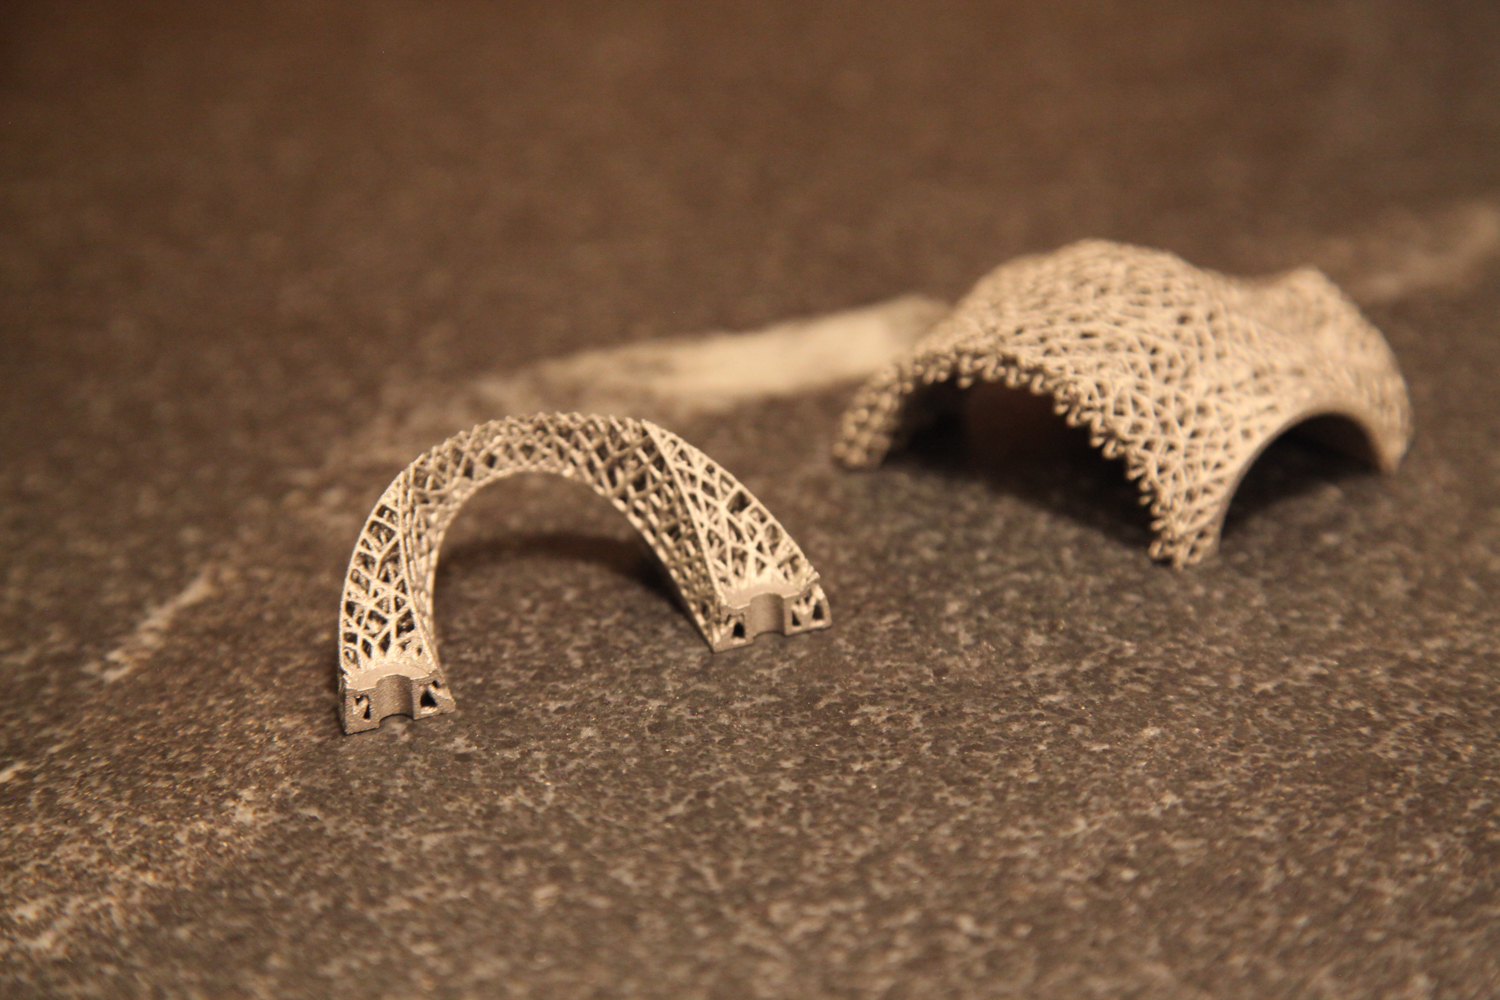
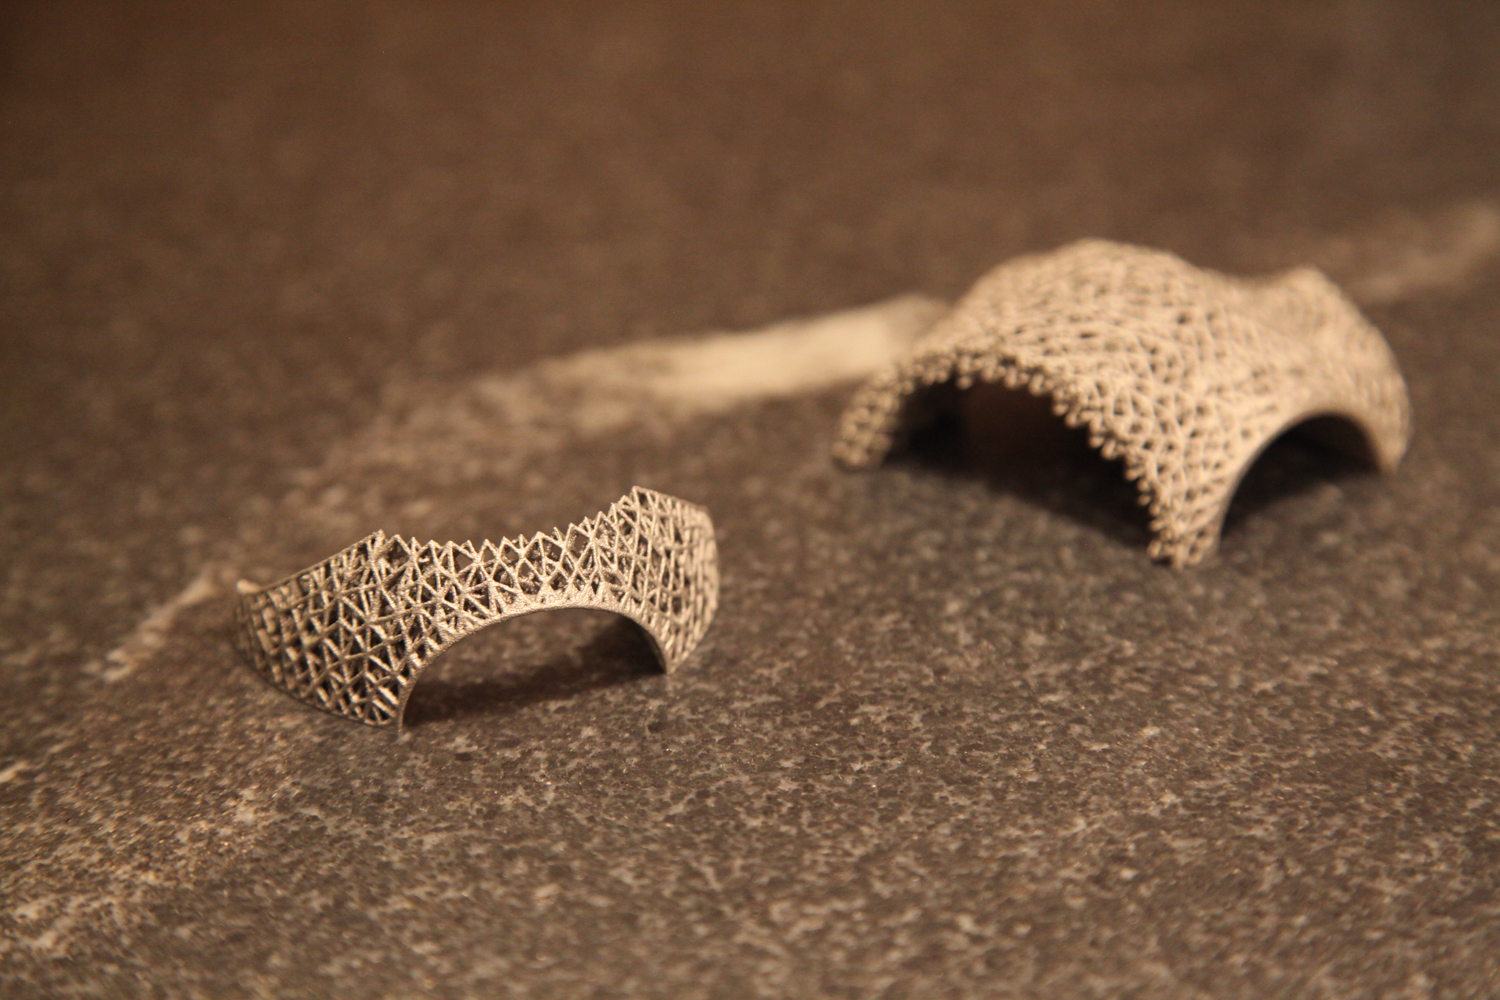
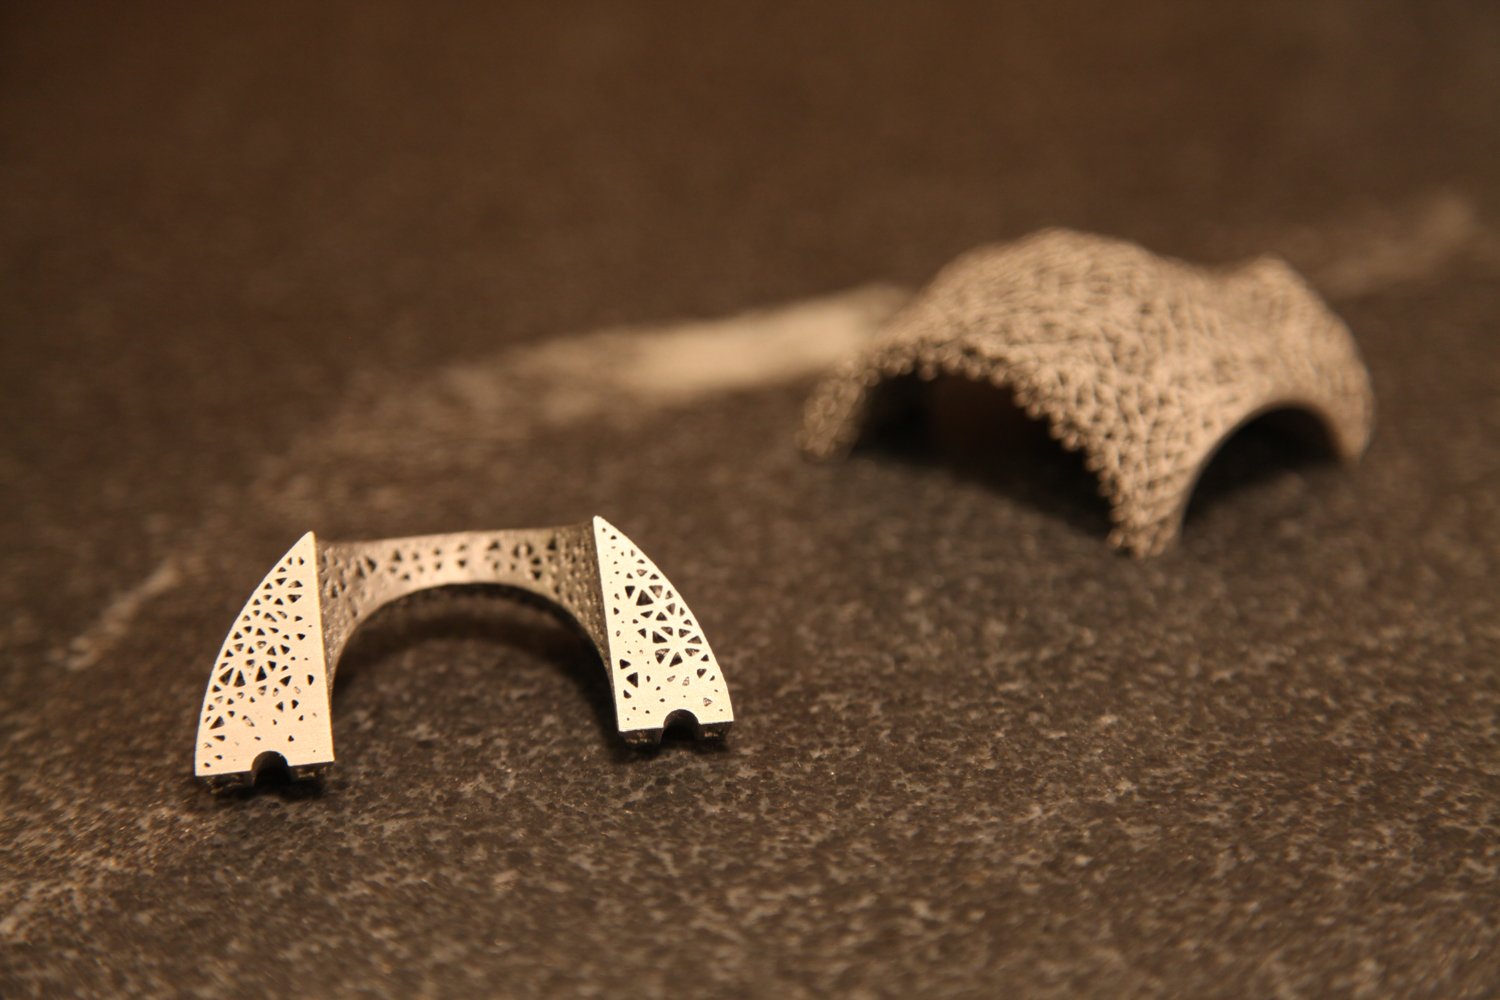
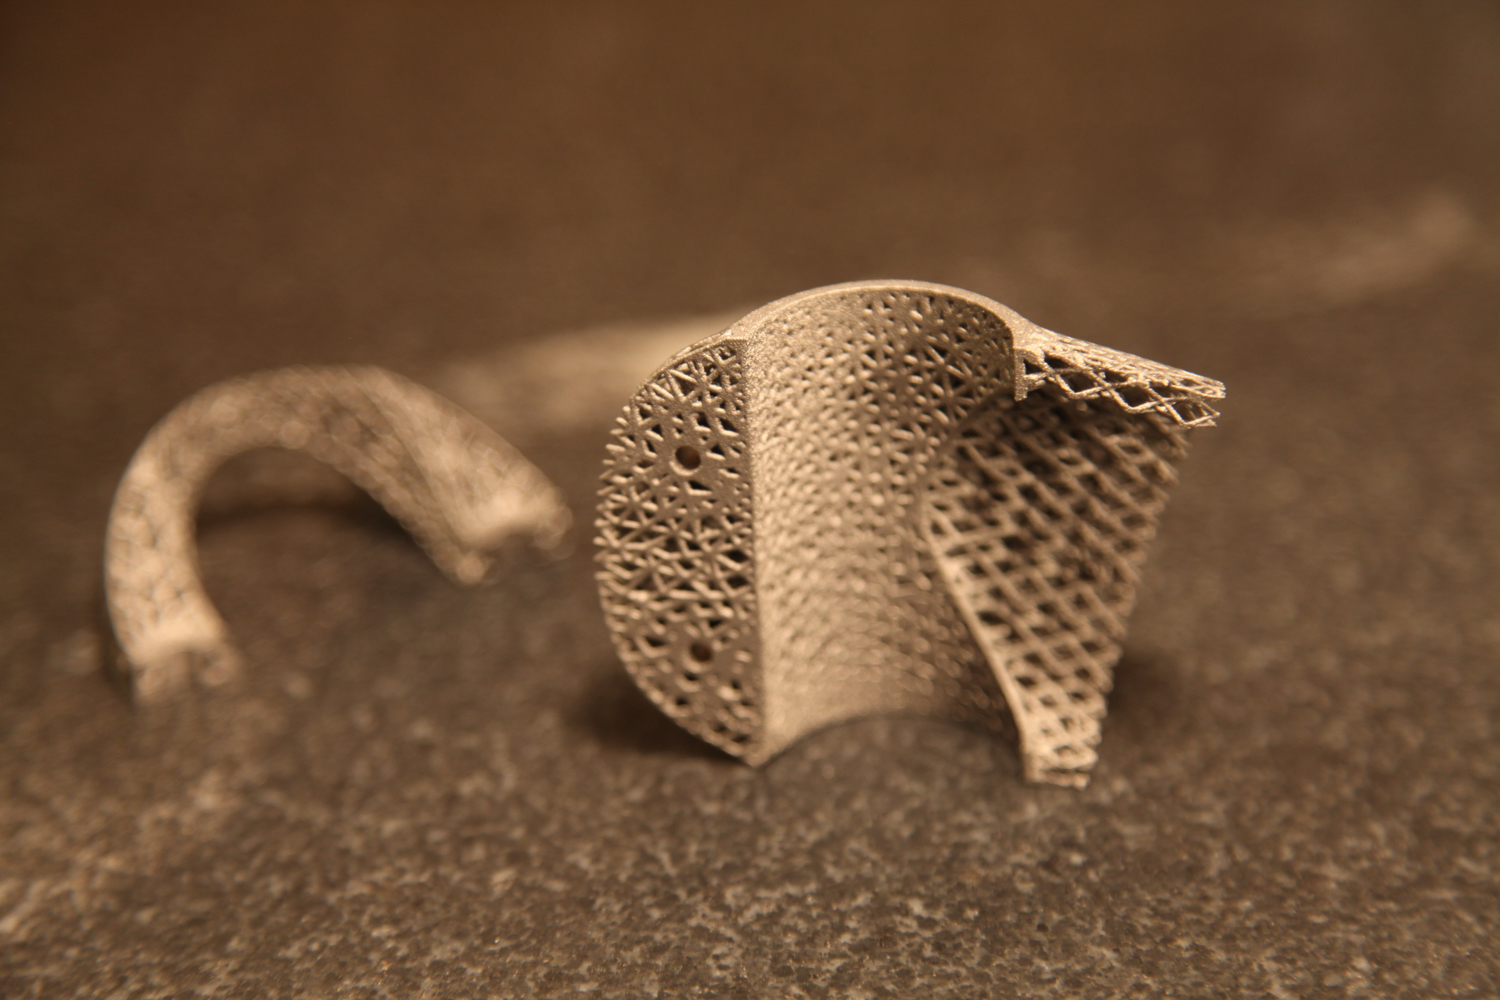
These parts were printed in titanium 6/4 by C&A Tool in Churubusco, Indiana; they were designed in nTopology Element.
This is a pure lattice structure - the entire geometry is designed as beams and nodes, with no explicitly defined solid regions. The beam lengths are on the order of 2-3 mm; their thicknesses range between .45 mm and 1.1 mm. In some areas (for instance, the bolt holes) this results in a fully solid part, but the transition from lattice to solid is continuous rather than discrete. The result is a structure that's solid where it needs to be and sparse elsewhere, with no stress risers where solid and lattice meet.
The parts are, of course, sample regions of the bike stem that I've been working on for some time now. The intent of the samples was to prove the printability of the structure and identify any potential difficulties. The results were overwhelmingly positive: With the exception of a few small flaws, the parts printed very well, and I believe the problematic areas can be addressed in the design pretty easily.
Given the good quality of the sample prints, I'm planning on printing a full version of the part soon. I'm also experimenting with a few other design variations (intended for a variety of different metal AM machines), and am running them through a beam sizing optimization process with Abaqus and Tosca in order to reduce mass and decrease strain energy. More on these soon :)
Thanks to Rich Stephenson for his ongoing help on this project - and for continuing to educate me on the metal AM industry.